Google Docs is Google’s version of Microsoft Word, allowing users to create, edit, and save documents and spreadsheets online. Google Docs allows you to access your files from any device with an Internet connection and a web browser, and it is offered by Google’s comprehensive package of online applications.
Docs by Google is also compatible with various presentation software and word processing applications. It can publish your work as a web page or a print-ready manuscript. The document owner has the power to control who can view or edit their work. It is the most outstanding feature by Google to maintain blogs and compose work.
Docs allow you to insert images, links, videos, borders, etc. It is evident for you to try and create a document with the border that goes around the entire page. But this isn’t supported directly. Instead, you can do it using a workaround. Read the article to find out how to create page borders in Google docs.
Steps to Make a Page Border in Google Docs
Unlike Microsoft word that offers Pageborder as a specific setting feature, Google Docs does not offer any such option. You have to manually work to insert a border in Google Docs.
- Open a new document in Google docs.
- Click on File present on the top left corner.
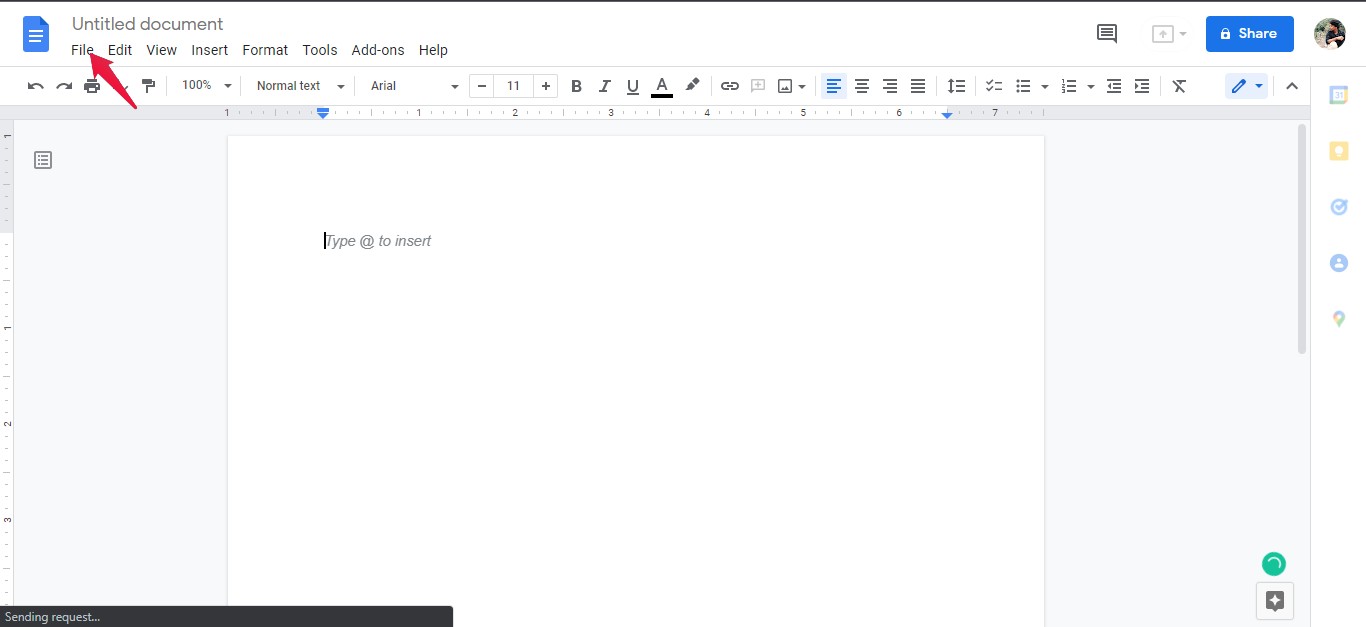
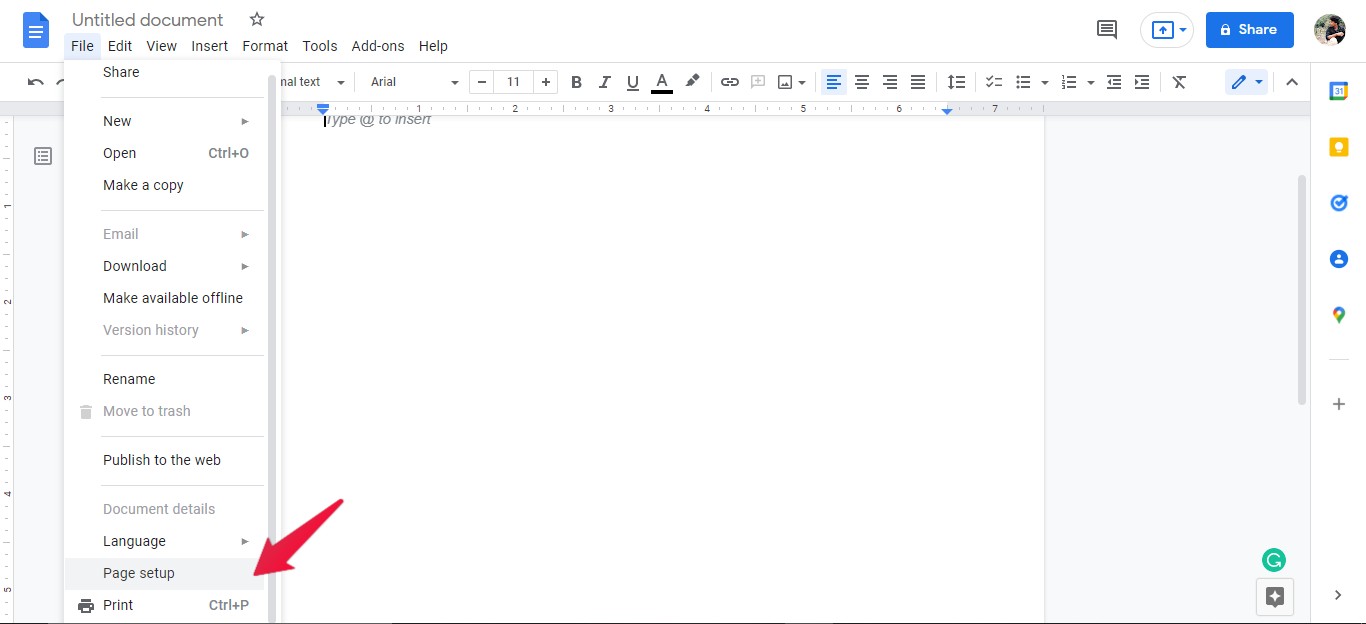
- Scroll down and click on Page Setup.
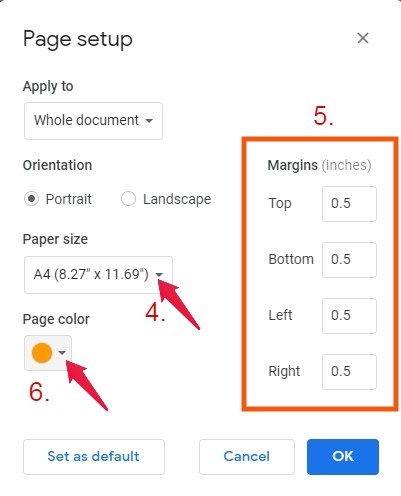
- Select your desired paper size. (Preferably A4)
- The margin length section set it to be 0.5 inches for top, bottom, left, and right.
- Now select your desired page color and click on OK. (I have changed the cell color just for demo)
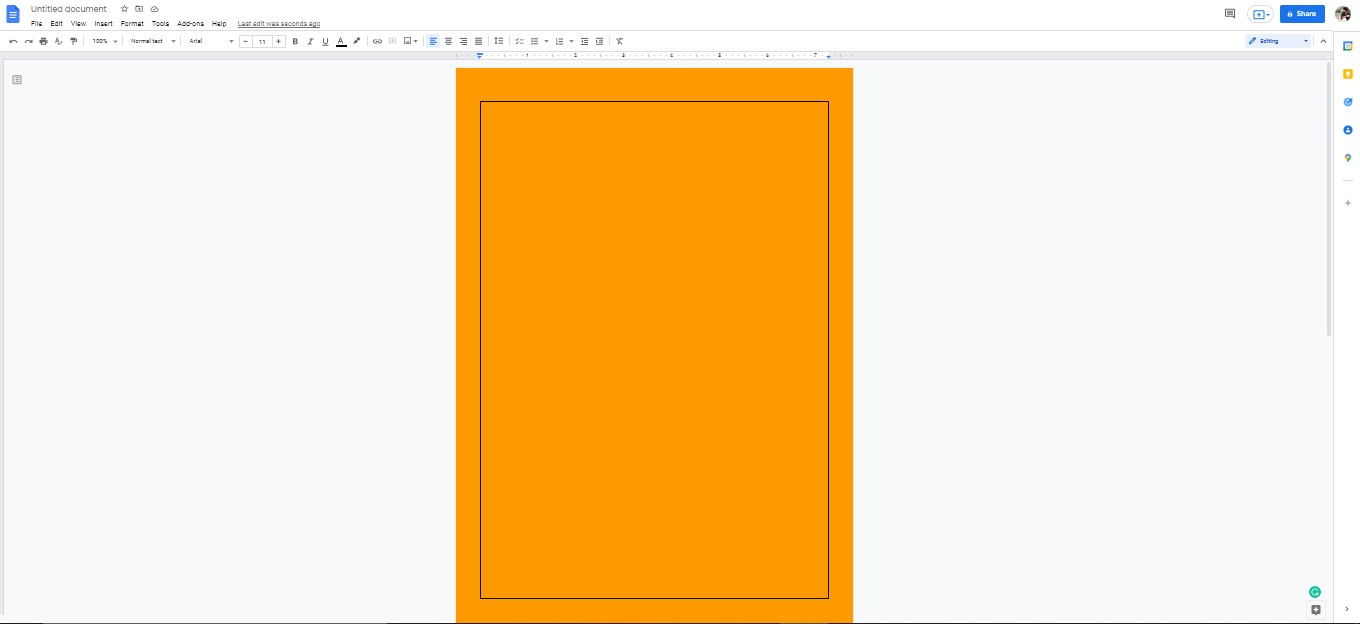
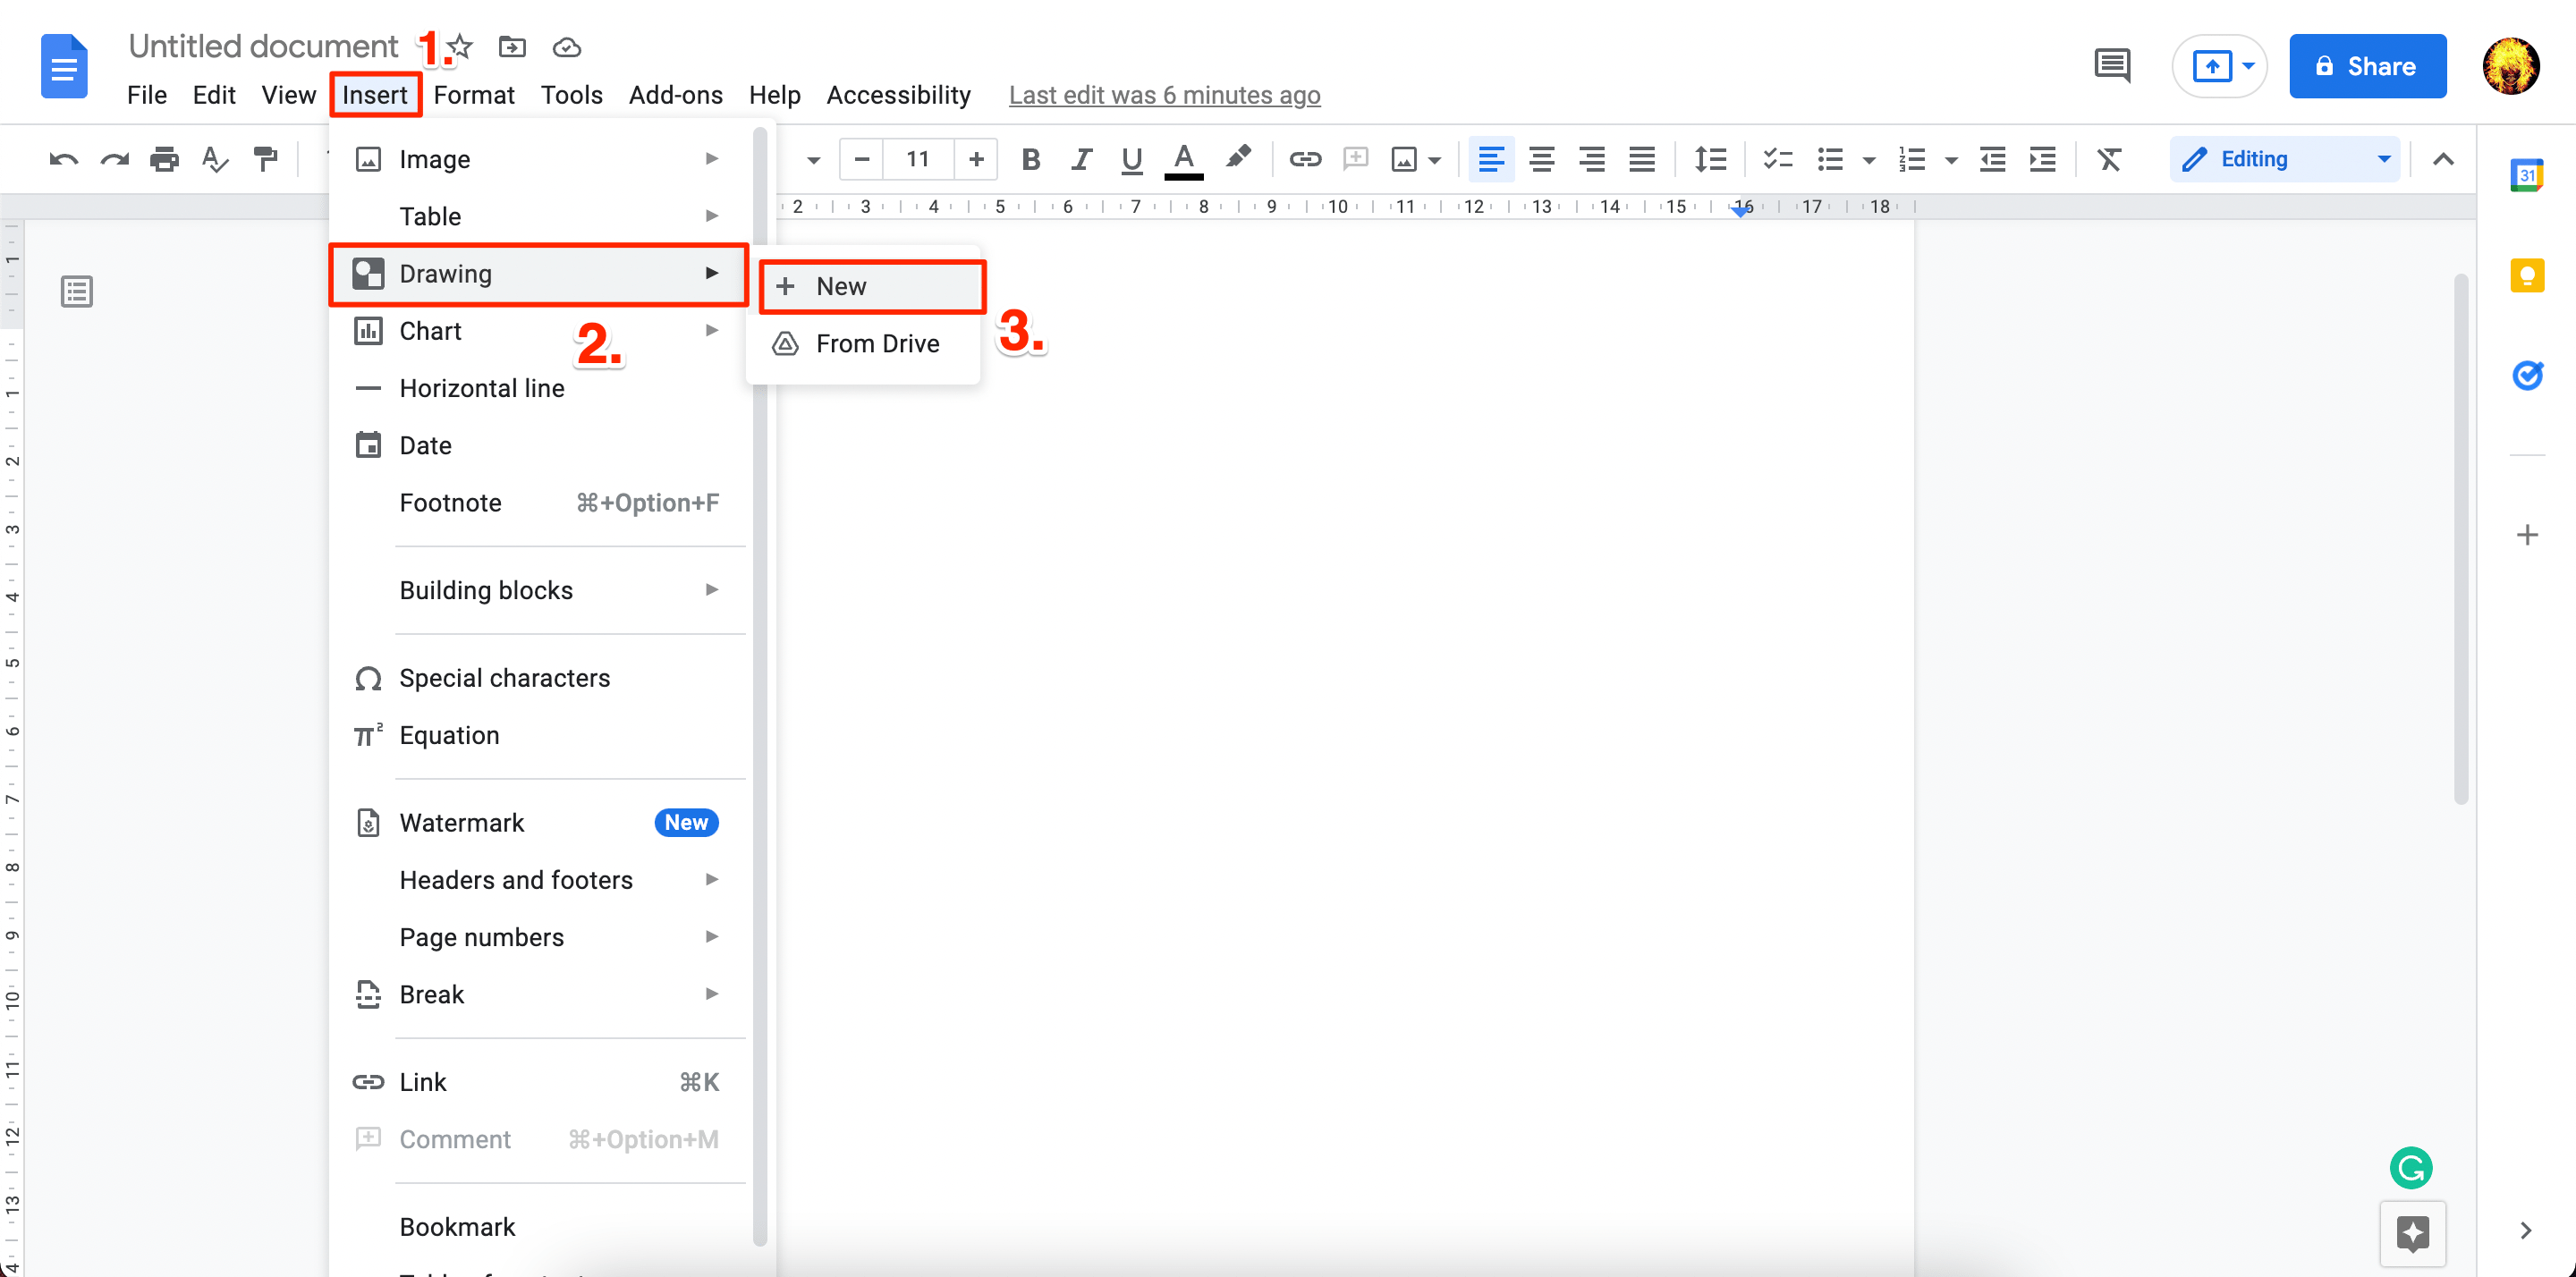
- Once you have set up the doc, click on insert and add one column and one-row table to the top of the page.

- Now put your cursor in the table and click on enter till you extend the table down the doc.
- Right-click inside the table, then scroll down and click on Table Properties.
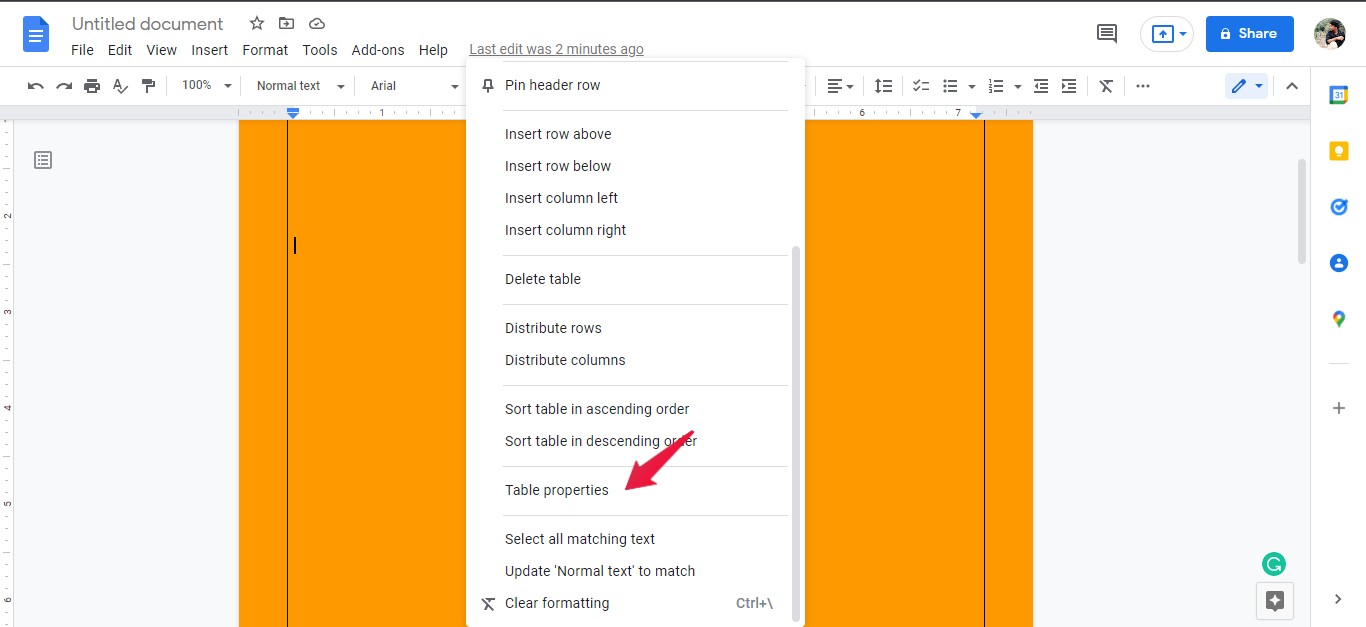
- Click on the table border to increase the thickness of the border as desired.
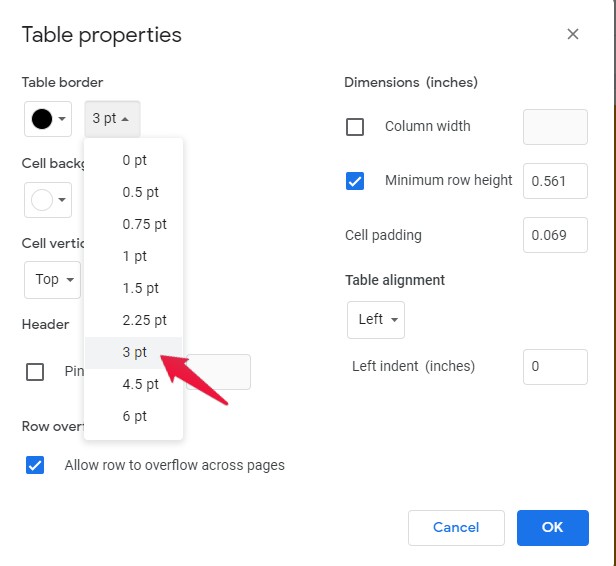
- As I had set the color to a cell background, I changed it to white. Click on OK.
- Now you can write inside the table and this will act as a border.
You now have your page with a color border, and you can directly add your text and information inside the table.
EndNote
This was all about how you can create page borders in Google docs. As Google doesn’t offer a page border tool in Google docs, we hope that you were able to add borders using the workaround mentioned above. Still, if you have any query feel free to drop a comment below.
