OneDrive is a cloud storage service that allows you to access all of your files from anywhere. All your devices that have OneDrive app or web can access the files and also share them with others; this lets you store and protect them. But, sometimes, you may face storage issues with the OneDrive on your device.
Therefore, it is better to stop syncing OneDrive from your PC. Although it’s an easy task, some users still find it difficult, which is why we are here. Today we will guide you on how to stop OneDrive syncing on your Windows 11/10 PC. Here you will learn how to unsync OneDrive easily from a PC.
What Does OneDrive Do?
Microsoft OneDrive is a cloud service where you can access all your files. All your files are stored and protected, people can access them from anywhere, and you can share them with other people.
In OneDrive, users can store and share files across devices with different access levels, which controls what others are able to see and edit. It is even possible to set the time limit for other users to able to access a particular file.
Steps to Unsync OneDrive Only for Specific Folders
Suppose you want to unsync some specific folder on OneDrive, then you can do this just by using the steps we will discuss further in this article. By stopping files syncing with OneDrive, you are not just freeing up storage on your cloud storage but also on your PC hard drive. So, in case you don’t know how to unsync Specific folders from OneDrive , you can use these steps:
- Initially, right-click the OneDrive icon in the system tray and select Settings.
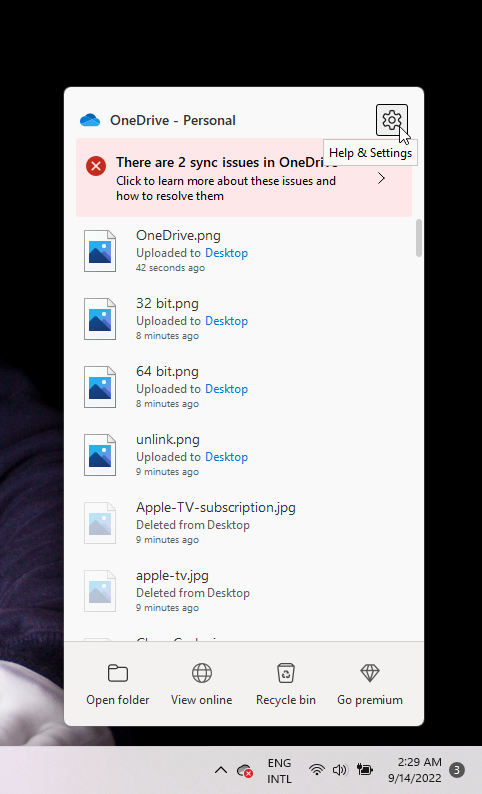
- Open the Account tab.
- To view your OneDrive folders and files, click Choose folders.
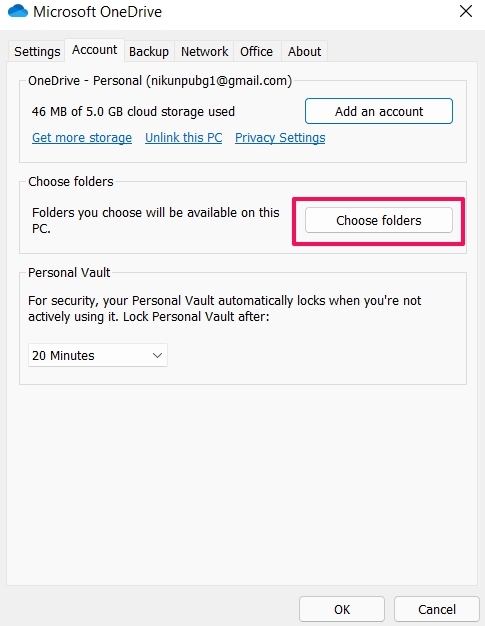
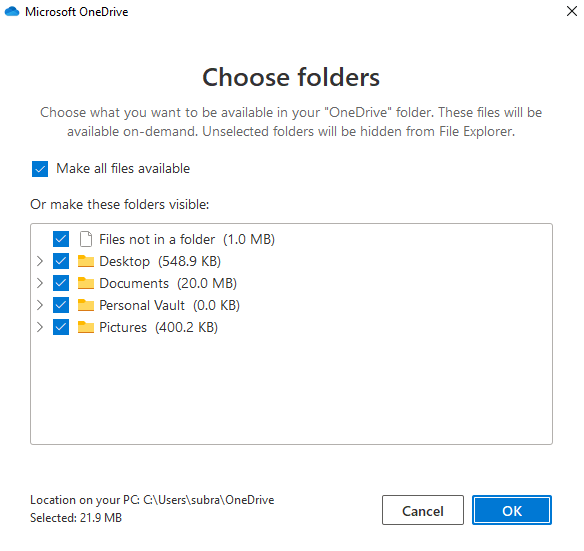
- Uncheck the boxes beside any folders or files you don’t want to be synced.
- When you have deselected the check boxes for files and folders, click OK to close the OneDrive windows. Now, in the OneDrive File Explorer, the folders and files that are not synced will no longer appear.
How to Stop OneDrive Sync on PC?
There are four different methods using which you can easily unsync OneDrive easily from a PC. So, in case you want to know about those methods, make sure to perform them. Therefore, let’s get started with them:
Method 1: Disable the App Using Control Panel
Initially, the thing that you try to unsync your OneDrive files from your PC is to uninstall it from that device. Yes, it is the easiest method that you can try to stop your files from syncing. However, if you are unfamiliar with the steps, don’t worry! Check out these steps:
- Firstly, press the Windows + R key altogether in order to open the Run box.
- Then, search for
appwiz.cpl. This will open the control panel. - Afterward, you must scroll down and locate the Microsoft OneDrive app. Moreover, you can also search for OneDrive directly on the search bar under Control Panel.
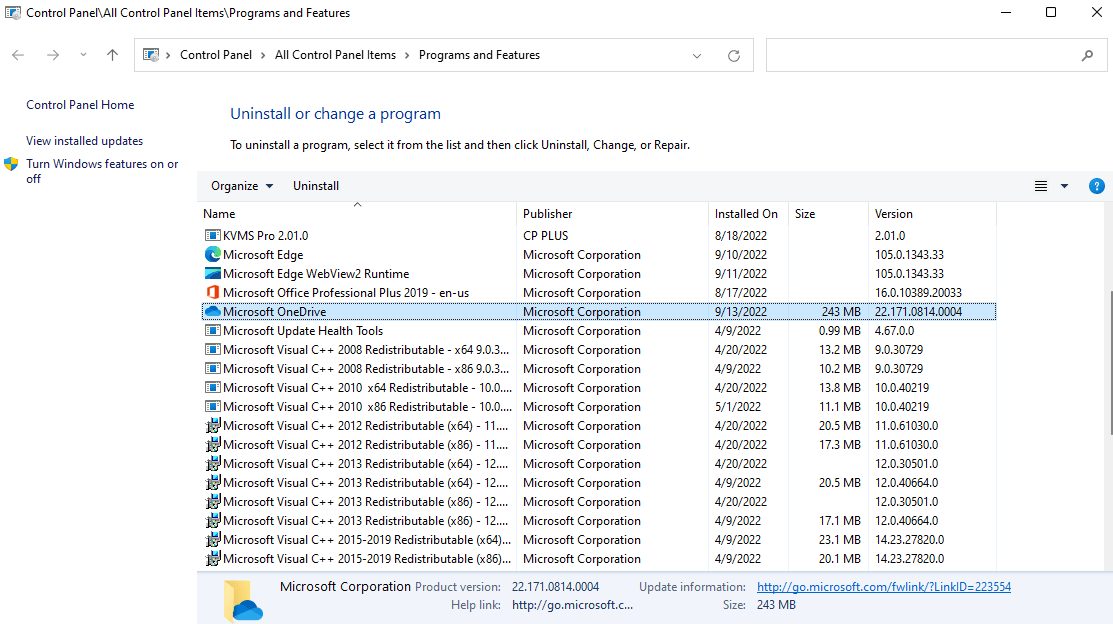
- Now, select the OneDrive app and double-click on it. Then select Uninstall/Disable.
- Finally, hit the Yes button to confirm your action.
Depending on your Windows 11 version, you may be able to uninstall the OneDrive app if you don’t use it for syncing at all and simply prefer to open documents through the browser. The OneDrive app can be uninstalled on the updated Windows 11 platform via the apps & features.
Method 2: Use Group Policy Editor
You can unsync your OneDrive using the Windows 11 Group Policy Editor. So, in case you don’t know how to do this, make sure to perform these steps:
- First of all, you must open the Windows Search box and search for
gpedit.msc.

- Now, go to the
Computer Configuration > Administrative Templates > Windows Components > OneDrive - Then, on the right side of Group Policy Editor, double-click the Prevent the Usage of OneDrive for File Storage setting.
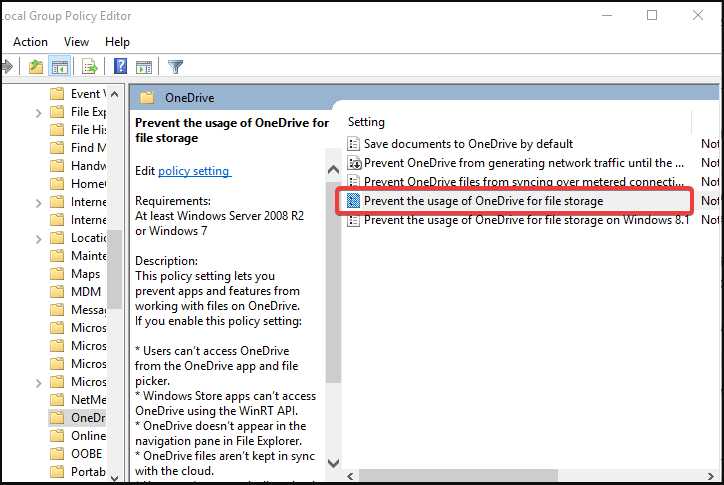
- Finally, hit Enabled, followed by OK.
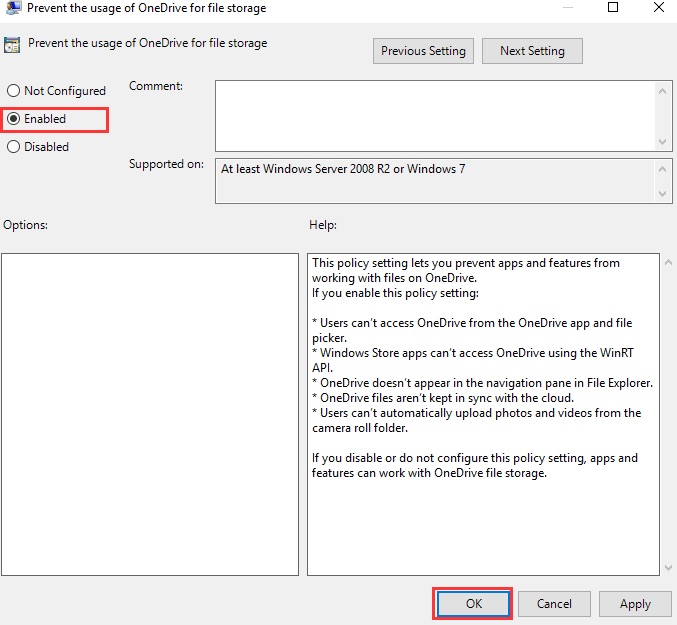
- And if you want to re-enable the OneDrive again, you can change the status of Prevent the usage of OneDrive for file storage to Not Configured.
Method 3: Uninstall OneDrive Using CMD
We have already mentioned that by uninstalling the OneDrive app, you can easily stop syncing on your PC. But in case using the previous methods, you won’t be able to uninstall the OneDrive, then you must try uninstalling it using CMD. So, to do this,
- Open CMD using the admin rights.
- Afterward, execute this command:
taskkill /f /im OneDrive.exe - On Windows 64-bit, uninstall OneDrive using this command:
%SystemRoot%\SysWOW64\OneDriveSetup.exe/uninstall.
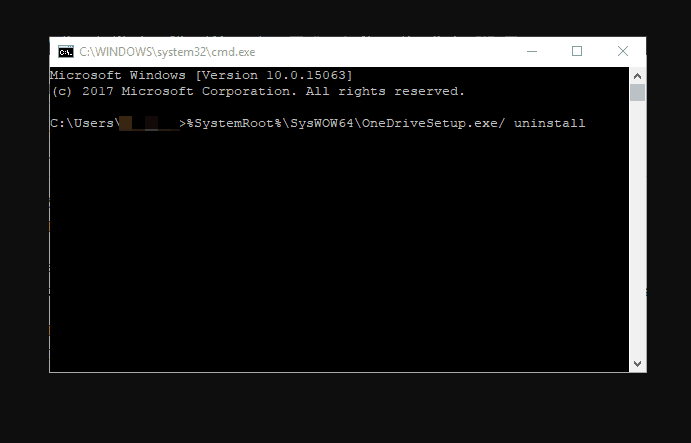
- On Windows 32-bit, uninstall OneDrive using this command:
%SystemRoot%\System32\OneDriveSetup.exe/uninstall.
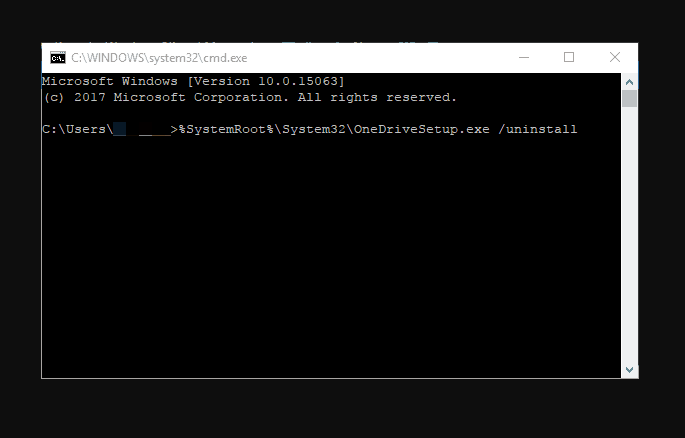
That’s it. Now, you just have to wait for some time until the mentioned command gets executed. Once done, the OneDrive successfully unsync from your PC.
Method 4: Unlink OneDrive Account
In case you don’t want to uninstall OneDrive from your device, you can simply unlink your account from OneDriv. So, to do this,
- Initially, right-click on the OneDrive notification area and select Settings.
- Thereafter, go to the Account tab.
- Then, tap on the Unlink this PC.
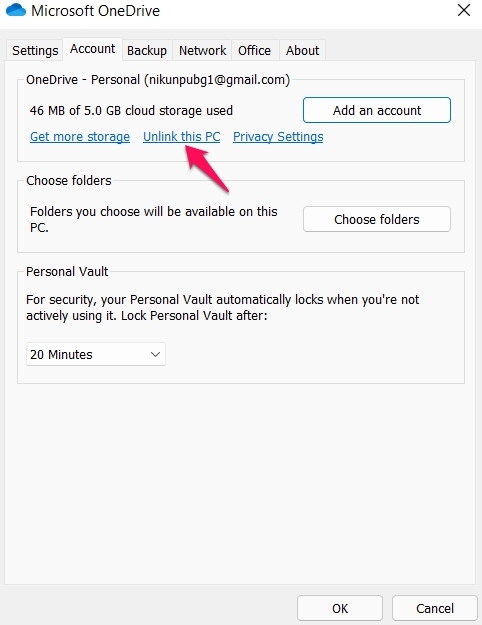
- Now, again hit the Unlink account to confirm your action.
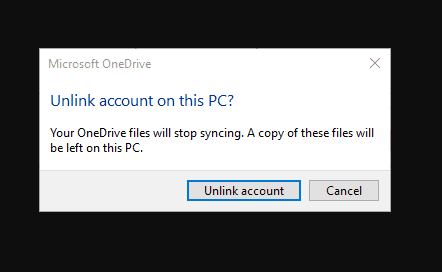
- Finally, uncheck the box next to Start OneDrive automatically when I log in to Windows. Then, hit the OK.
That’s it. Now, you have unlinked your OneDrive account from your Windows PC. Therefore, it will not stop syncing.
From Author’s Desk
So, that’s how to unsync easily from your PC. We hope the methods mentioned in this guide have helped you. Meanwhile, in case you have any doubts or queries, comment below and let us know.
