In this guide, we will learn how to sync Google Photos on the iPhone. Users always have their choice of apps when it comes to using any service, the same goes for using apps to manage Photos and videos.
Just because someone is using an iPhone doesn’t mean they will prefer using the native apps of iOS. Most users install the Google Photos app on iPhones. Suppose you are a user who may have changed from an Android device to an iPhone. Then you will have to sync Google Photos on your iPhone.
It is worth noting that Google offers far more cloud storage as compared to Apple iCloud. With Google, you get 15 GB of free cloud storage space but Apple only offers 5 GB of storage.
How to Sync Google Photos on iPhone?
Keep in mind that to sync Google Photos on your iPhone, you need to install the app on your iPhone. By default, when you have a new iPhone, the Google Photos app doesn’t come pre-installed on it. Visit the App Store and download the Google Photos app.
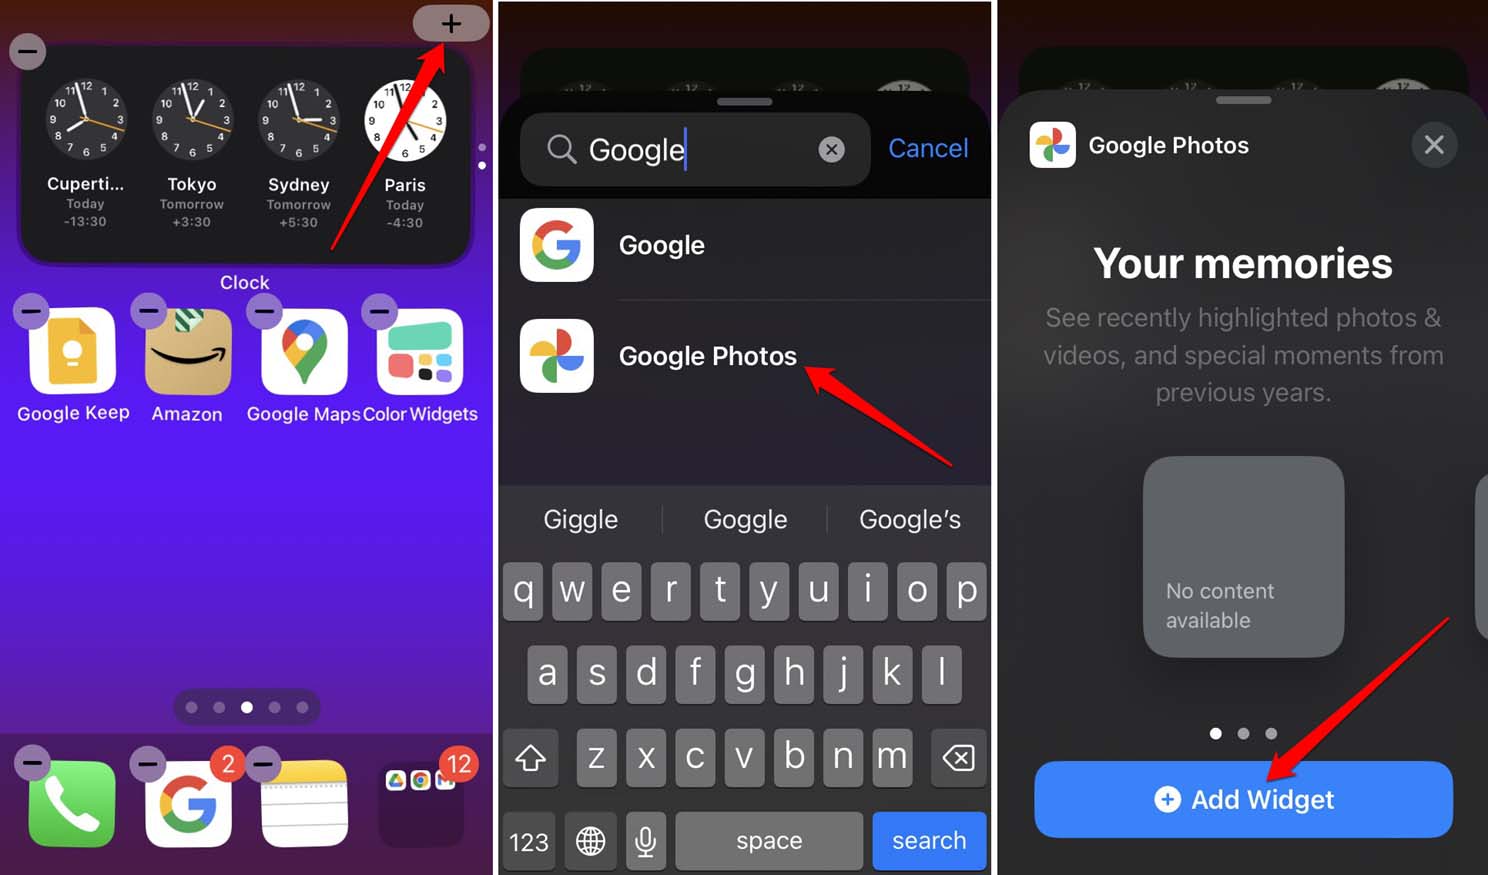
Additionally, you can also set up the google Photos widget on the iPhone home screen. Instead of navigating through multiple apps on the home screen or searching on App Library, you can access the widget of Google Photos. With one tap you can access your photos.
- Long press on the home screen of the iPhone to initiate the jiggle mode.
- Now, tap on the + icon.
- Select the Google Photos widget from the list of available widgets.
- Set the size of the widget and tap on Add Widget to integrate it on the home screen.
Steps to Sync Google Photos on iPhone
Syncing your Google Photos on iPhone is easy and here are the steps for that. Only when the iPhone is connected to a faster network such as WiFi, Google Photos can sync with the iPhone. On mobile data syncing won’t take place.
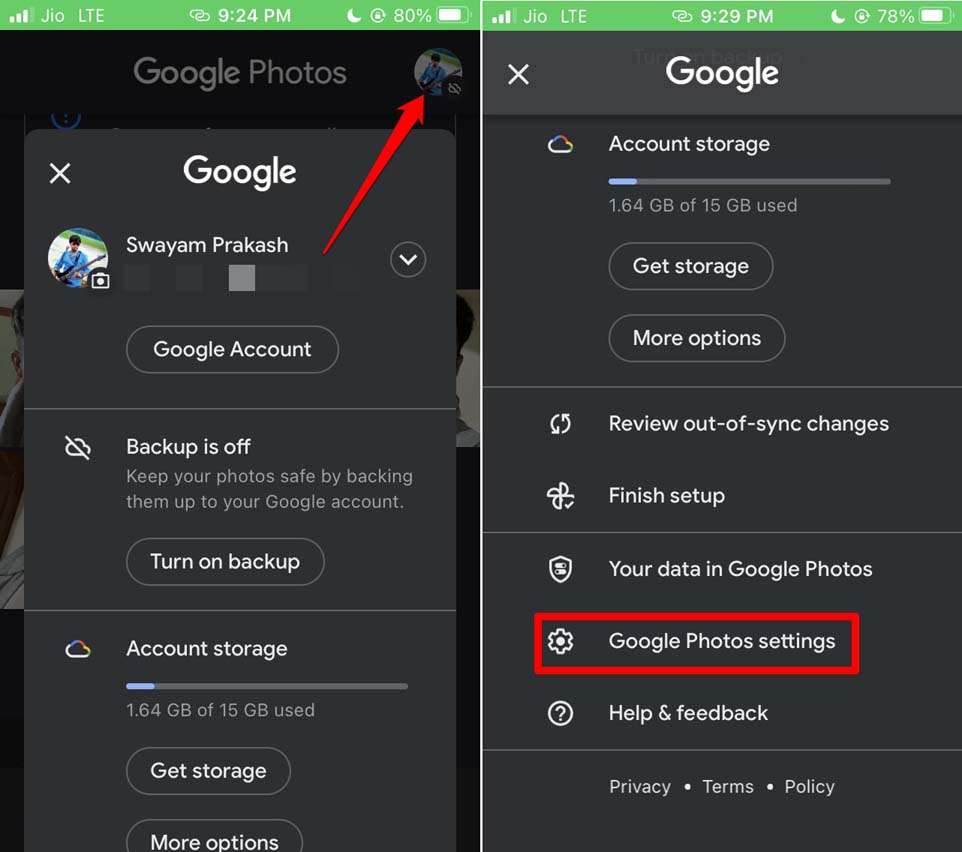
- Launch the Google Photos app on your iPhone.
- At the upper-right corner, tap the Gmail account profile image.
- From the menu, navigate to Google Photos settings and tap on it.
- Tap on Backup & Sync.
- On the next page, tap on the switch beside Backup & Sync to enable it.
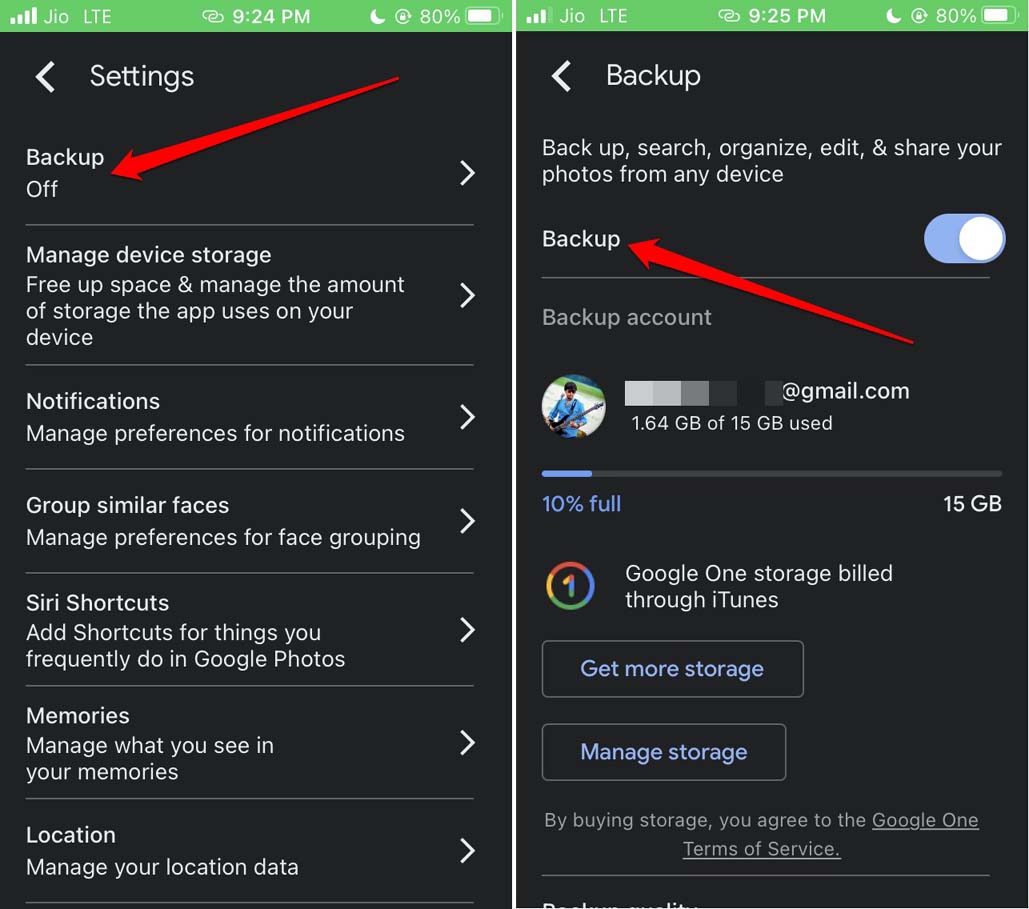
- Once backup & Sync is enabled, you will see more options.
- Tap on Upload Size to set the quality of images and videos that you will back up or sync from your iPhone.
If you select Storage Saver, then the photos will be uploaded in reduced quality. This will help in saving storage space. When you select Original Quality there will be no change to the image quality that you sync from your iPhone to Google Photos.
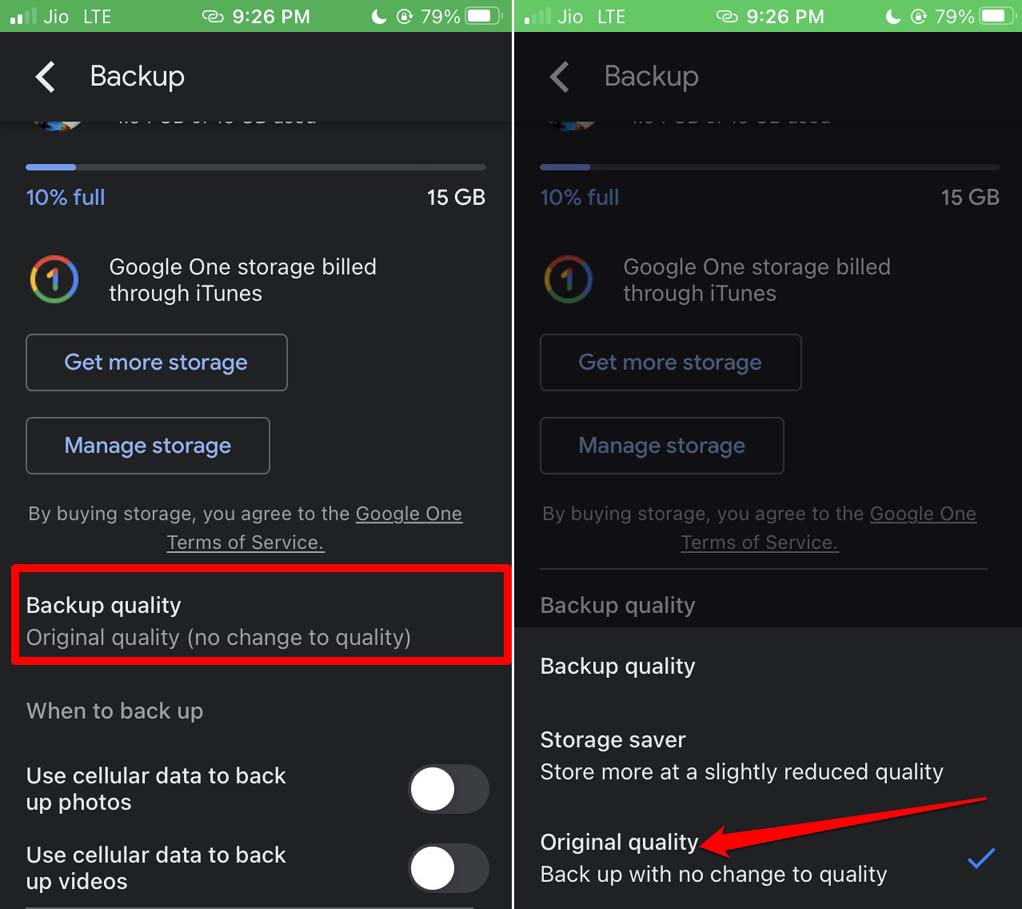
By default, when you start to sync Google Photos on your iPhone, the photos will sync in their original quality unless you opt for the Storage Saver option as mentioned.
Managing Storage of Google Photos on iPhone
Only syncing Google Photos on iPhone is not sufficient if there is not sufficient storage available on Google Photos. Google Photos settings have options to free up storage space. To check for storage or remove the photos that may already have been backed up to Google Photos follow the steps mentioned below.
- Launch the Google Photos app on your iPhone.
- At the upper-right corner, tap the Gmail account profile image.
- From the menu, navigate to Google Photos settings and tap on it.
- Tap on Manage Device Storage.
- Under that, tap on Free Up Space to remove all the photos or videos from the iPhone that are already backed up to Google Photos.
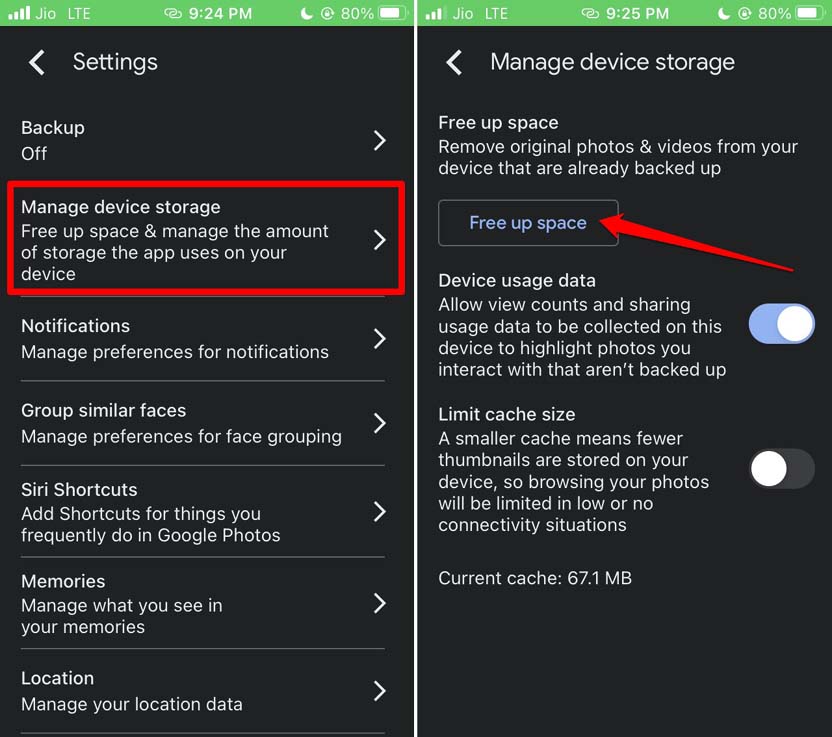
Later if you want to have any of the photos present on google photos on the iPhone, you can download them in their original picture quality. Couldn’t get any easier or simpler right?
Conclusion
That’s all regarding how to sync Google Photos on iPhone and manage it. Instead of using separate apps for storing the same photos, any one app will suffice. In this case, it is Google Photos as it is easy to use and provides more free storage. I hope the guide was helpful.
