Google Photos is a versatile photo and video storage platform. It makes it simple for users to store and manage their photographs and videos. Users can also share them with others quickly. Google Photos allows users to back up essential photos and videos too. Not just this, users can edit their photos using the in-built editing tools too.
Managing photos and videos in Google Photos is quite simple. Users can create or edit photo albums to organize them. Although the process is simple, we have made a guide that details the process of creating or editing photo albums.
All you need to Know About Albums on Google Photos
Before we look at the process of creating an album, let us take a look at the things one can do and cannot do when creating an album.
- An album can hold up to 20,000 photographs or videos in Google Photos.
- In their photo albums, users can edit and add elements like texts and maps.
- Users can create live albums, however, the live album feature is not available in some countries.
- On an album, collaborators can only share photographs and videos, not make any modifications.
Creating an Album on Google Photos Mobile App
You can create and edit Album on Google Photos App on Android and iPhone. Here is the simple guide to follow;
- Open Google Photos App.
- Click on Library.
- Here click on Empty New Album.
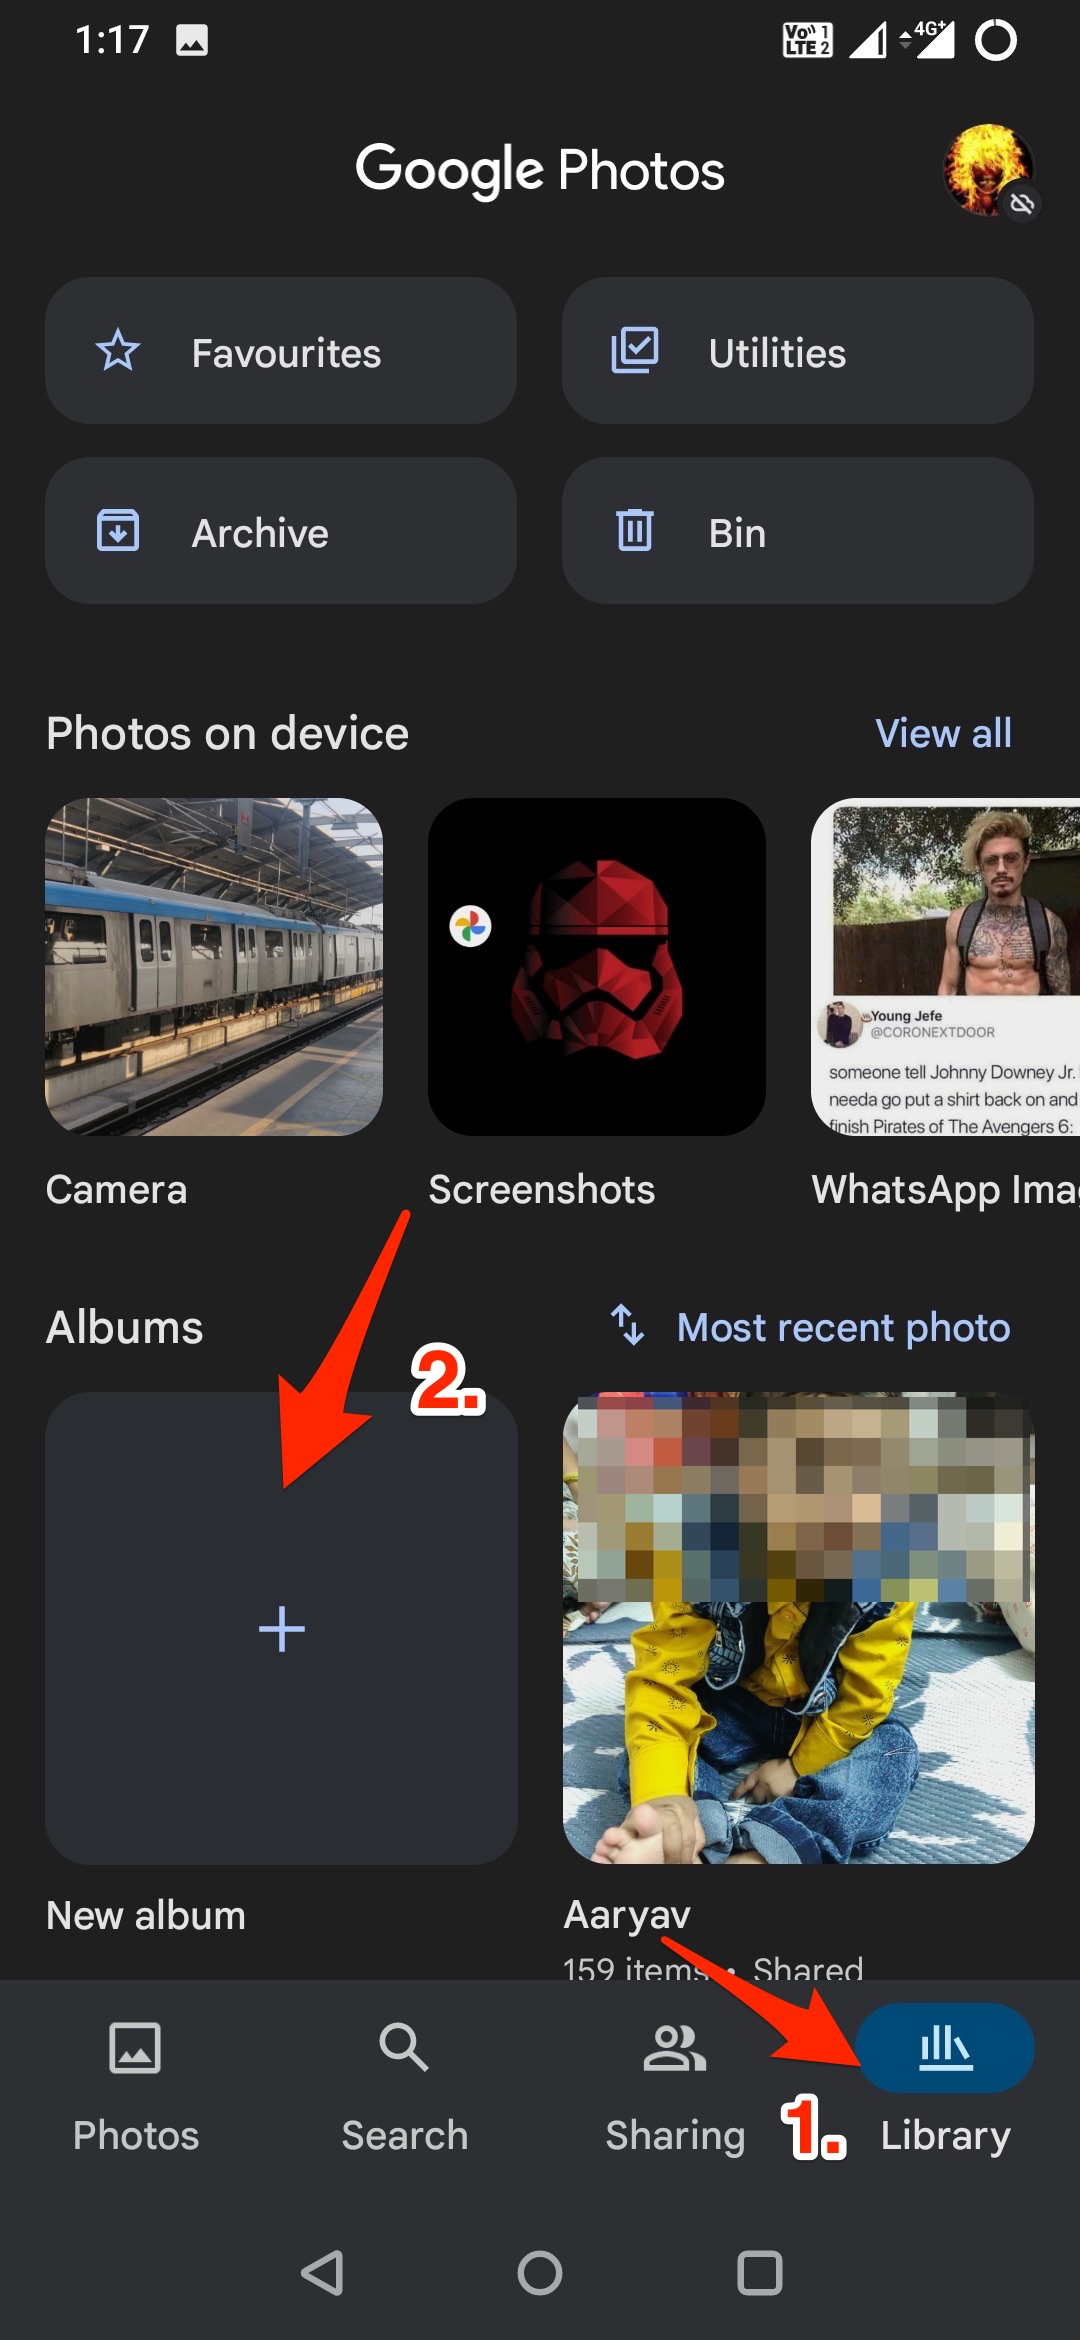
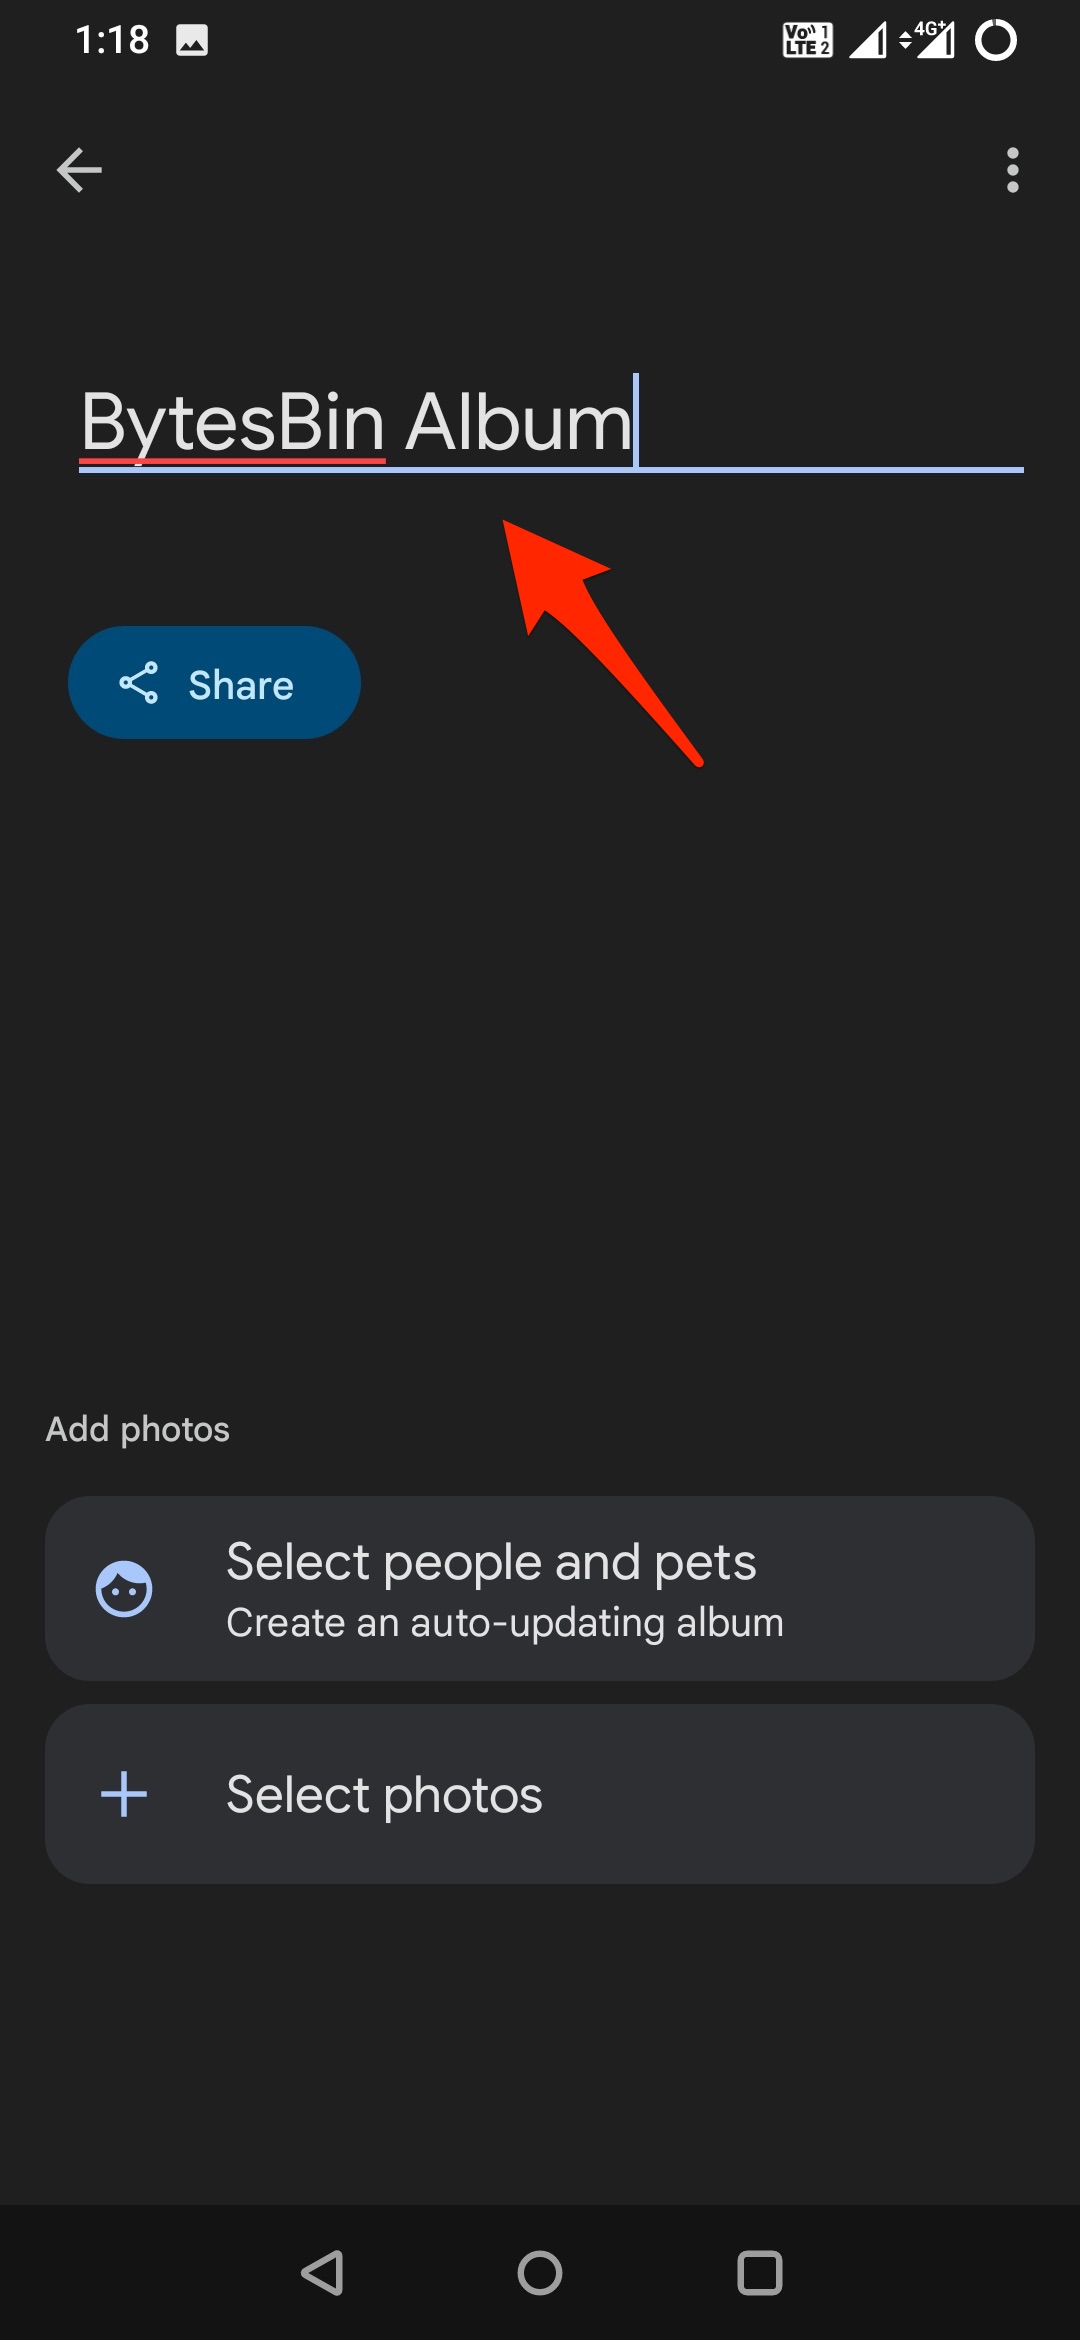
- Give the album a Title name.
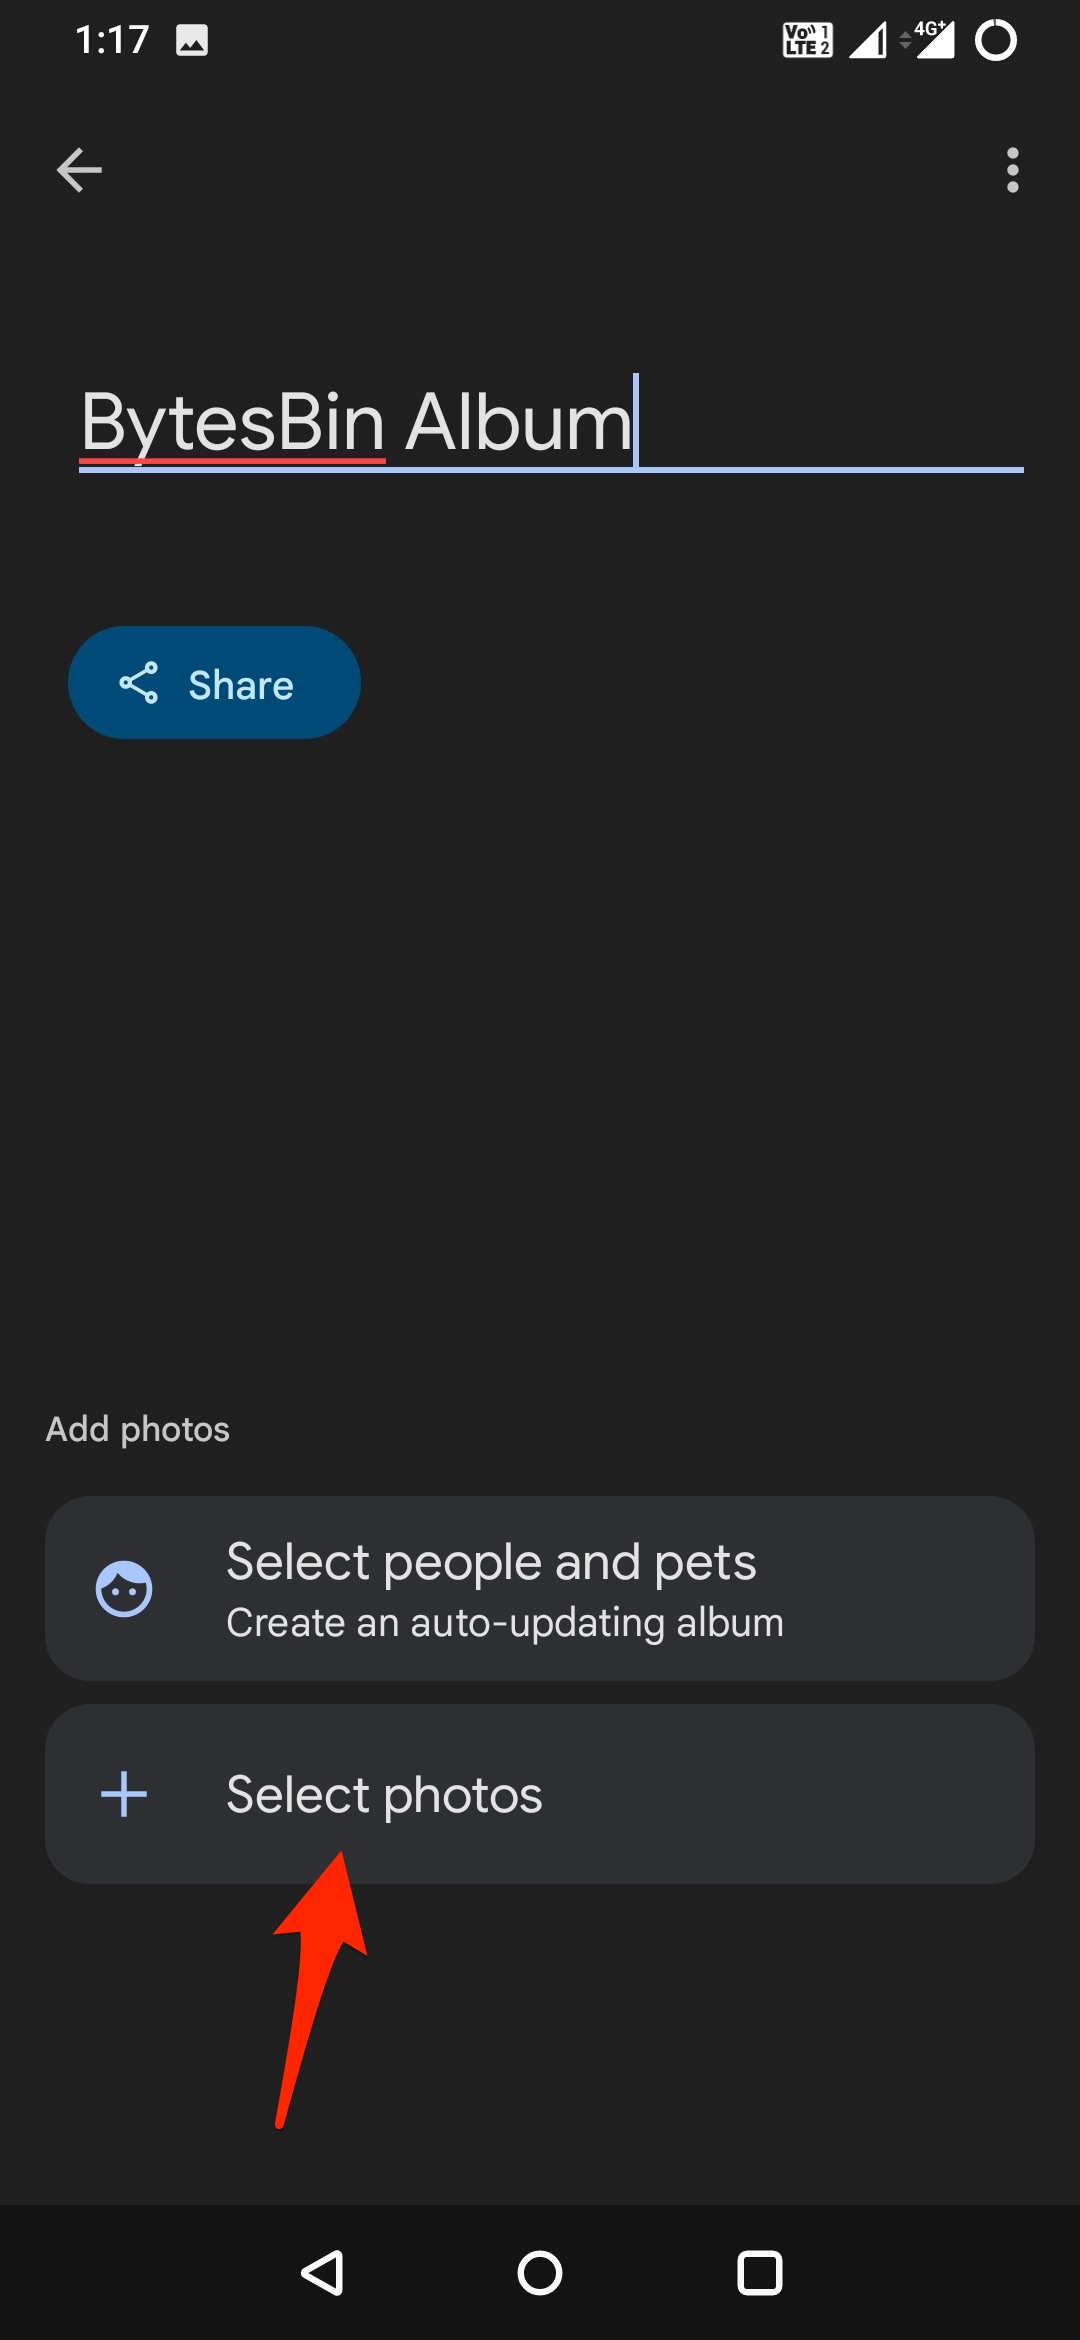
- Click on Select photos.
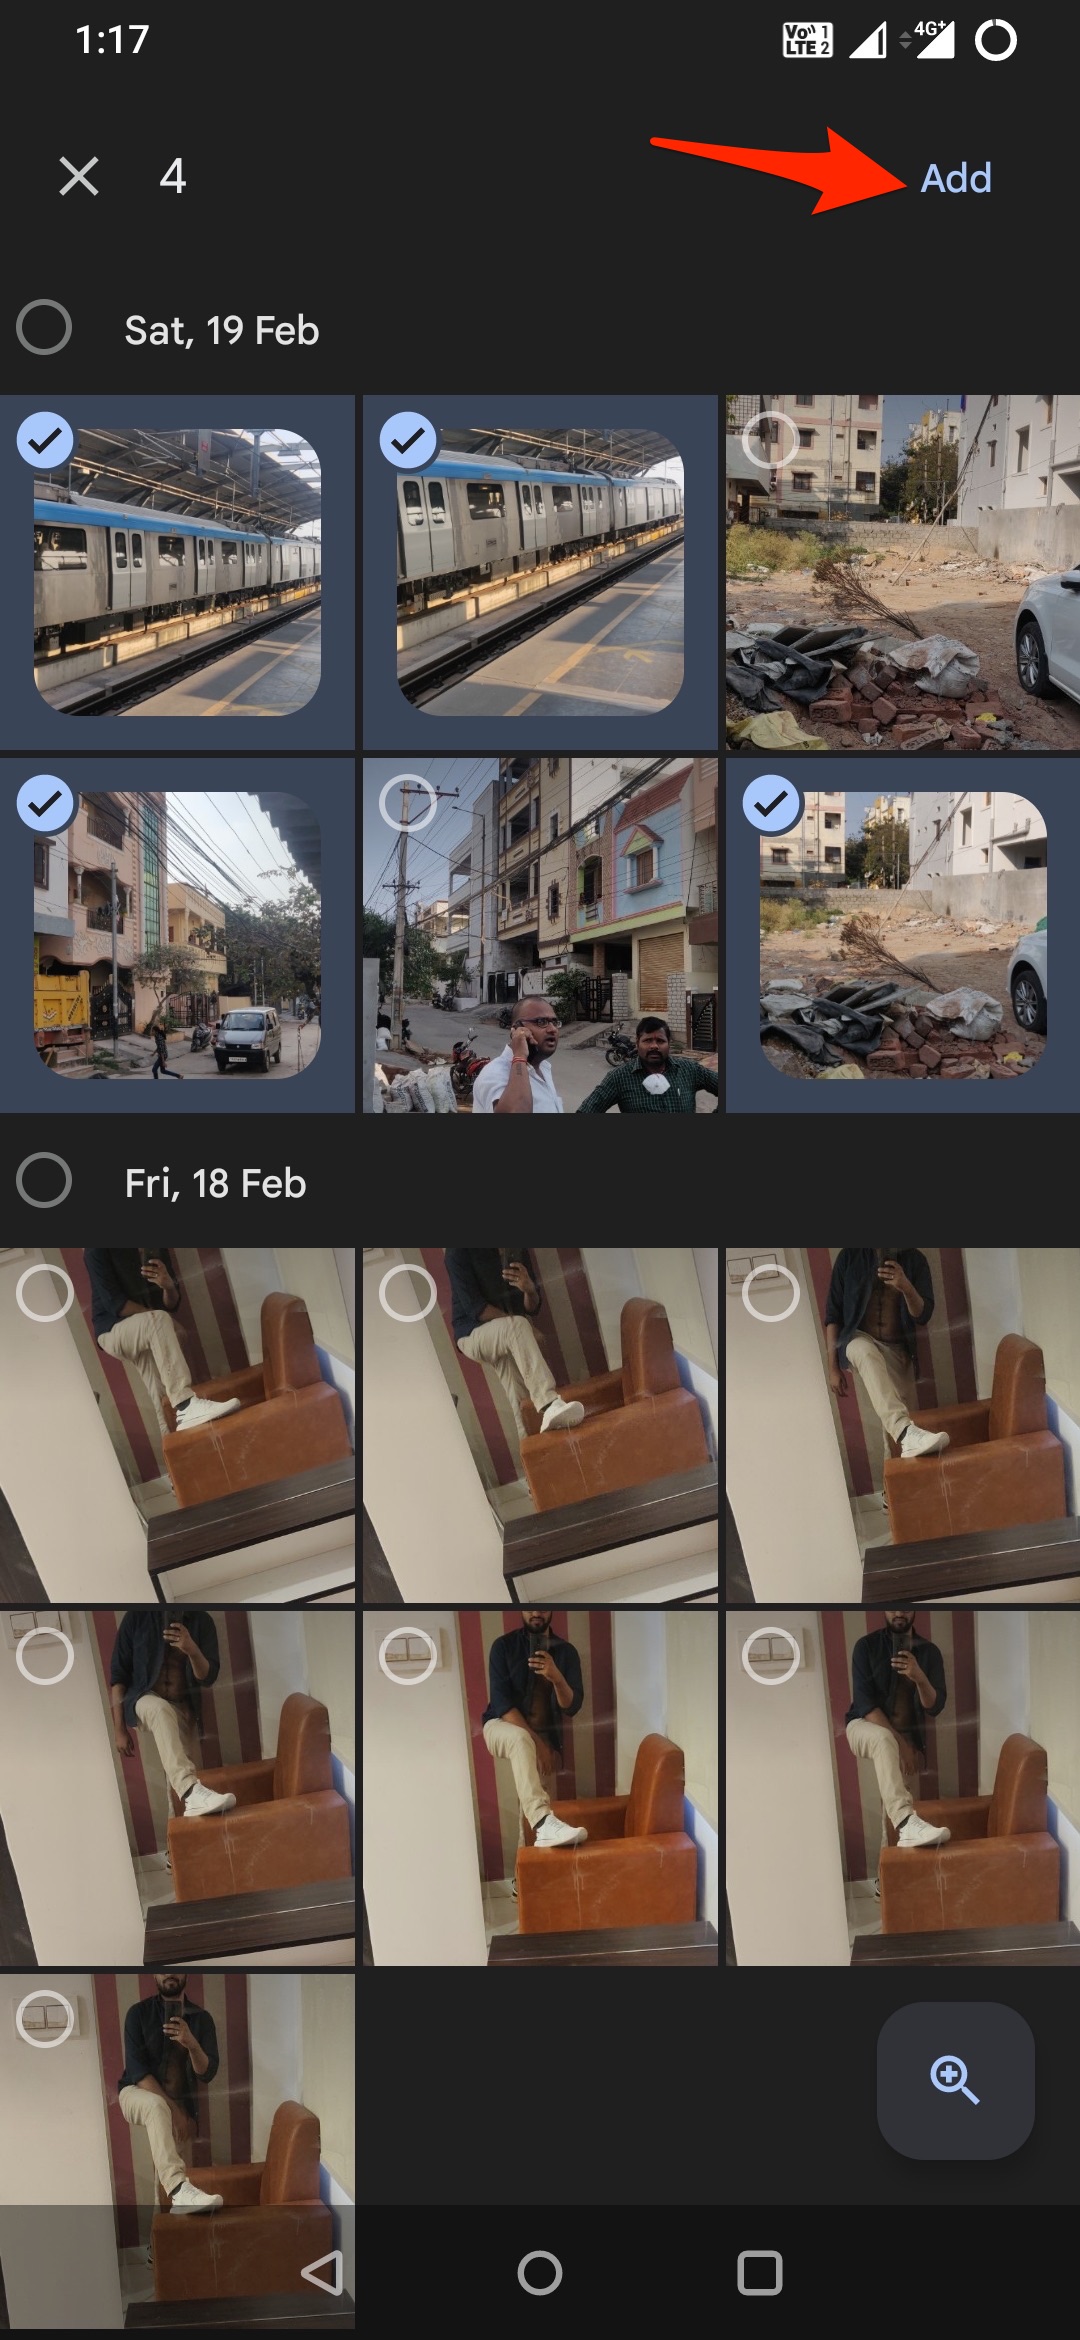
- Select the photos to add to the album and click Add.
- Done! The Album is created.
Create a Live album to Auto Backup Media
If you do not wish to manually add photos to the album then you can set up an album to automatically add photos of your friends and family from the device gallery using this simple feature.
- At the bottom, tap Library → Albums → New album.
- Tap Select People and pets.
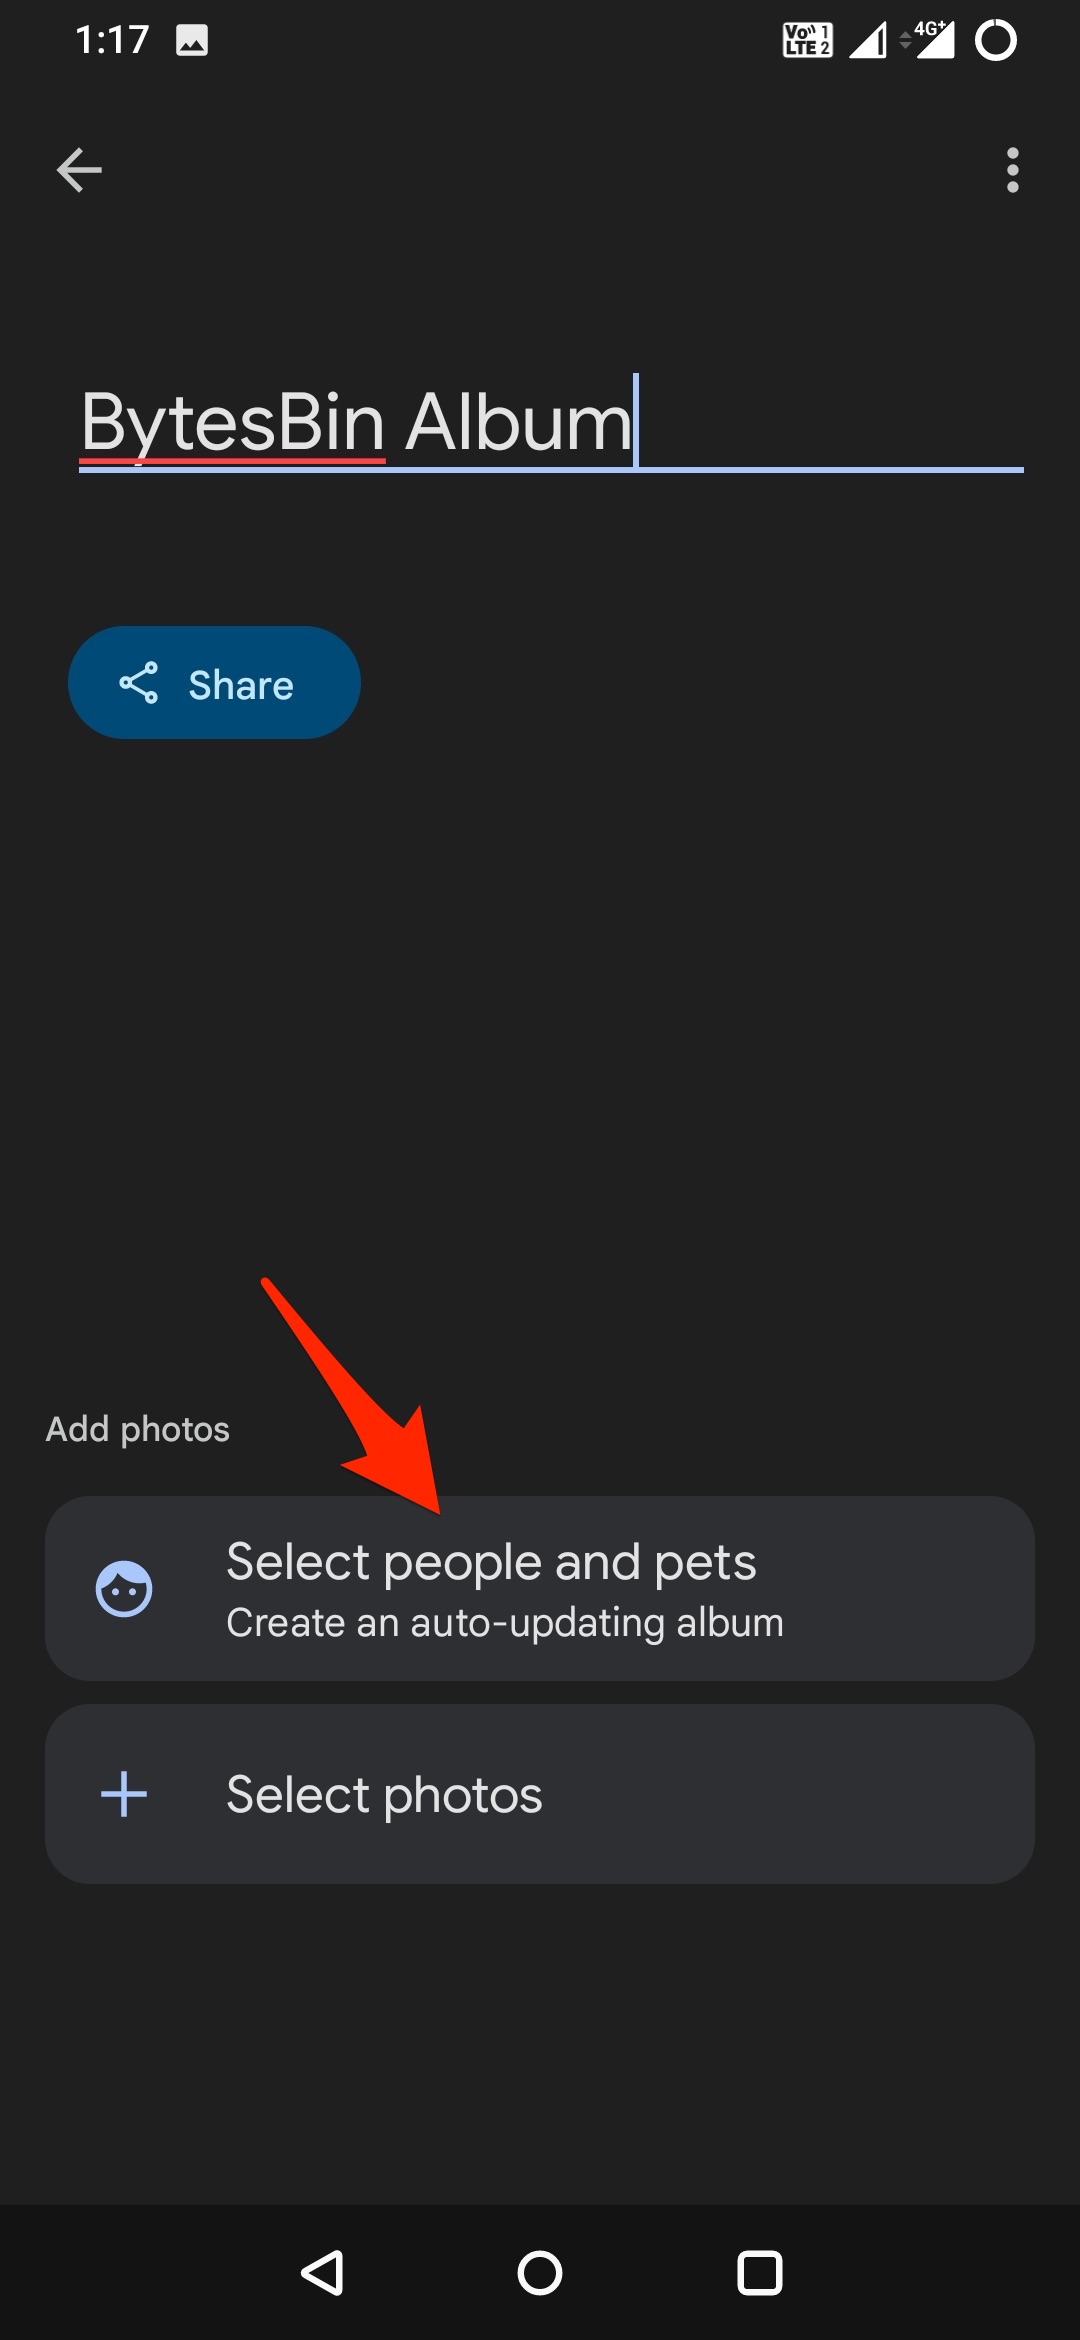
- Select the face or faces whose photos you want to add to the Album. All the photos in your gallery that have these faces will be automatically added to the Album.
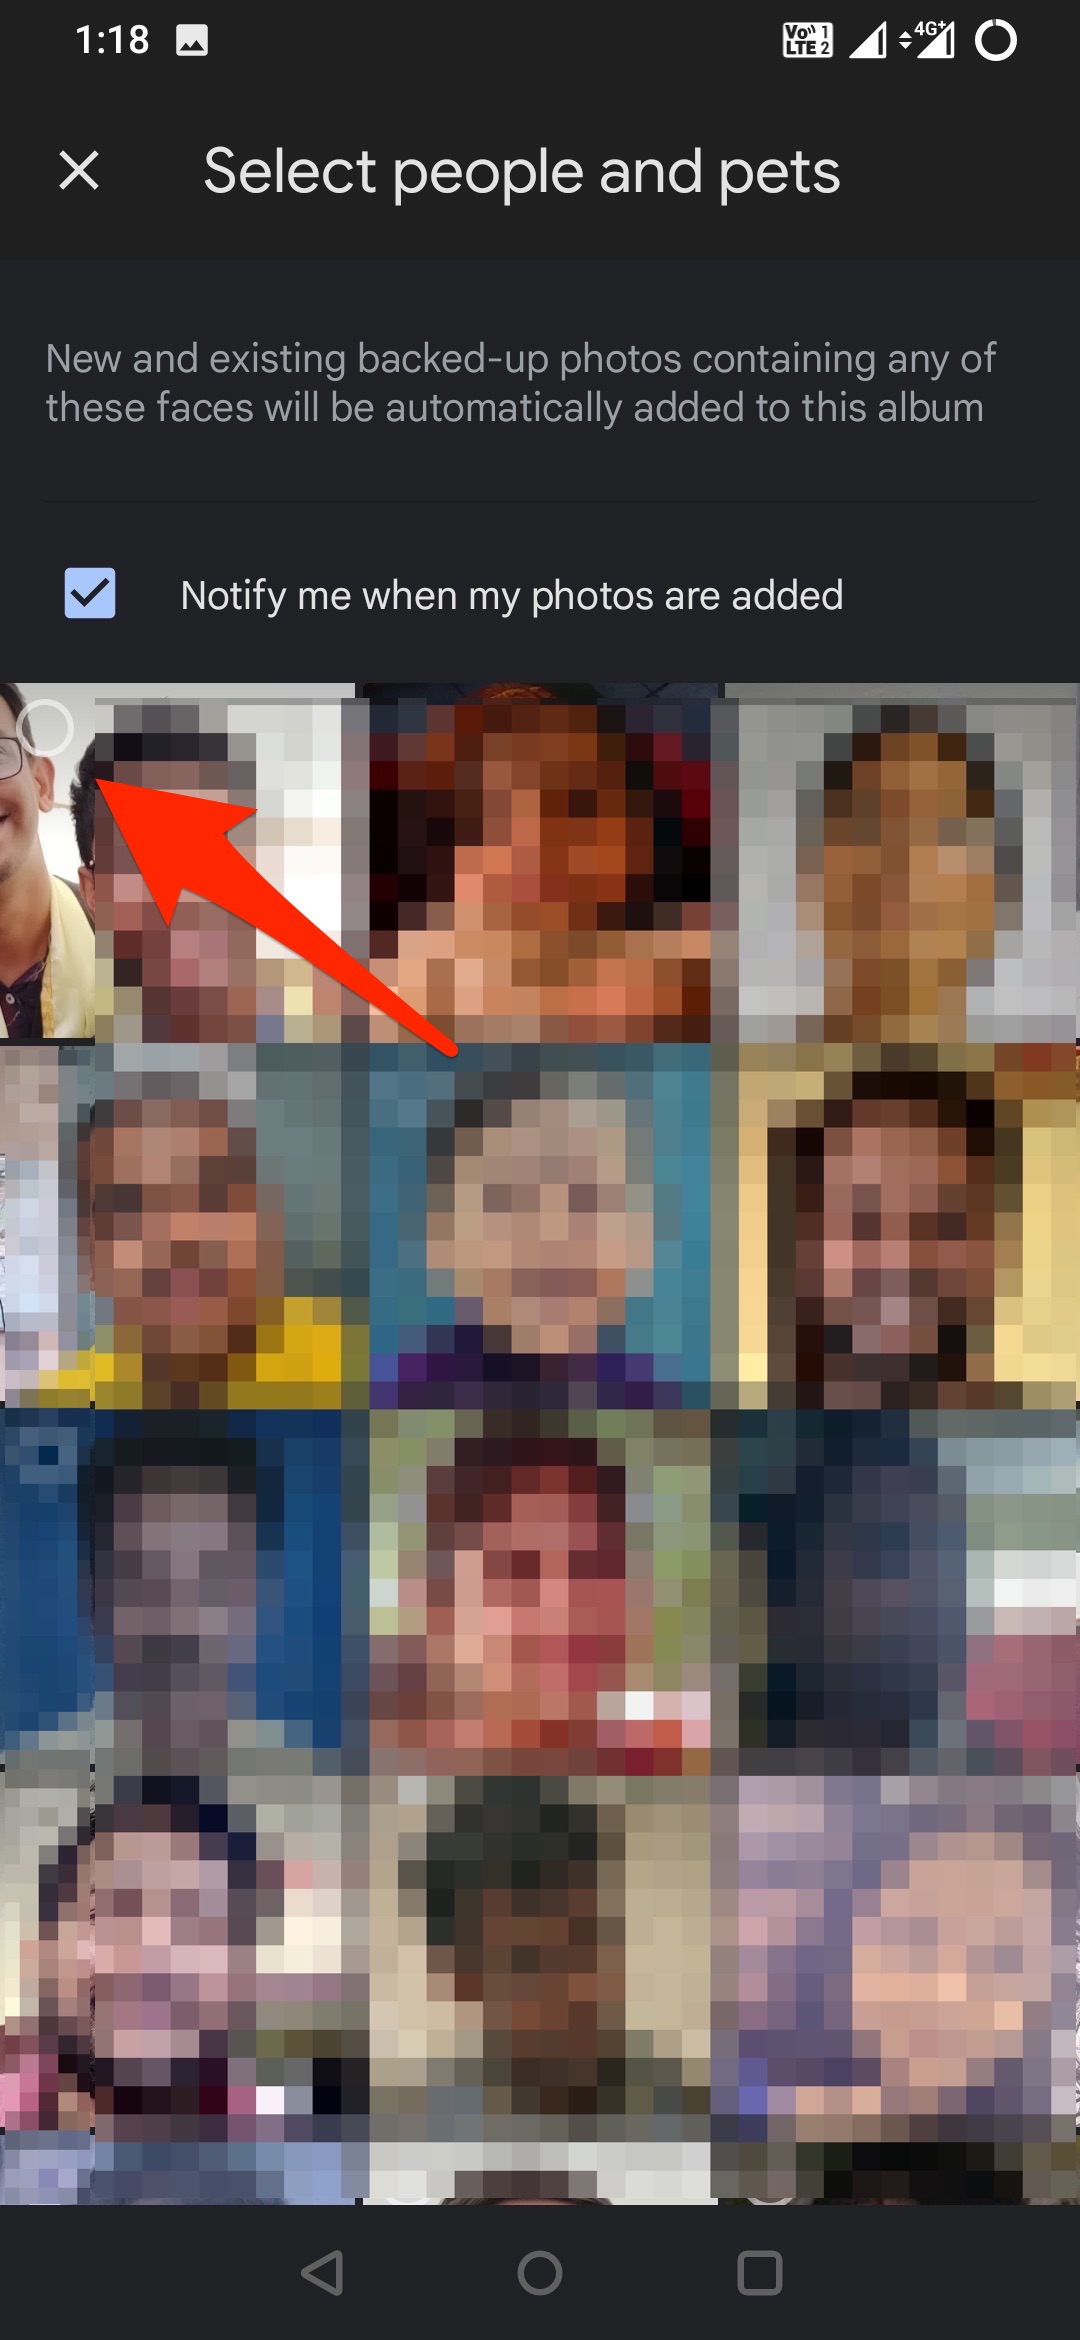
- At the top right, tap Confirm.
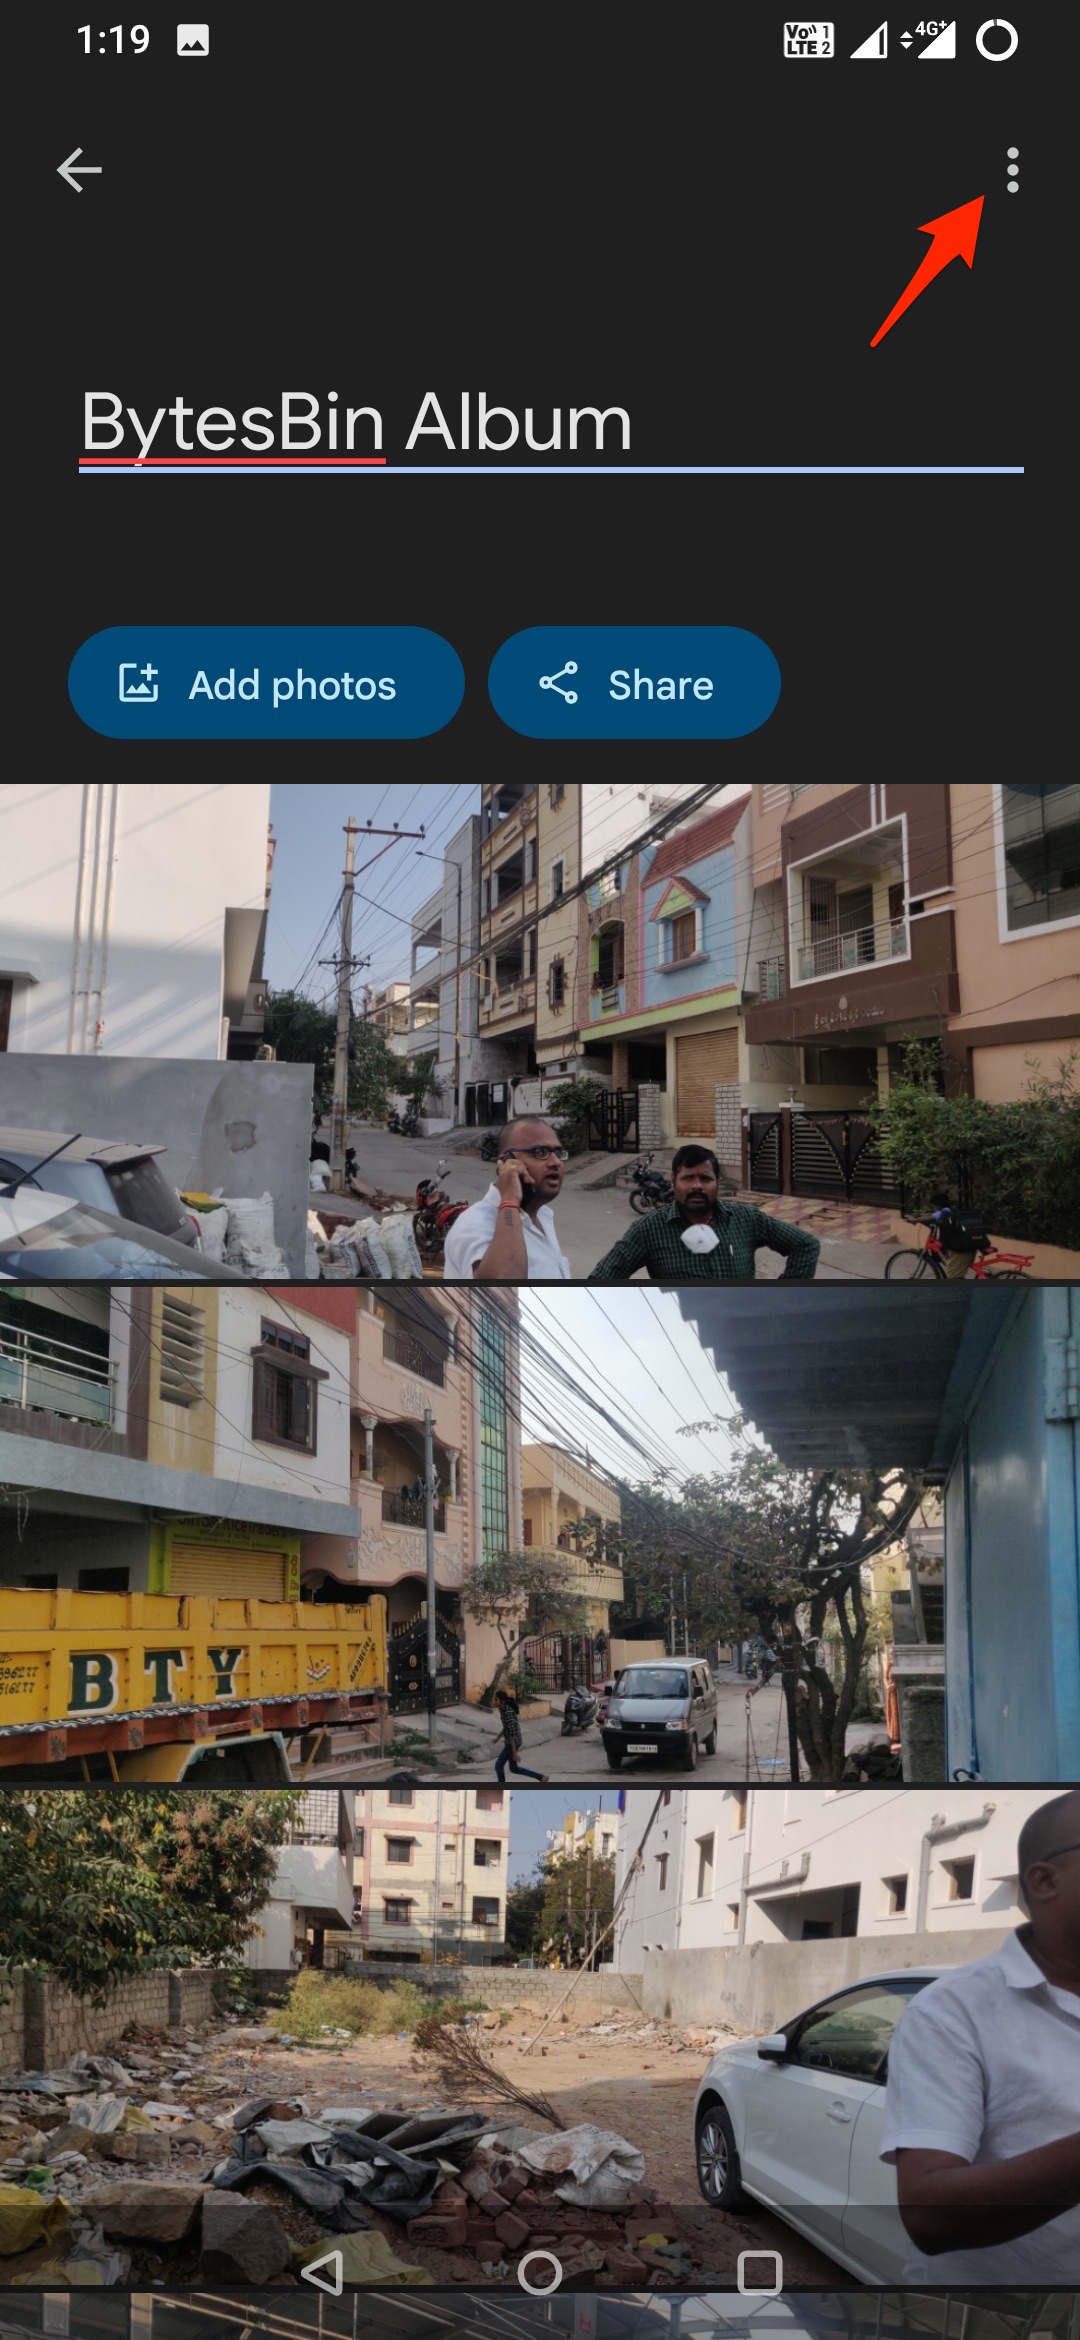
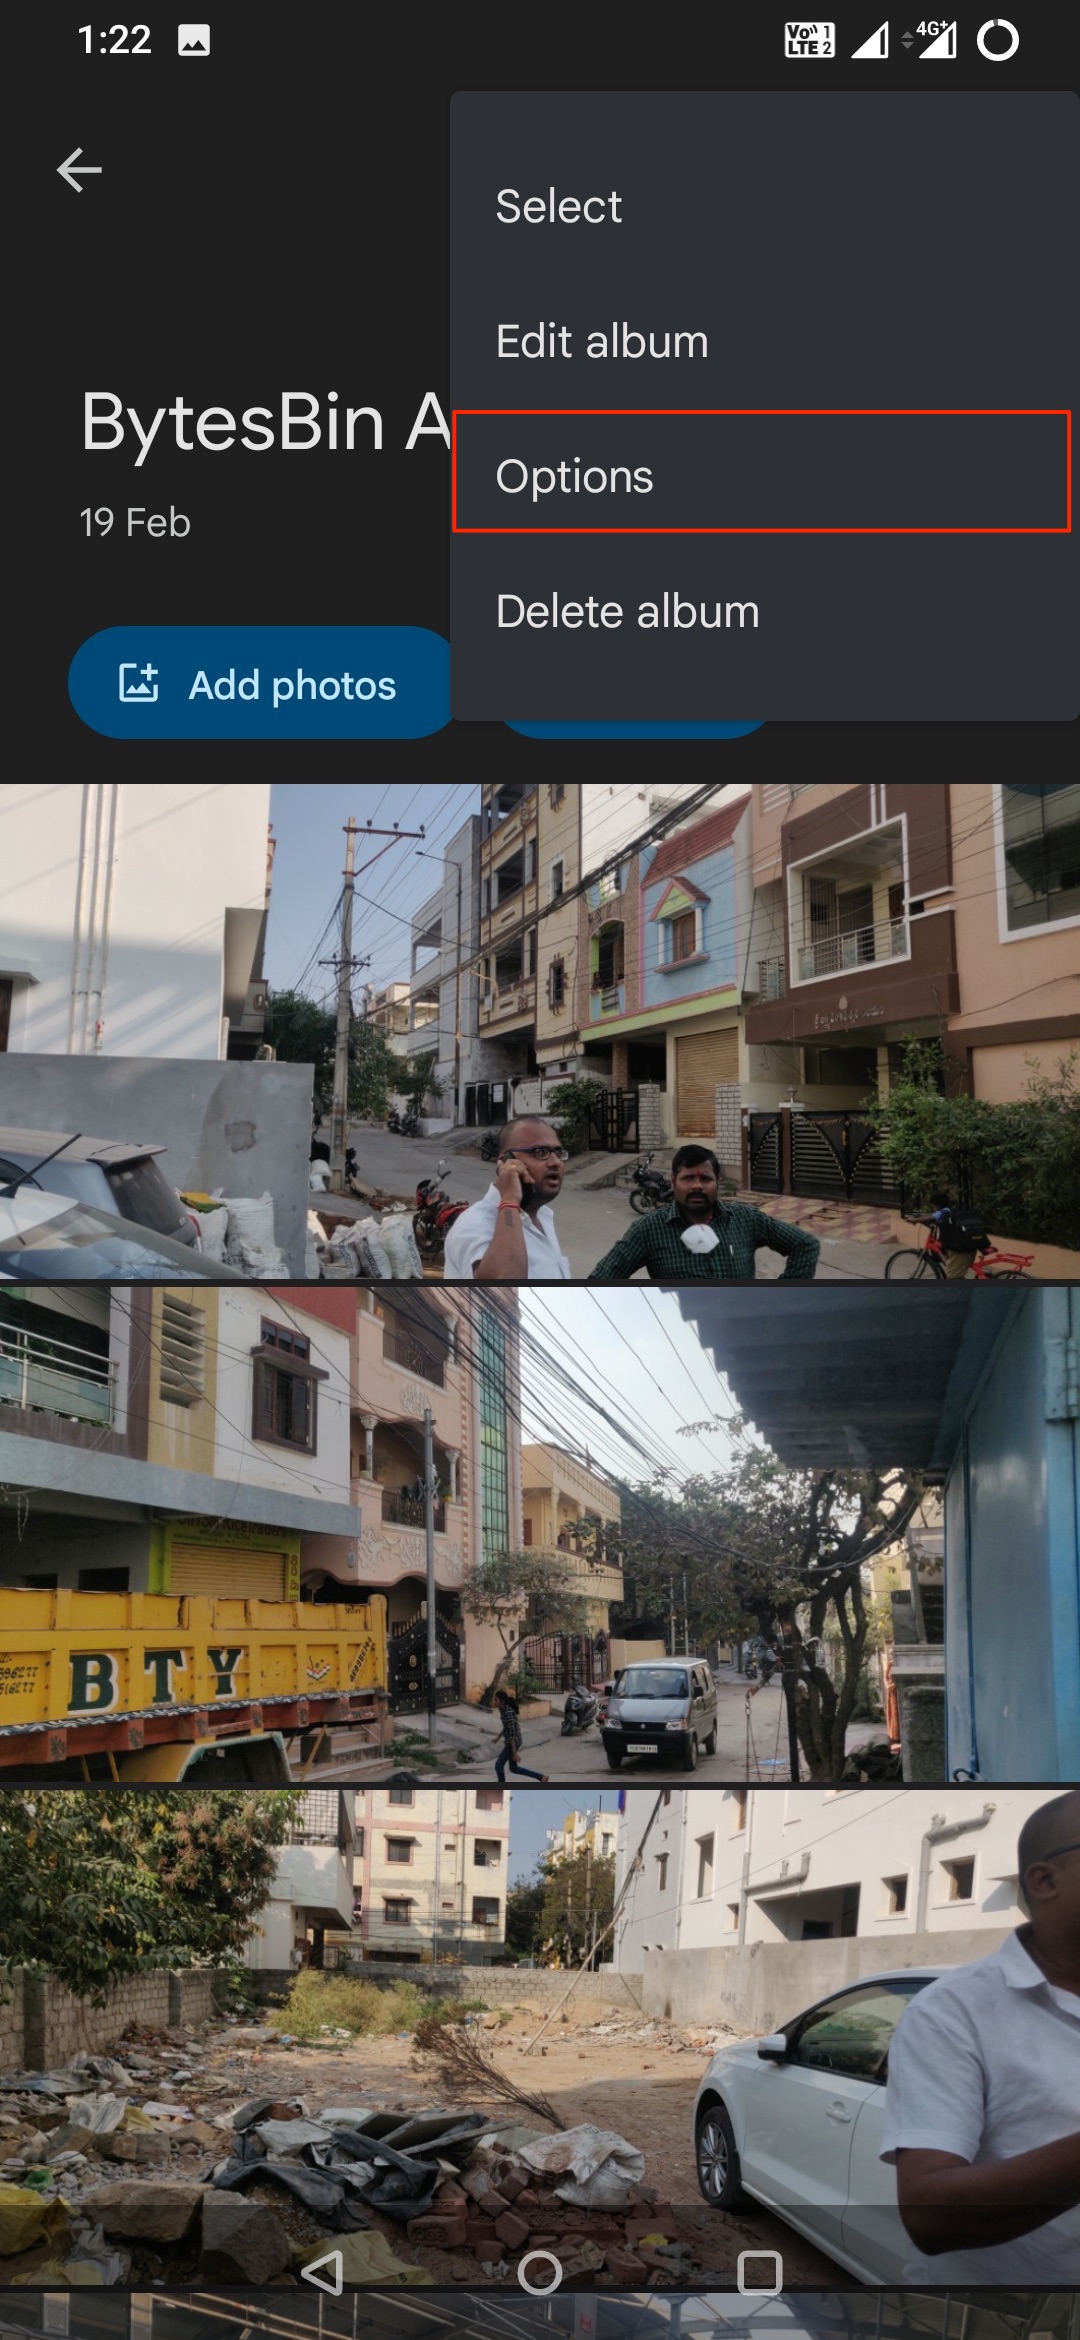
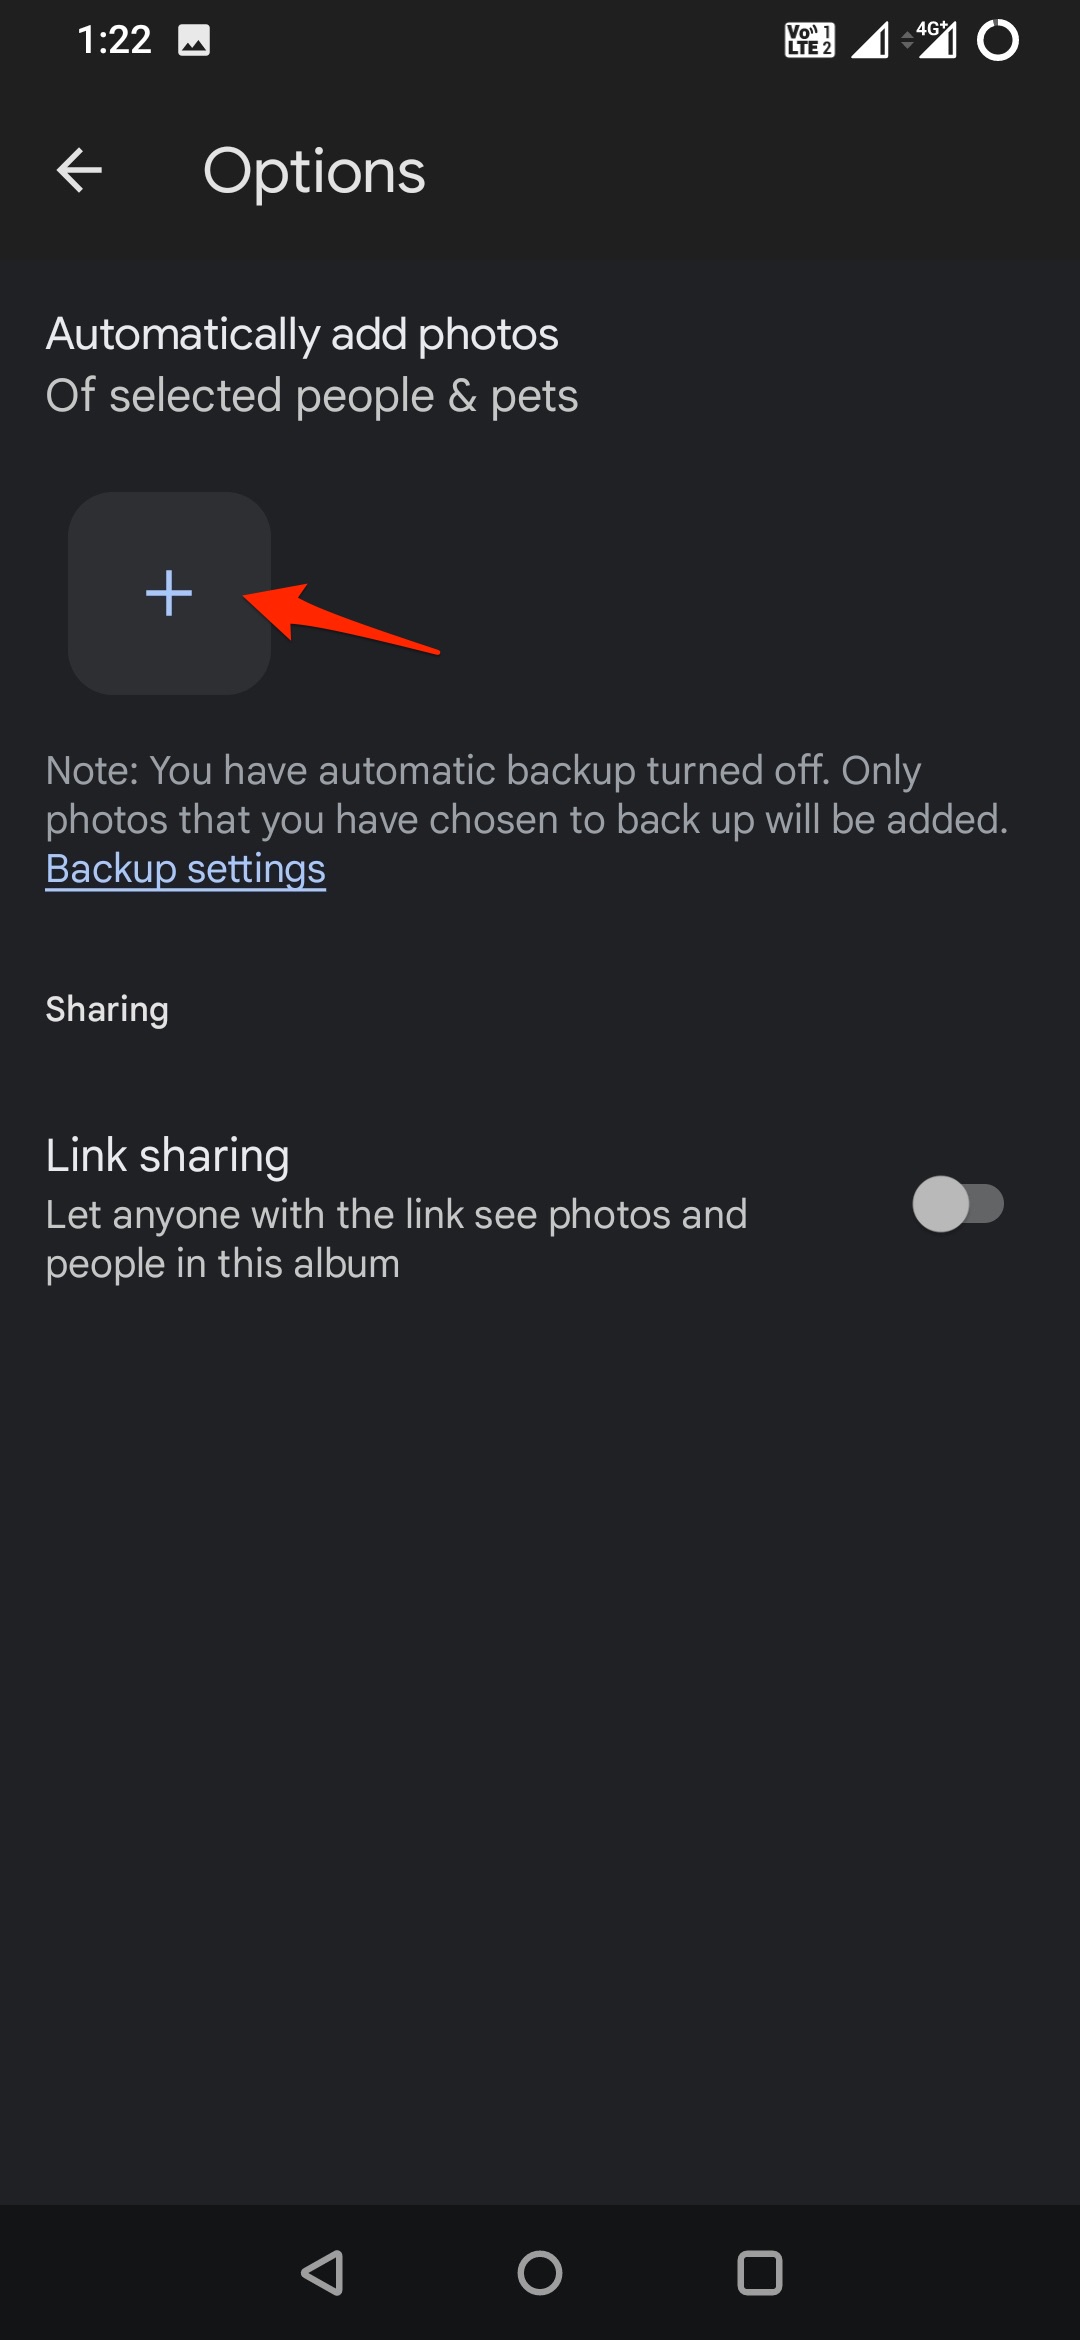
- If you have already created an album then you click on more
 and then on Options.
 - Here select the faces to backup media to the album.
Change Album Cover or Thumbnail
- Sign in to your Google Account.
- Open the album.
- Open the photo that you want to use.
- At the top right, tap More → Use as album cover.
Change the Title of an Album
- Open the album.
- Tap the title, then type a new title.
- Tap Done.
Edit Items in the Album
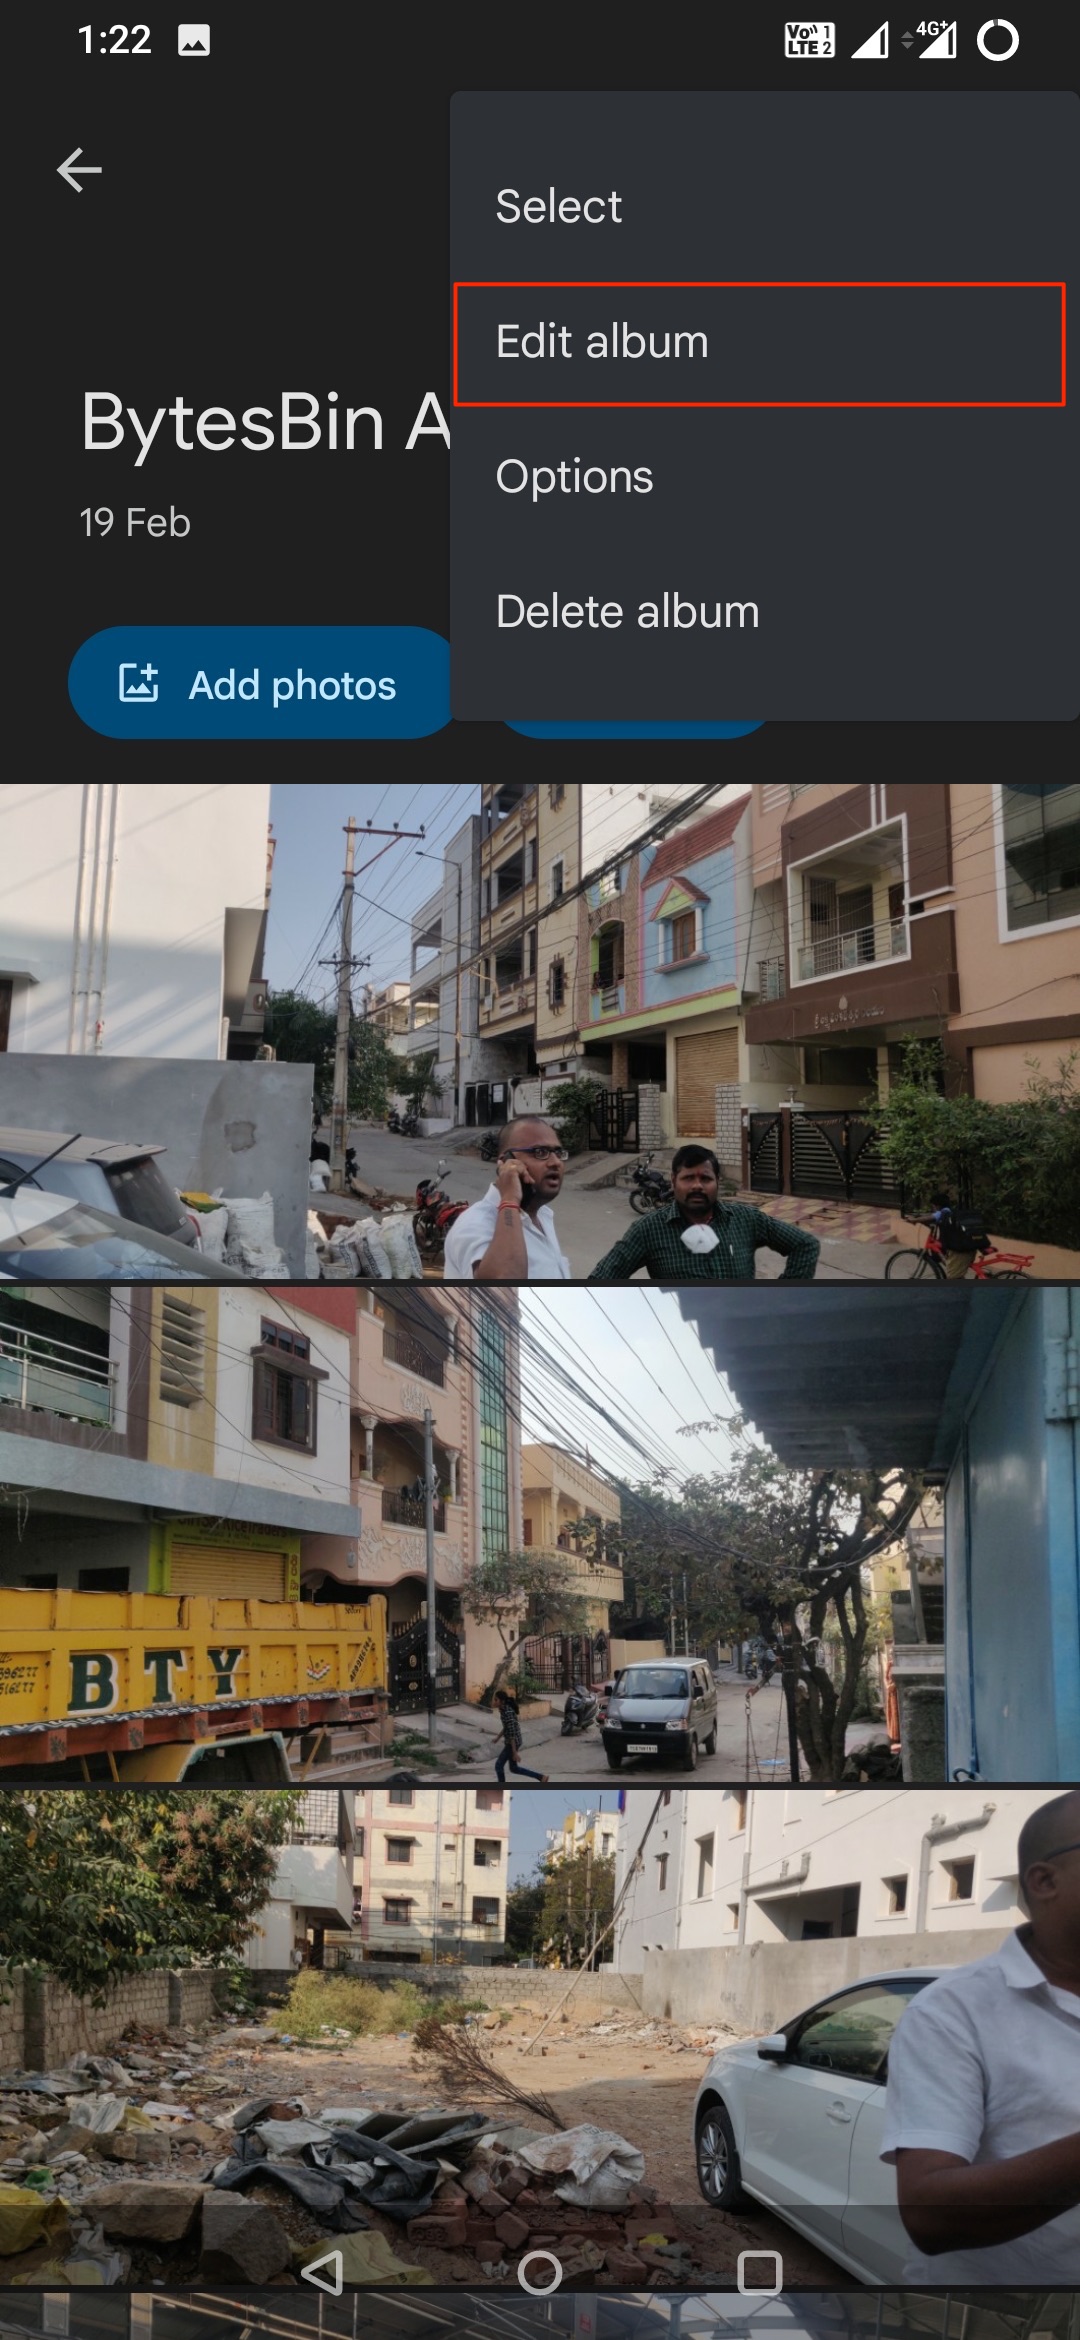
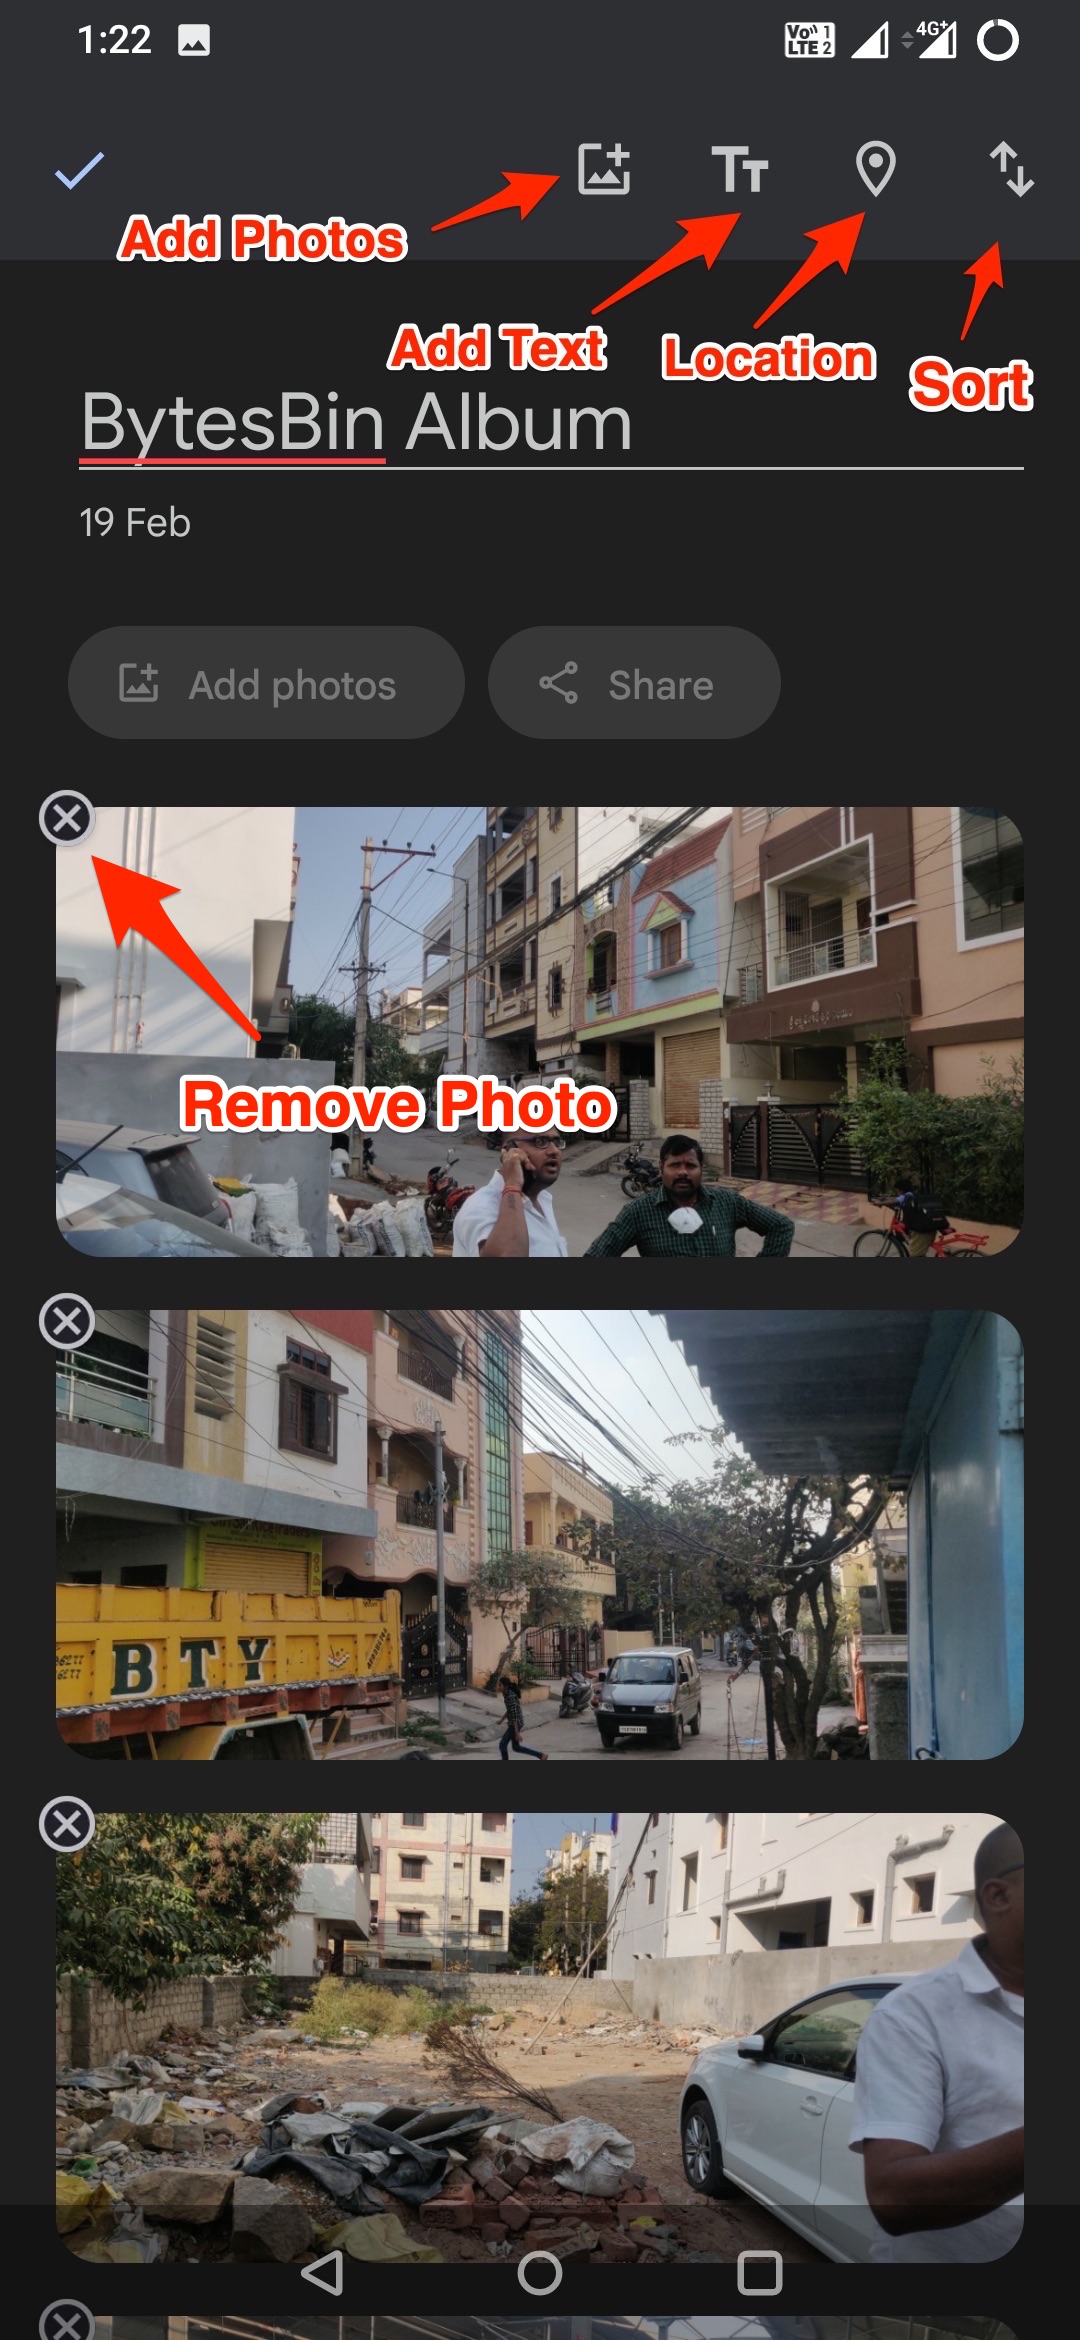
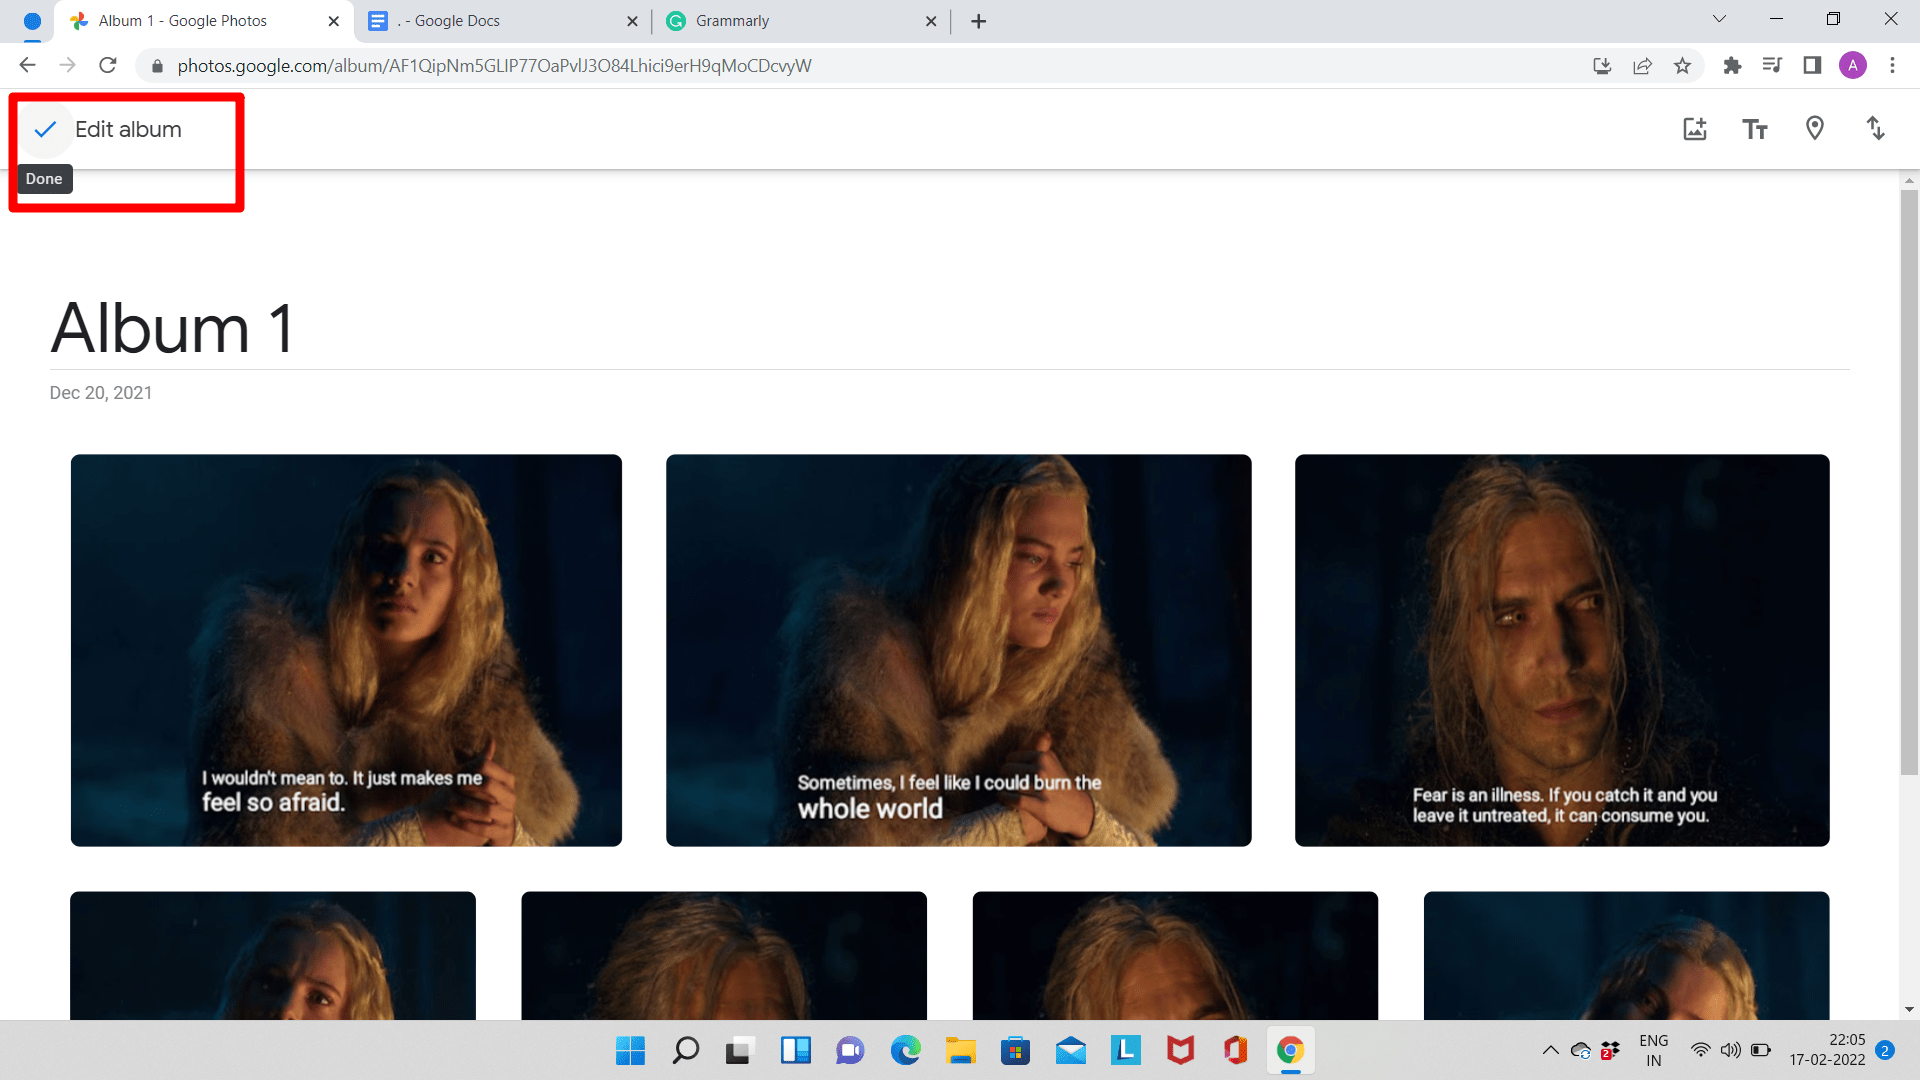
Click on more options and you will see the Edit album option.
- You can add, upload or remove photos and videos.
- Add maps and locations to the album.
- Add or change text
- Delete an album
Create an Album in Google Photos Website
Now we finally take a look at the steps behind creating a new album in Google Photos. The complete process will not take long and by the end of it, you’ll have a new album.
Step 1: Sign in to your Gmail account, then go to Google Photos.
Step 2: Find the photo you want to add to an album and click on ‘Select‘.
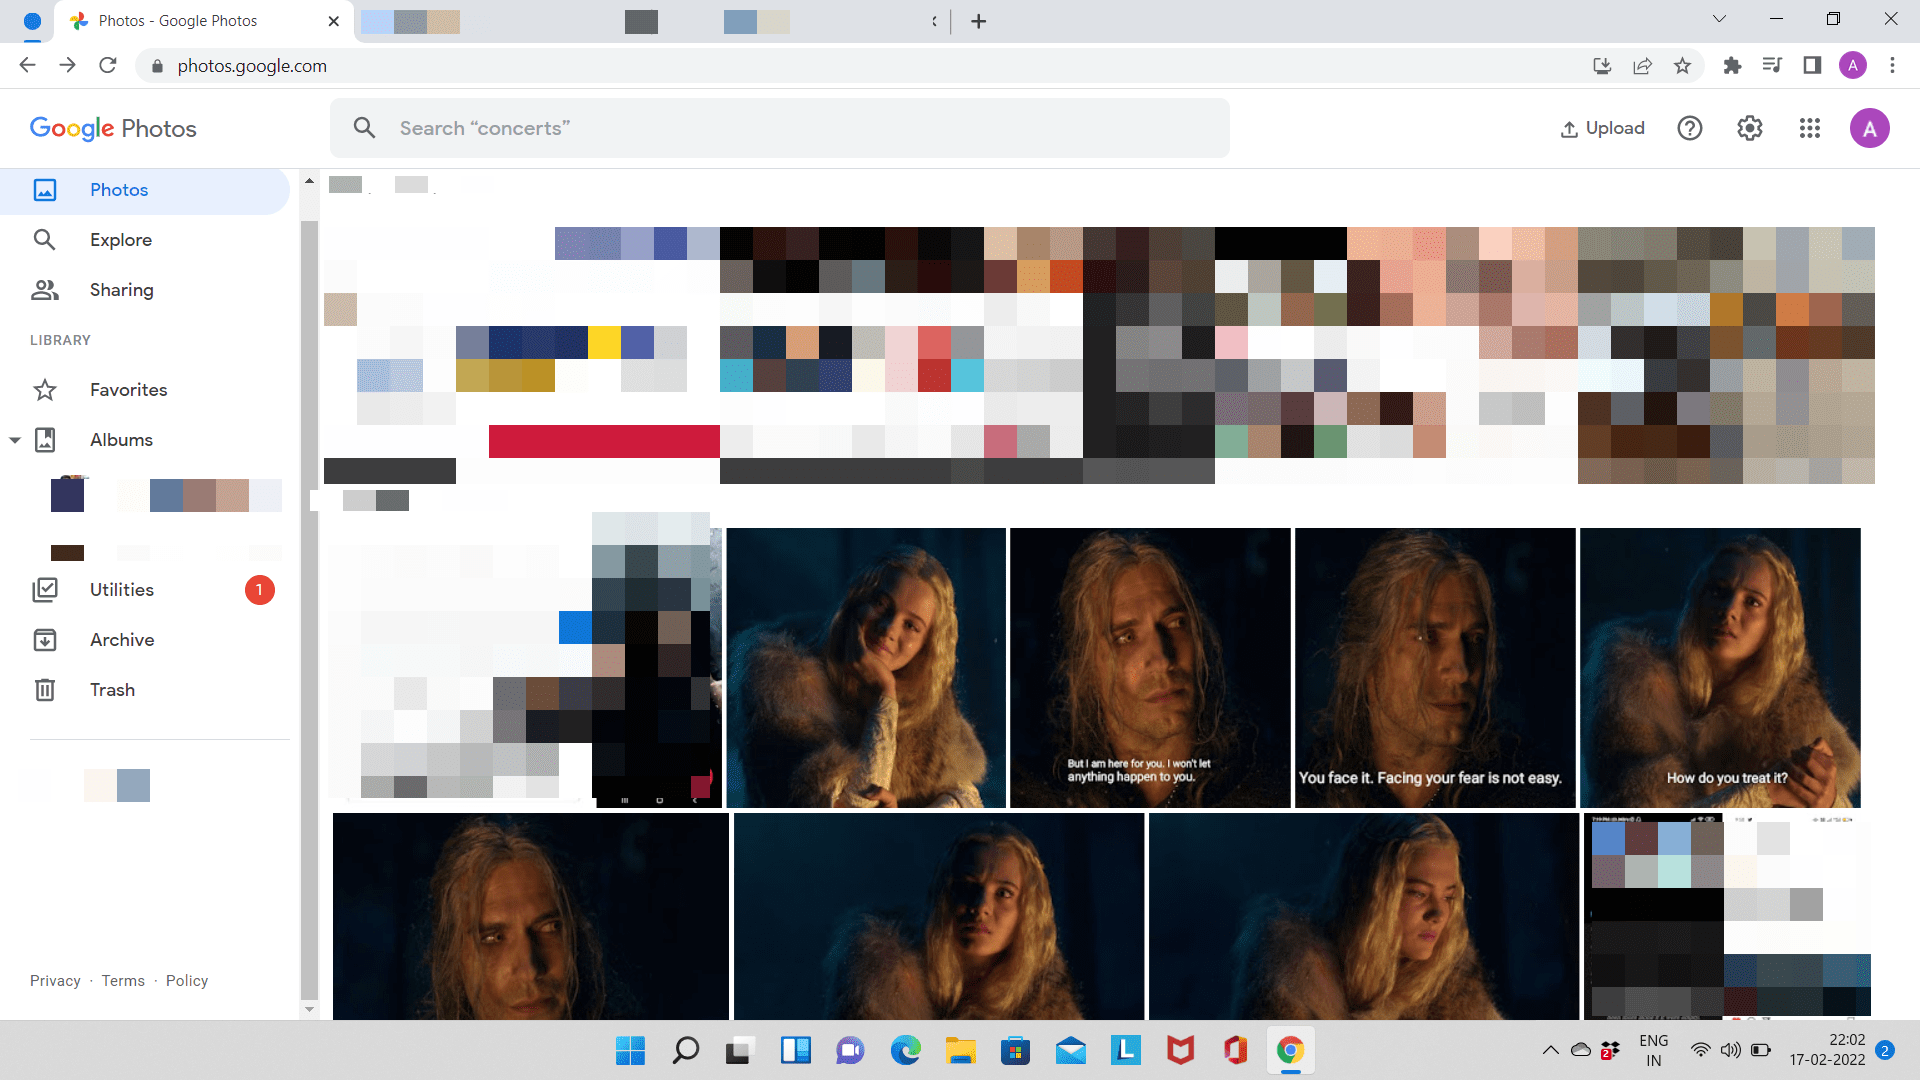
You can select a number of photos that you wish to add to your album.
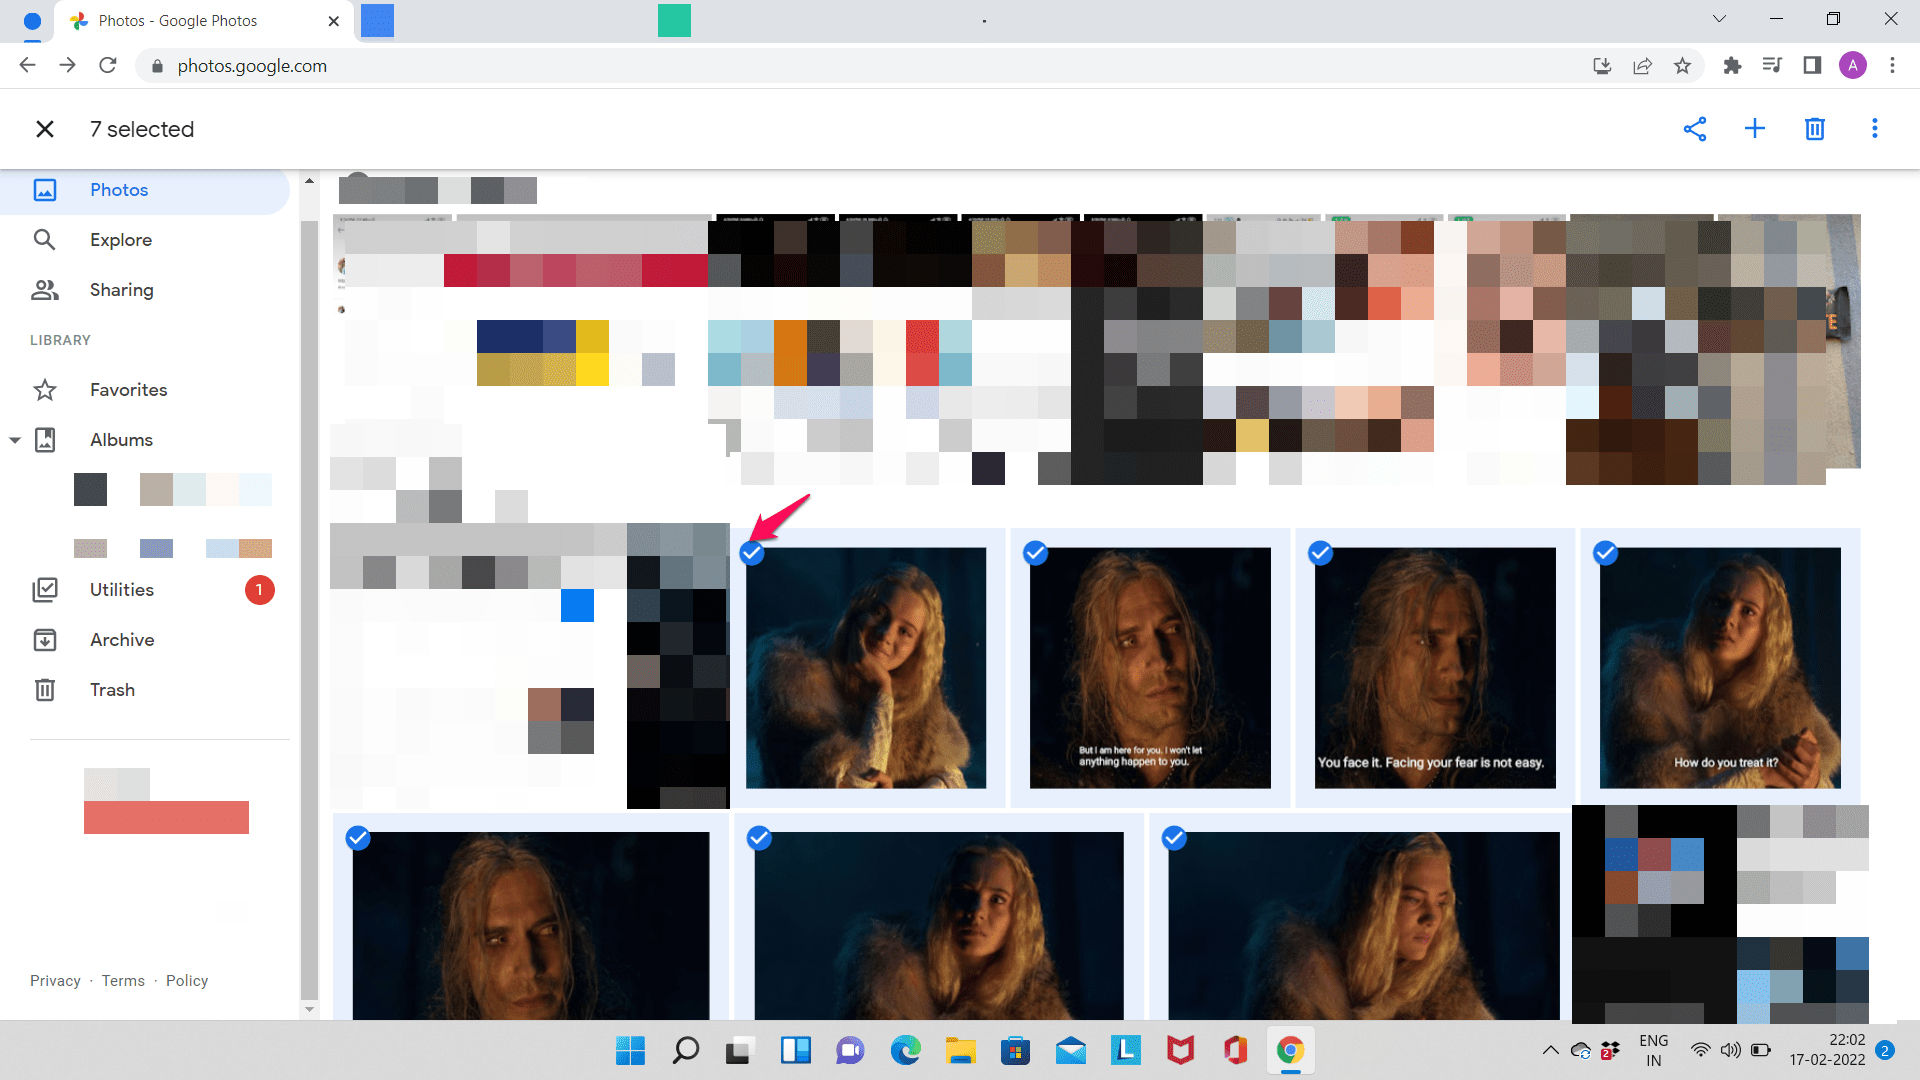
Step 3: Once you have selected the photos, click on the plus + symbol at the top.
![]()
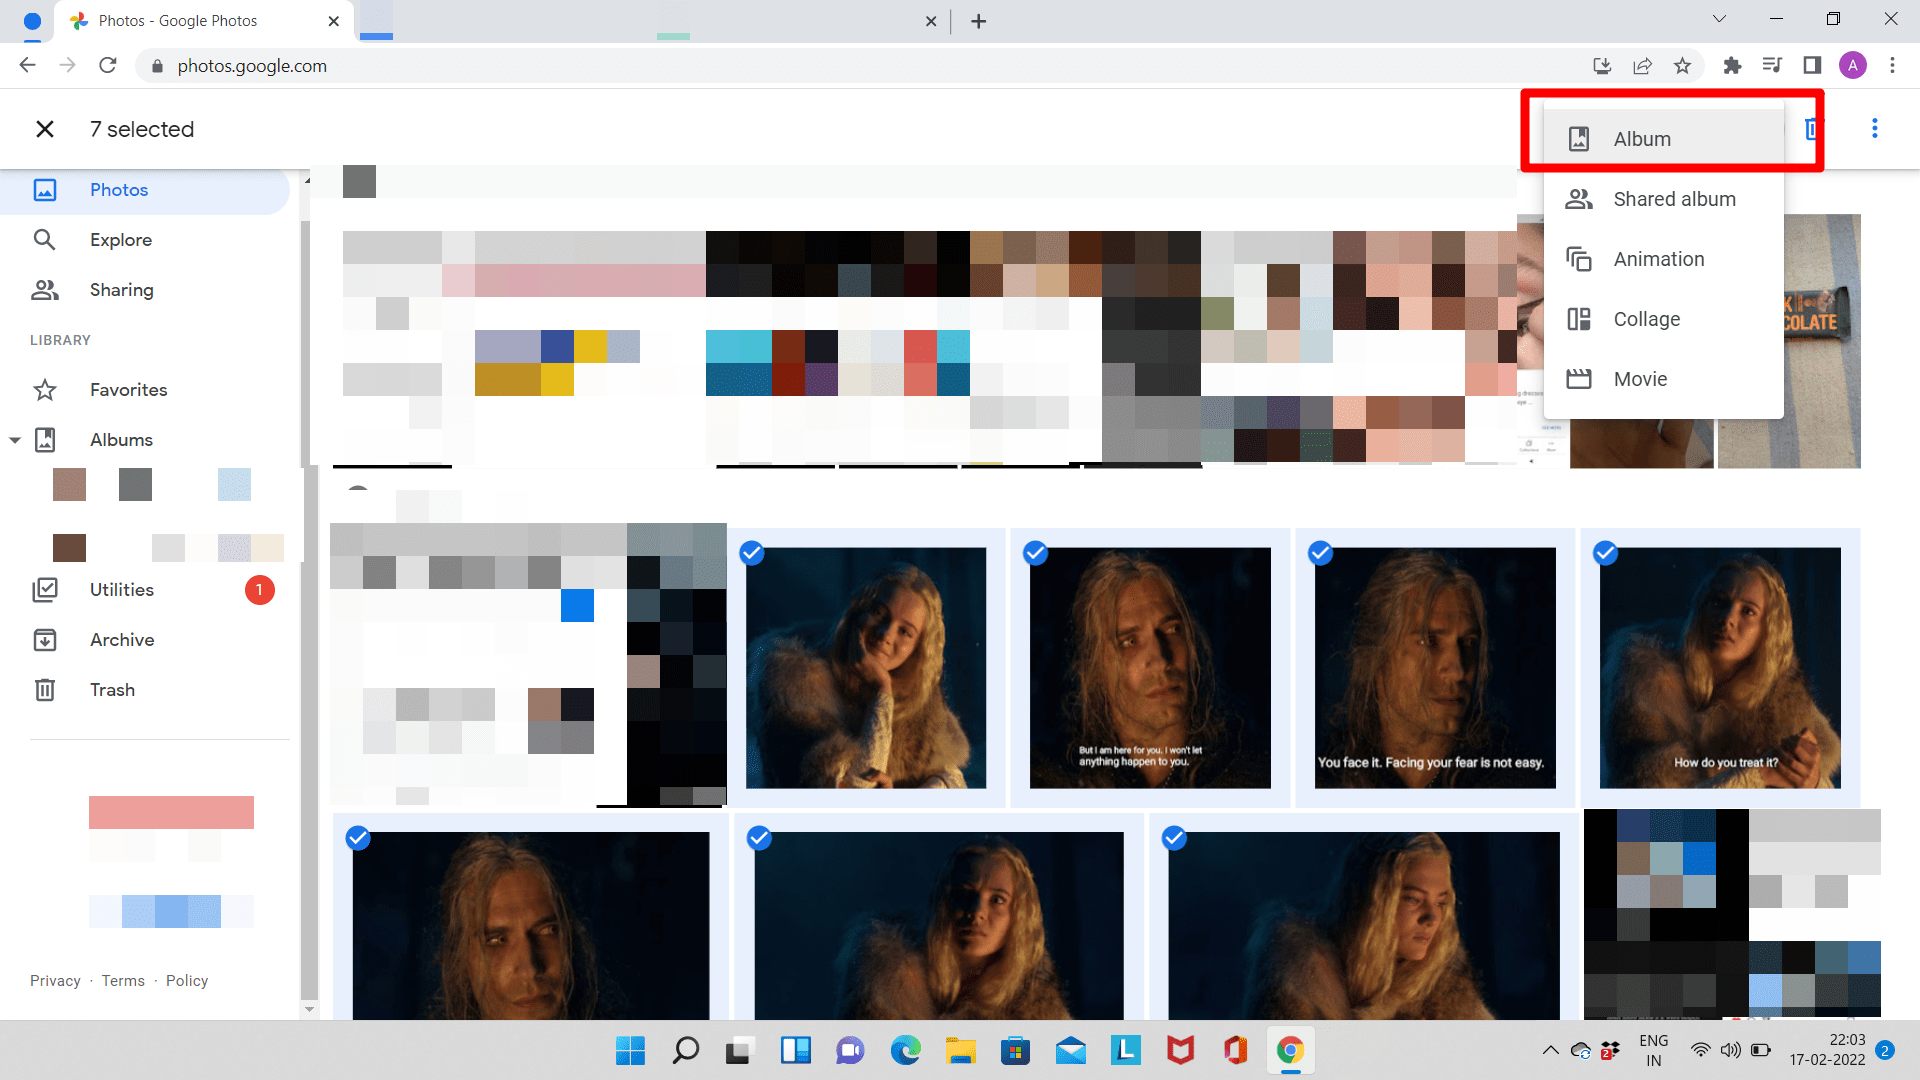
Step 4: Now, click on ‘Album‘. Add a title to the album to complete the process.
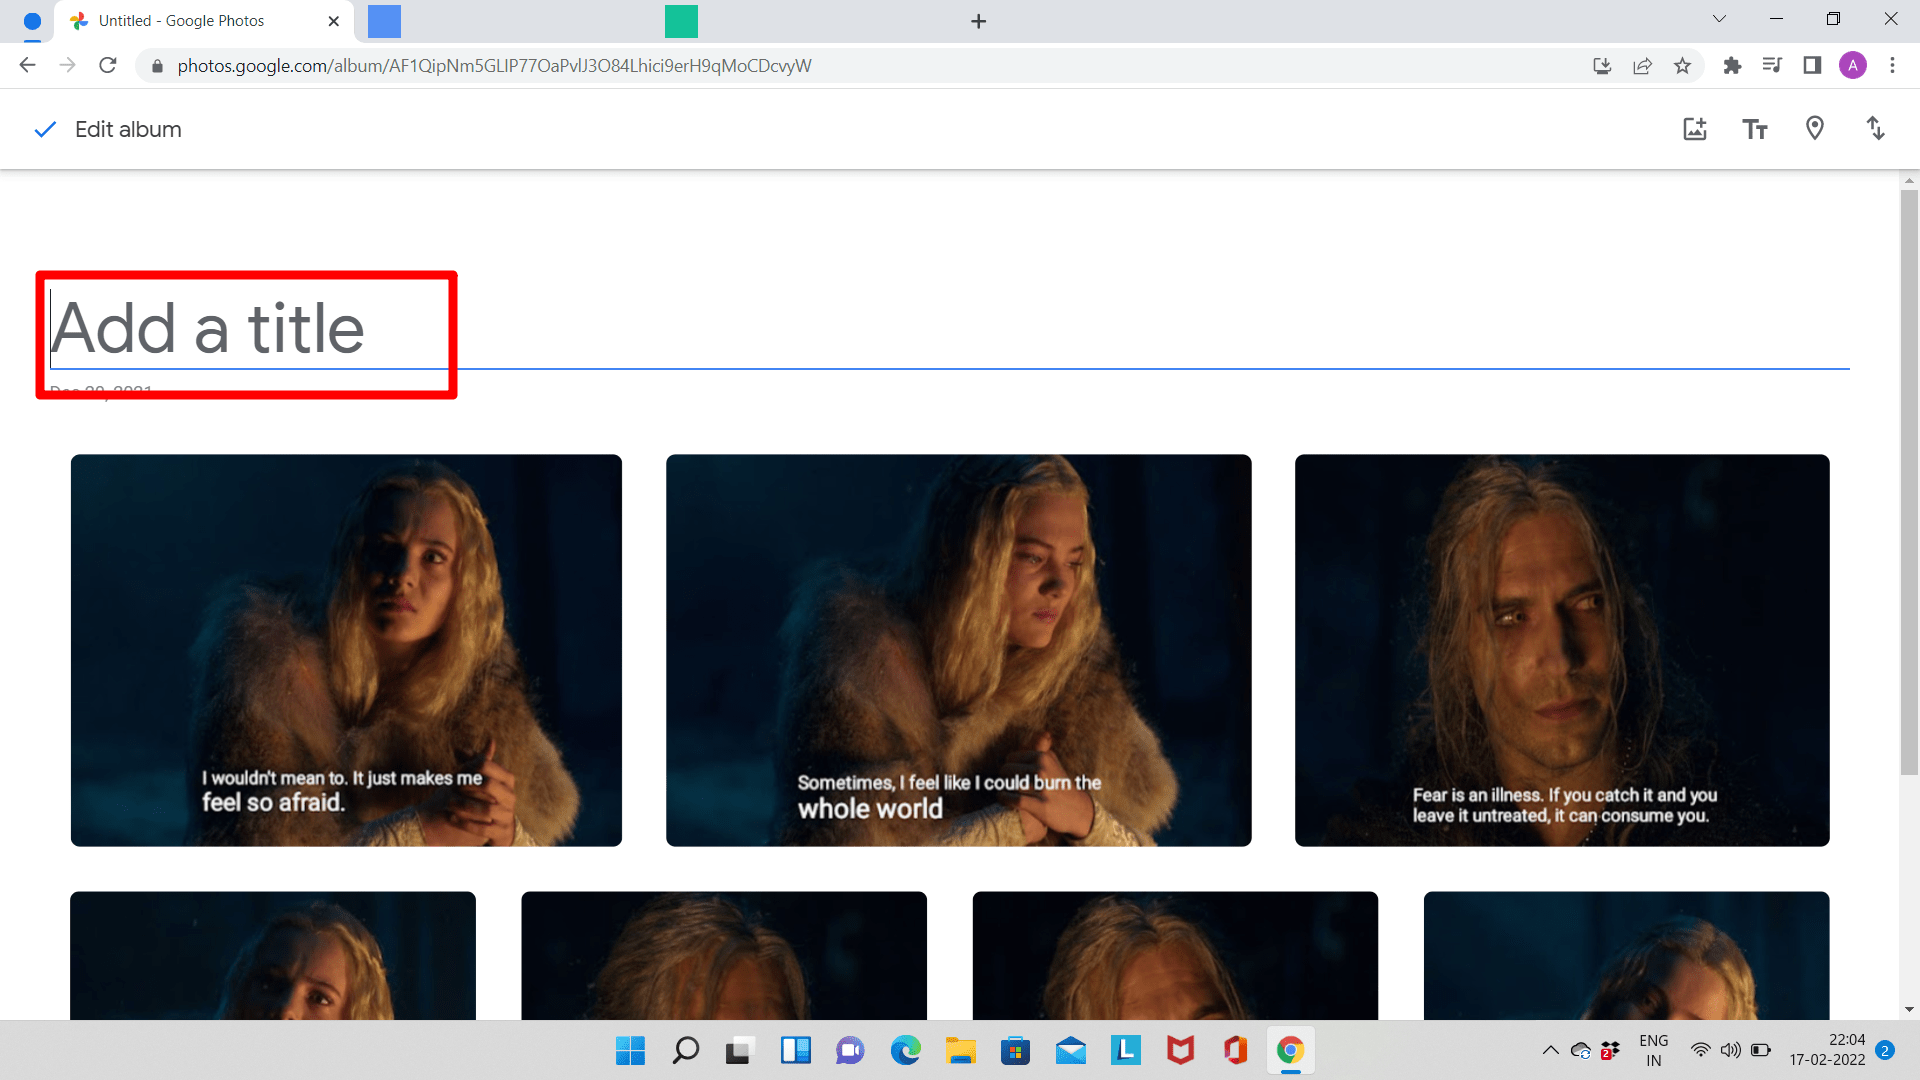
Step 5: Click on ‘Done‘ and the album will be created.
Create a Live Album in Google Photos
Creating a live album in Google Photos is not difficult. It’s pretty similar to creating a basic album.
Step 1: Sign in to your Gmail account, then go to Google Photos.
Step 2: In the menu on the left, click on ‘Albums‘ and click on ‘Create Album‘.
Step 3: Click on ‘Select people and pets‘. Then click on any face icon and click ‘Select‘.
Step 4: Click on ‘Confirm’ and the live album will be created.
Editing an Album in Google Photos
You can do multiple things like changing the cover photo, changing the title, adding or removing photos, and deleting an album in Google Photos.
Deleting an Album in Google Photos
You can delete an album in Google Photos very easily.
Step 1: Sign in to your Gmail account, then go to Google Photos.
Step 2: Open the album you want to delete.
Step 3: Click on the More menu located at the top right, then click on ‘Delete’. The album will be then deleted.
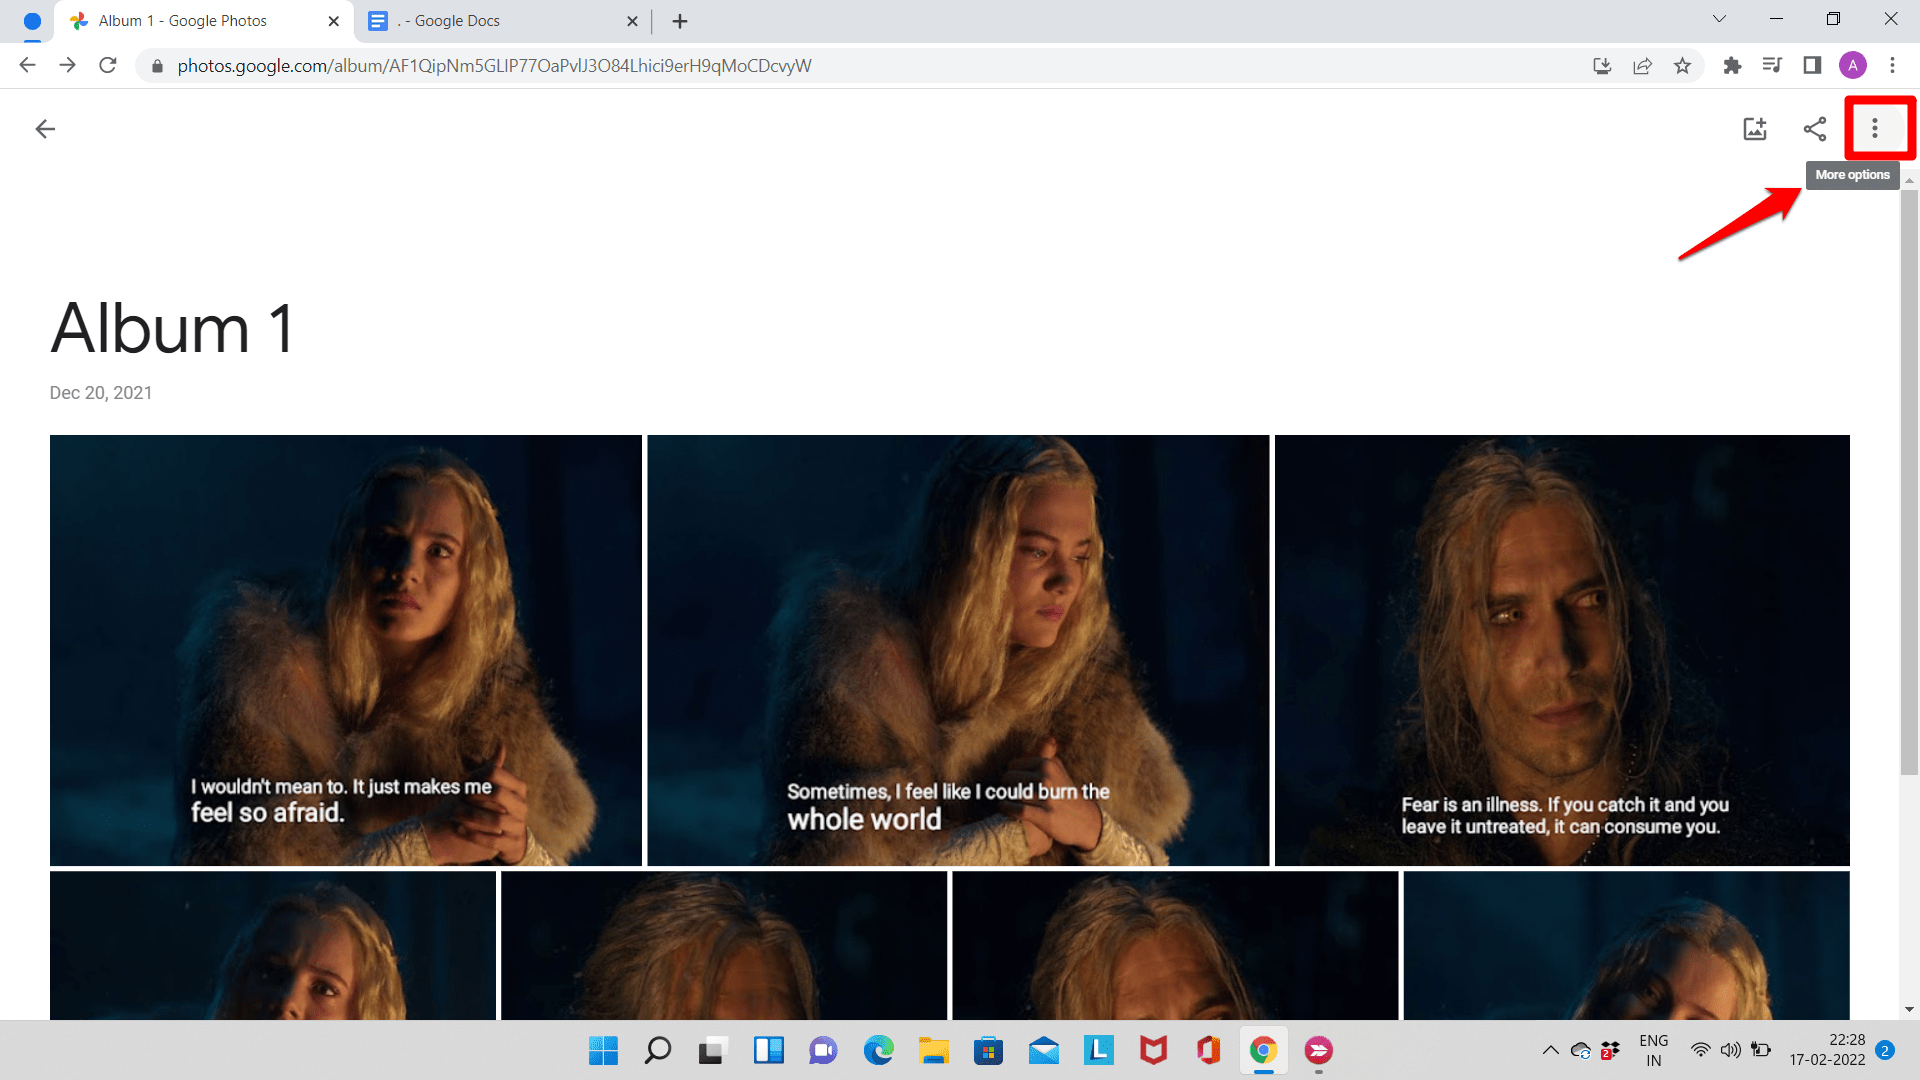
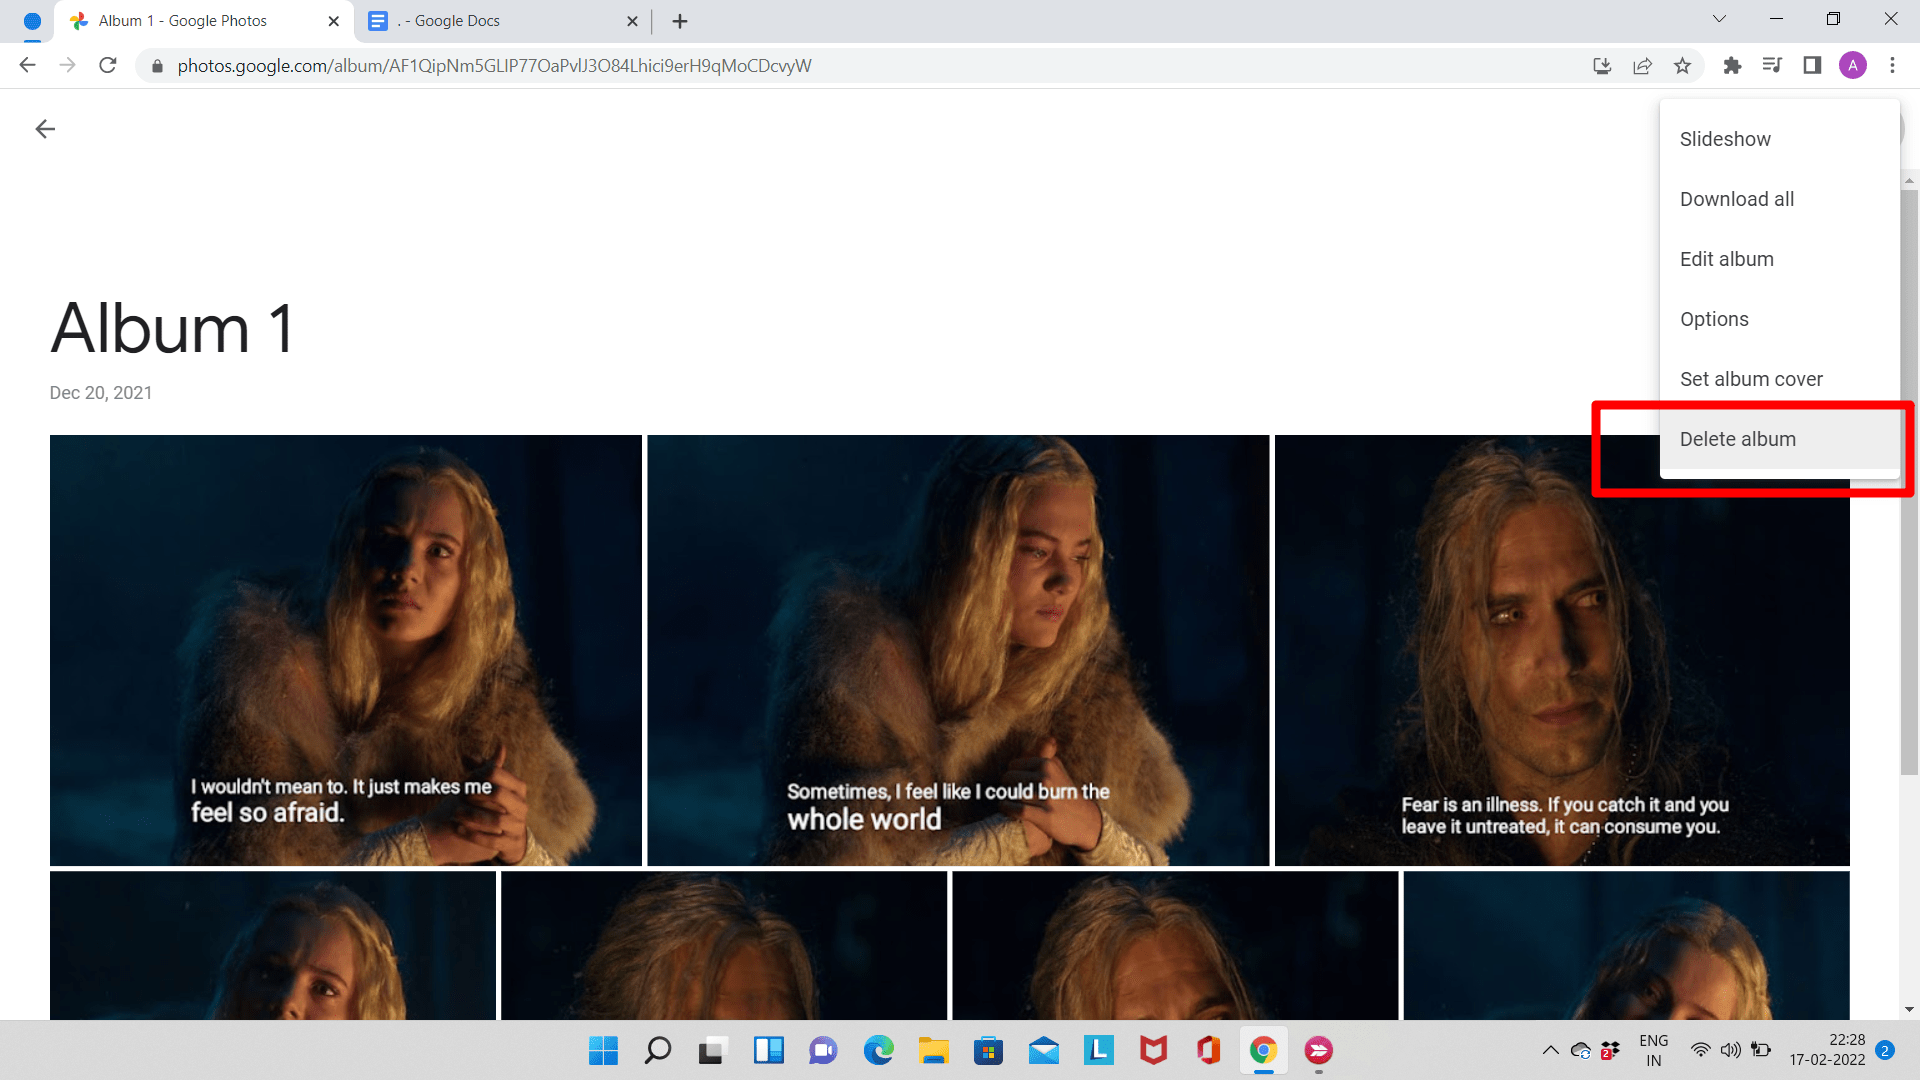
Alternatively, when you move your mouse over the album, the ‘More’ menu/three vertical dots will be displayed at the top right. Click on it and click on ‘Delete album’ to delete the album.
Changing the Title of the Album
The title or name of an album can be changed just like the album cover.
Step 1: Sign in to your Gmail account, then go to Google Photos.
Step 2: Open the album whose name you want to edit.
Step 3: Click on the title of the album and type in a new title.
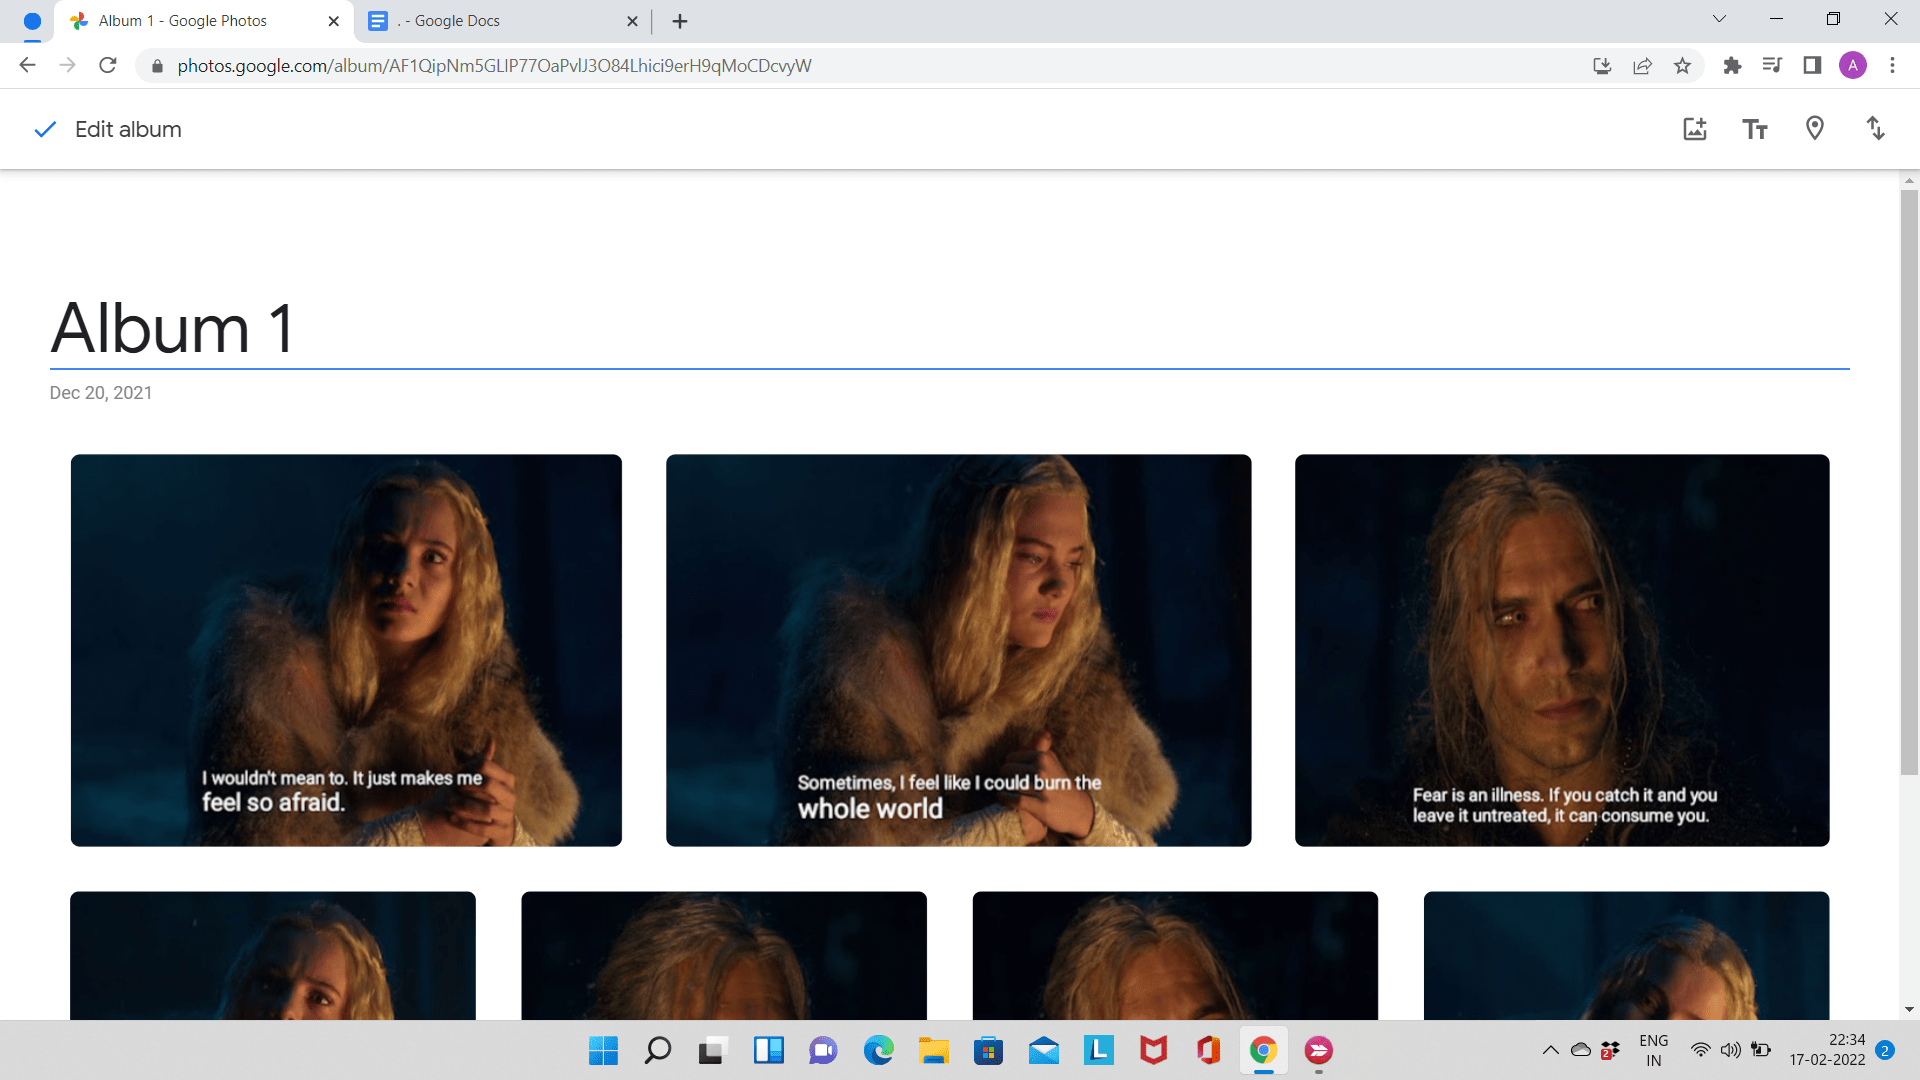
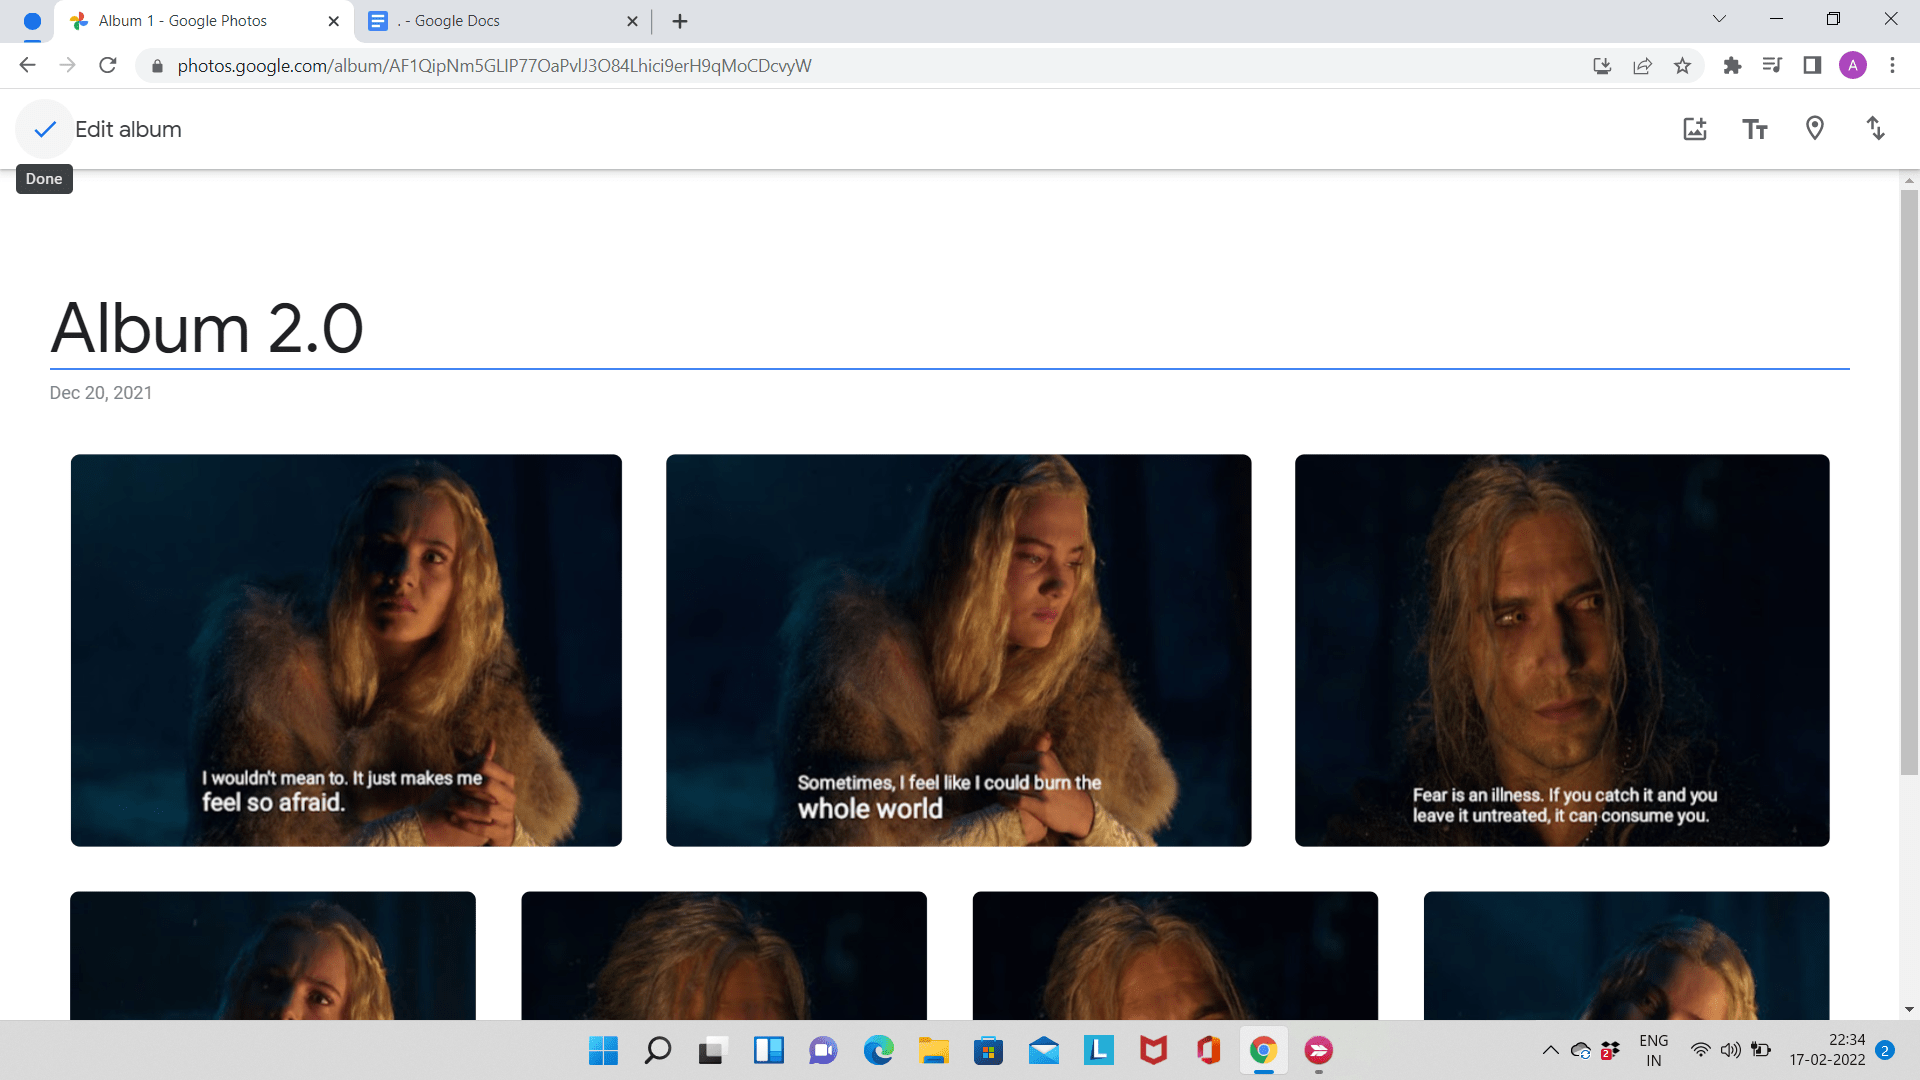
Click on ‘Done’ and the title will be changed.
Alternatively, when you move your mouse over the album, the ‘More’ menu/three vertical dots will be displayed at the top right. Click on it and click on ‘Rename Album’ to rename the album.
Changing the Album Cover
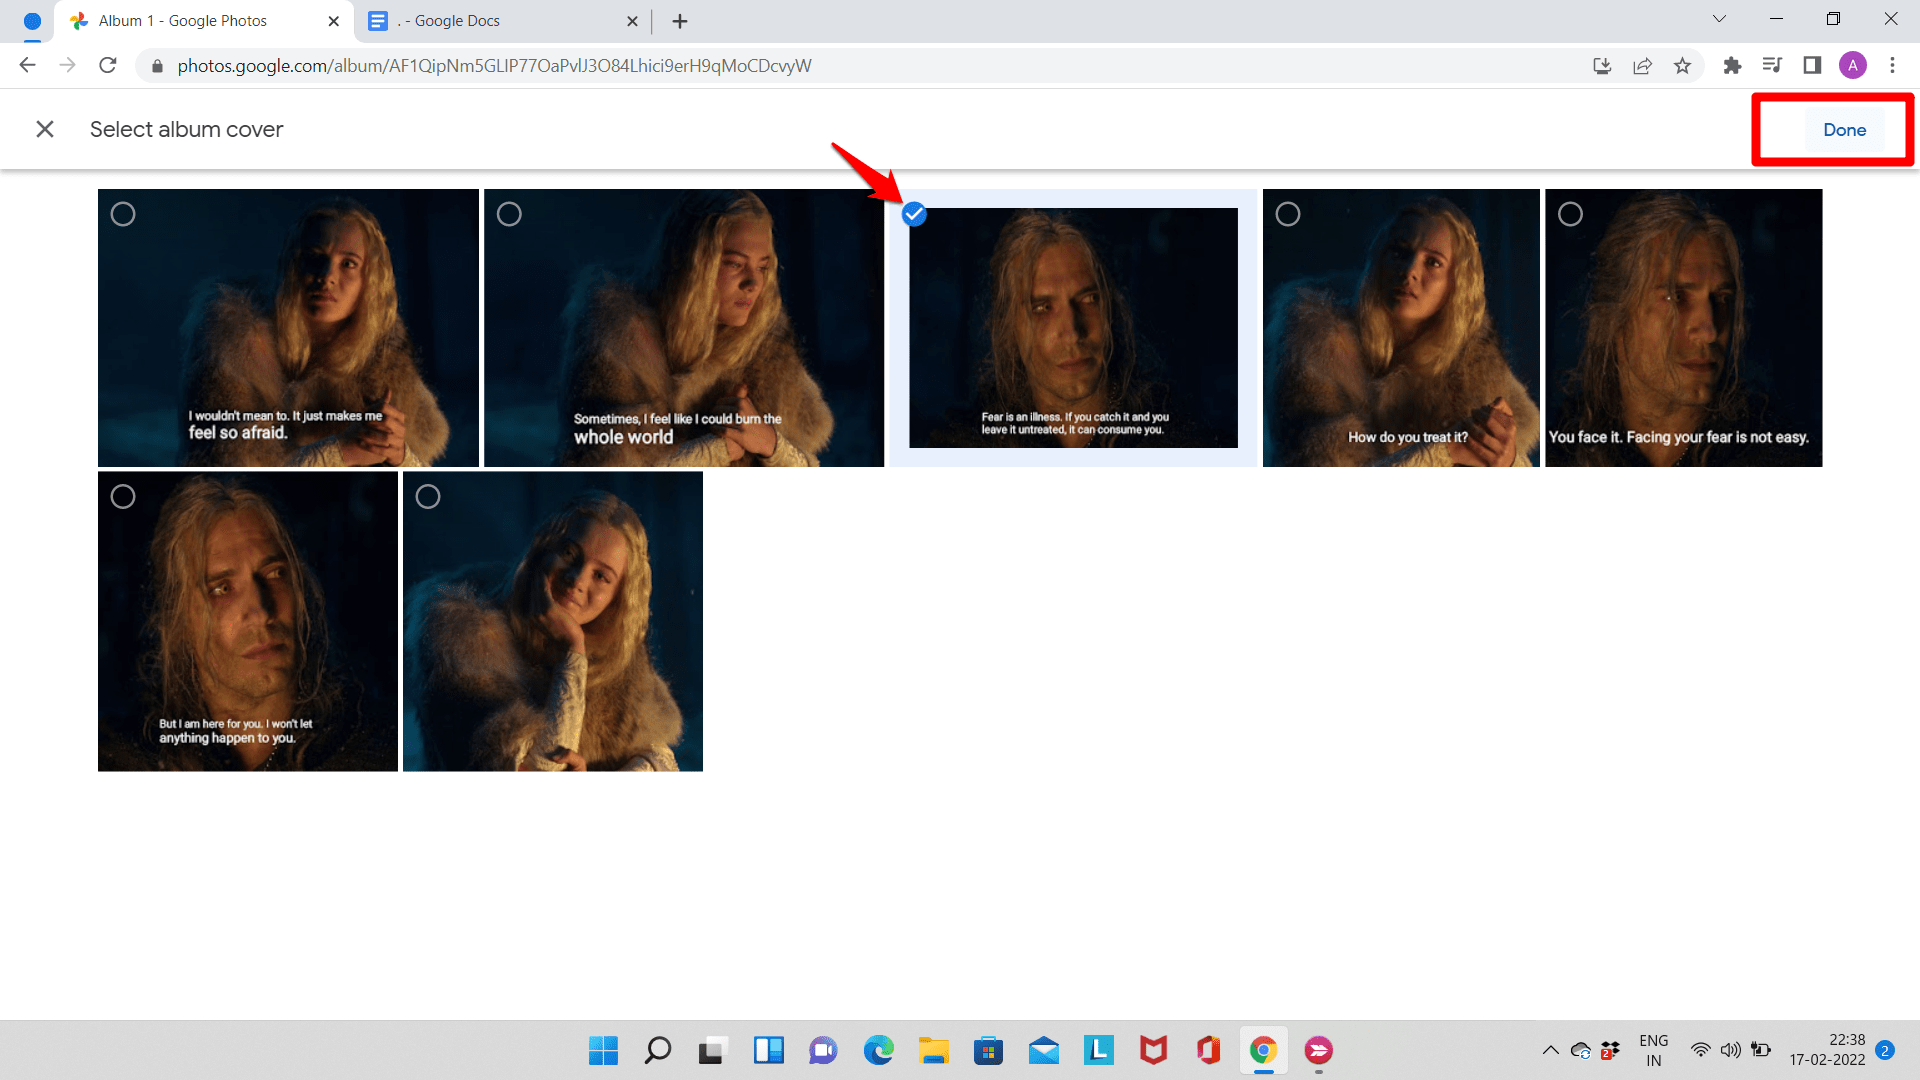
The album cover is the photo that is displayed at the front of the album. You can change it if you don’t like the current album cover.
Step 1: Sign in to your Gmail account, then go to Google Photos.
Step 2: Open the album whose cover you want to change and locate the photo you want as the album cover.
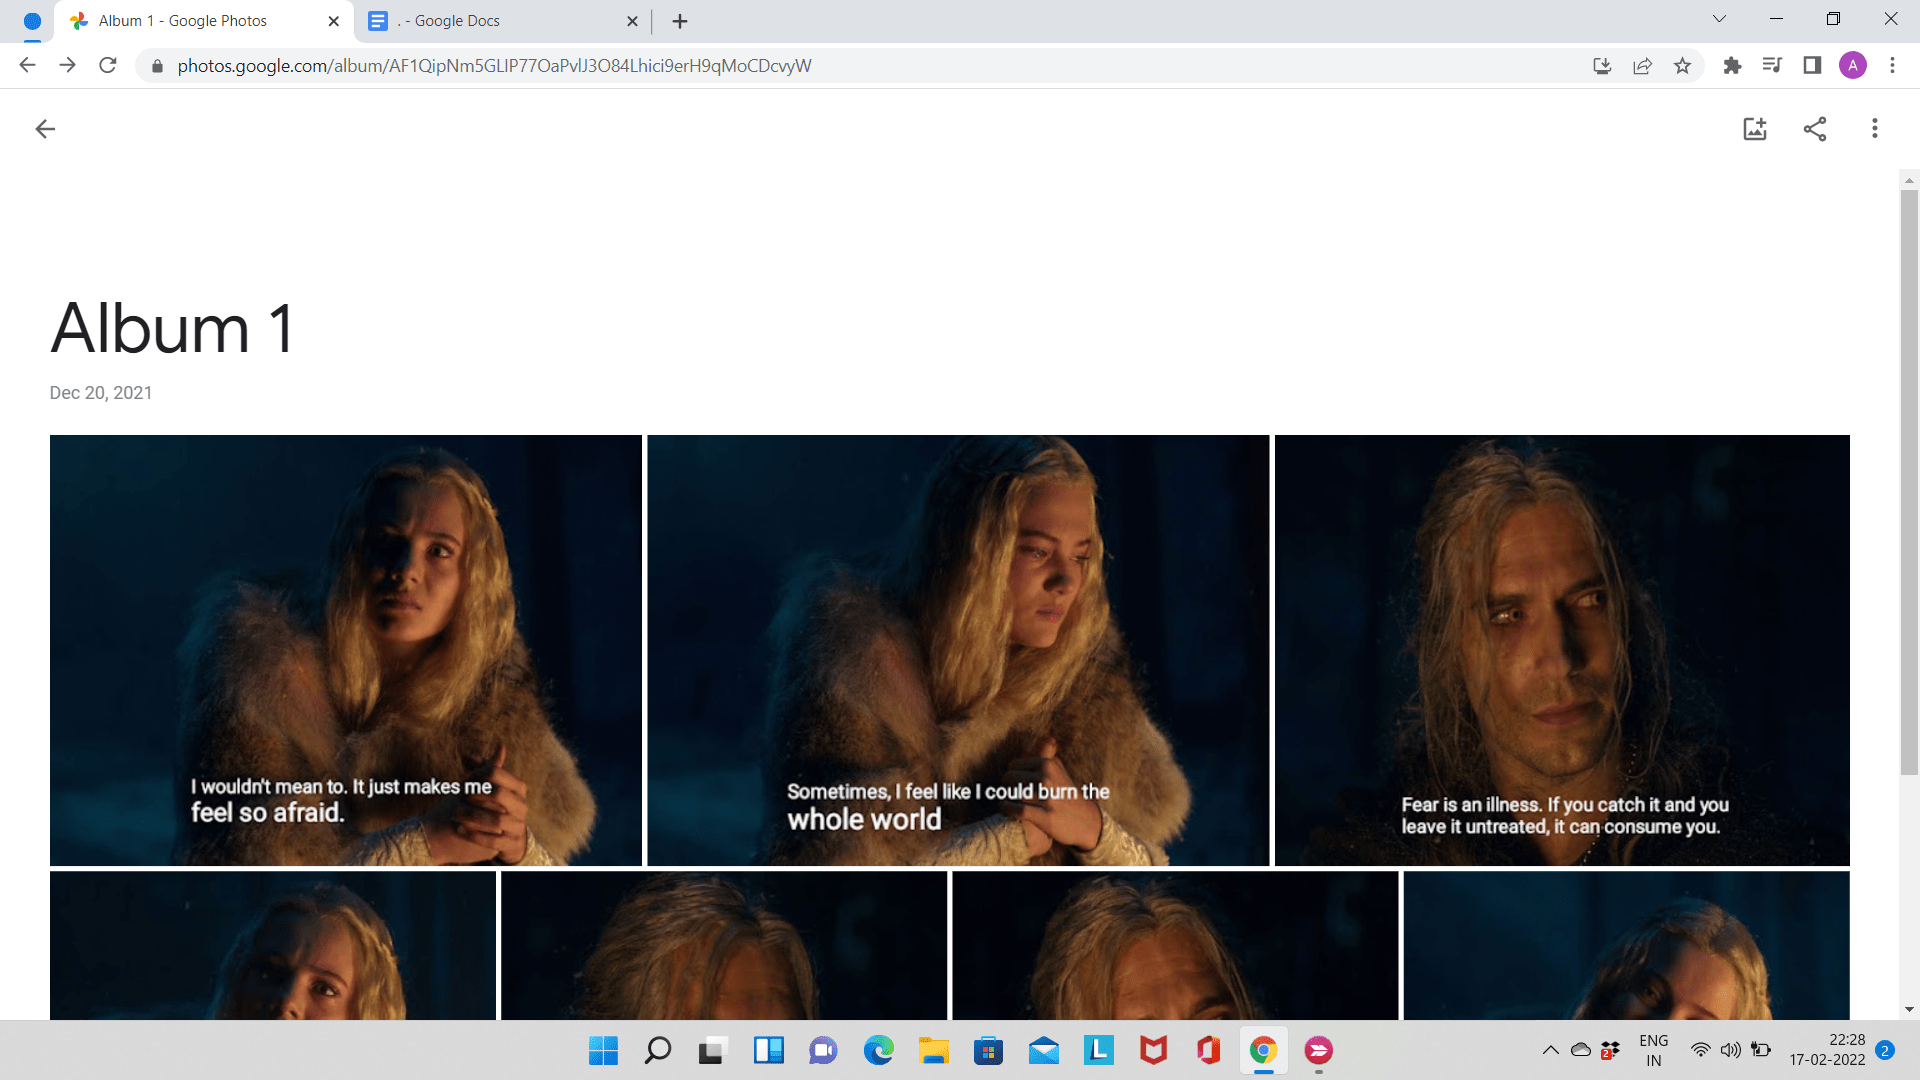
Step 3: Click on ‘More’ and click on ‘Use as album cover‘.
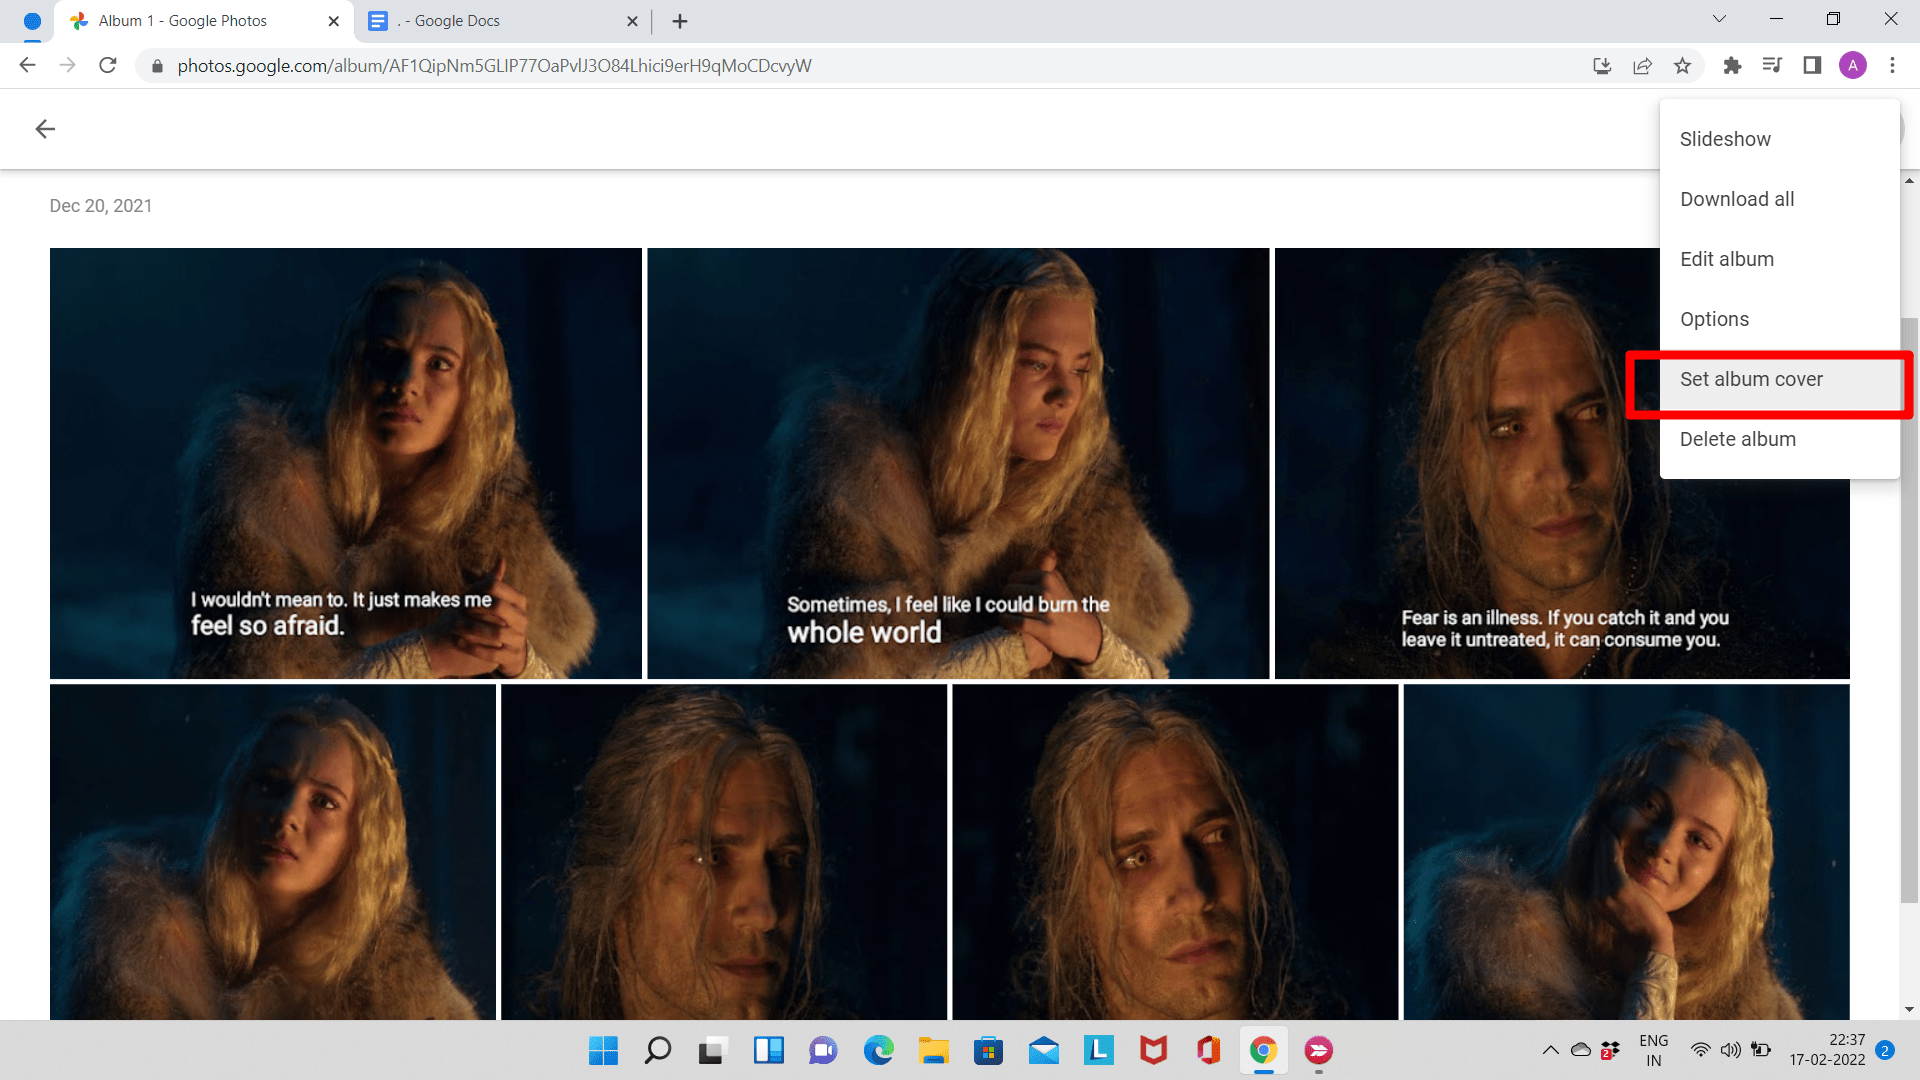
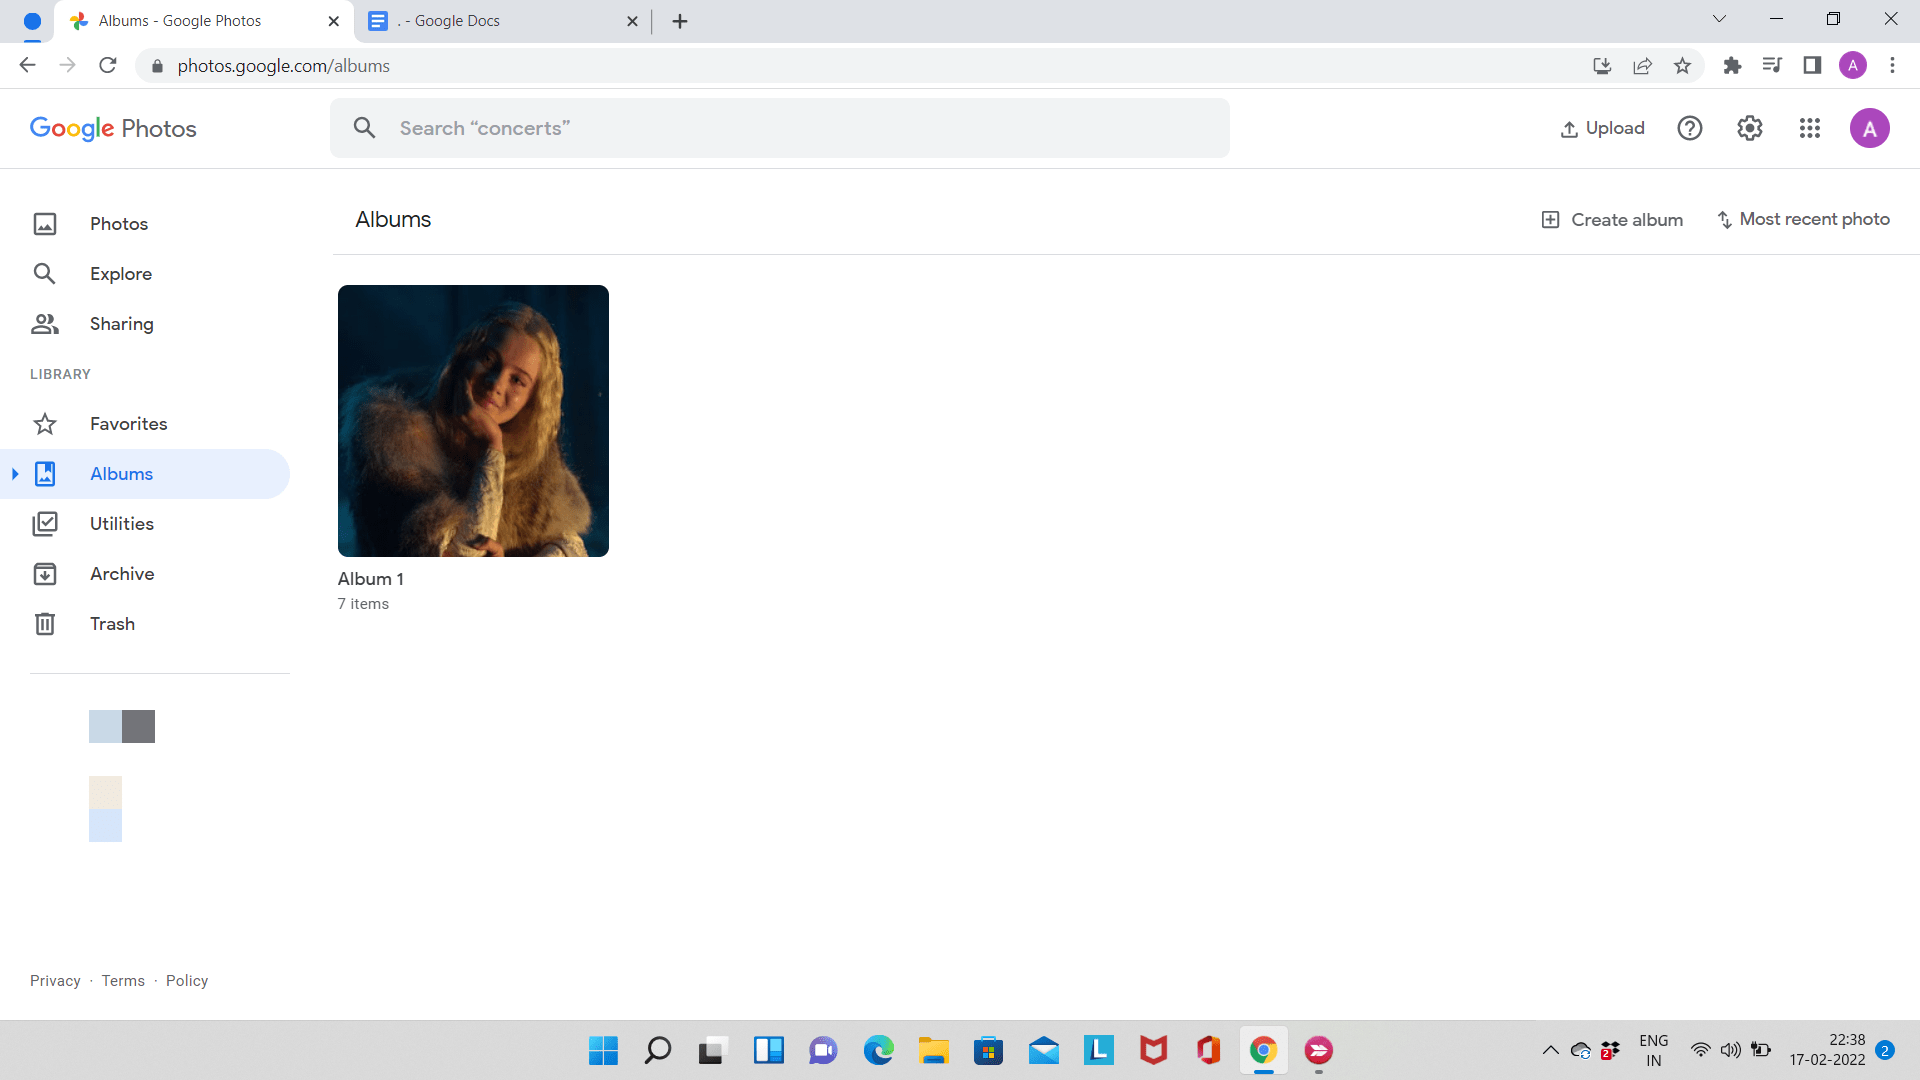
After this, select the image you want as the new album cover and click on ‘Done’.
Removing Photos and Videos from an Album
Removing photos and videos is just like adding photos/videos to an album.
Step 1: Sign in to your Gmail account, then go to Google Photos.
Step 2: Open the album you wish to remove the photos from.

Step 3: Click on ‘More’ and click on ‘Edit album‘.
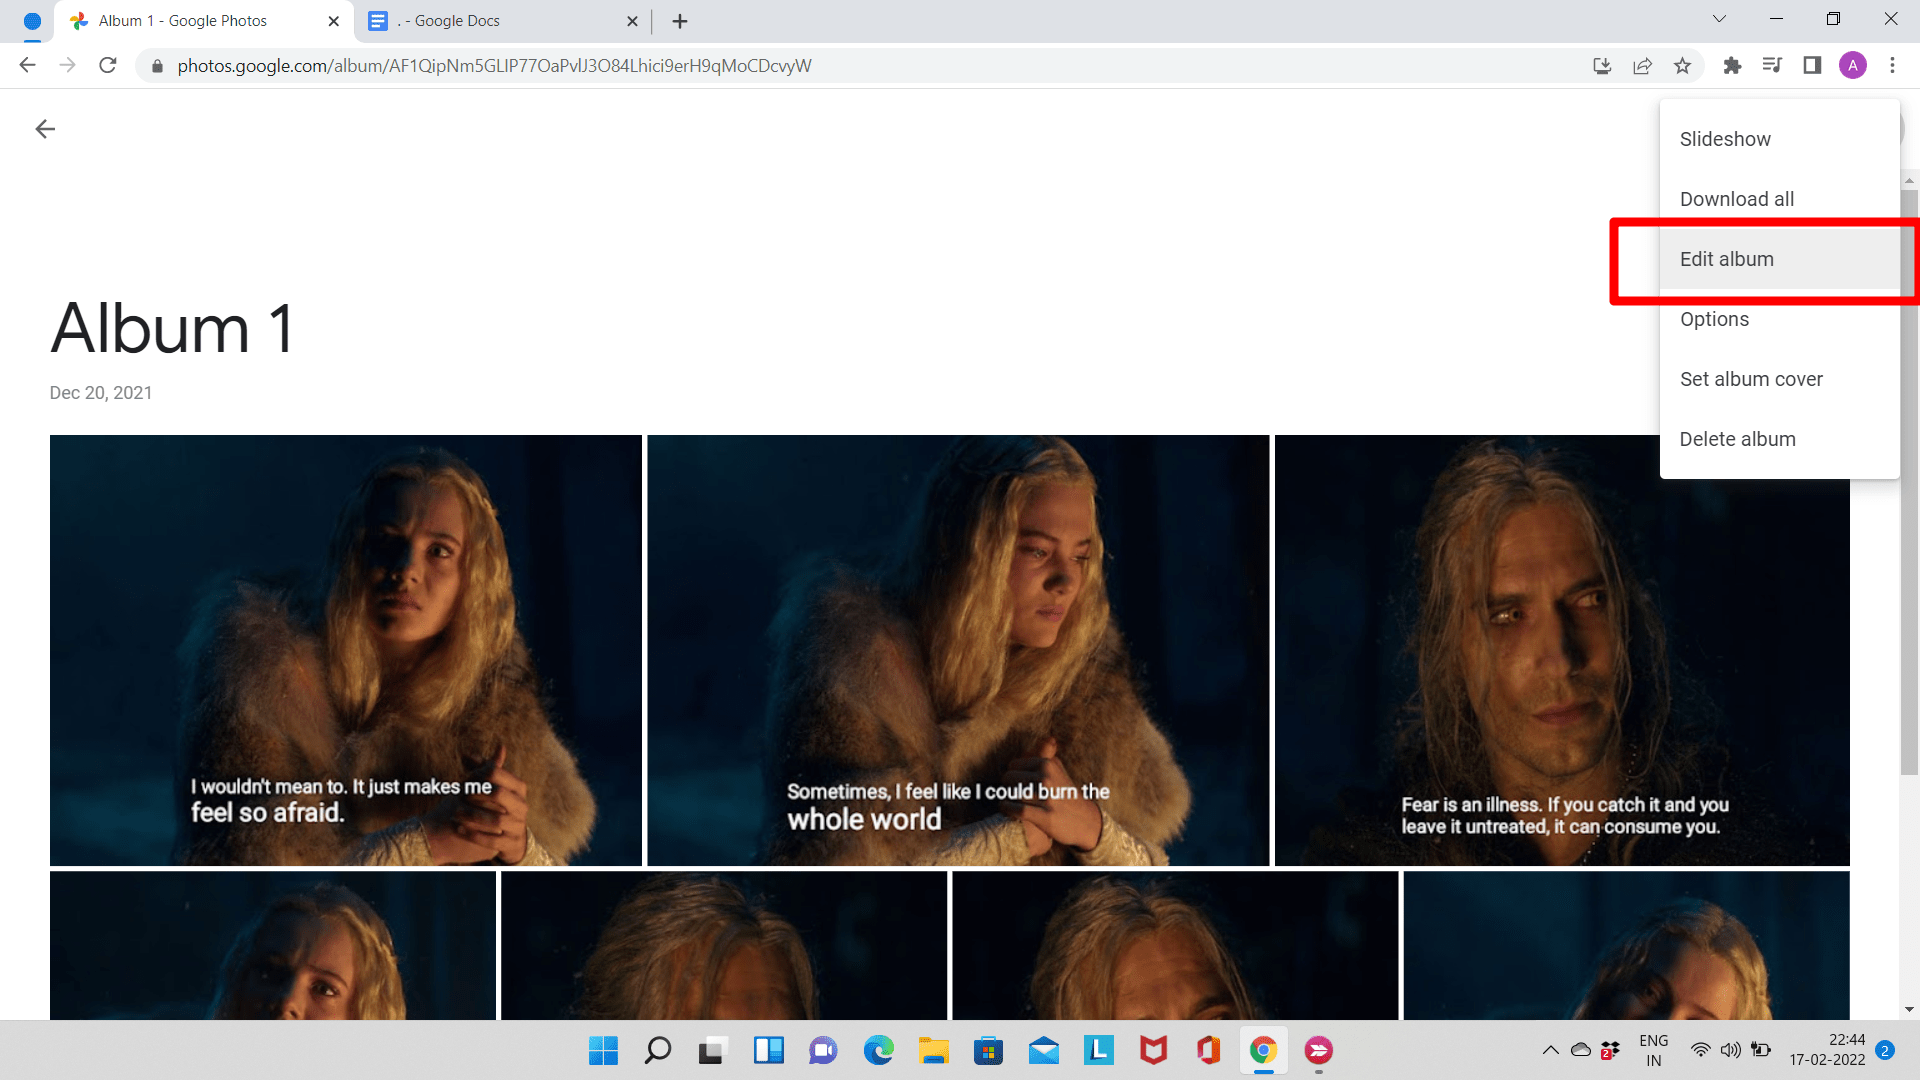
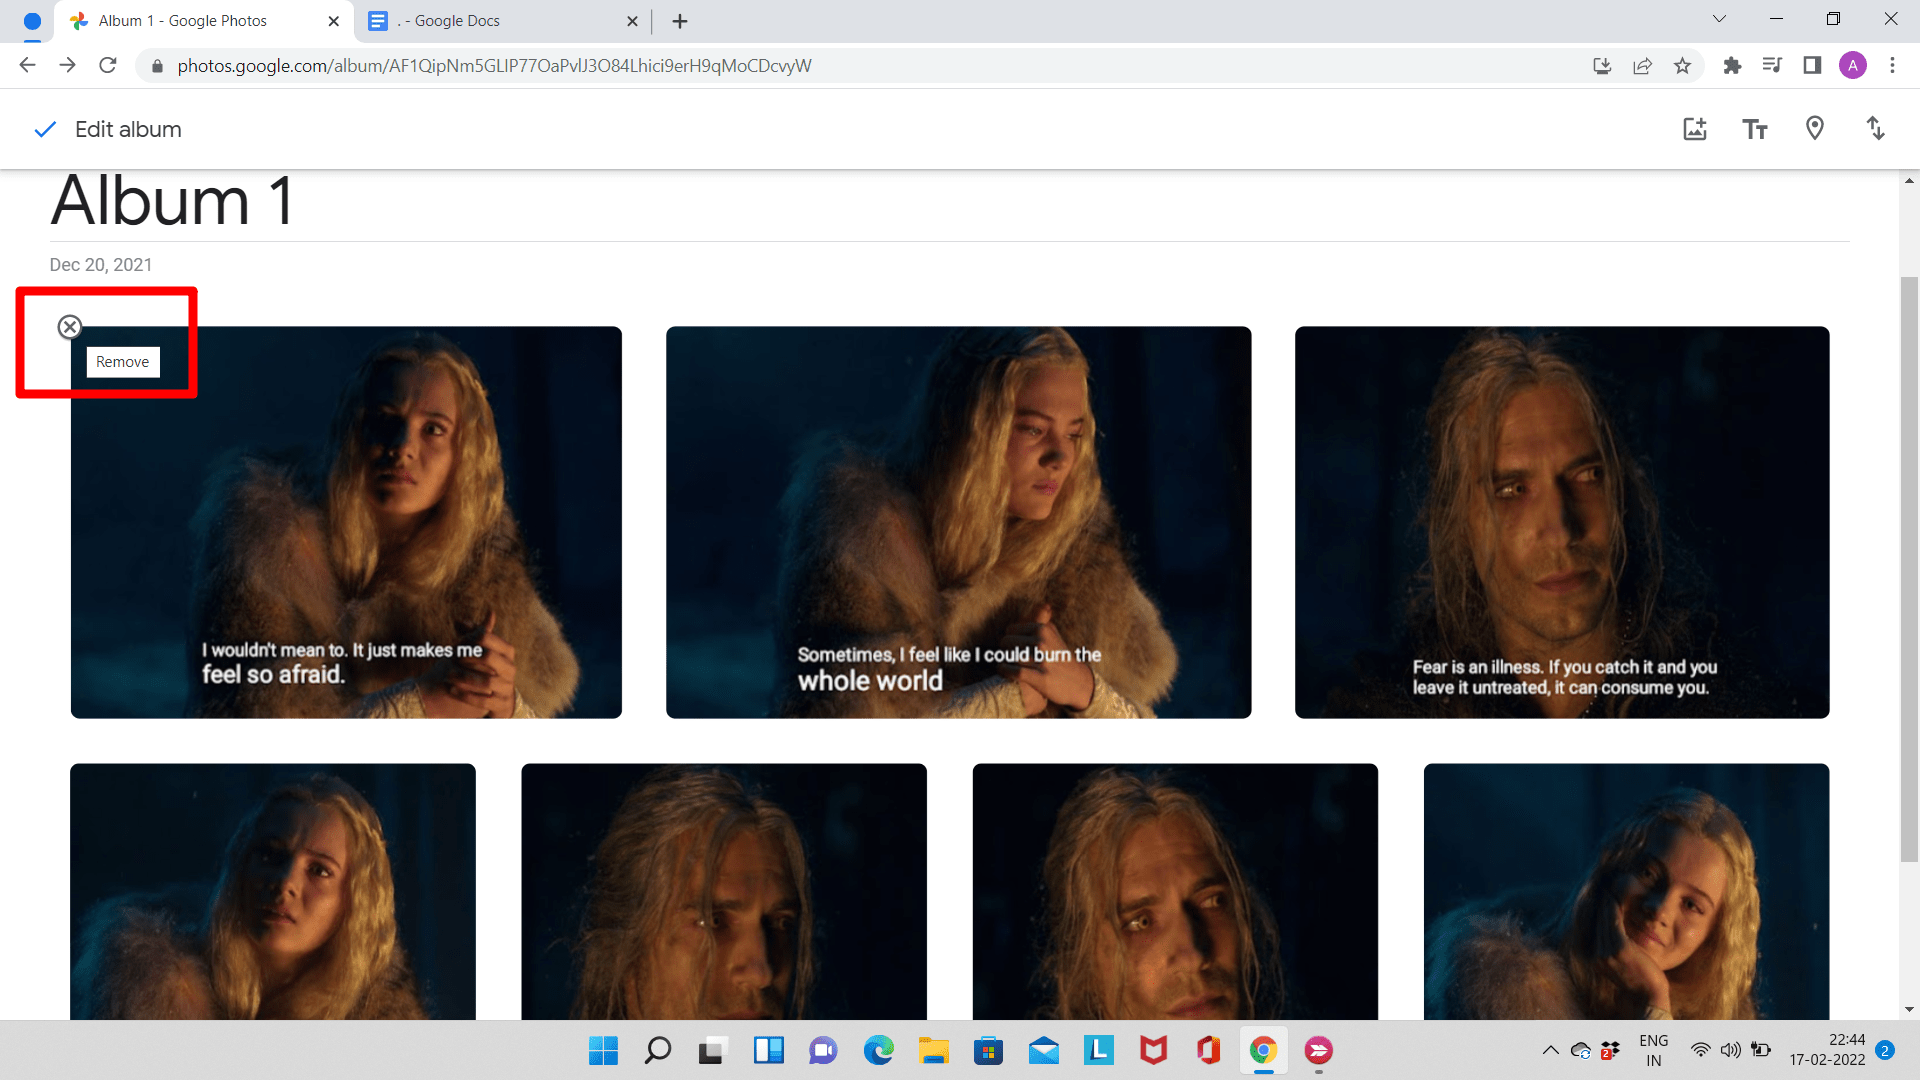
Step 4: Remove the photos/videos by clicking on ‘Remove’.
Adding Text, Location, and Maps to Albums in Google Photos
Adding text, locations, and maps to an album in Google Photos allows the user to add extra details about an album.
Step 1: Sign in to your Gmail account, then go to Google Photos.
Step 2: Open the album you wish to add the text, location, map in.
Step 3: Click on ‘More’ and click on ‘Edit album‘.

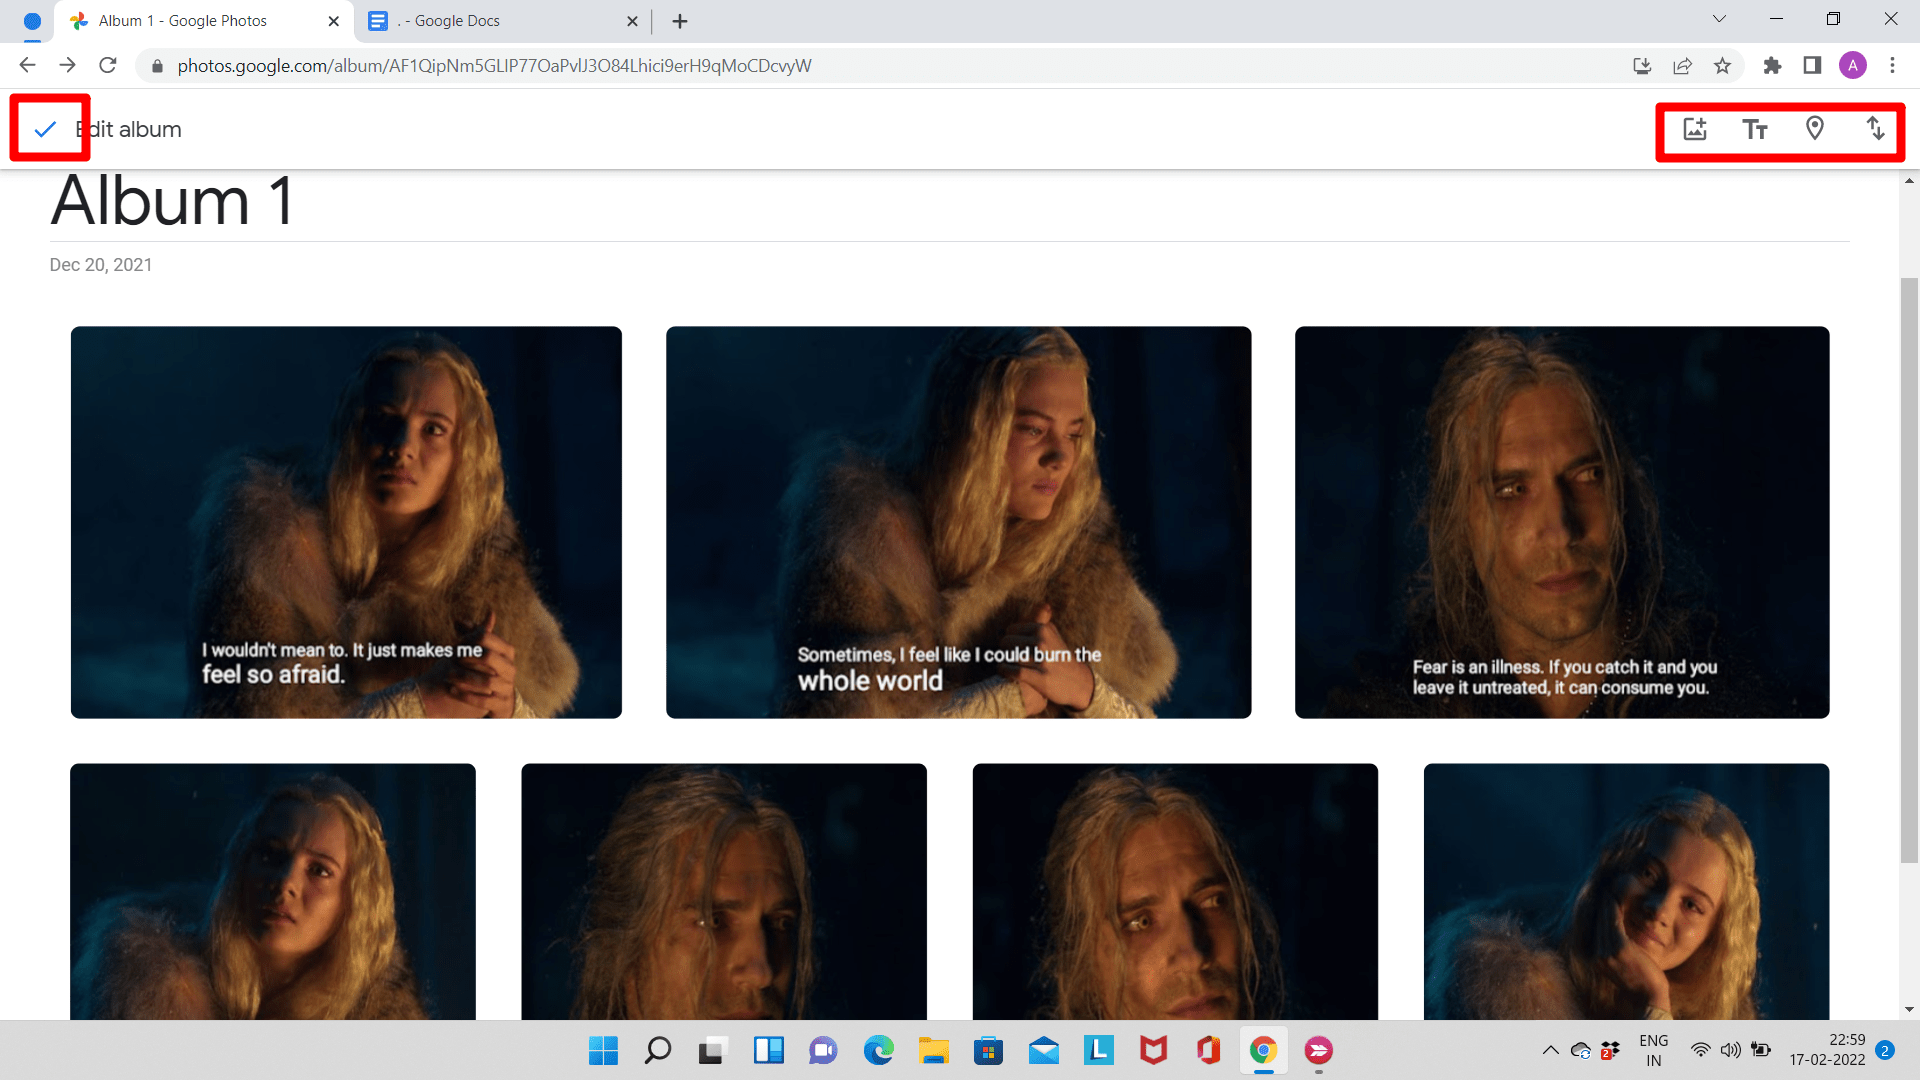
Step 4: At the top right, buttons for adding text, location, and maps are given. Choose the appropriate button and click on ‘Done’ to finish the process.
Conclusion
Thus, Google Photos is a pretty reliable photo storage platform. Anyone can use Google Photos and manage their photos and videos efficiently. We hope this guide helped you understand how you can create and edit albums in Google Photos.
