One of the most functional and practical online working tools is Google Docs. You can create documents, excel sheets, slides, and much more and work on the go. The best part is that Google Docs negates the need to download software such as Microsoft Office, Libre Office, etc., on your PC. While these standalone programs have their own set of advantages, Google Docs is pretty versatile in itself.
One of the advantages of using Google Docs is that it comes with a built-in spell checker. However, several users have reported that for them, the spell checker feature isn’t working for them in Google Slides, and when checked thoroughly, it isn’t working in any of the Google Docs tools. If you are also among those users for whom the spell checker isn’t working on Google Slides, then you can follow the solutions mentioned in this guide and hopefully solve the problem.
1. Reload the Page
One of the easiest things that you can do to check if this fixes the issue or not is to simply reload the page on your browser. There are chances that some of the key elements of Google Docs did not load during the previous session and are causing issues such as the spell checker not working on Google Slides. Try reloading the page and see if this resolves the problem or not.
2. Set the language of the Doc
Notably, users have resolved the issue by manually setting the document language. Setting the language will make sure the grammar is properly corrected. For that, you can follow the steps below:
- Open Google Slides on your browser.
- Click on File.
- Select Language from the list.
- Select English, or whatever language you prefer.
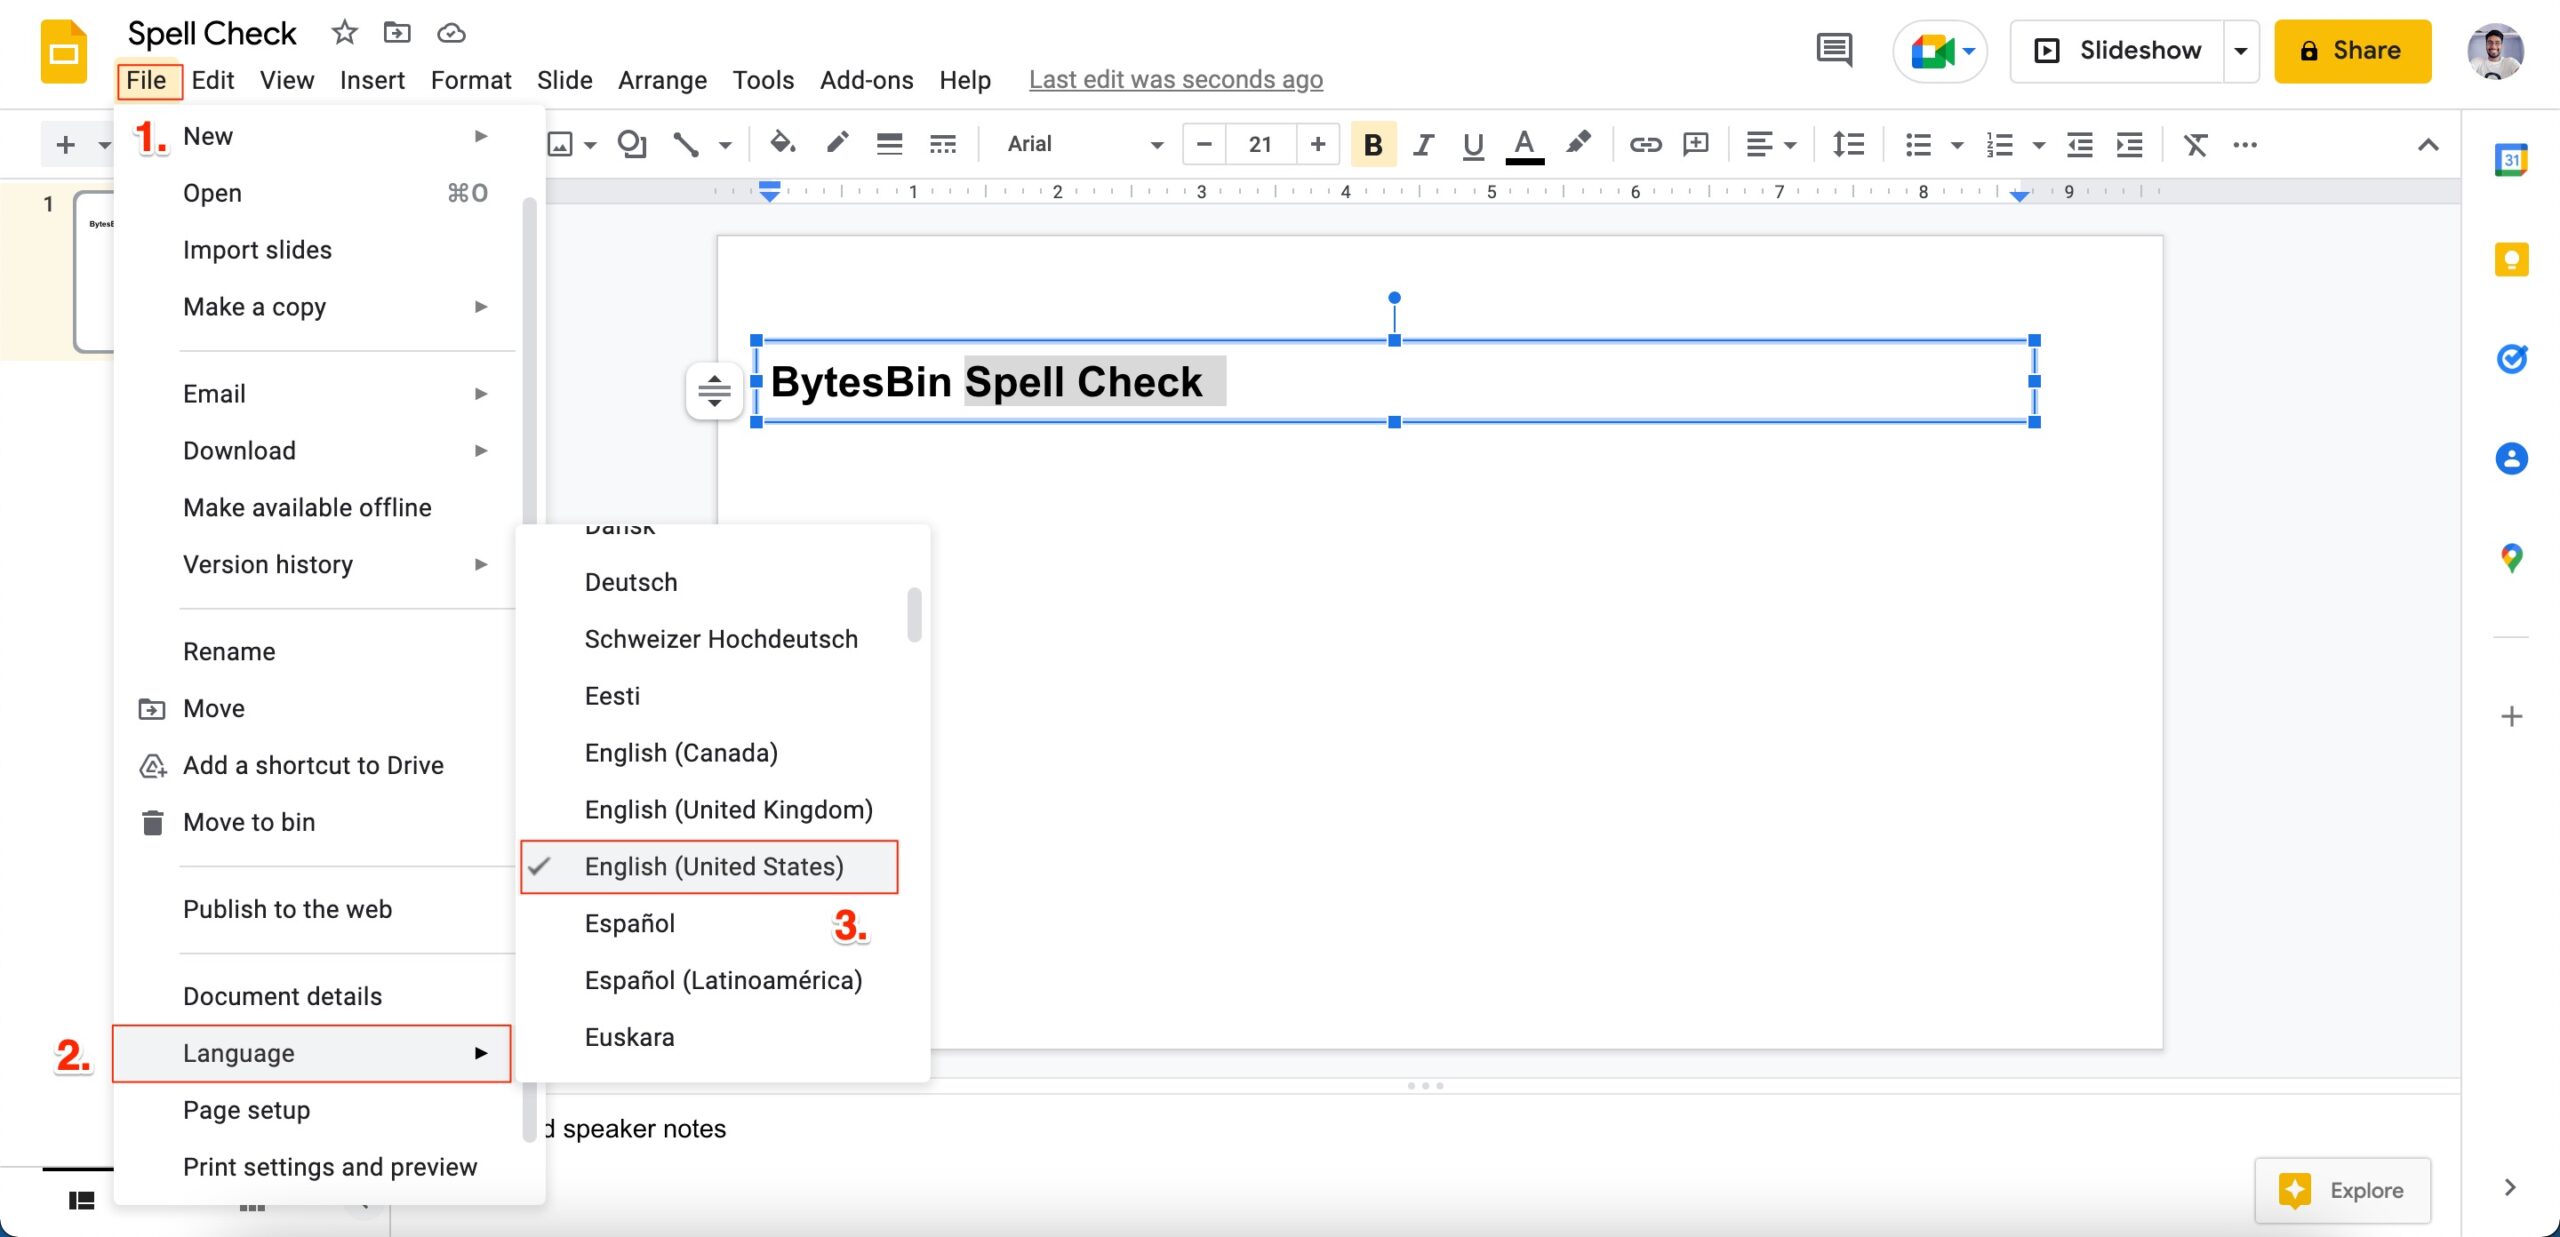
- Now check if the spell checker is working correctly or not.
3. Check if the Spell Checker is Enabled or Not
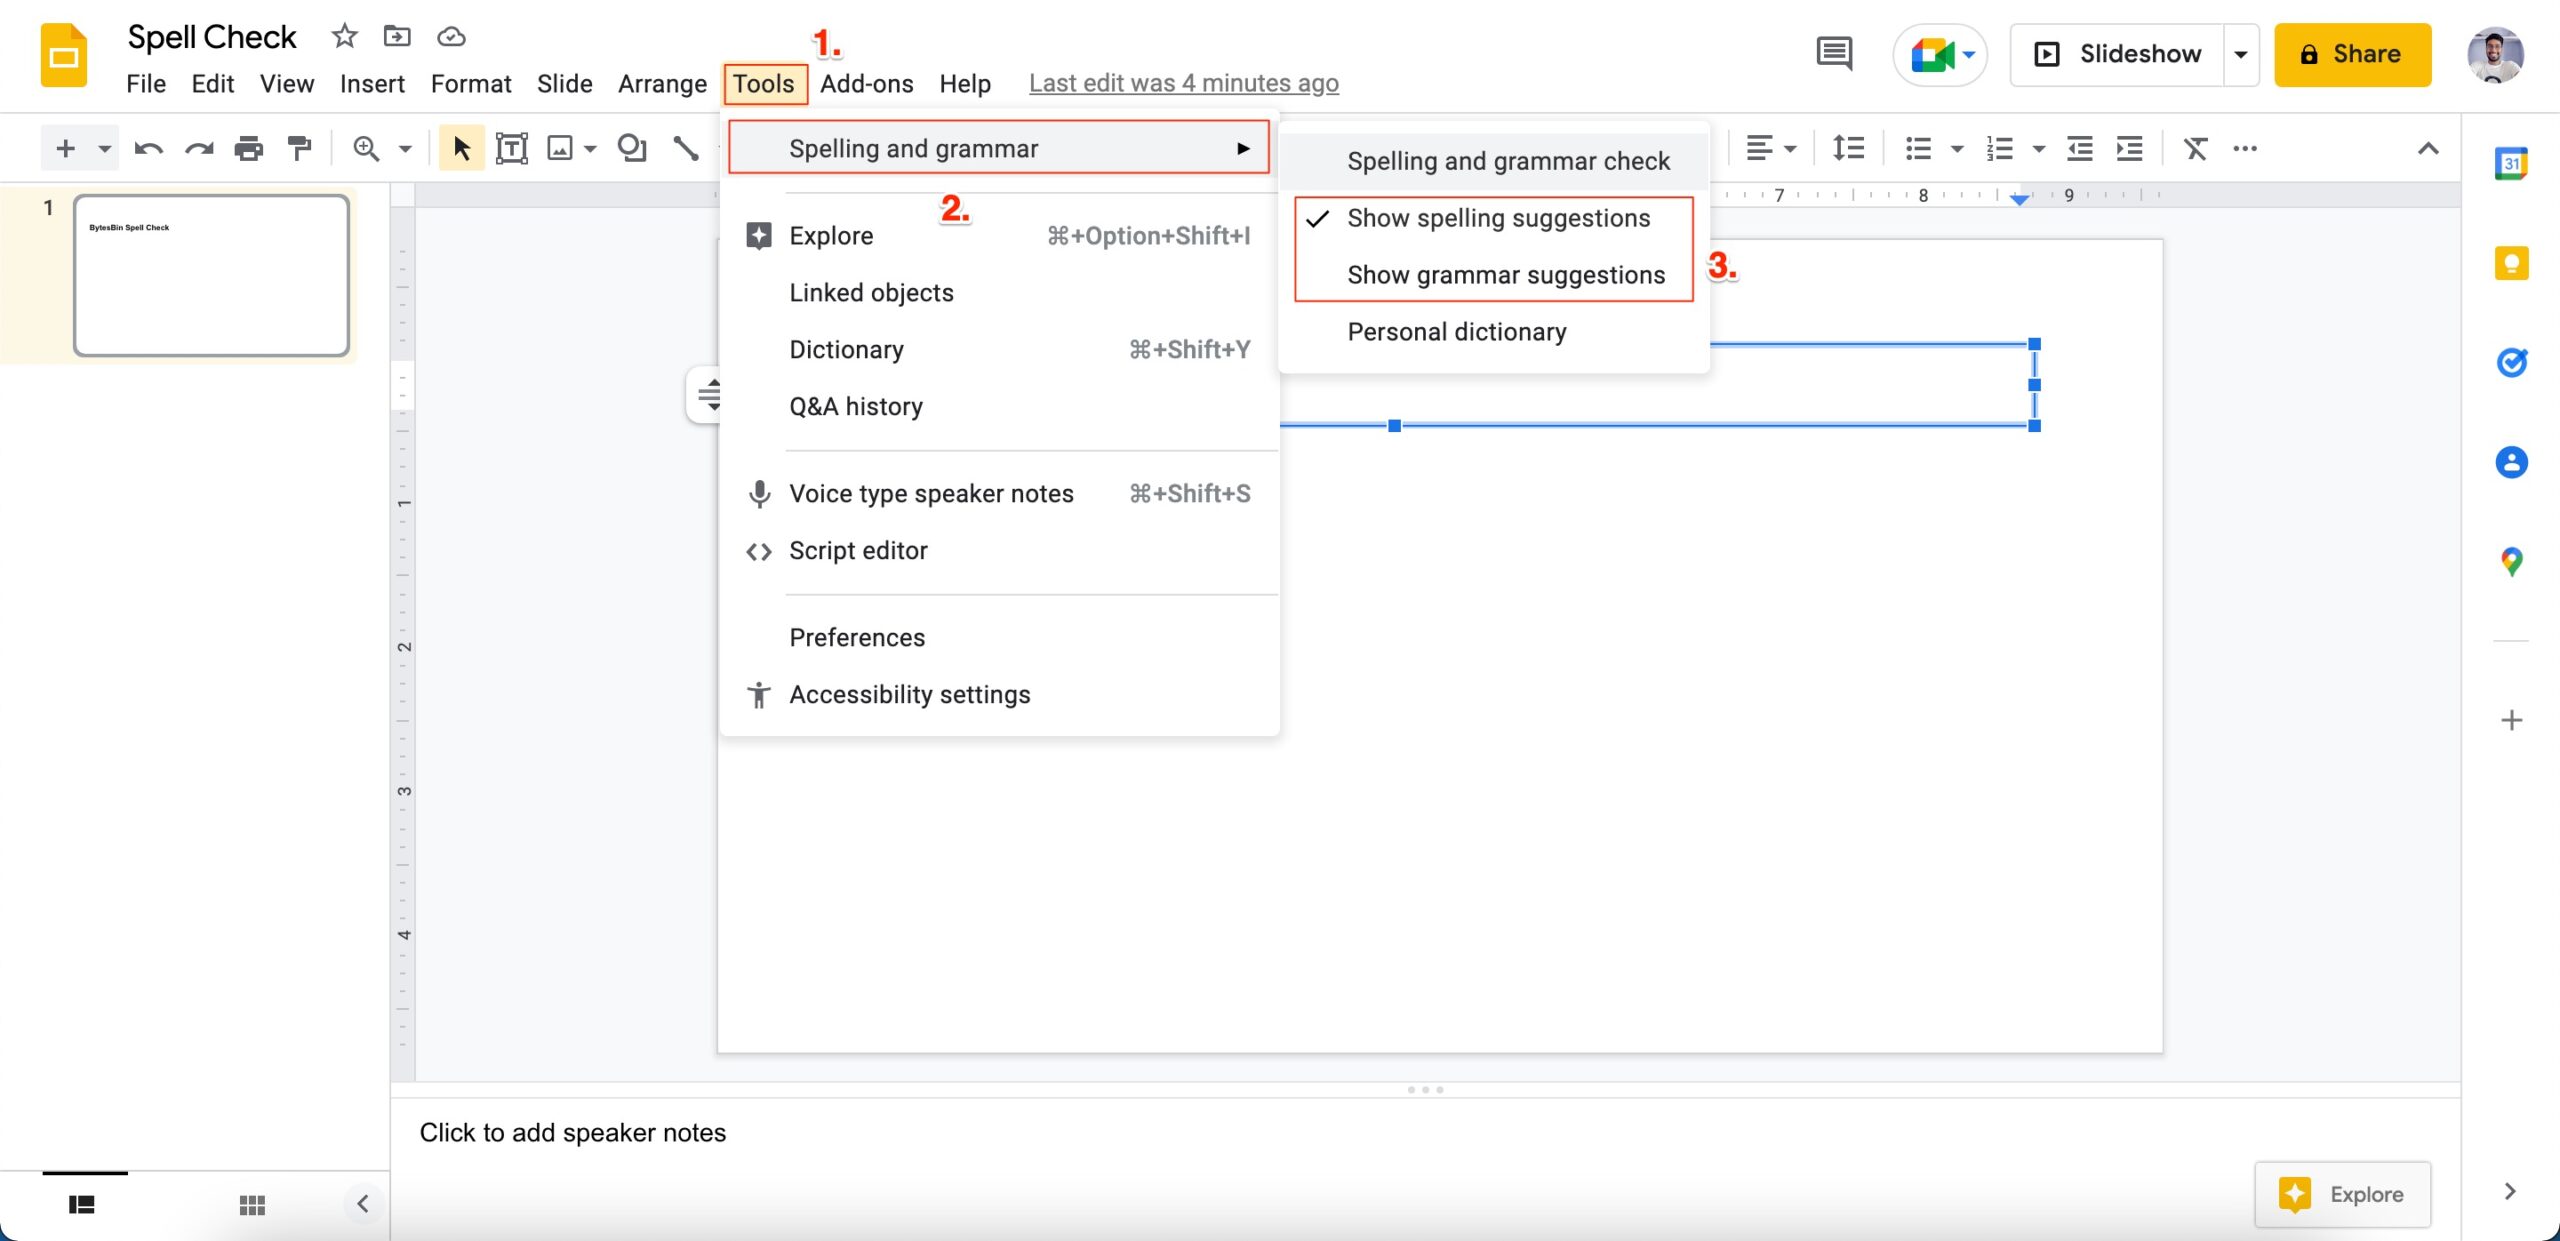
A recent update might have disabled the spell checker feature in Google Slides. So, we advise you to check if the feature is enabled or not.
- Open Google Slides.
- Click on Tools.
- Click on the option of Spelling and Grammar.
- Now, you need to enable Show Spelling Suggestions and Show Grammar Suggestions.
4. Check for Formatting Error
If you have copied text from somewhere, let’s say, a website or a document, then the chances are that the format of that website or document is different from your current slide. This could very well be the reason why the spell check is not working for you on Google Slides.
To resolve this problem, you should always paste using the keyboard combination Ctrl + Shift + V. This shortcut pastes the text without formatting, matching what you currently have on your Google Slide.
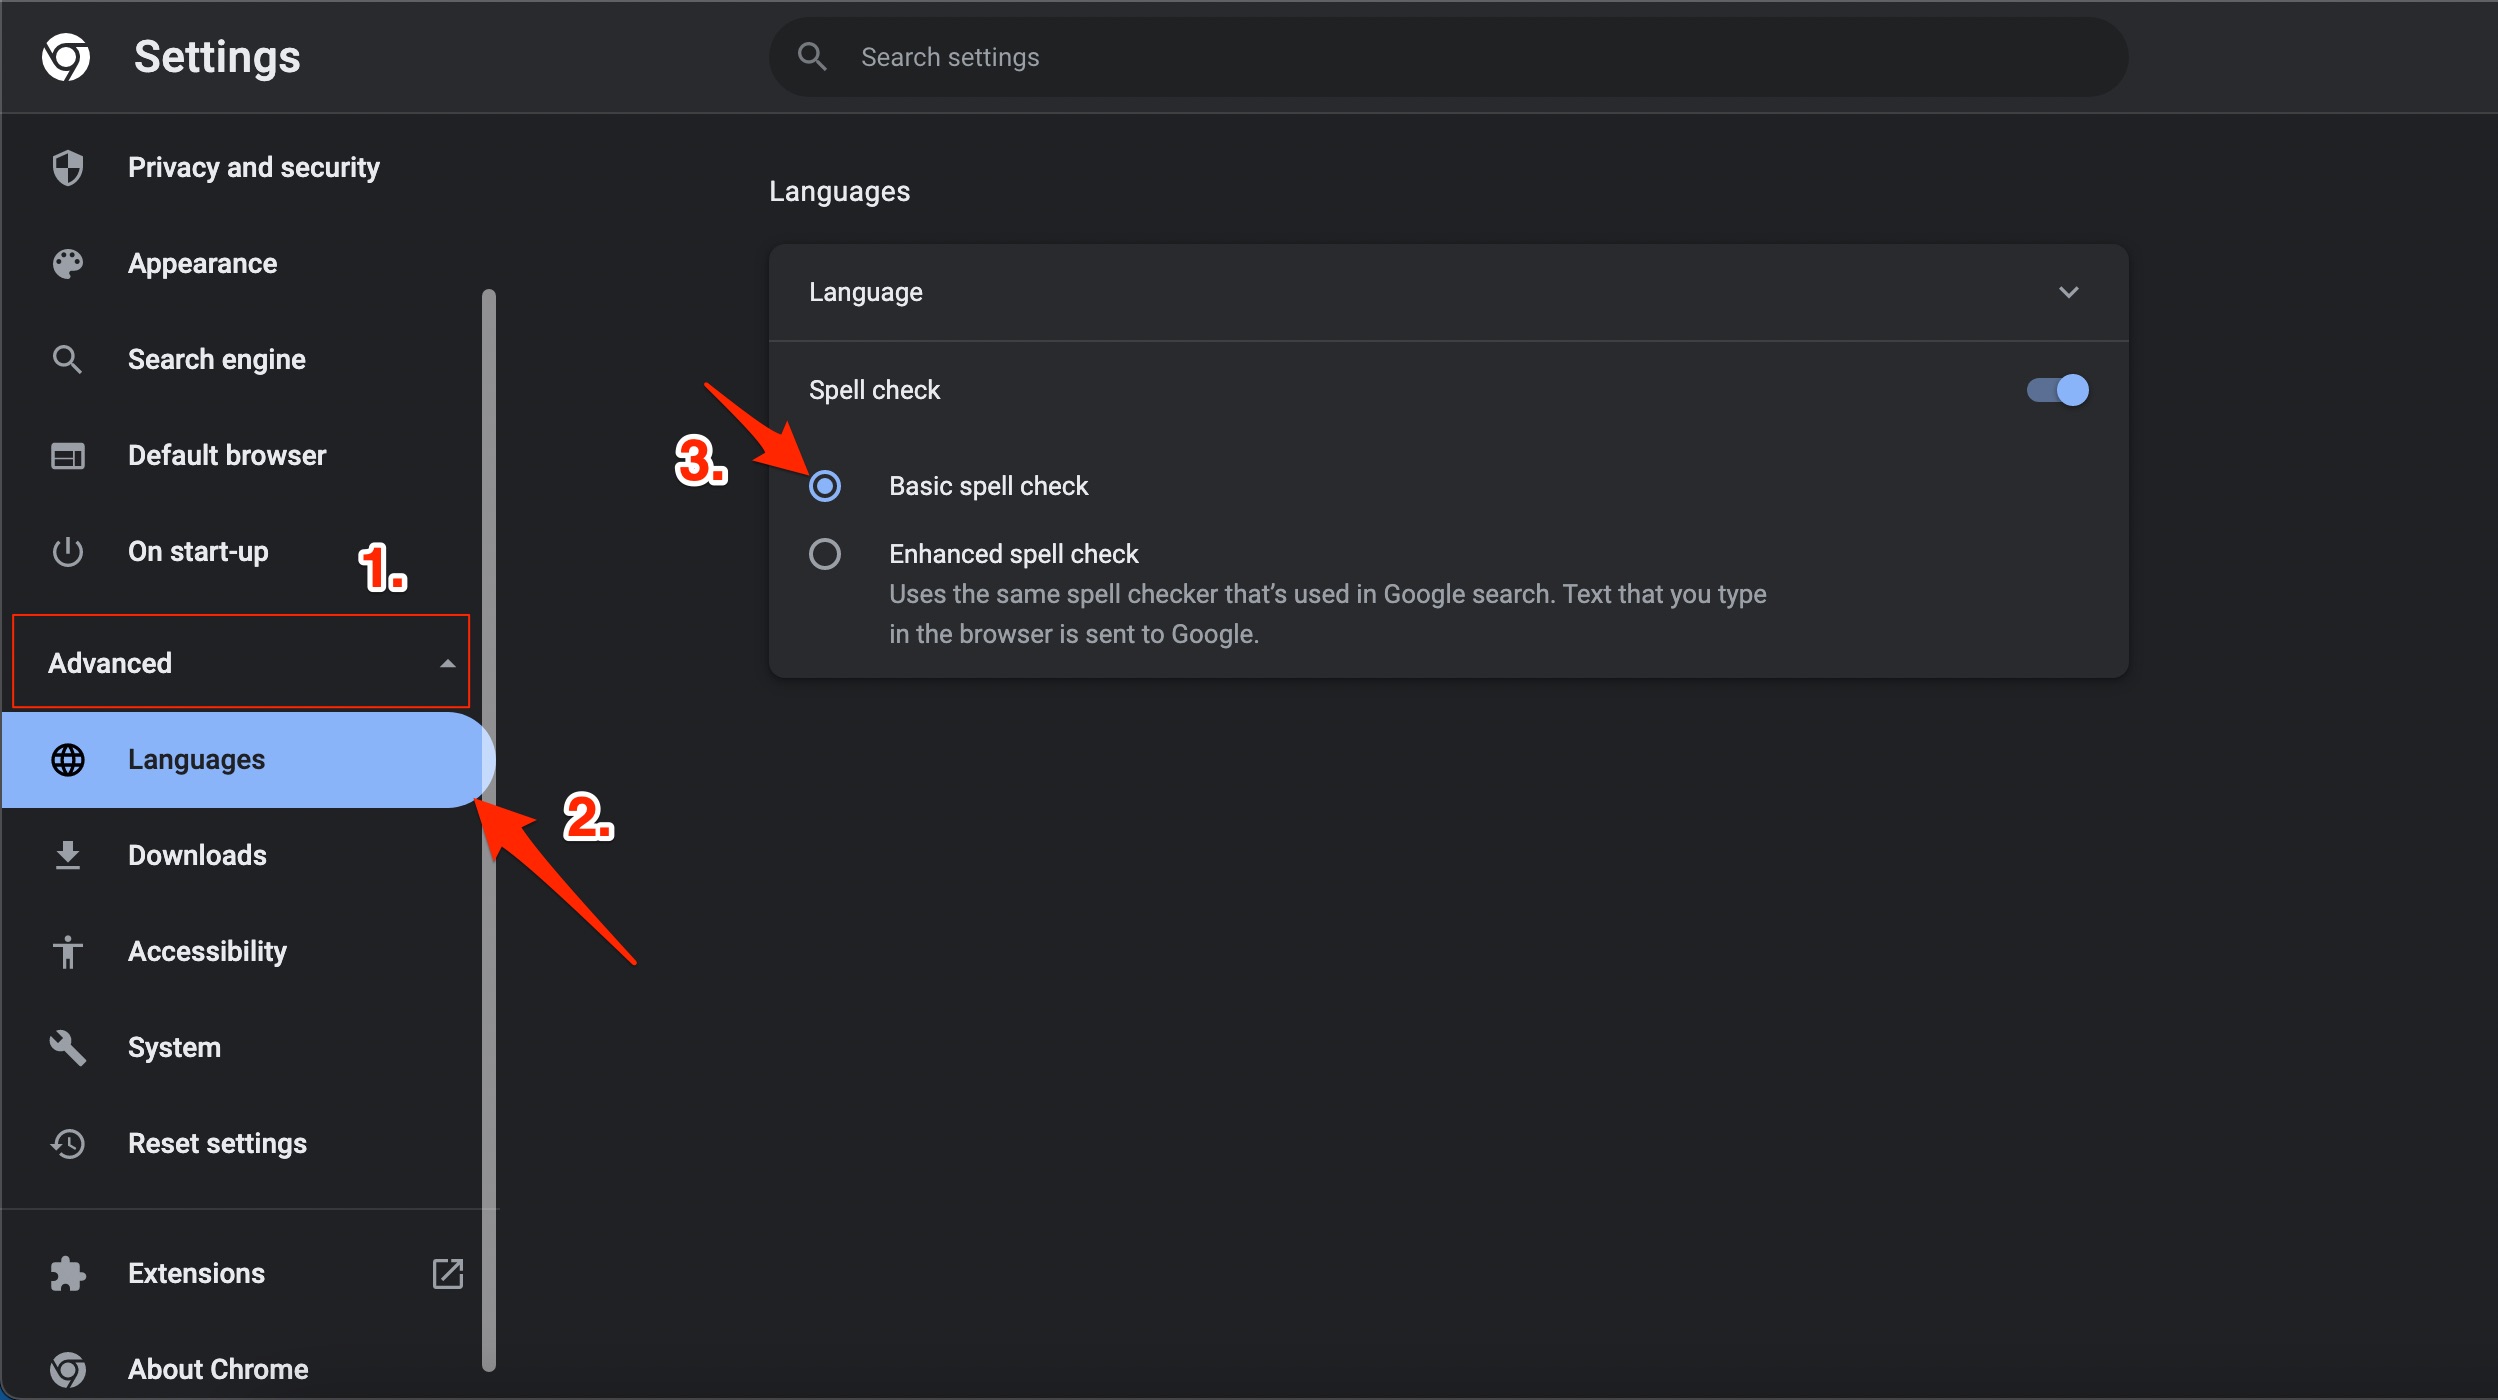
5. Disable Enhanced Spell Check in your Browser
Browsers such as Google Chrome and Firefox have in-built advanced spell checkers. This could often be the reason the spell check on Google Slides fails to function properly. In such a case, you can follow the steps below and disable enhanced spell check in your browser.
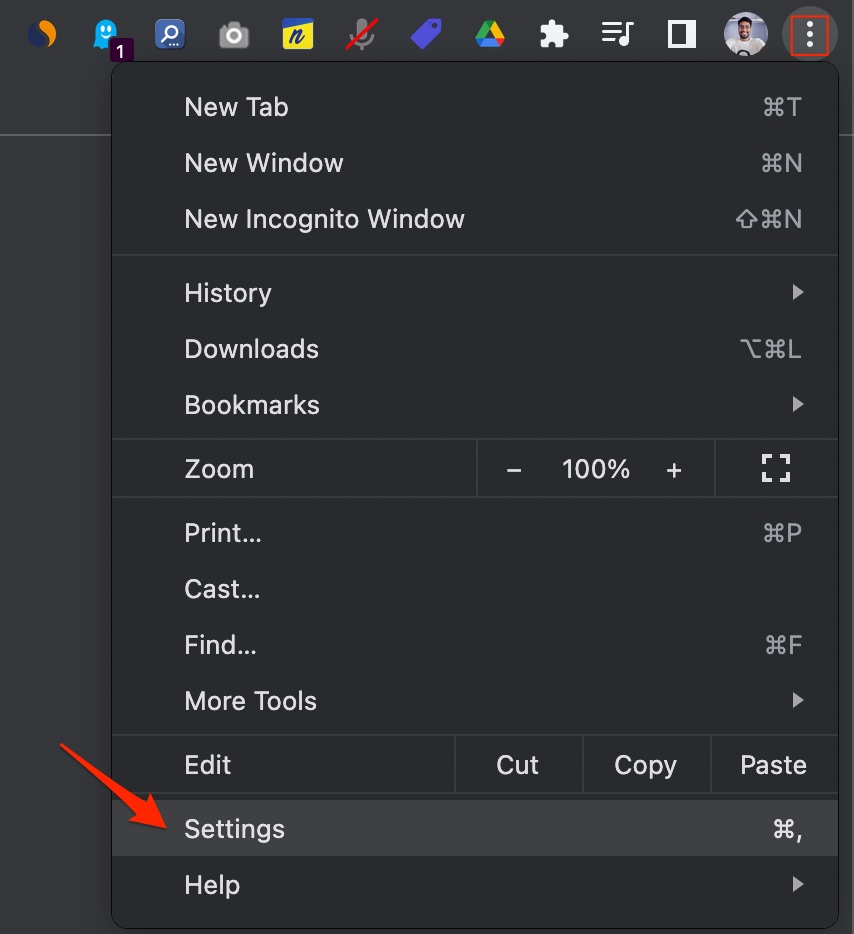
- Open Chrome.
- Click on the 3-dot menu.
- Click on Settings.
- Expand the Advanced option.
- Now, click on Languages.
- Under the Spell Check option, select the Basic Spell Check option.
- Close the browser and relaunch it.
6. Switch to a Different Browser
Some browsers often misbehave, causing several issues with online tools and apps. If you think your browser is causing an issue, then the best thing to do to resolve the problem would be to switch to a different browser. There are plenty of options available, which you can opt for depending on the features you ask for. You can check out our list of some of the best browsers available.
7. Remove Extra Languages from your Browser
If you have multiple languages enabled in your browser, then the spell check on Google Slides could malfunction. Follow the steps to remove the extra languages from your browser.
- Open Chrome.
- Click on the 3-dot menu.
- Click on Settings.
- Expand the Advanced option.
- Now, click on Languages.
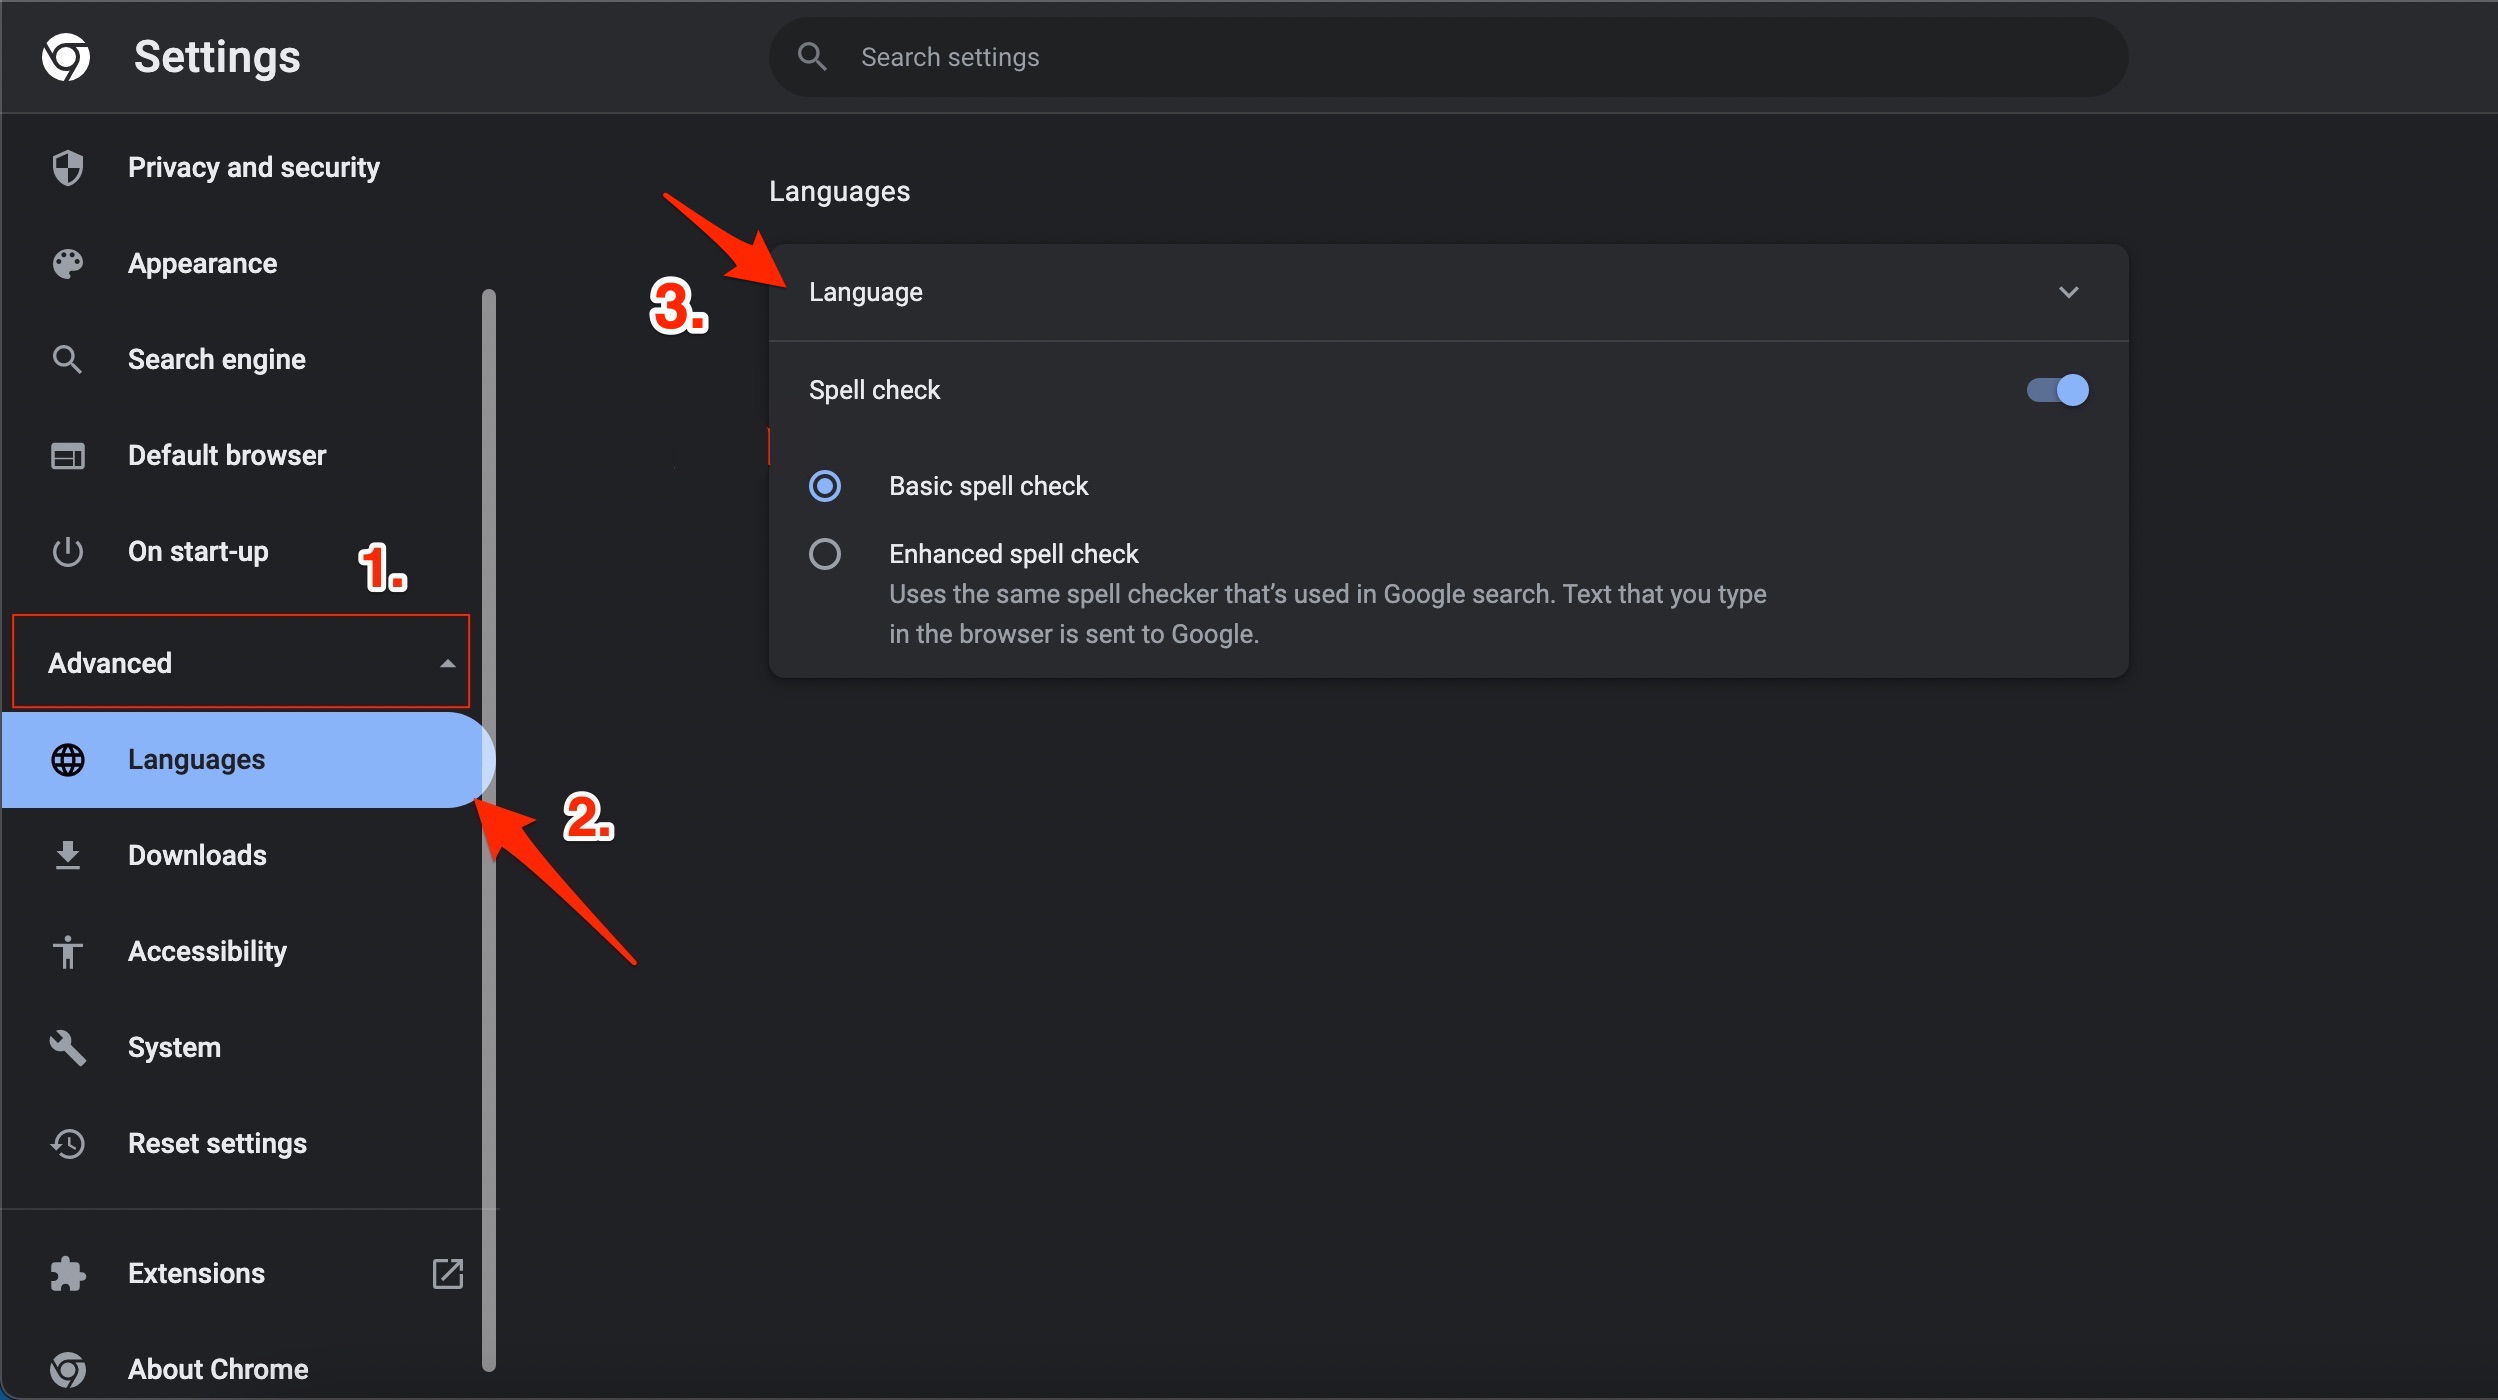
- Under languages, expand your primary languages.
- Click on the 3-dot icon next to the preferred language and set it to the top.
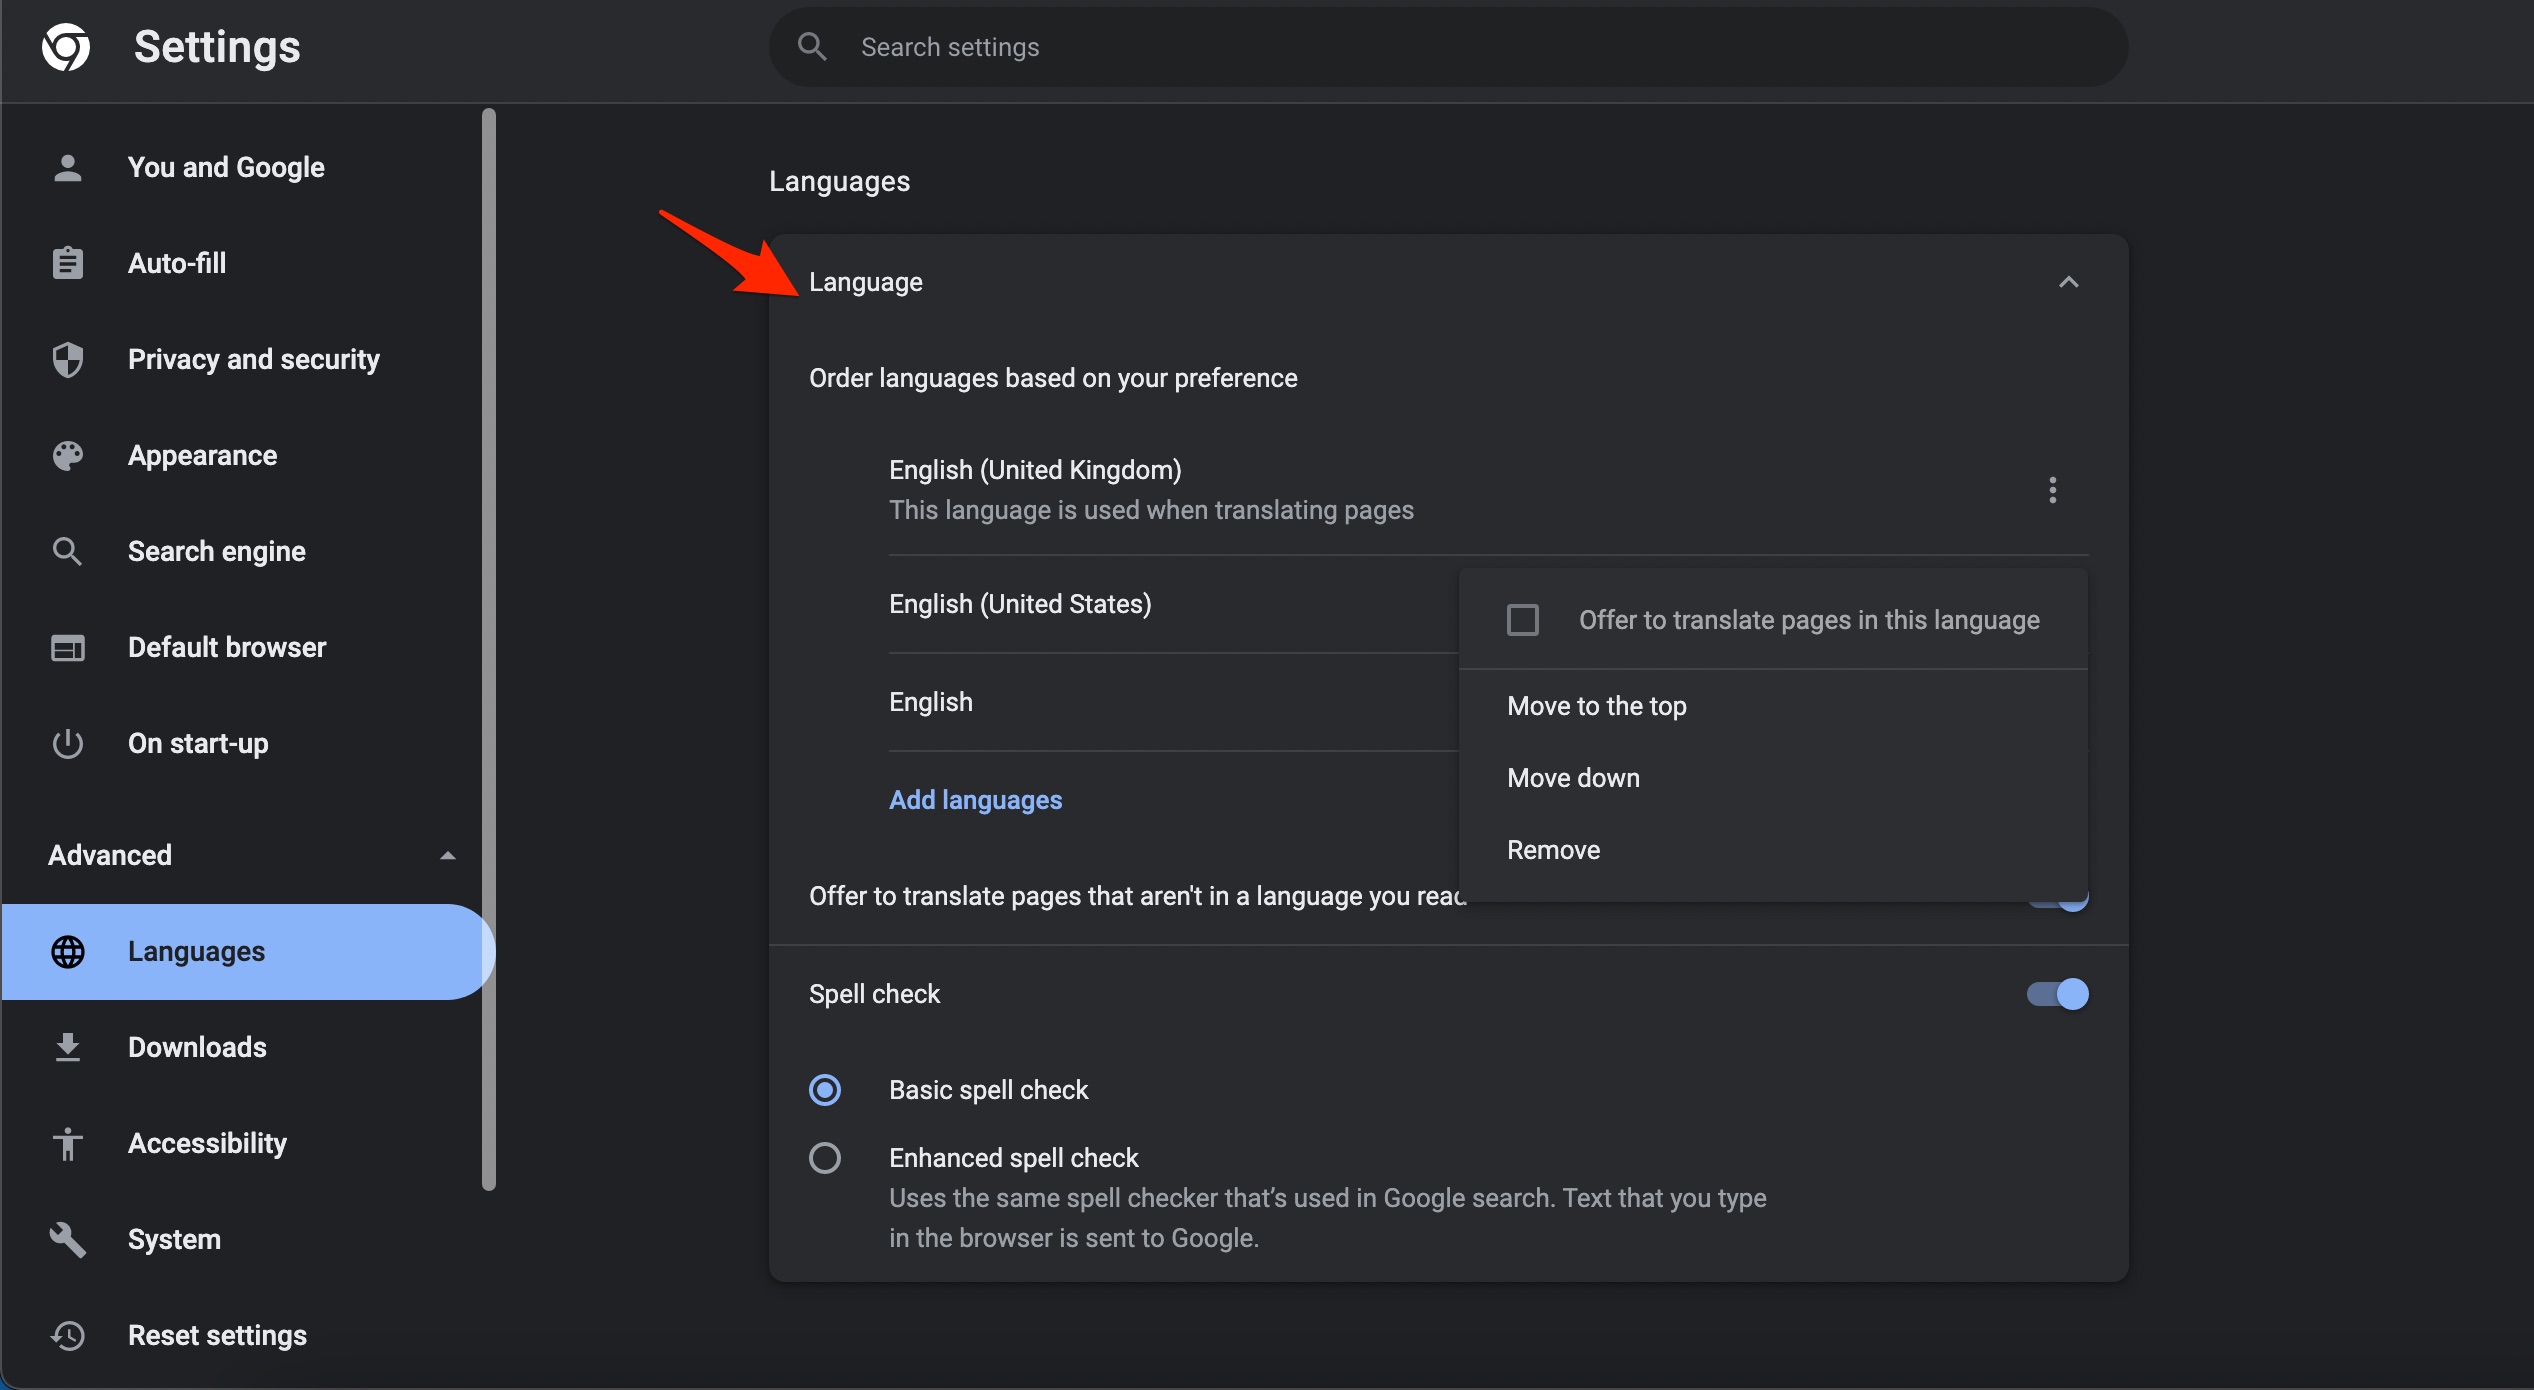
- You can also remove other languages from the list.
8. Disable Extensions
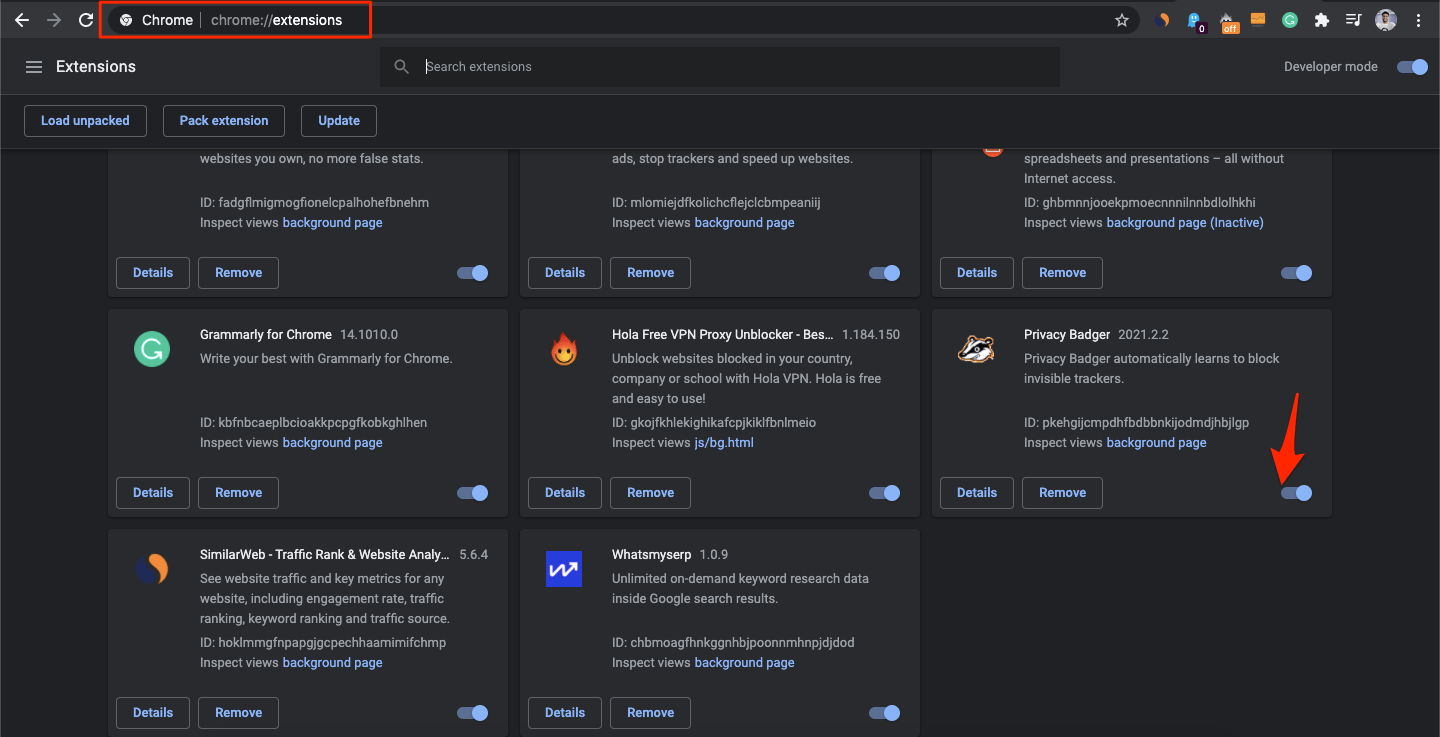
Extensions are the best tools to enhance the productivity of browsers. However, these can conflict with the workings of some online tools. If you have extensions such as Grammarly or any other grammar checker extension specifically, then we would advise you to disable it and then check if Google Slides spell check is working or not.
- Go to
chrome://extensions - Here look for Blocker Extension and Turn OFF the Toggle.
19. Clear Browser Cache
Cache data over a period of time gets piled up and, if corrupted, can cause several complications within the browser. It is recommended that you clear the browser cache regularly. You can do that by following the steps below.
- Open the browser.
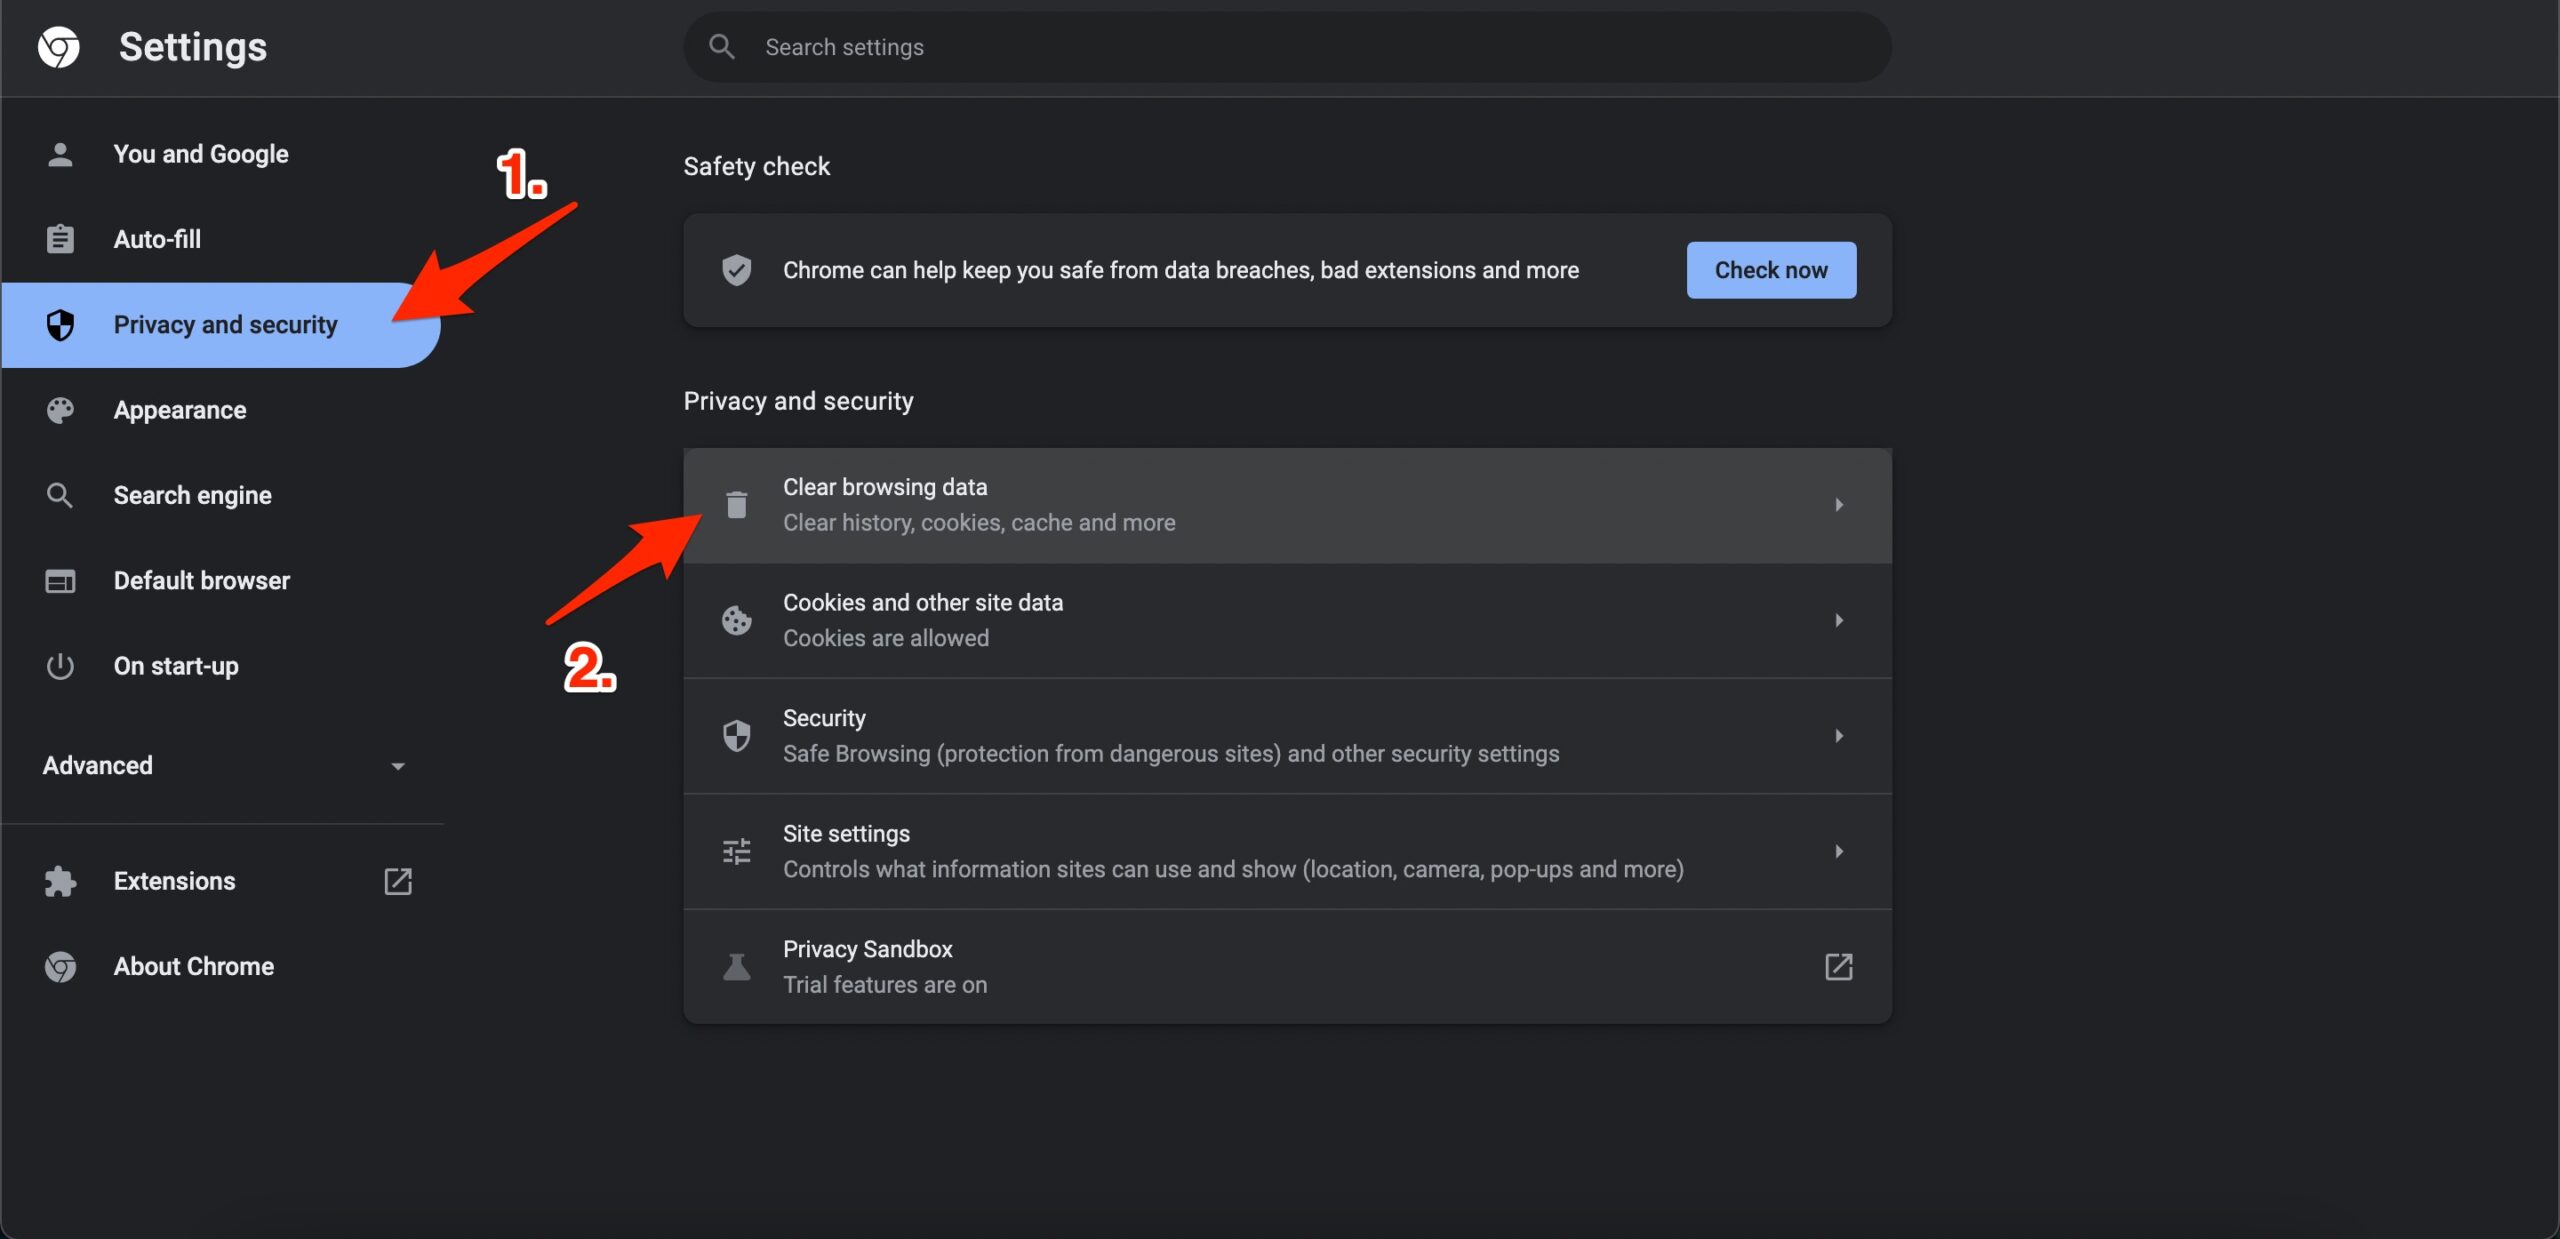
- Open Settings by clicking on the three-dot menu option.
- Here click on Privacy and Security and open Clear Browsing data.
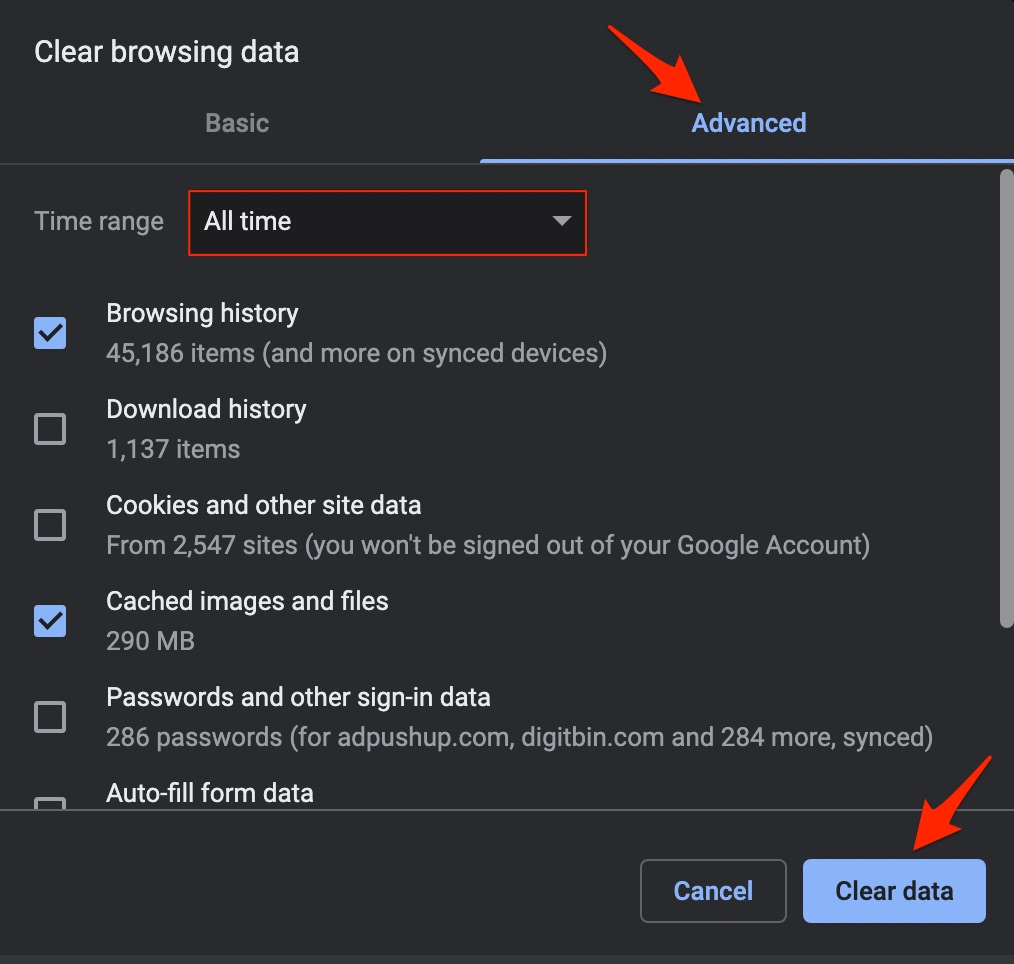
- Click on Advanced, and set the Time Range to All Time.
- Select the checkboxes Cookies and Other Site Data. Also, tick the one that says “Cached images and files.”
- Then click on Clear Data.
- Launch the browser after clearing the cache.
10. Use Grammarly Extension
If the spell check is still not working, then the best option is to use the Grammarly extension or addon on your Chromium browser. The Grammarly extension helps as a Grammar checker, Spelling checker, and Punctuation checker. Grammarly also helps you streamline wordy phrases and rewrite sentences that are likely to confuse readers.
