While drafting a presentation or any document, formatting is quite a clumsy part of it. Once you are ready with your content and start writing it. You realize a few moments later that format inconsistencies are a real deal.
You try to adjust the text in one line, but the paragraph below it gets completely out of place. Or, while working on a presentation, you write something that does not fit the specified area. Sometimes it falls short, or the text overflows from it. And you keep thinking of a way out from this. Somehow you try to manage it with some temporary arrangement, but it does not necessarily work every time.
A tool works best when you know how the specific functions work. The hack and the quick fix do not necessarily work every time. Fortunately, Google Slides offers easy-to-use options to deal with such a situation.
Reading the title, you must be thinking…
What is the placeholder?
So, a placeholder is a pre-designed area for incorporating text, images, or video content on a slide according to the preference.
In the following sections, you will learn how to adjust the placeholder to fit the text.
How to Customize Placeholders and Text Boxes to Fit in the Text?
- Go to Google Slides.
- Open a new presentation, or continue work on the existing presentation.
- Select the placeholder or the textbox.
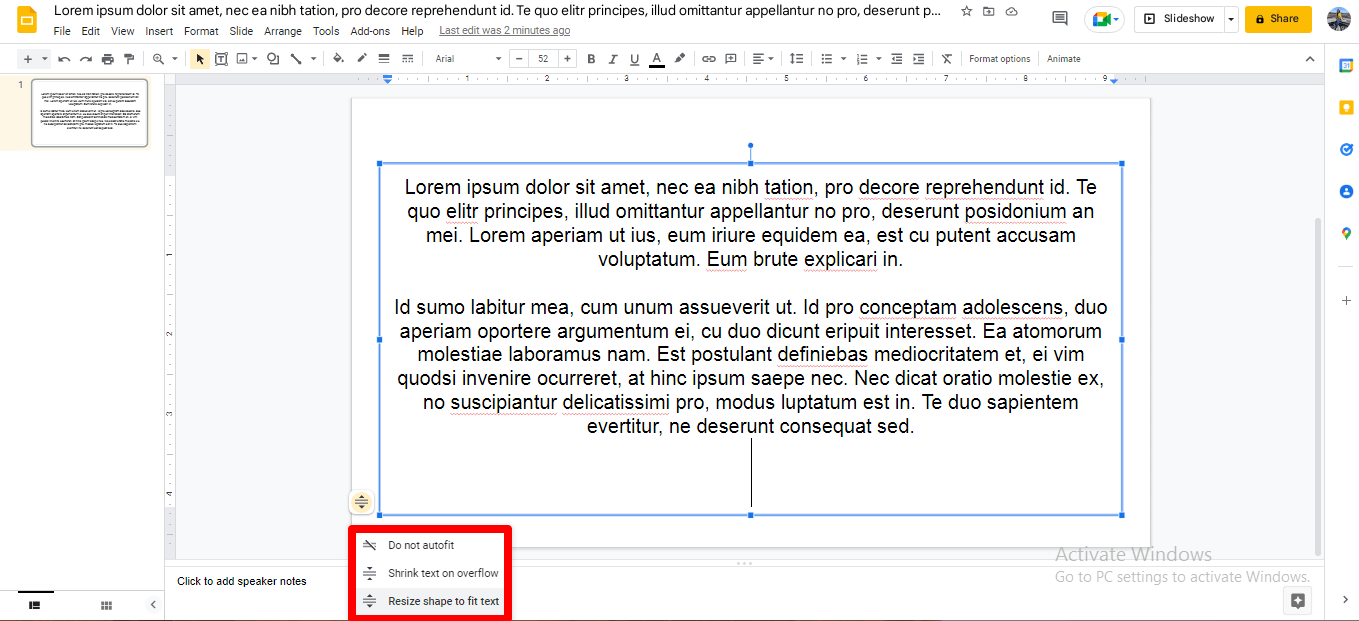
- Click on the icon that appears on the boundary of the placeholder.
- Three options appear; choose as per the need:
- Do not autofit: The option allows the text to overflow from the placeholder/textbox.
- Shrink text on overflow: The option allows the text size to reduce/increase according to the size of the placeholder/textbox.
- Resize shape to fit text: The option allows changing the size of the placeholder for the text to fit in.

How to Customize the Default Setting for New Text Boxes?
Note: You can use this feature to apply a specific condition to all the text boxes you create in the future. This technique only works for textboxes you create; it won’t affect any template placeholders whatsoever.
- Go to Google Slides.
- Open a new presentation, or continue work on the existing presentation.
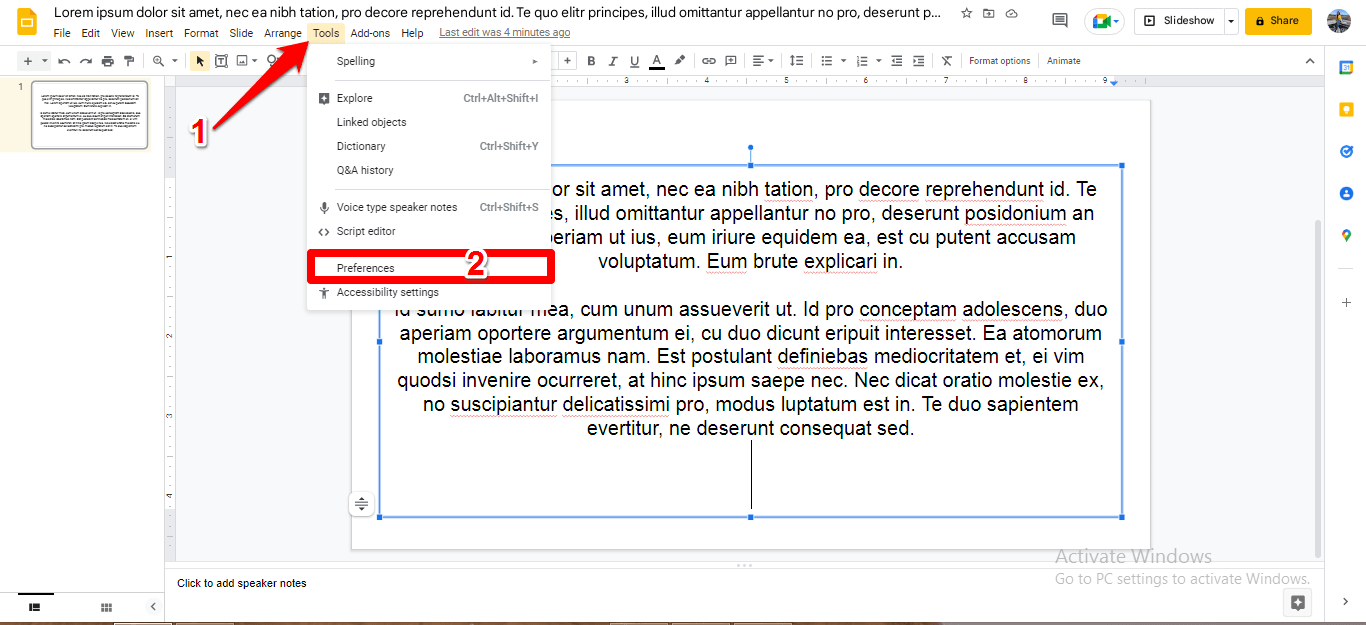
- Go to Tools option > Click Preferences option.

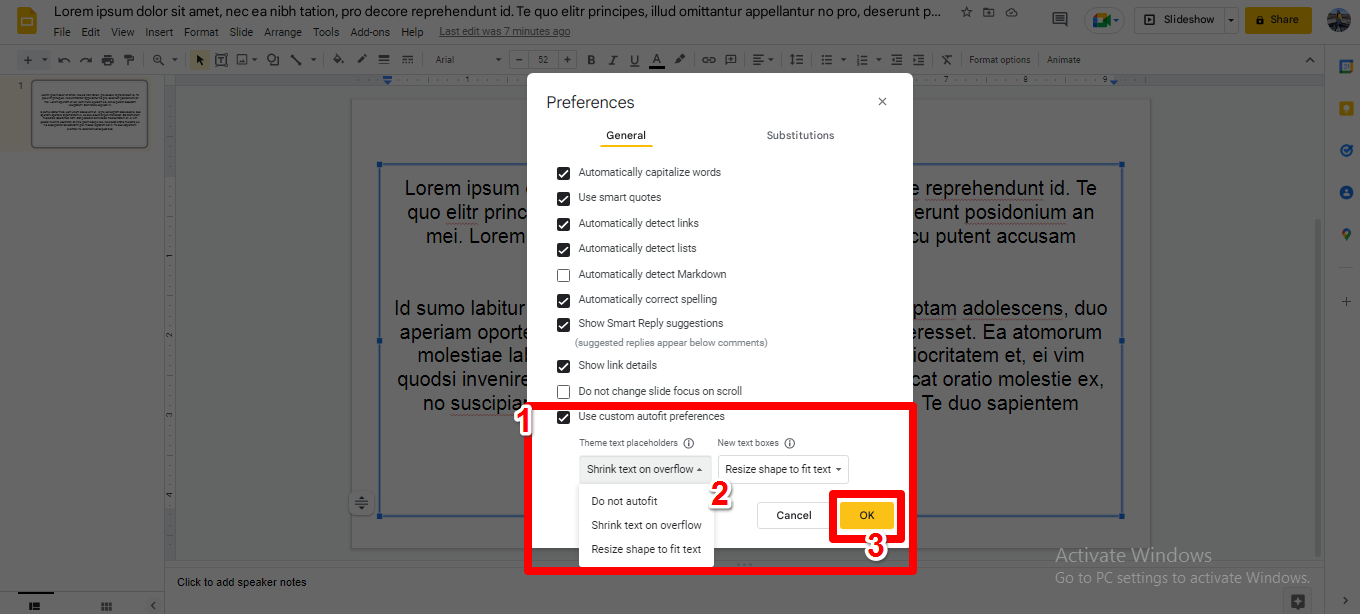
- Click the Use custom autofit preferences option under the General tab.
- You can select one of the three options mentioned earlier for both the text box and the placeholders. These changes shall be applied in the new presentation.
- Click the OK option.

Conclusion
Follow these steps to make the formatting game a little fuss-free. The knowledge of these functions saves you time to work efficiently without picking your brain.
I hope you find this article helpful and resourceful!
