How to Fix MegaSync Desktop Not Working on Windows 11? Now we live in a time where you don’t need to carry an HDD or SSD drive in order to carry your important files with you. Thanks to the presence of trusted cloud storage, you can now upload your files over the cloud and access them whenever you go, in any part of the world. All you need to do is log in with your account credentials and you can view all of your files.
There are a plethora of cloud storage services you can opt for. One such popular service is MEGA. It offers web clients, desktop software, and even mobile apps using which you can store and easily access all of your uploaded files. If you have a video file, then simply by using the file link, you can stream it on your favorite player.
While there are several other benefits to using the MEGA cloud storage service, there are several users who are facing issues running the desktop client on their Windows 11 PC. If you are one of such users, then you have landed in the right place. Because in this post, we will share with you some solutions that you can apply to fix the MEGA Sync desktop client not working on Windows 10/11 problem. Without any further ado, let us jump right in.
1. Restart the MEGA Sync App
The first thing that you can do is to end the MEGA Sync app process and restart it on your Windows 11 PC. Often, apps fail to load important files that ensure the smooth functioning of the software. In such a scenario, you could encounter problems such as the MEGA Sync desktop client not working on Windows 11.
Here are the steps to restart the MEGA sync app:
- Open the Task Manager by pressing the Ctrl+Alt+Del buttons on your keyboard and selecting Task Manager from the list of options that appear. Alternatively, you can right-click on the Start menu on the Taskbar below and select Task Manager.
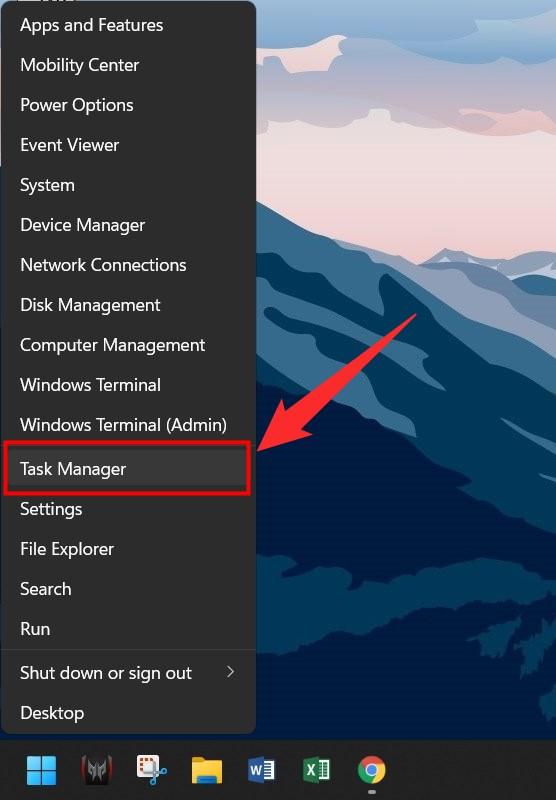
- Under the Processes tab, locate the MEGA sync desktop client app and click on it.
- Finally, click on the End task button at the bottom of the interface.
- After this, simply double-click on the MEGA sync desktop client icon on your home screen to open it and see if this fixes the issue or not.
2. Remove and Reinstall the App
During installation, if due to some issues, the process was interrupted, then you may come across such issues with an app on your Windows 11 PC. Installation should be done after closing all the background apps to ensure all the important files are installed on your PC correctly, related to that app.
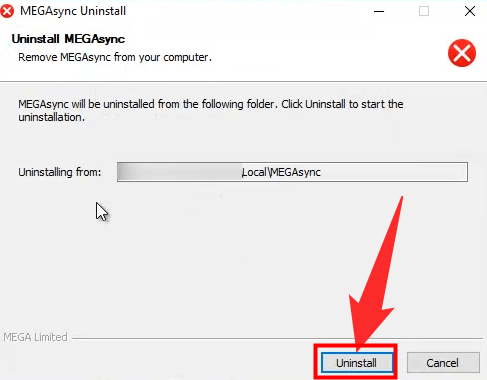
On the other hand, over time, apps collect temporary and cache files, which when corrupted can interfere with the proper functioning of the app. So, in such a case, we would advise you to uninstall the MEGA sync app from your PC, reinstall it, and see if this fixes the issue or not.
You can uninstall the desktop client from the Control Panel by navigating to Control Panel > Programs and Features. Locate the app and uninstall it.
After the uninstallation is done, head over to the MEGA official website and download the Windows desktop client on your PC. Follow the on-screen instructions and avoid opening any other apps in the background for uninterrupted installation.
3. Set MegaSync Settings Properly
The MegaSycn Syncs all the files from the selected PC folder to Mega Drive and also shows the selected Folder from Mega on your PC. You need to check other MegaSync settings to find any incorrect settings blocking the Sync.
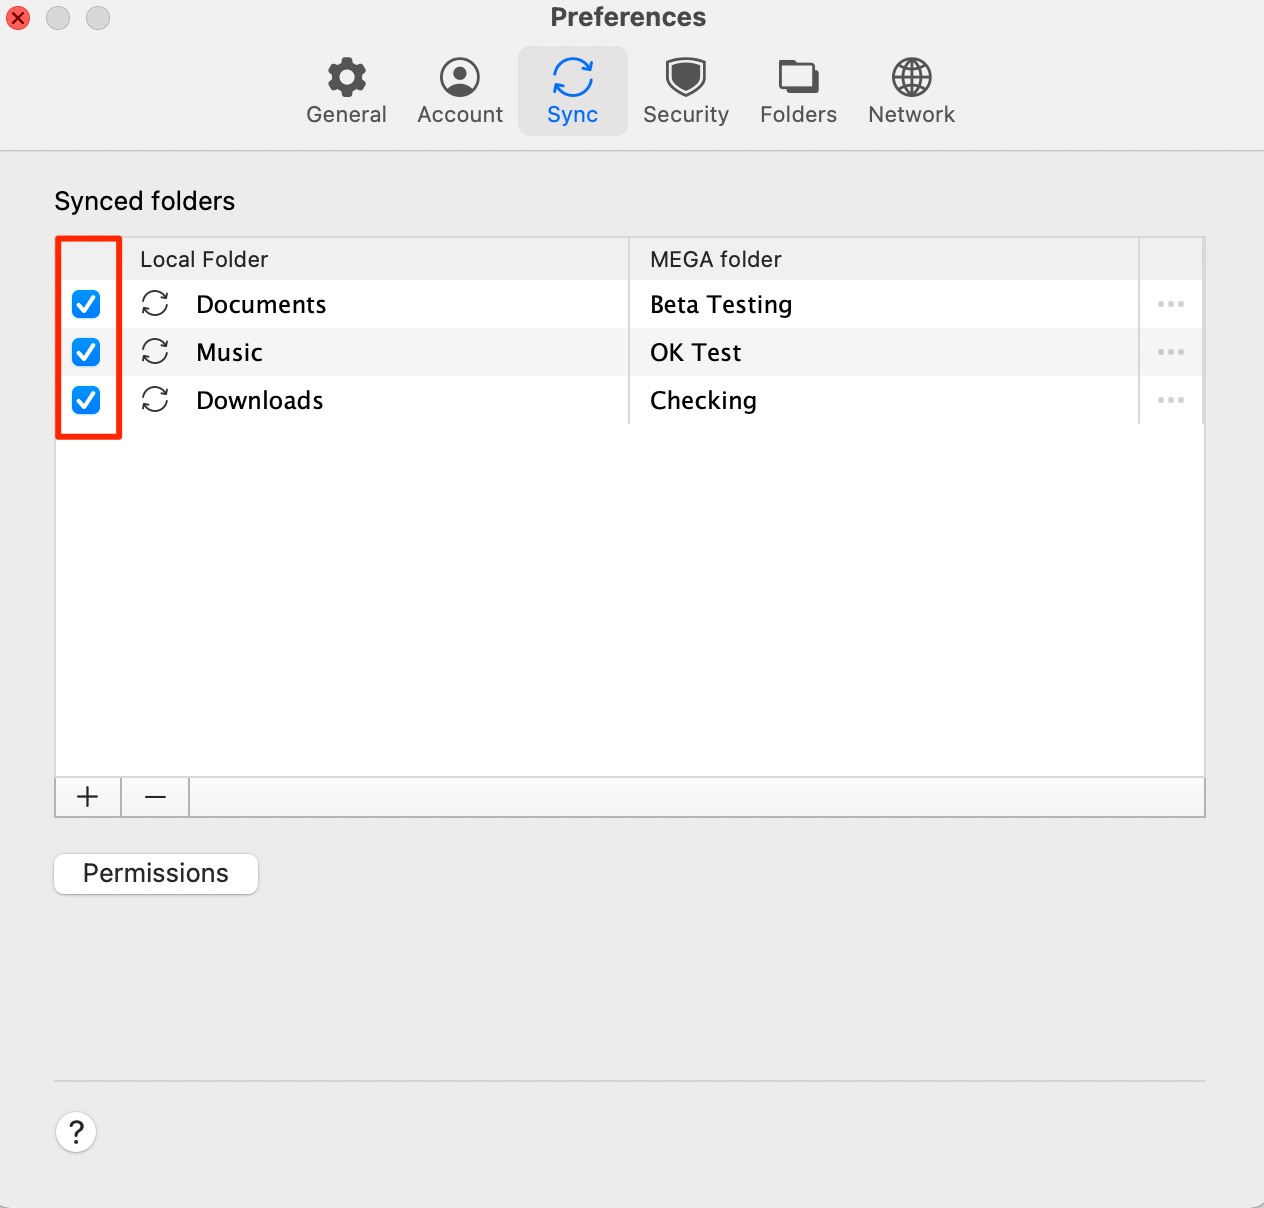
- Open Preferences.
- Click on the Sync tab.
- Make sure you right ticked selected the folders that you want to Sync across PC and Mega.
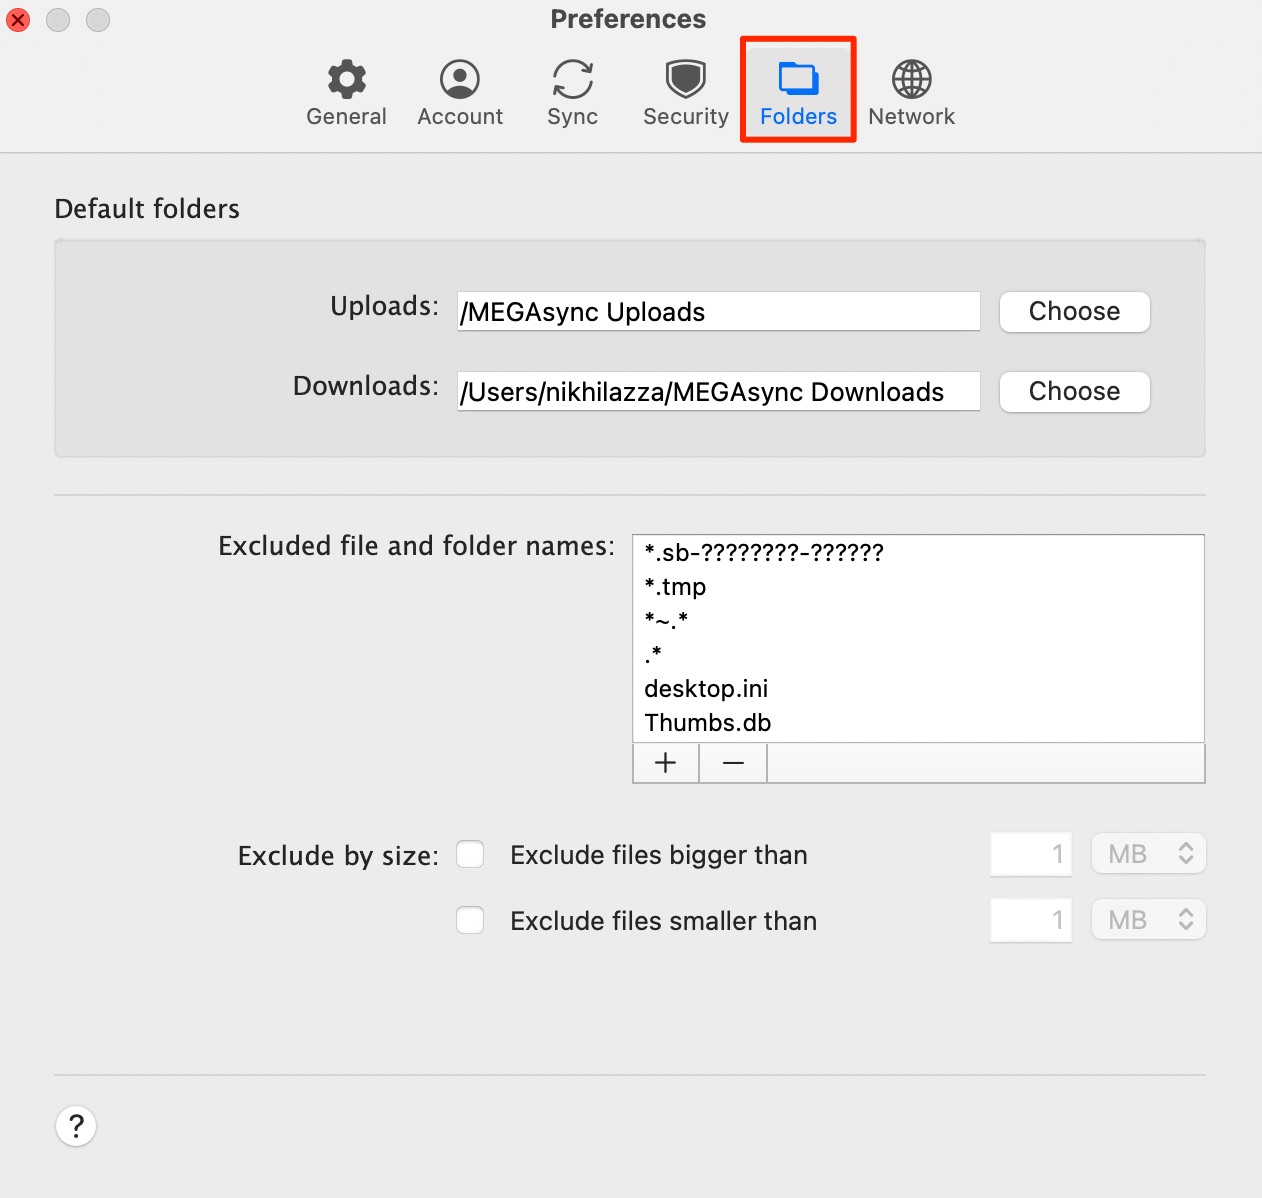
- You can click on the Folders and check if any of the options is blocking the sync process on the Mega Client.
- Check other settings like the Network to see if any of the bandwidth constrictions is causing the sync to pause.
4. Check MEGA Sync Servers
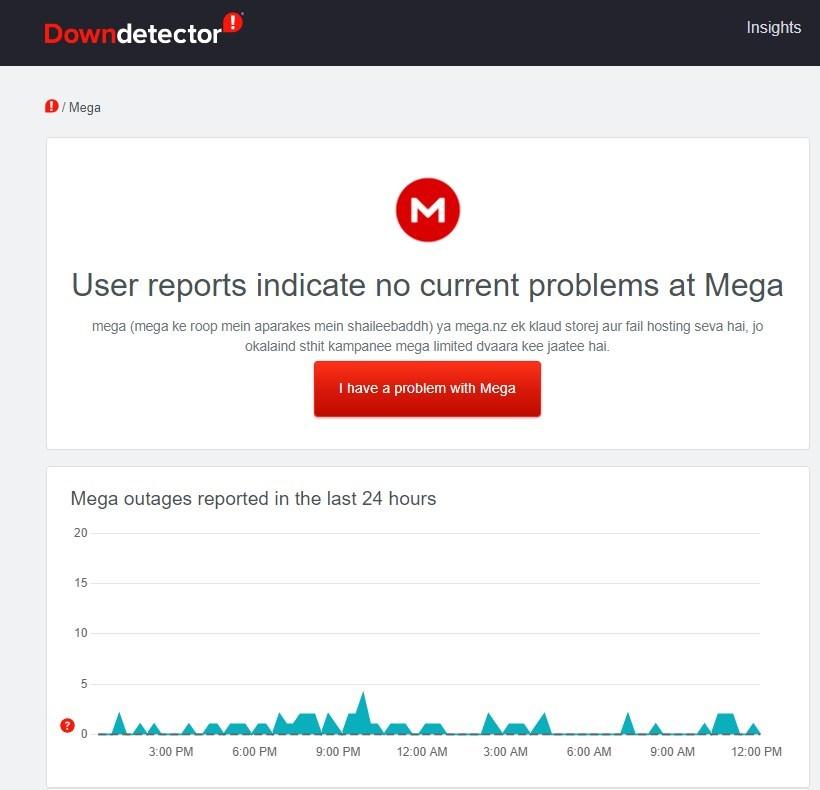
If the official servers of your cloud storage are having some issues, then you will eventually face the impact. Before trying out any of the complicated steps to resolve this issue, we would advise you to see and check if the MEGA servers themselves aren’t facing any issues. You can make use of websites such as IsItDownRightNow or Downdetector to know about the server status. If the server is down for MEGA, then there is nothing that you can do but wait for the developers to fix it.
5. Update the App
Another thing that you can look out for is a new update for the Desktop app. Often, updates are rolled out by companies that not only bring new features but also fix the bugs present on the app. The MEGA Sync desktop client not working on Windows 11 could be because of a bug. So, to be on the safe side, we would advise you to see if a new update is available. If yes, then install it on your desktop and see if this fixes the issue or not.
6. Switch Over to the Web Client
If none of the above-mentioned workarounds did the job for you, then as a last resort, we would advise you to stop using the desktop client on your Windows 11 machine, and switch over to the web client for your cloud storage tasks. The MEGA web app works without any hiccups and is as feature-full as the desktop client. So, till the developers fix the problem on the desktop client, make use of the web app and stay away from worries about fixing the problems.
7. Check Internet Connection
A faulty internet connection could also be the reason why MegaSync doesn’t sync on Windows. Restart your router if you are using Wi-Fi, or conduct a speed test using Fast.com if you are using cellular data.
8. Force Quit MegaSync App
Use the task manager to force quit the MegaSync app. Forcibly quitting MegaSync can help resolve the issue. Here is how you can do it:
- Click on Start and search for Task Manager.

- Click on Open.
- Search for MegaSync and right-click on it.
- Click on End Task.
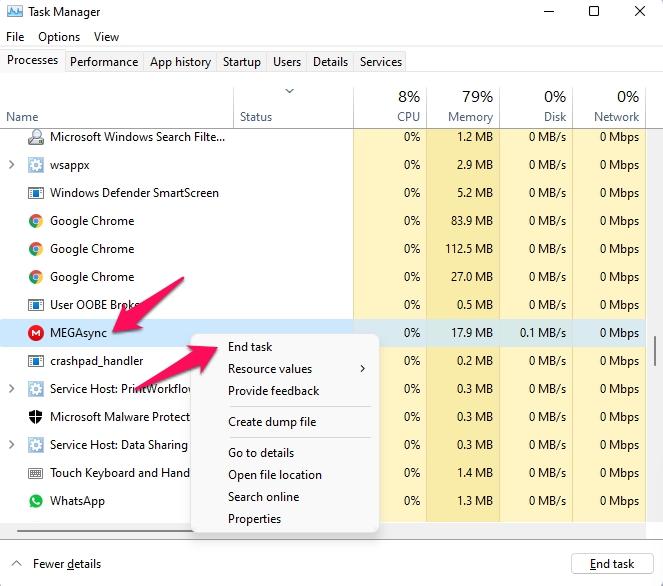
- Restart your computer and check if the MegaSync Not Syncing issue is fixed
9. Run MegaSync as an Administrator
MegaSync can stop syncing on Windows due to a lack of permissions. Running MegaSync as an administrator will confirm that the app doesn’t crash due to a lack of permissions to sync files from your system. Here is how you can do it:
- Click on Start and search for MegaSync.
- Click on Run as Administrator.
- The MegaSync should work fine and the MegaSync Not Syncing problem is solved.
10. Run SFC
Malicious or corrupted files may not allow MegaSync to run on your PC. Run an SFC scan to get rid of any such files present on your PC. Here is how you can do it:
- Click on Start and search for Command Prompt.
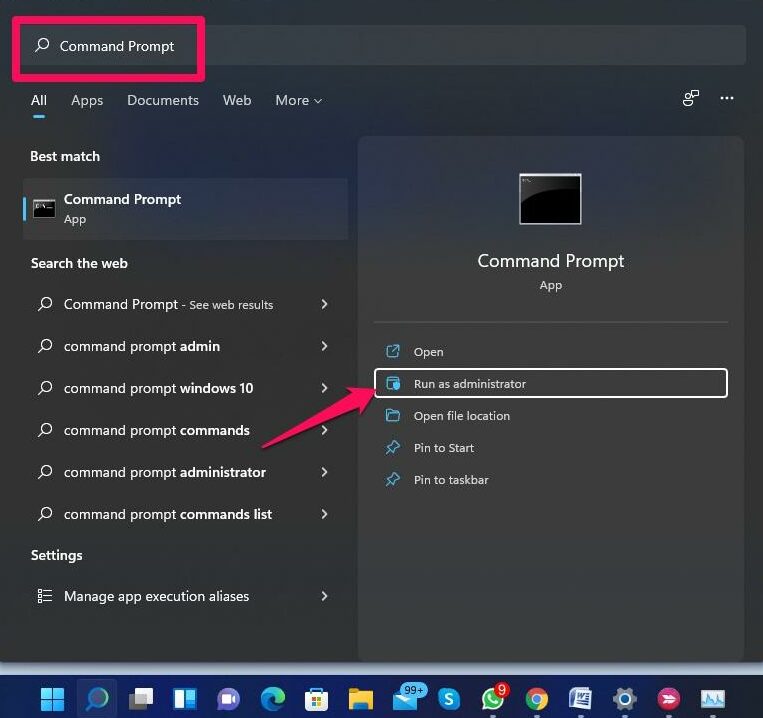
- Click on Run as Administrator.
- Type the following command and press Enter.
sfc/scannow
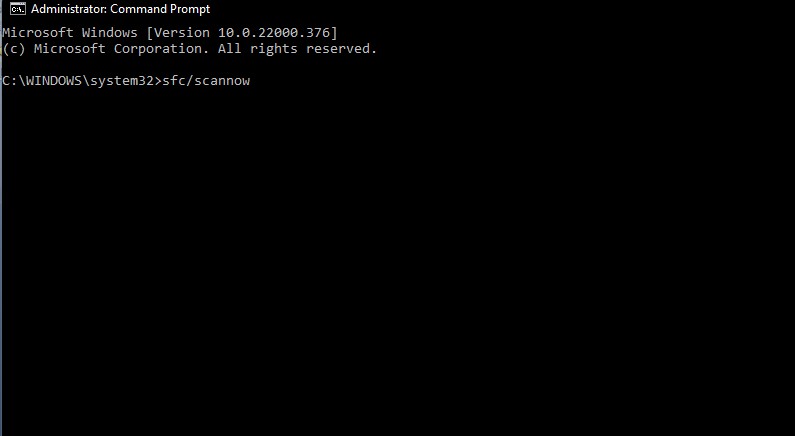
- Restart your computer once the process is complete and check if the problem is fixed or not.
11. Reset Winsock Catalog
The Winsock catalog contains your device’s configuration for data transfer and internet connectivity. Resetting the Winsock Catalog can fix the issue with MegaSync. Here is how you can do it:
- Click on Start and search for Command Prompt.
- Click on Run as Administrator.
- Type the following command and press Enter.
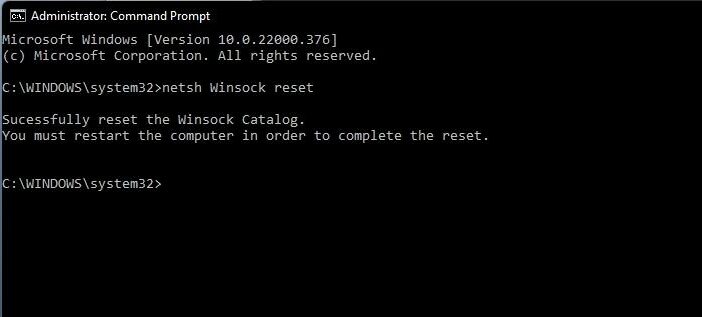
netsh Winsock reset
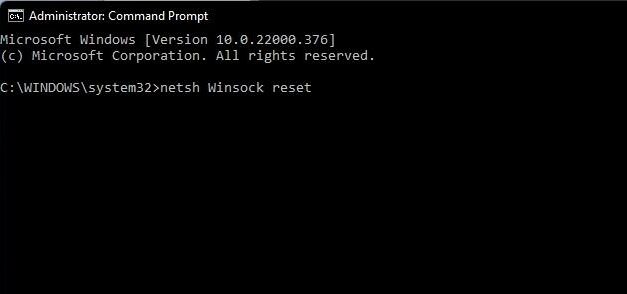
- Restart your computer to complete the process.
12. Disable your Antivirus and VPN
Third-party antivirus software can also interfere with MegaSync’s functionality. Disable the antivirus software temporarily and check if the issue is resolved or not.
VPN creates a secure tunnel and bypasses the predefined DNS set by your ISP. This may block the MegaSync to retrieve and send the data as VPN filters may block MegaSycn Servers.
13. Don’t Use HTTP
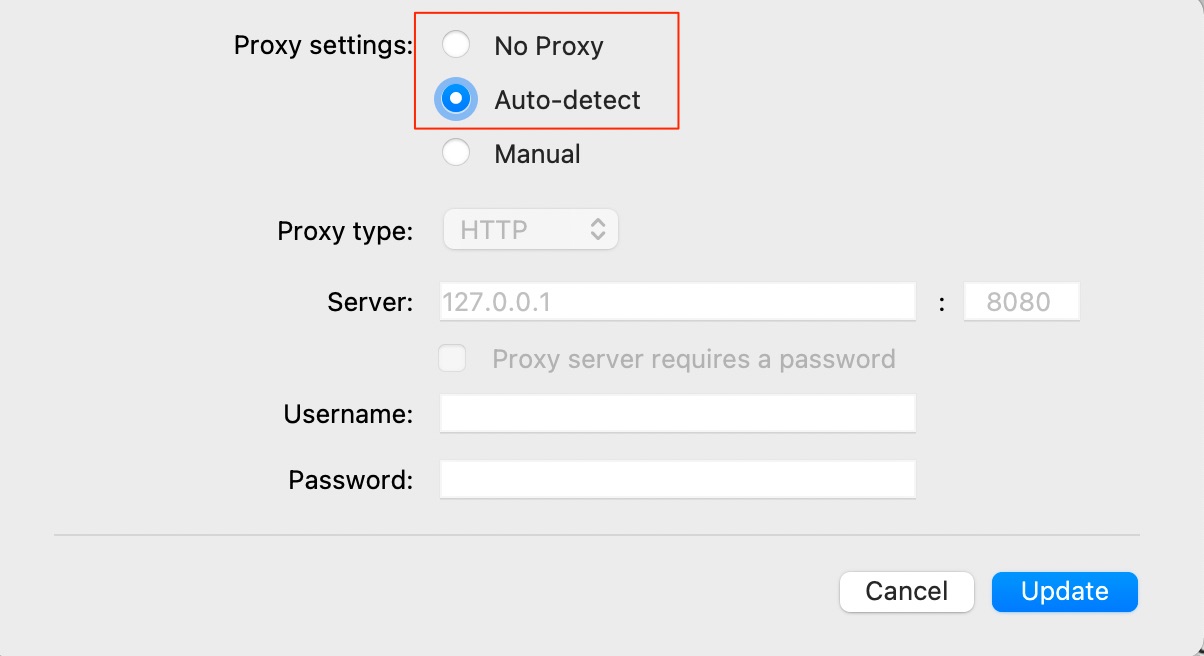
The Megasync app has a Network settings option where you can limit data transfer and set proxy.
- Open Network in Mega Sync Preferences settings.
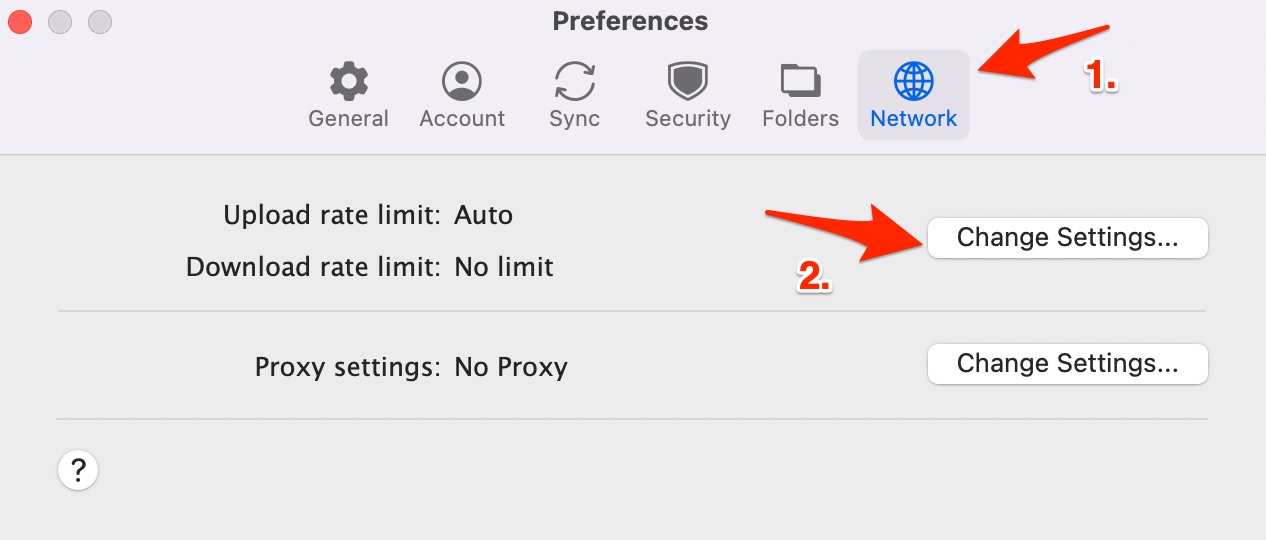
- Make sure the upload and download limit is set to No Limit/Auto. Here, Disable or Turn OFF Don’t Use HTTP if the transfer is not working/starting on Mega Desktop App. Click Update and check if files are syncing with Mega.
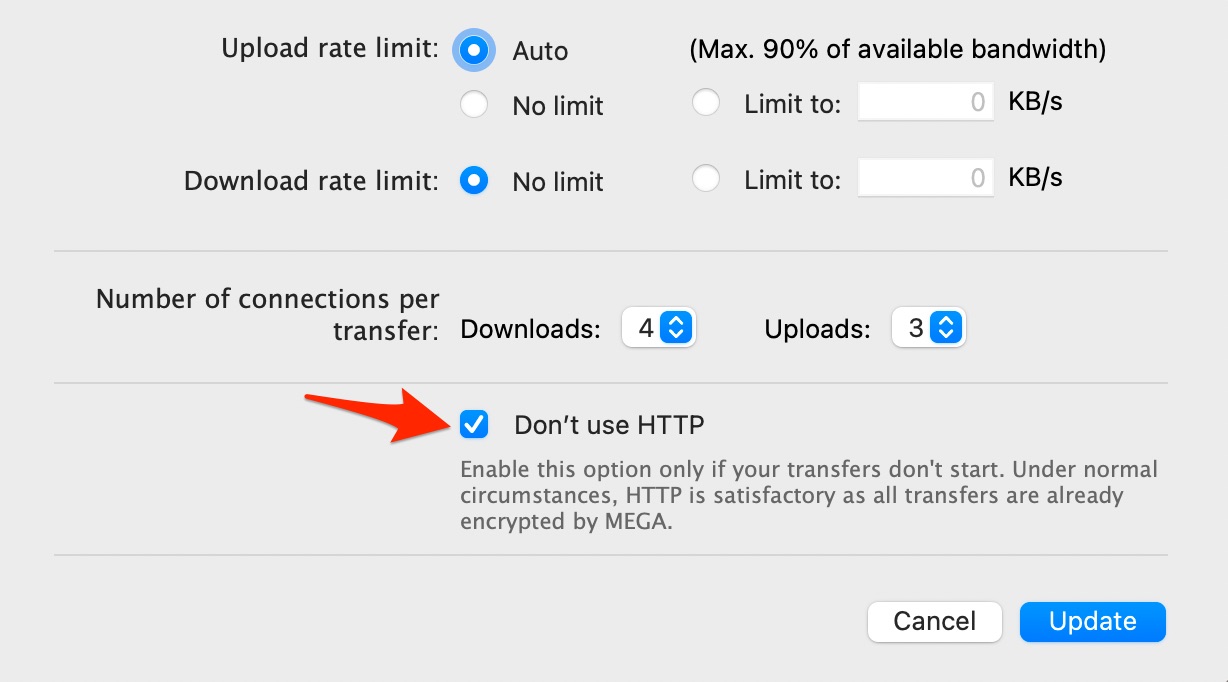
- Also, make sure the Proxy settings are set to No Proxy or Auto-detect.
This was all about how you can fix the MegaSync not syncing on Windows 11. By following the troubleshooting methods mentioned above, you will be able to solve this problem.
