One of the best things about OneDrive is the compatibility with the Windows operating system. It can integrate with most of the features and by connecting it you can collect and store the data to the clouds.
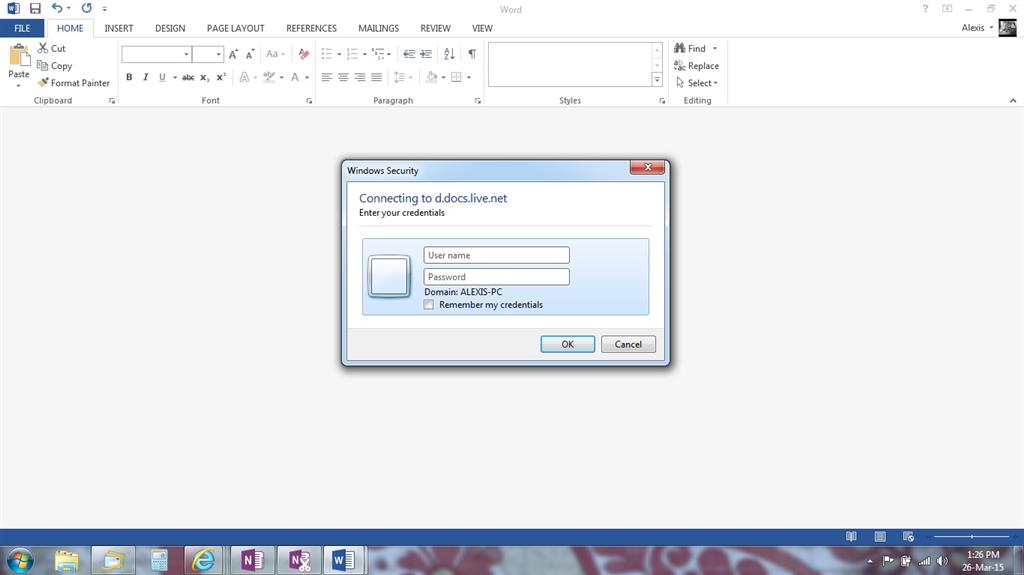
A bunch of users reported an error where while synchronizing the data to the OneDrive an error dialogue box appears with the error ‘Connecting to d.docs.live.net‘ or ‘We can’t connect to https://d.docs.live.net/‘. Moreover, the error halts the user from using any kind of Office service.
In this article, we tried to cover all the possible solutions to the OneDrive error.
Fix OneDrive Error Connecting to d.docs.live.net
Here are Few Solutions to Fix ‘Connecting to d.docs.live.net’ or ‘We can’t connect to https://d.docs.live.net/ error on Windows
Delete Office Upload Centre Cache
This is the first solution we are recommending doing in order to get rid of the dialogue box with the error ‘Connecting to d.docs.live.net‘ or ‘We can’t connect to https://d.docs.live.net/‘. If the office had any kind of caching issue then this method will delete the cache and start the operation from scratch.
Note: This method is not applicable if you are using Microsoft Office 365.
- Press both Win Key and S simultaneously in order to open the default search function.
- Then search for the term ‘Microsoft Upload Center‘ and hit enter to open it.
- Now, navigate to the settings, and then finally press the Delete Cached Files to delete its data.
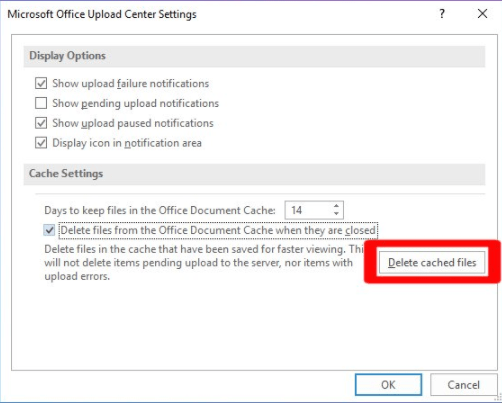
Now, reboot your system and try to work, and see whether you are getting the error again or not. If yes then follow the below other solutions.
Delete System Cache (Junk)
In case you are using Office 365 or the above method didn’t work in your case then try removing the system cache, like all the temporary files, browser cookies, etc. This will solve the issue if the issue to related to office caching.
- Press both Win Key+ S simultaneously in order to open the default search function.
- Then search for the term ‘Control Panel‘ and hit enter to open it.

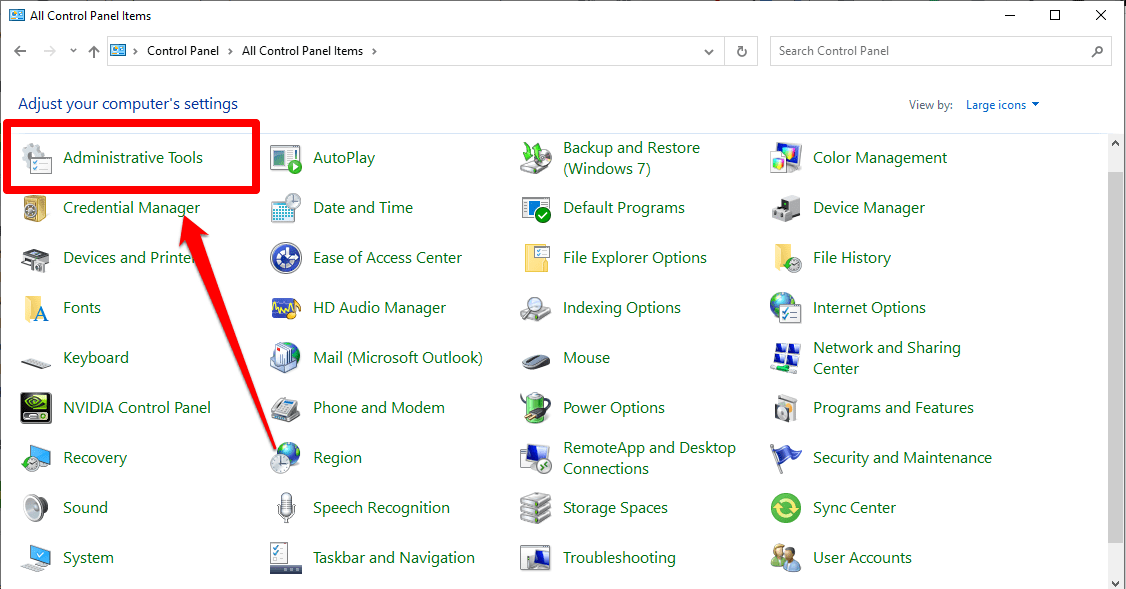
- After opening the Control Panel, change the view option from Category to Large Icons.
![]()
- Now, open the Administrative Tools by clicking on it.
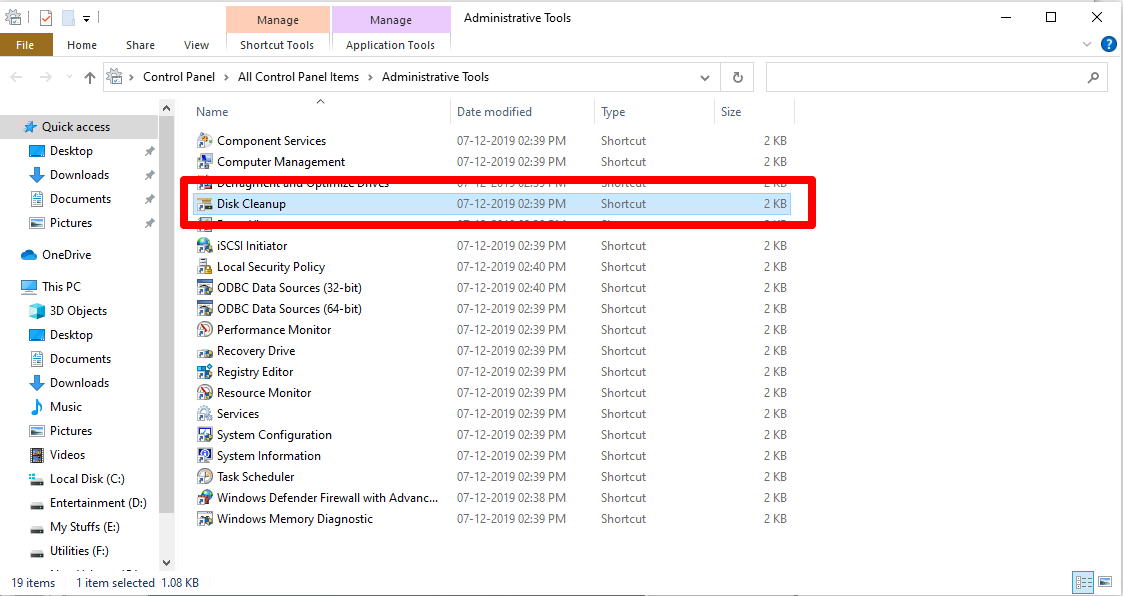
- Then, Click on the Disk Cleanup shortcut to open it.
- A small dialogue will appear where you will be asked to select the drive. Choose the one, where Microsoft Office is installed.
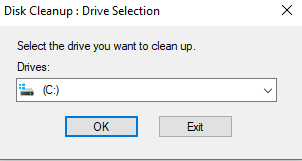
- Now, after a couple of moments, a new window will appear where you will be asked to select the files to delete. Delete all the unimportant files.
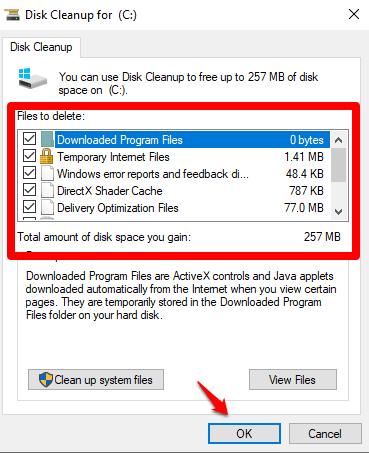
Empty Office Credential Manager
- Press both Win Key and S simultaneously in order to open the default search function.
- Then search for the term ‘Control Panel‘ and hit enter to open it.

- After opening the Control Panel, click on the User Accounts option.
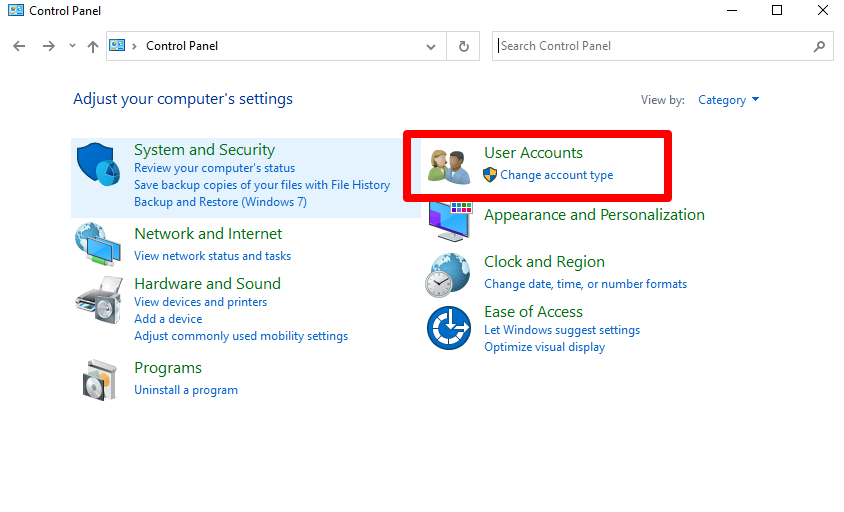
- Now, click on the ‘Credential Manager‘ section.
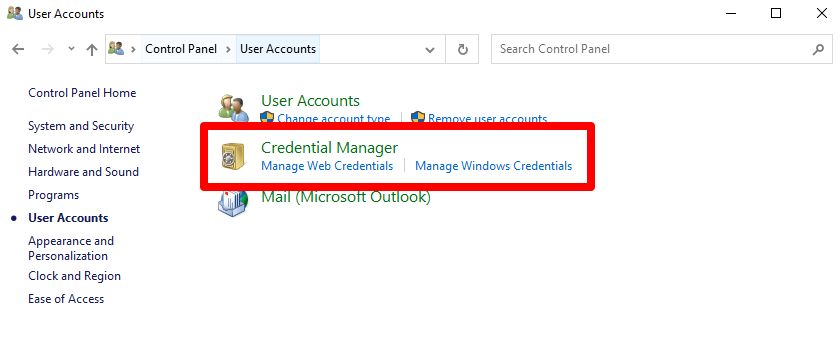
- Now, switch to the ‘Windows Credentials‘, and under the ‘Generic Credentials‘, search for ‘MicrosoftOffice16_Data…etc’.
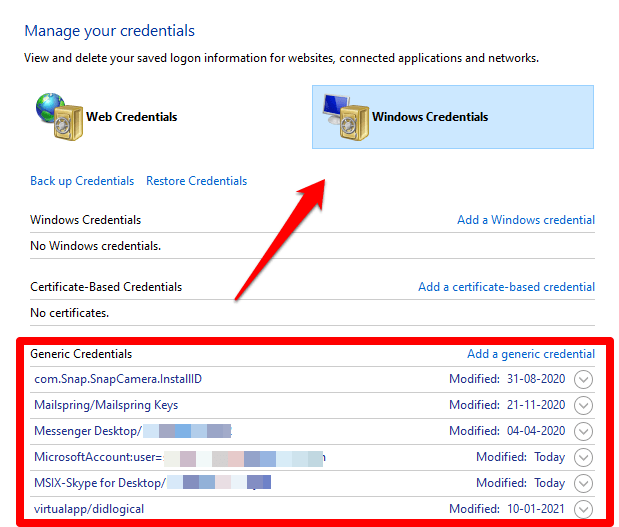
- Now, click on it and use the Remove option to delete that credential.
- After removing the credential, reboot the system.
- Finally, open Word or Excel, and check whether you are still getting the error or not.
Reset OneDrive
This will be helpful in those cases where you or anyone else disturbed the default OneDrive settings, which ultimately occurring the issue.
Method 1: Via Windows Settings
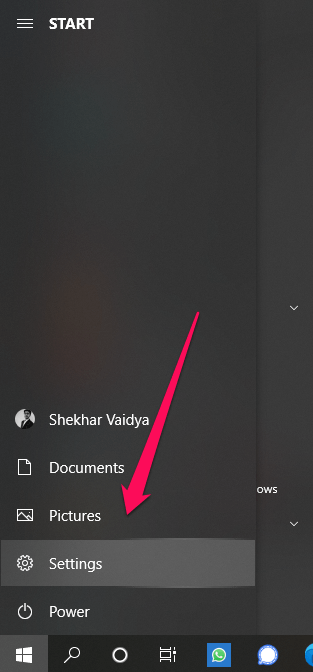
- Open the Setting app from the Start menu.
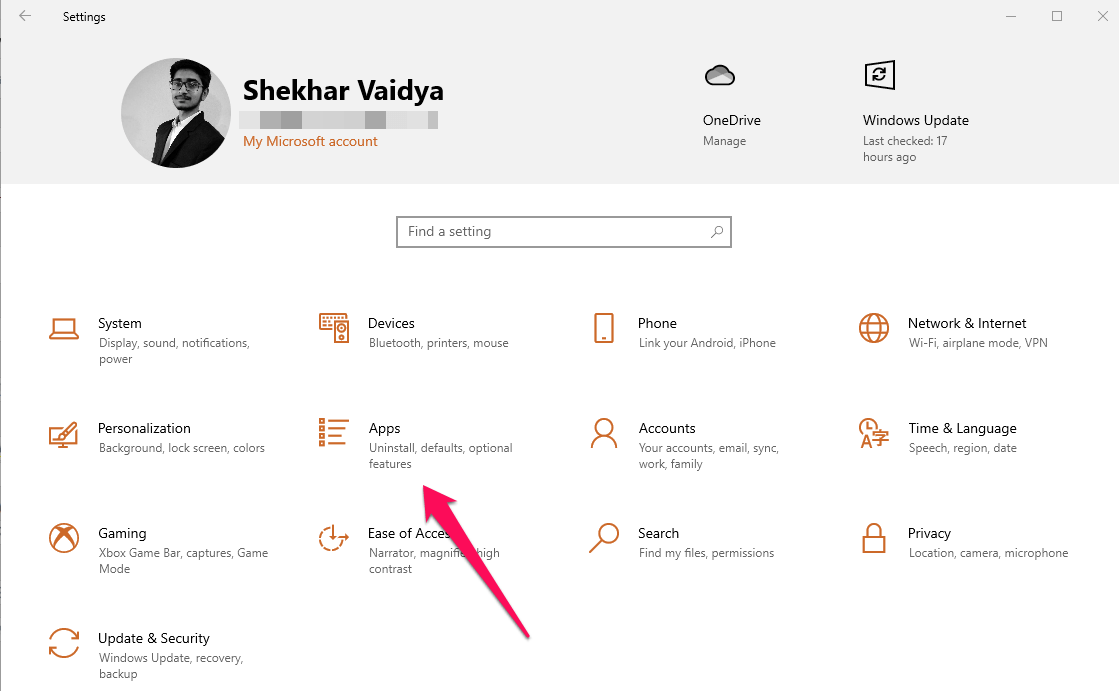
- Now, go to the Apps sections.
- After opening, you will see the list of all the installed apps on the right side of the window
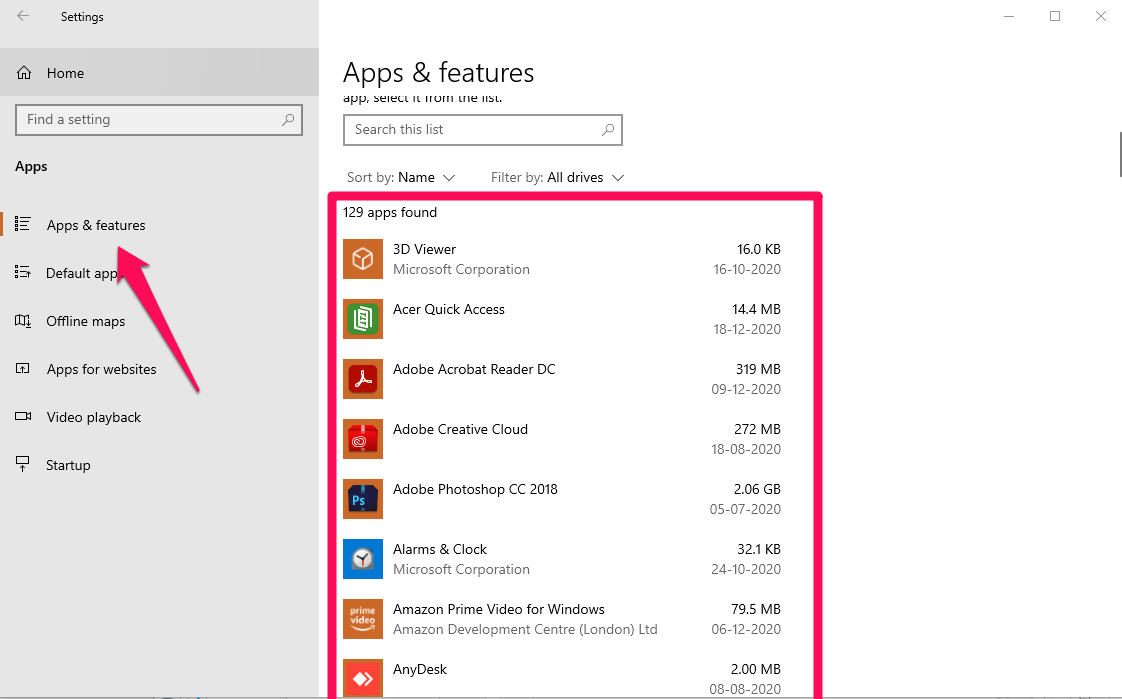
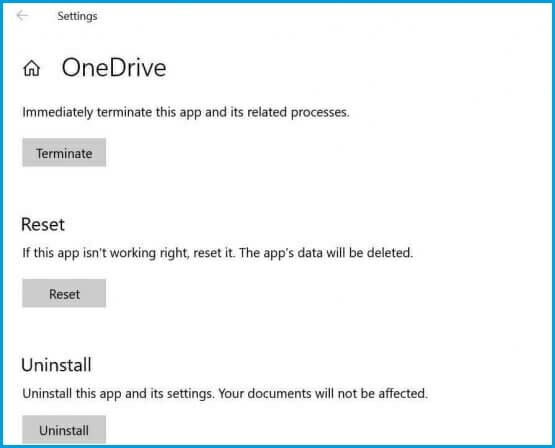
- Scroll down to OneDrive, click on it to select it. Then on the Advanced Options
- Now, finally, click on the Reset button, this will reset the OneDrive app, and you will have to re-login to use the app.
Method 2: Via RUN
- Open the RUN command by pressing Win Key and R simultaneously.
- After opening the RUN window, type the following command in it and then hit the enter button to execute the command.
%localappdata%\\Microsoft\\OneDrive\\onedrive.exe /reset
- To check whether the command worked or not, put the icon on the taskbar, then you will notice that the icon will disappear and then appear again.
- If the above command didn’t work then use the following command,
%localappdata%\\Microsoft\\OneDrive\\onedrive.exe
Update to Latest Windows Version
This is the last option we are suggesting. If the issue is related to Windows and at the same time if there is any update pending then updating the pending updates will solve the issue.
- Open the ‘Setting‘ app from the Start menu.

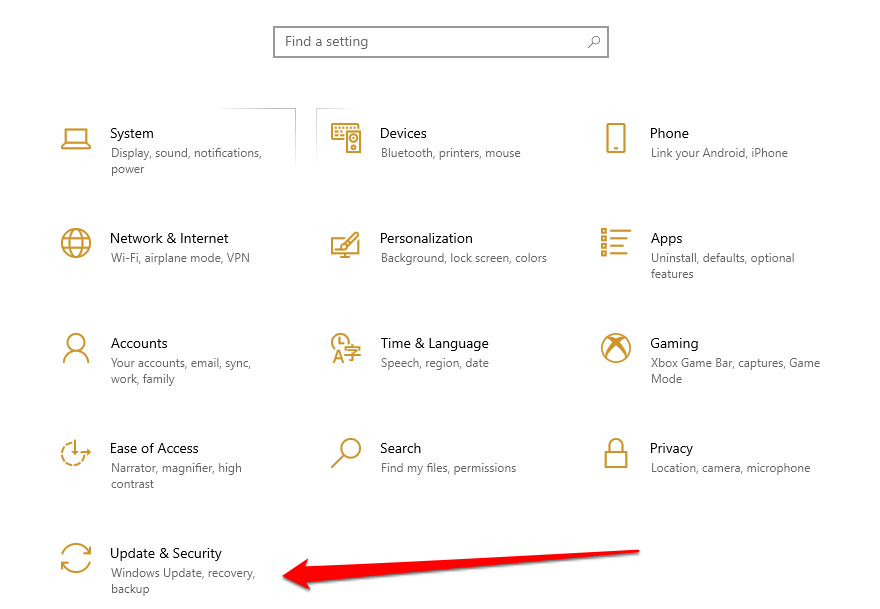
- Now, go to the ‘Update & Security’ option.
- Now, if there are any pending updates, then download and install the update(s).
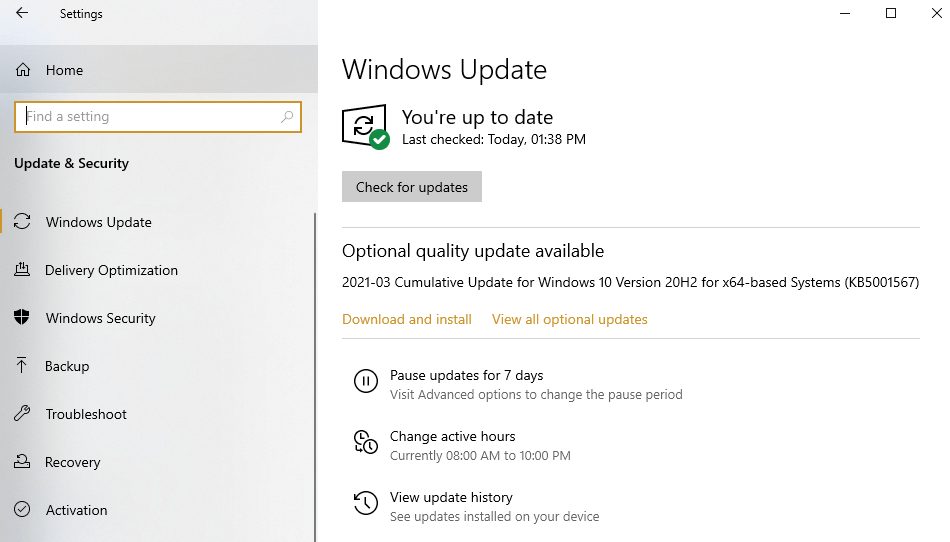
- And then finally, reboot the system.
