Google Slides, part of the Google Drive suite, is a fantastic productivity tool. This word processor is a collaboration tool as well. Google Slides is both free and efficient. Google Slides enables users to not only create and manage presentations online but also collaborate simultaneously with other people. To make the document more attractive, users can add a bunch of things to it like images, drawings, music, and videos, among other things.
Adding images to your document is the most powerful way to get your message across. But this is effective only if the images are clear and high quality. Sadly, Google Slides tends to downgrade the quality of the images sometimes. Blurry images can take away the attention from good quality content! If you have faced this issue, then worry not because we will talk about this issue at length in this post.
What are the Supported Image Formats on Google Slides
Before we take a look at the reasons behind the loss of quality of images, let us take a look at the supported file formats on Google Slides. Google Slides supports the following formats:
- .jpg
- .png
- .tiff
- .bmp
Why do Google Slides Lower the quality of the Images Uploaded?
Many have pondered over this question, but have found no concrete answer. Based on the speculations, it is clear that the loss of quality of the images seems to be due to the compression of the images.
Other reasons behind the loss of quality could be:
- Pixel Size – Uploading an image that is over the size limit supported by Google Slides. Google Slides supports an image that has a pixel size of 2000 x 2000. Any image above that limit is bound to be compressed.
- Aspect Ratio – Google Slides accidentally messed with the image’s aspect ratio. This aspect ratio is a description of the pixels of the image. If an image appears stretched out/blurry, then there is a high chance that the image’s aspect ratio was not preserved.
- File Limit Exceeded – Exceeding the file limit of 50MB can also lead to the downgrade of image quality. Google Slides can compress multiple high-quality images that exceed the file limit to maintain the document’s quality.
How Much is Image Compressed (Study)?
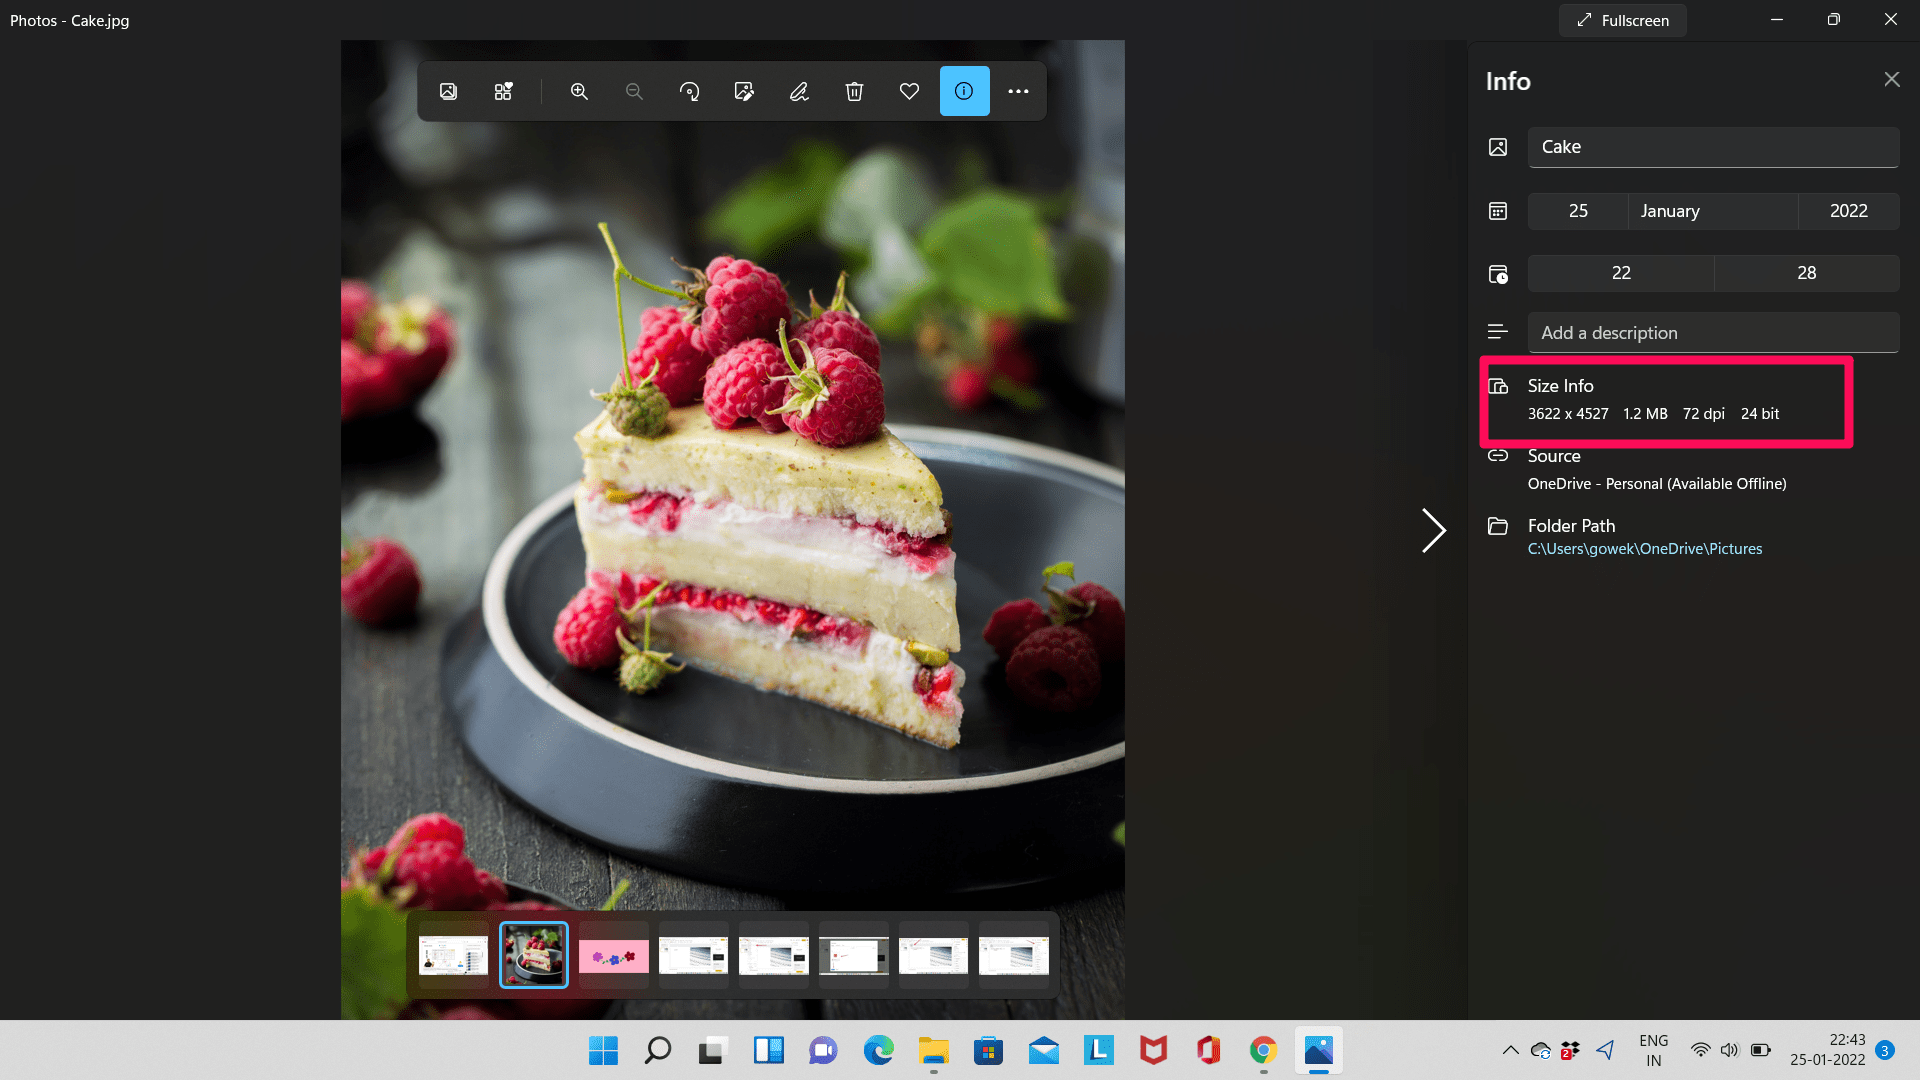
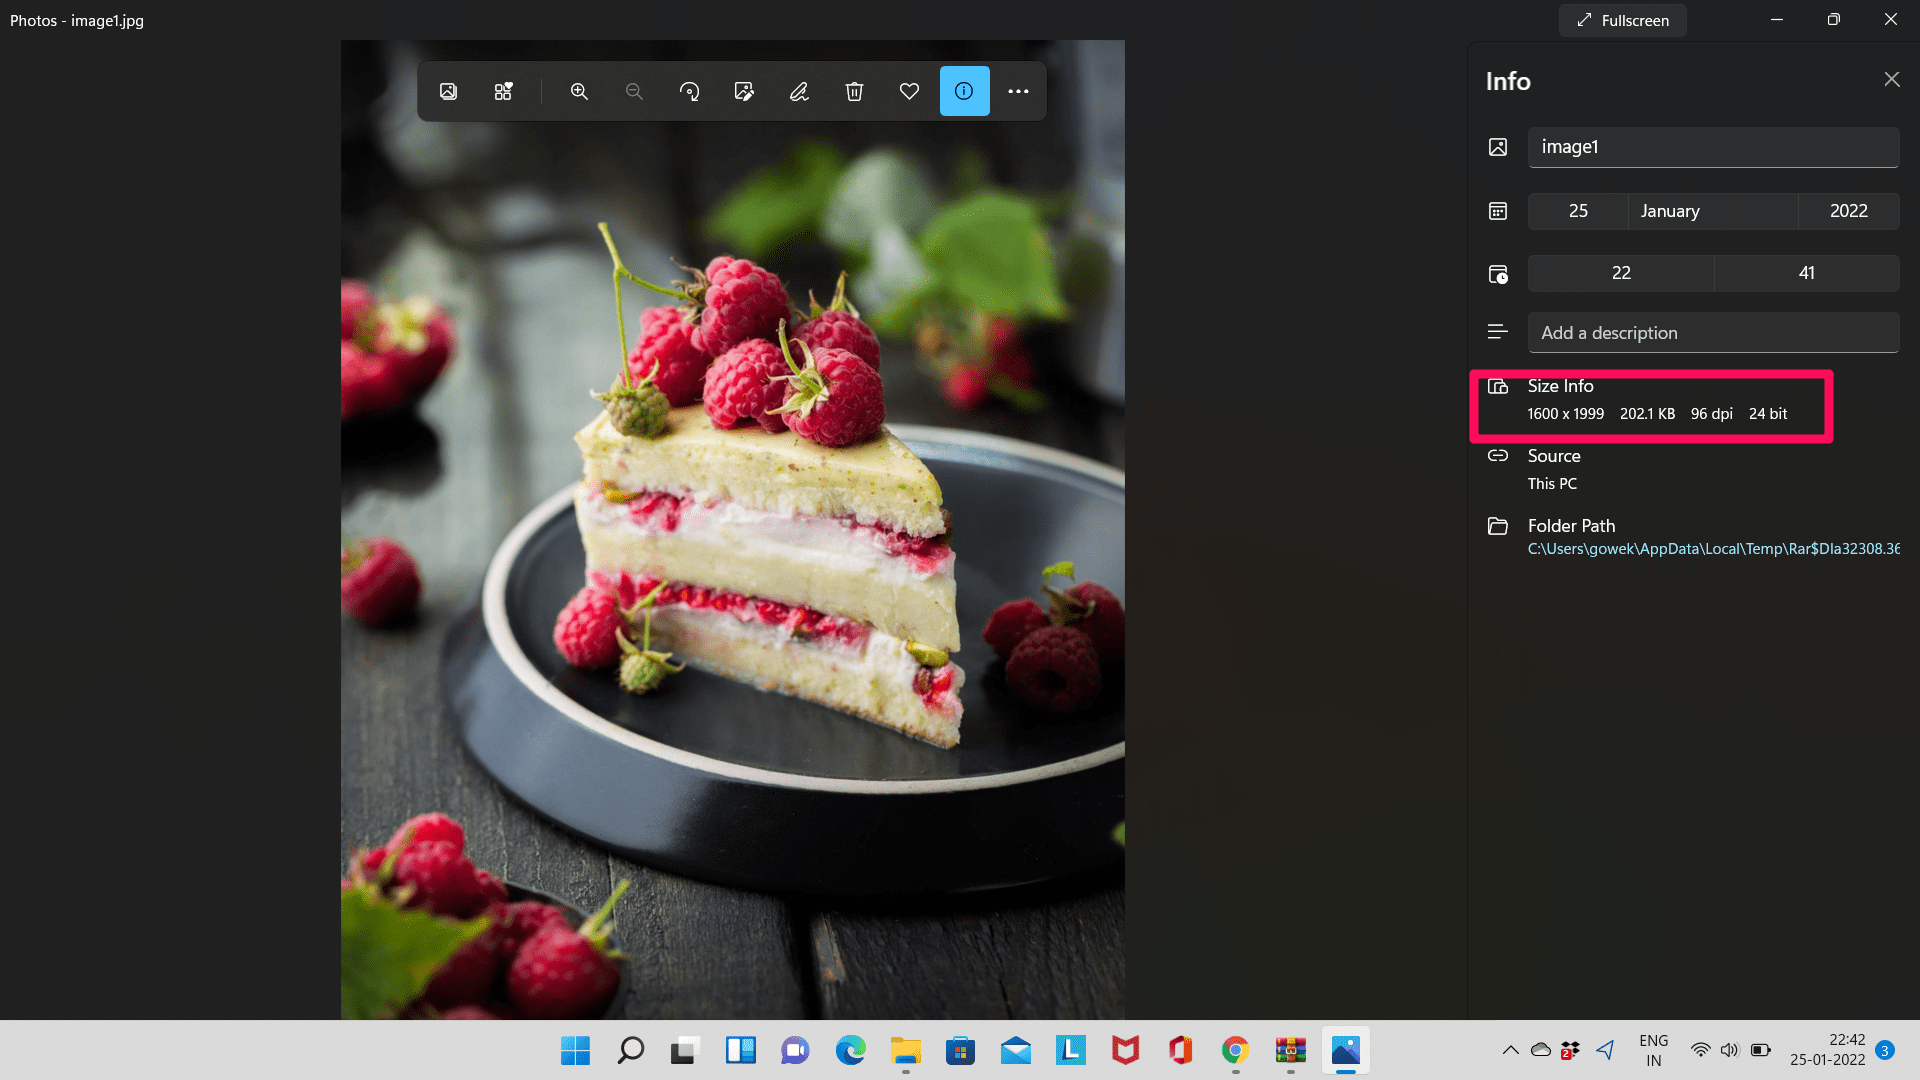
Let us tell you about an experiment we conducted to verify that this problem exists. We took an image whose size was 1.2MB and 3622 x 4527 pixels. We added the same image in Google Slides, where it was changed to a size of 202.1KB and 1600 x 1999 pixels.
The image in Google Slides is clearly of lower quality.
Here are the original image details

And here are the modified image details for comparison

How to Stop Images from being Blurred after Inserting in Google Slides?
There’s no guaranteed way of preventing the decline in the quality of images. Users can try to manually compress the images to prevent the image from being ruined. To do this, users can use a variety of third-party apps. Hundreds of such apps are available on the internet. ResizePixel, BeFunky, Photo Resizer are some of the tools that can be given a try for resizing images.
If you upload the photos to slides, then slides will rasterize the image size according to their own calculations, but if you manually compress the image to the maximum limit, then you reduce the file resolution without compromising the details.
How to Resize Images on ResizePixel?
ResizePixel is a free online tool. The online image resizer from ResizePixel allows users to modify the pixel size of images in a simple yet powerful way.
Given below are the steps for resizing an image on ResizePixel.
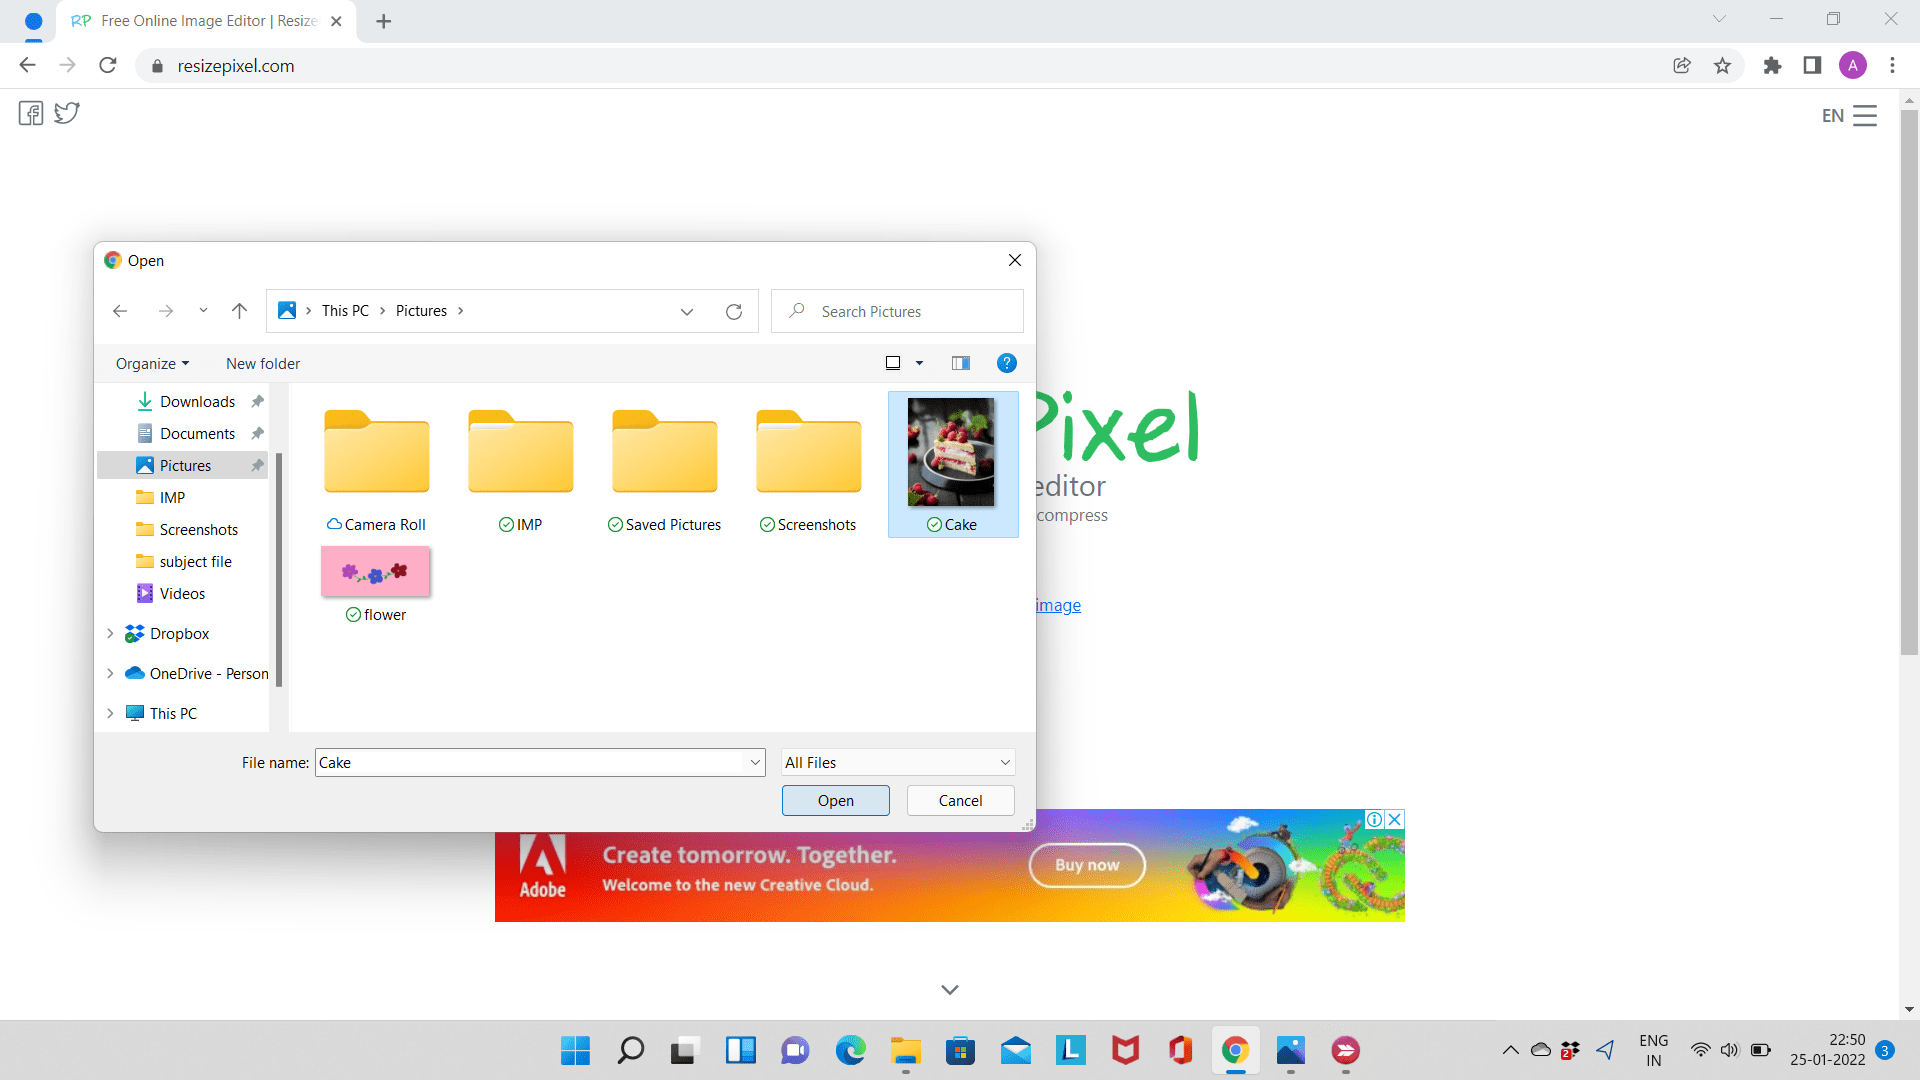
Step 1: Go to the ResizePixel platform.
![]()
Step 2: Choose the image you want to resize. Make sure that you have the right to use the image in your document.

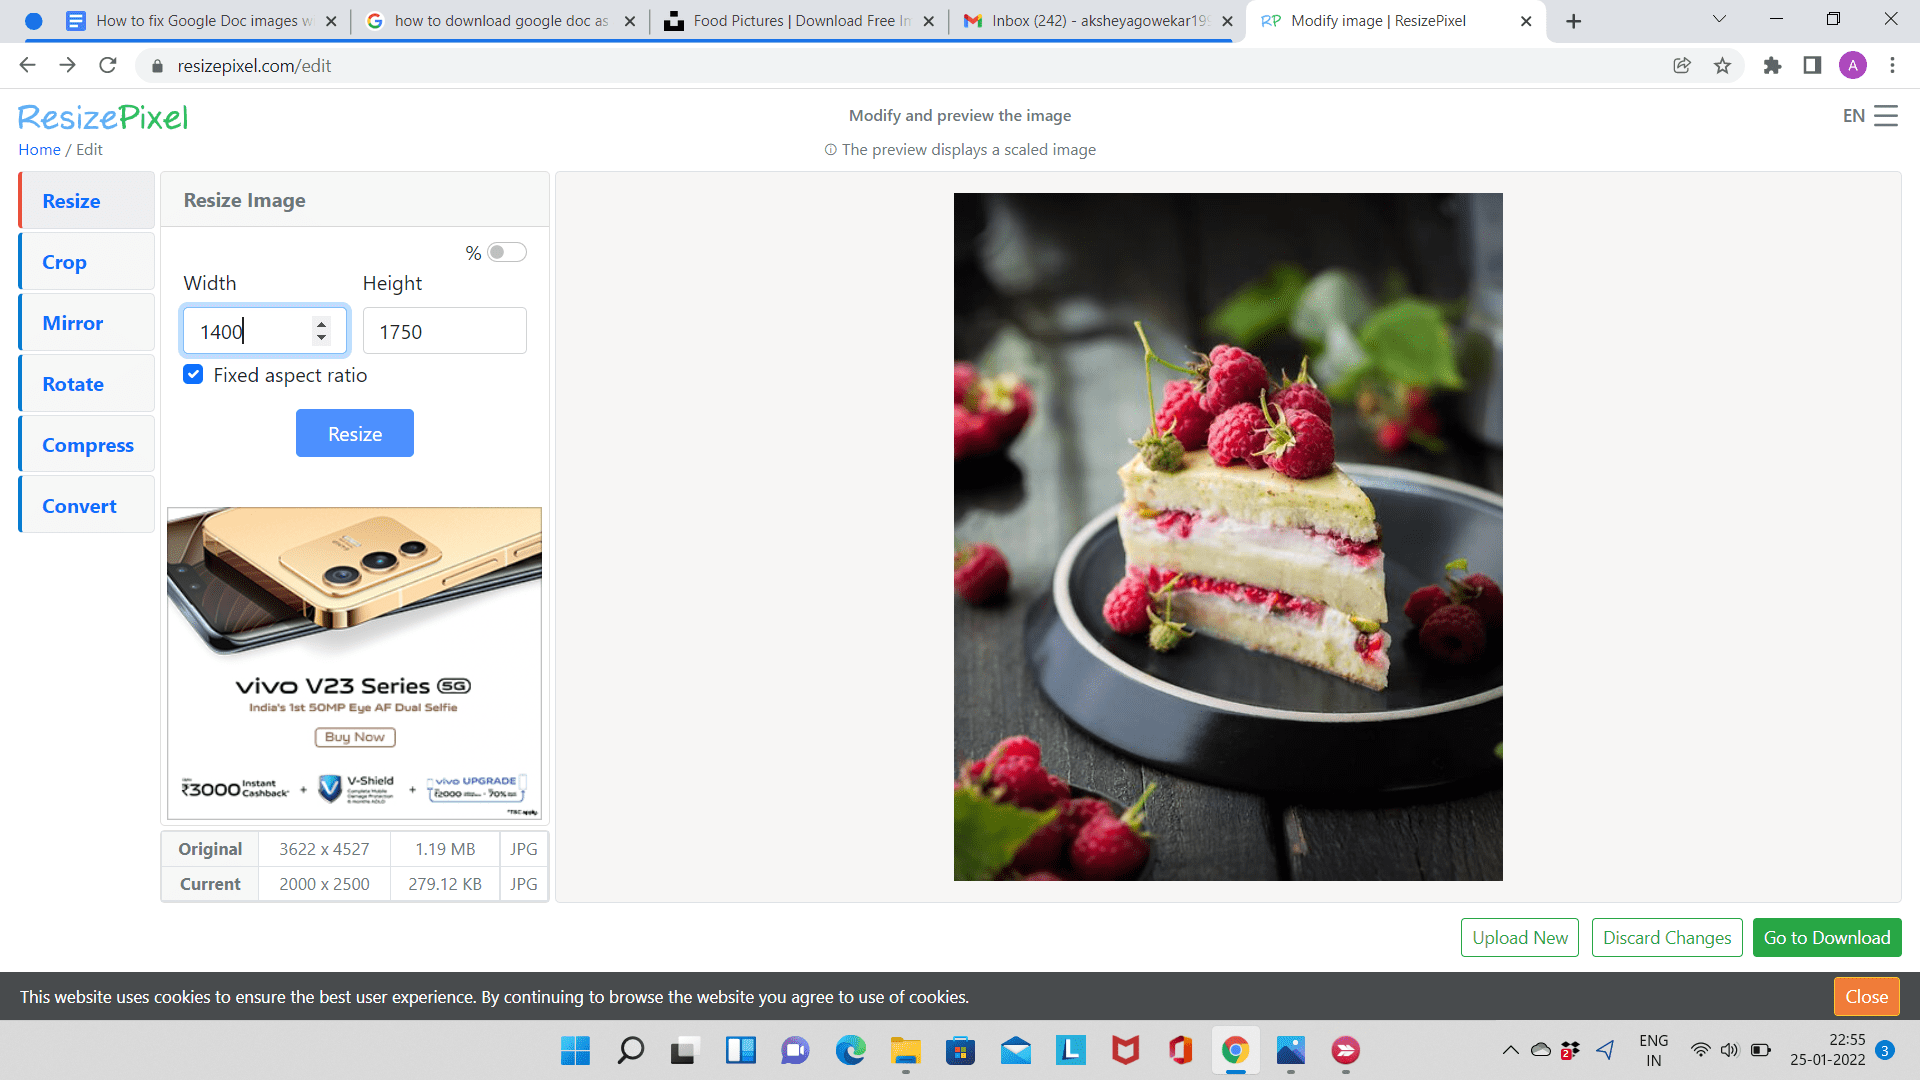
Step 3: The image will be uploaded. Resize the image as per your needs.

Step 4: Once you are satisfied, download the image from the website.
Here is a side-by-side comparison of the two images if you are skeptical of the solution. On a closer look, the manually compressed image looks better than the original image uploaded to Google Slides.
Conclusion
Thus, we’ve laid out the possible reasons behind the downgrade of image quality in Google Slides and also provided solutions. We hope this guide helped you solve your problem. Try the solution mentioned in our guide and let us know if you liked it.
