OneDrive is one of the best cloud storage services that you can try on your Windows 11 PC. It comes with a Microsoft account and offers 5 GB of free storage to all users. It also has paid plans that provide more storage and additional features.
Considering the storage that OneDrive offers, you can also use it to backup Windows 11. There can be different reasons because of which you are trying to backup your Windows system to cloud storage. It can be that you are continuously facing ransomware attacks, or you are suffering from a corrupted hard drive. Whatever the reason may be, it’s essential to know how to backup Windows 11 to OneDrive, and this post is all about that.
Here, we will be sharing different methods using which you can easily backup your Windows 11 settings to OneDrive. So, without any further ado, let’s get started.
How to Backup Windows 11 to OneDrive?
There are three ways using which you can easily backup Windows 11 to OneDrive. First is the official way offered by Microsoft. The second one is a workaround, or better say a “third-party” workaround. Whereas, in the last method, we will be taking the help of OneDrive itself.
In the first method, we will create a Windows 11 system image using the built-in backup tool offered by Microsoft. After that, we will put the created image in the OneDrive folder to sync all the data to the cloud. And in the second method, we will use a third-party application called “AOMEI Backupper Standard” to get the work done.
Method 1: Backup Using OneDrive
Among all the methods, this is the easiest way by which you can backup Windows 11 to OneDrive. So, here are the steps you need to follow. The OneDrtive app is by default installed on your Windows 11, you can use these features to backup the files, images, videos, and other docs to your OneDrive account.
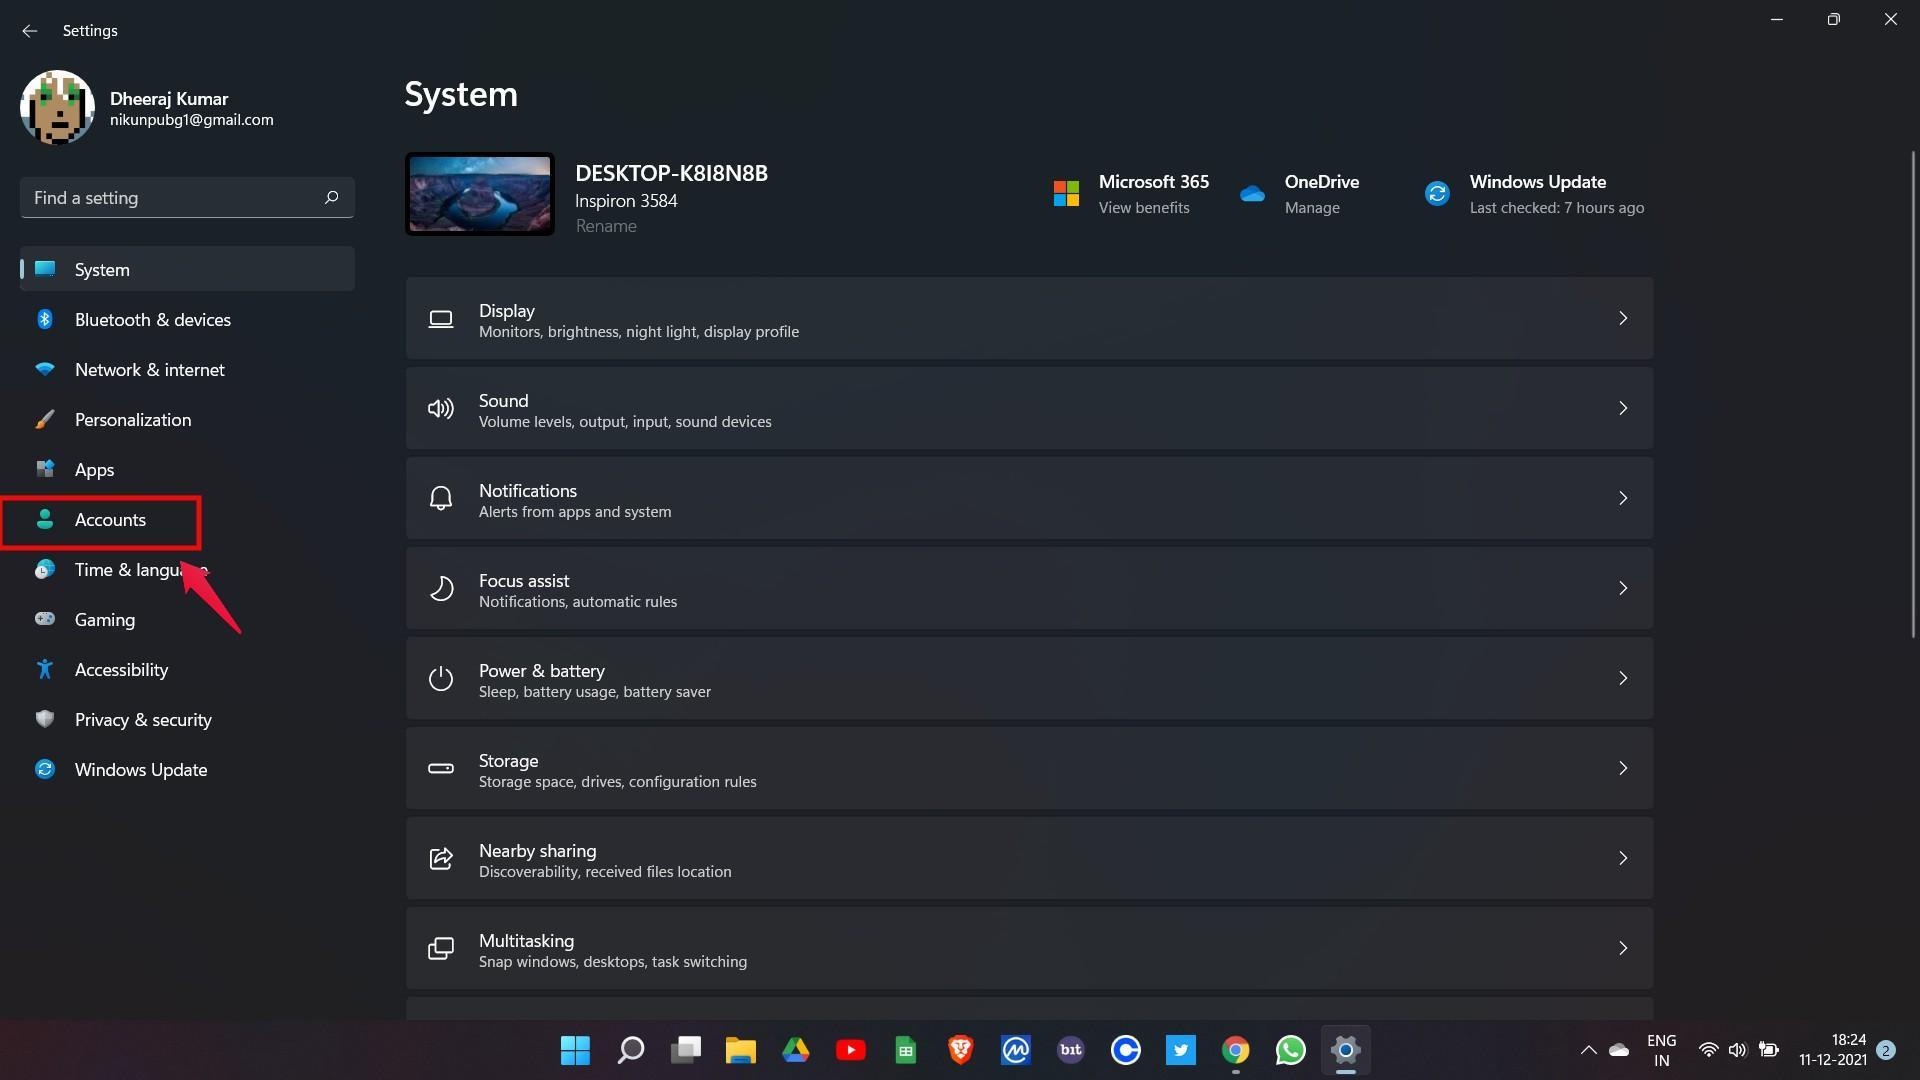
- Go to Windows Settings.
- Tap on “Account“.
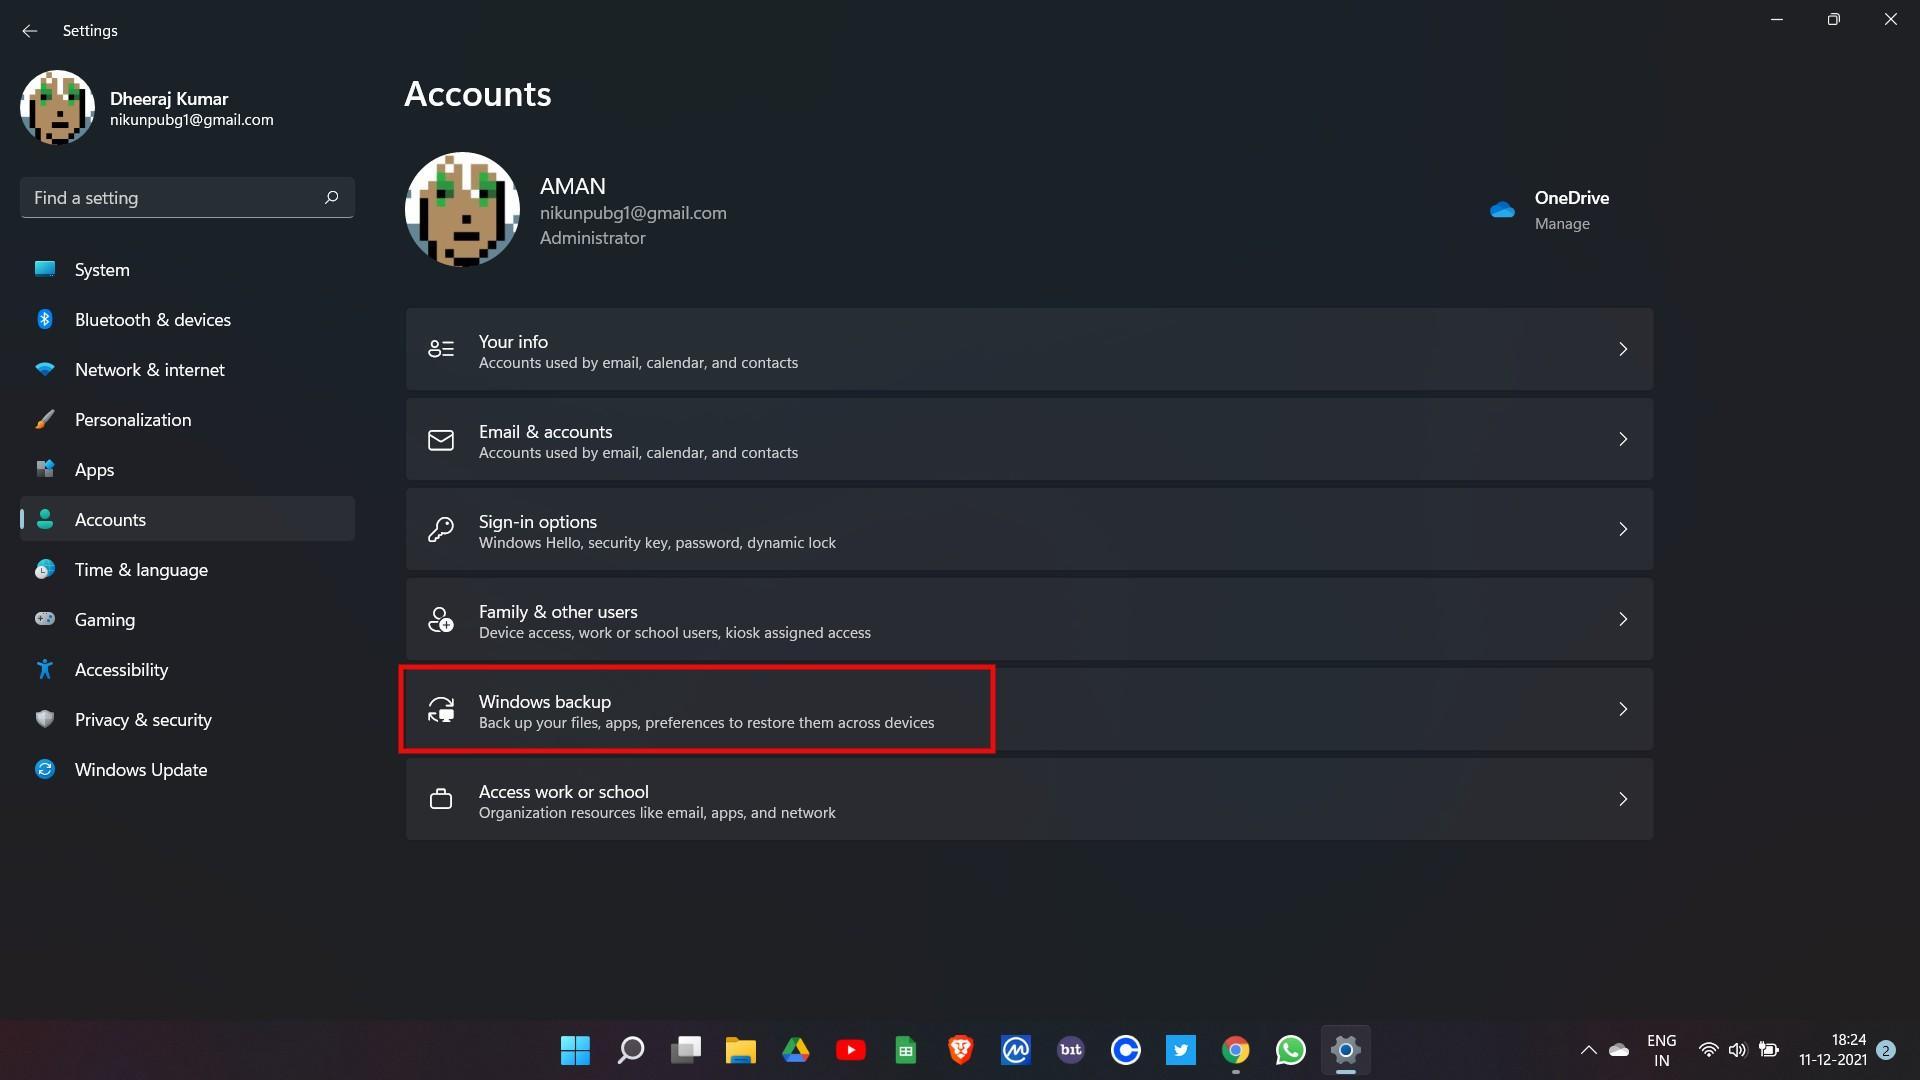
- Go to “Windows Backup“.
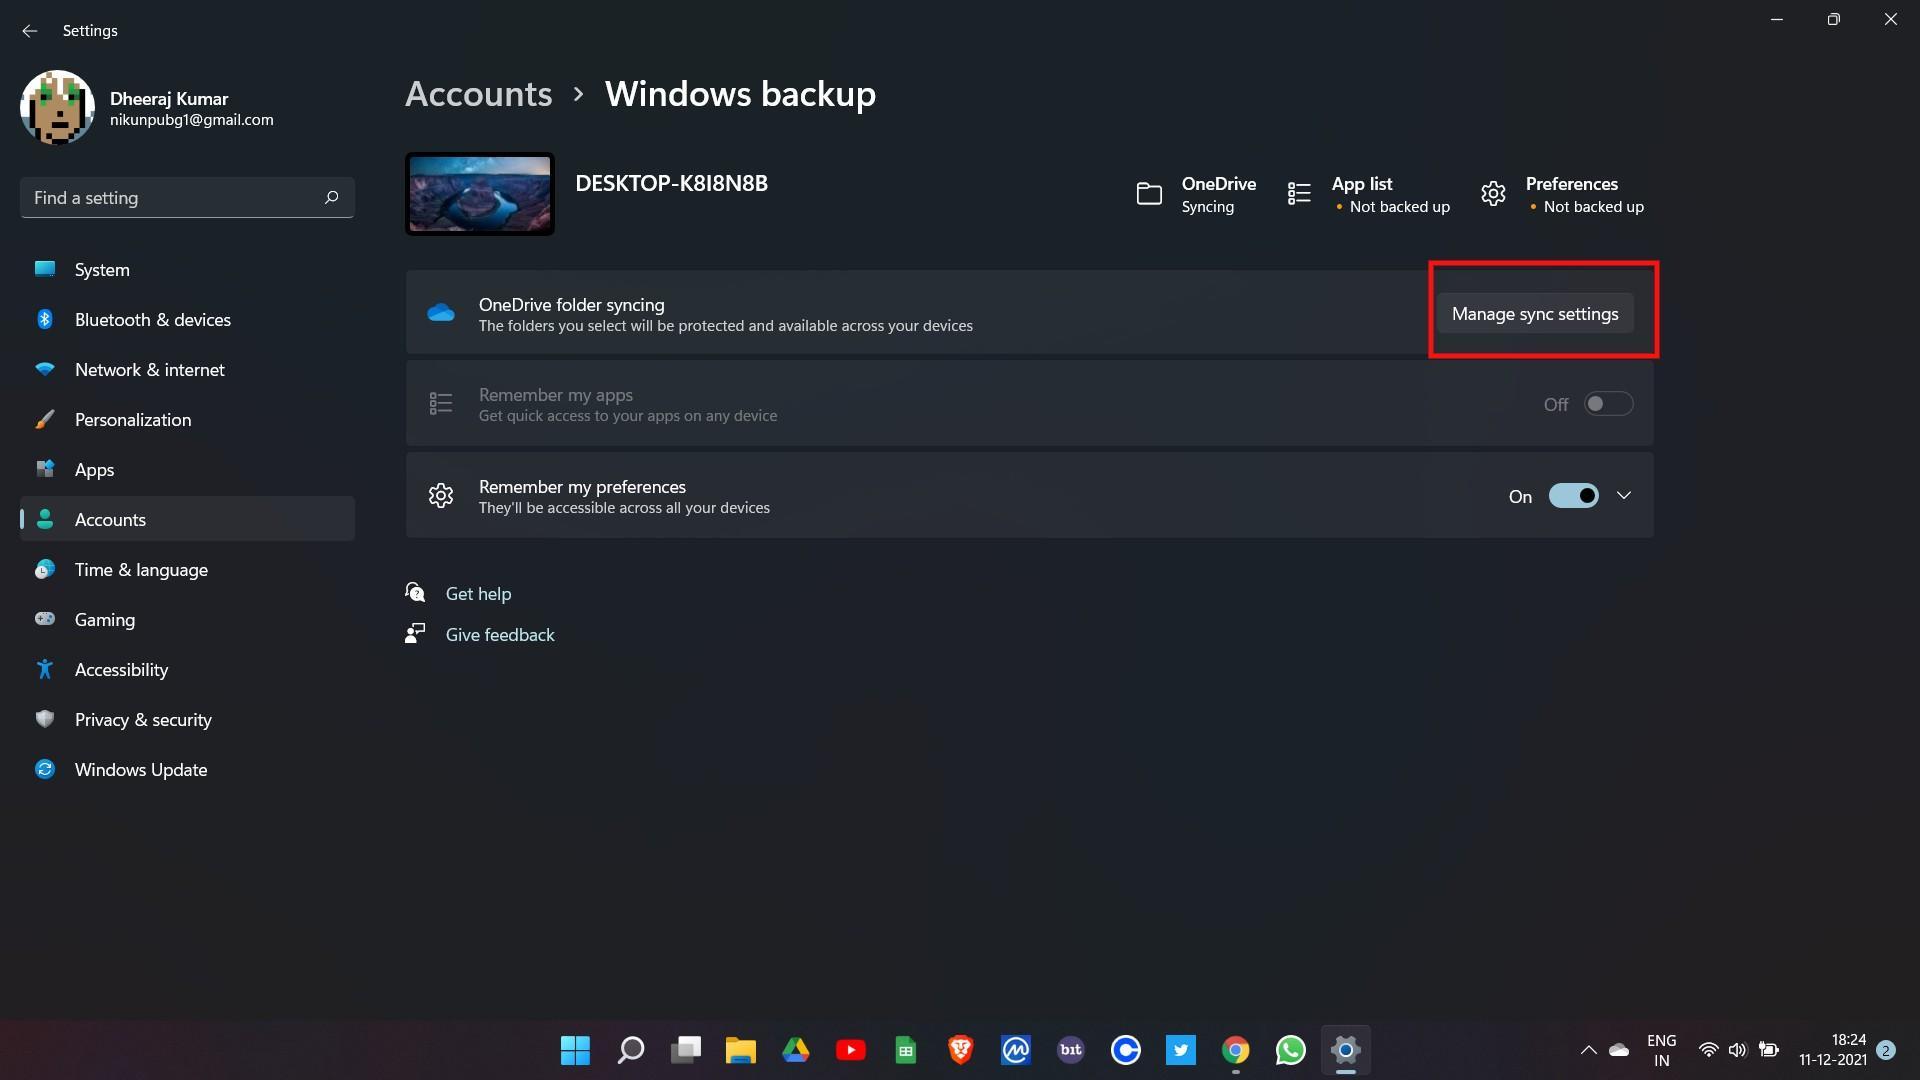
- Tap on “Manage Sync Settings“.
- Now, a Window will pop up. Select the folder that you want to backup.
- Lastly, select “Start Backup“.
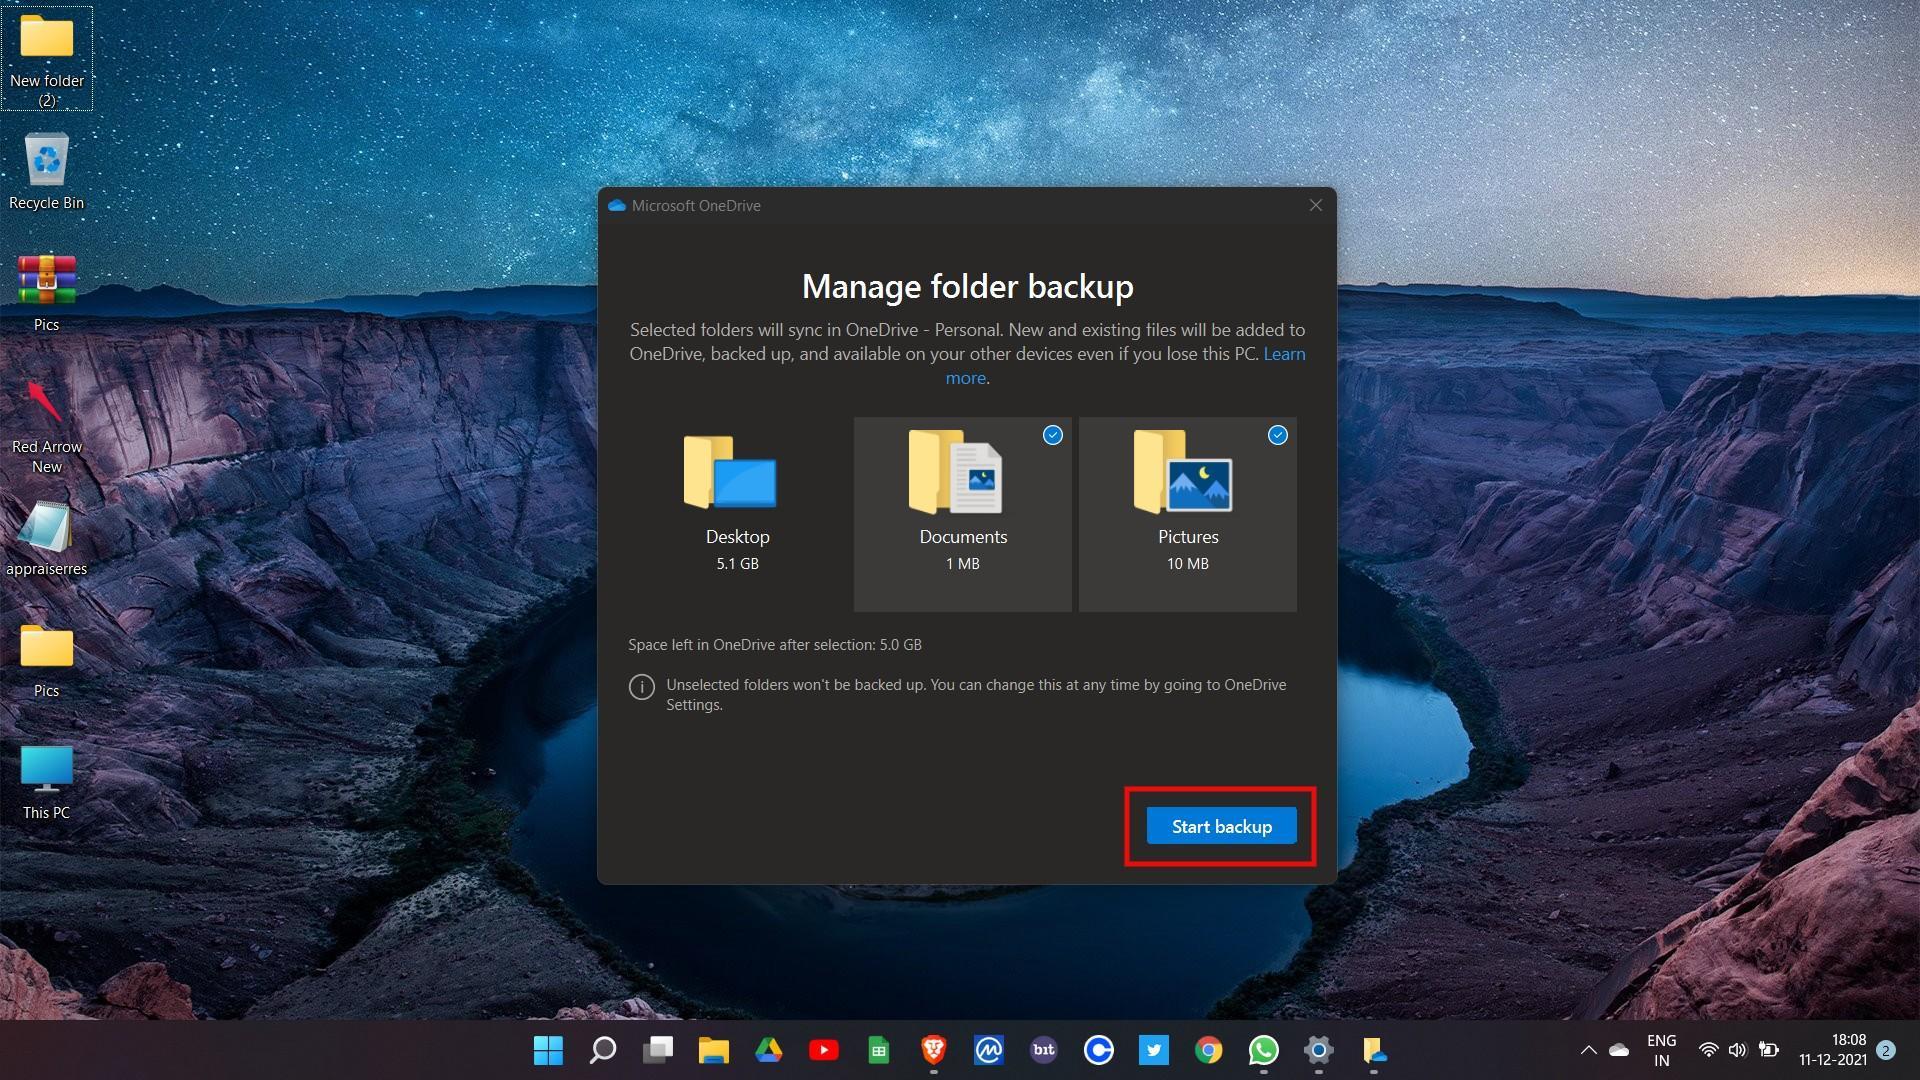
That’s it. Depending on the number of items you’ve selected, OneDrive will take a few seconds or minutes to backup everything selected. If you make any changes to the folder then the same will be backed up and synced with OneDrive storage.
Method 2. Backup Windows 11 to OneDrive By Creating System Image
Windows comes along with a built-in backup and restore tool offered by Microsoft. You can use this tool to create a system image, later back it up on any external hard drive, DVD, or even on network drives without any hassle. Nevertheless, here are the steps you need to follow.
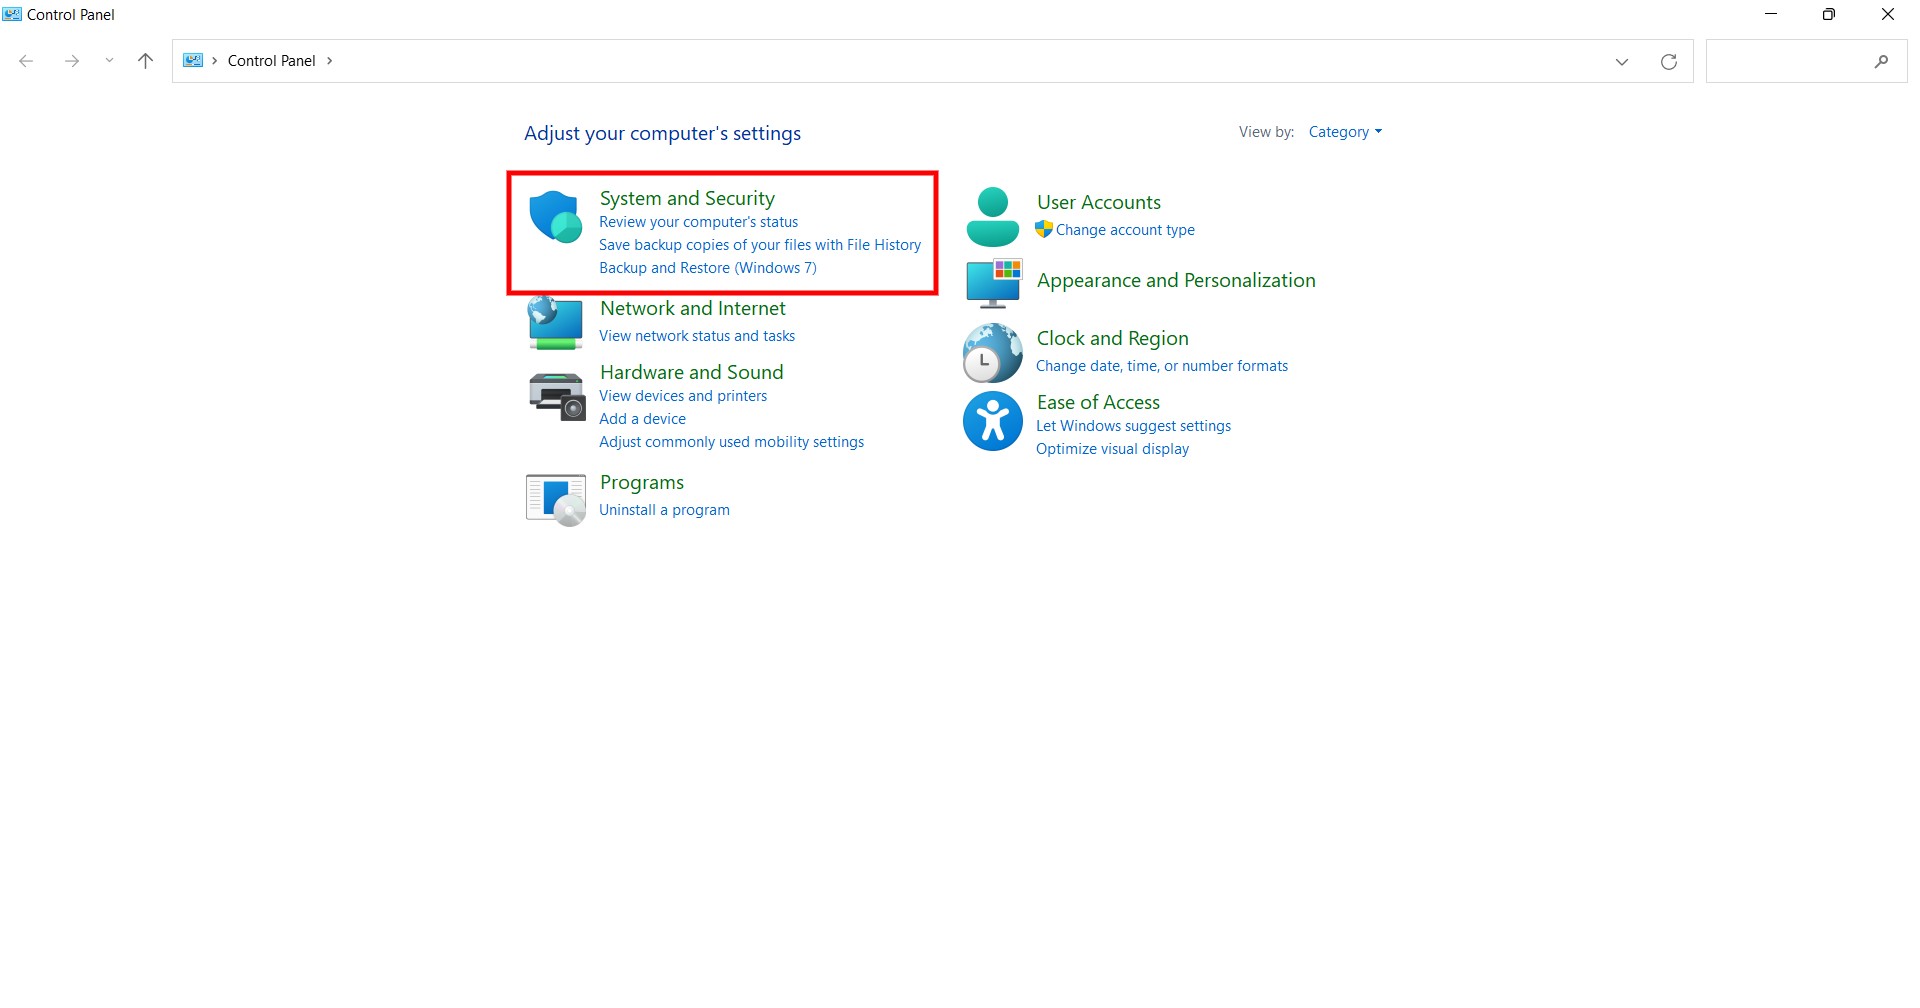
- Go to the Control Panel, and select the “System and Security” option.
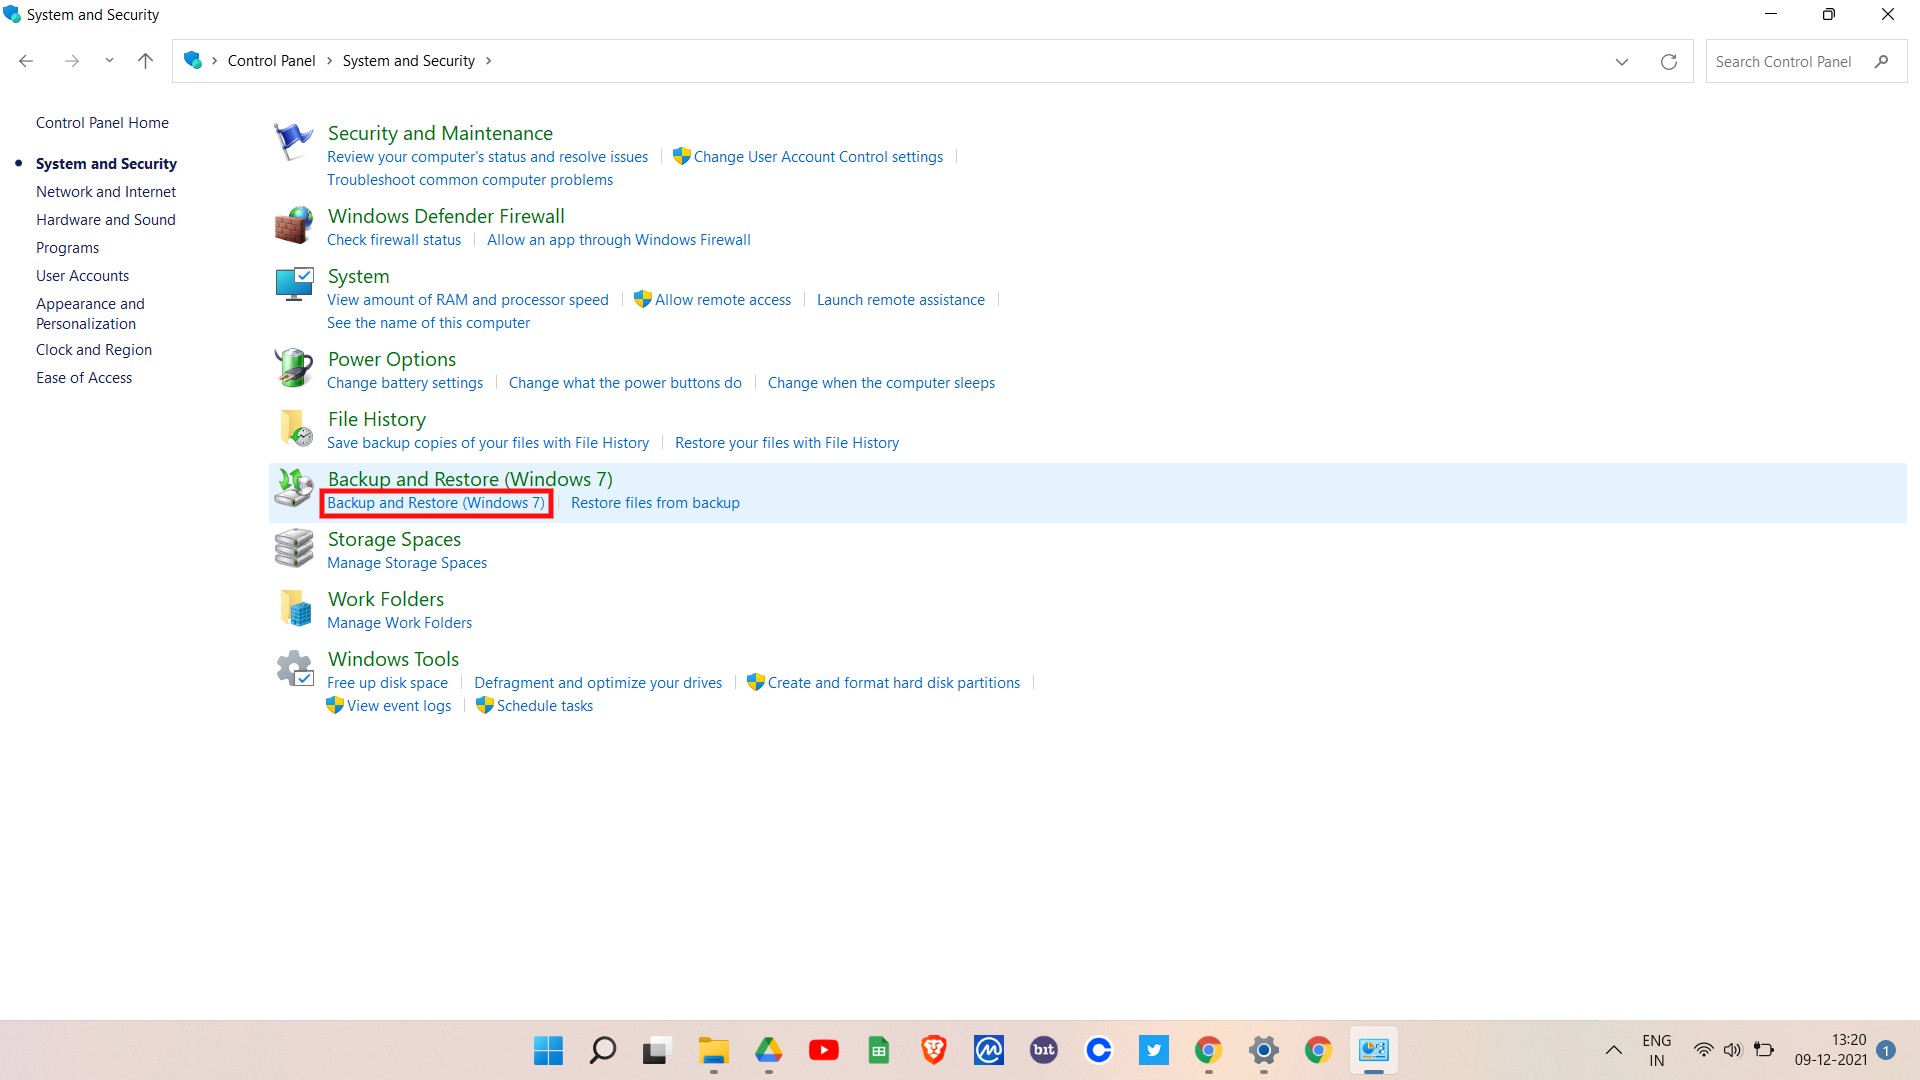
- Tap on “Backup and Restore“.
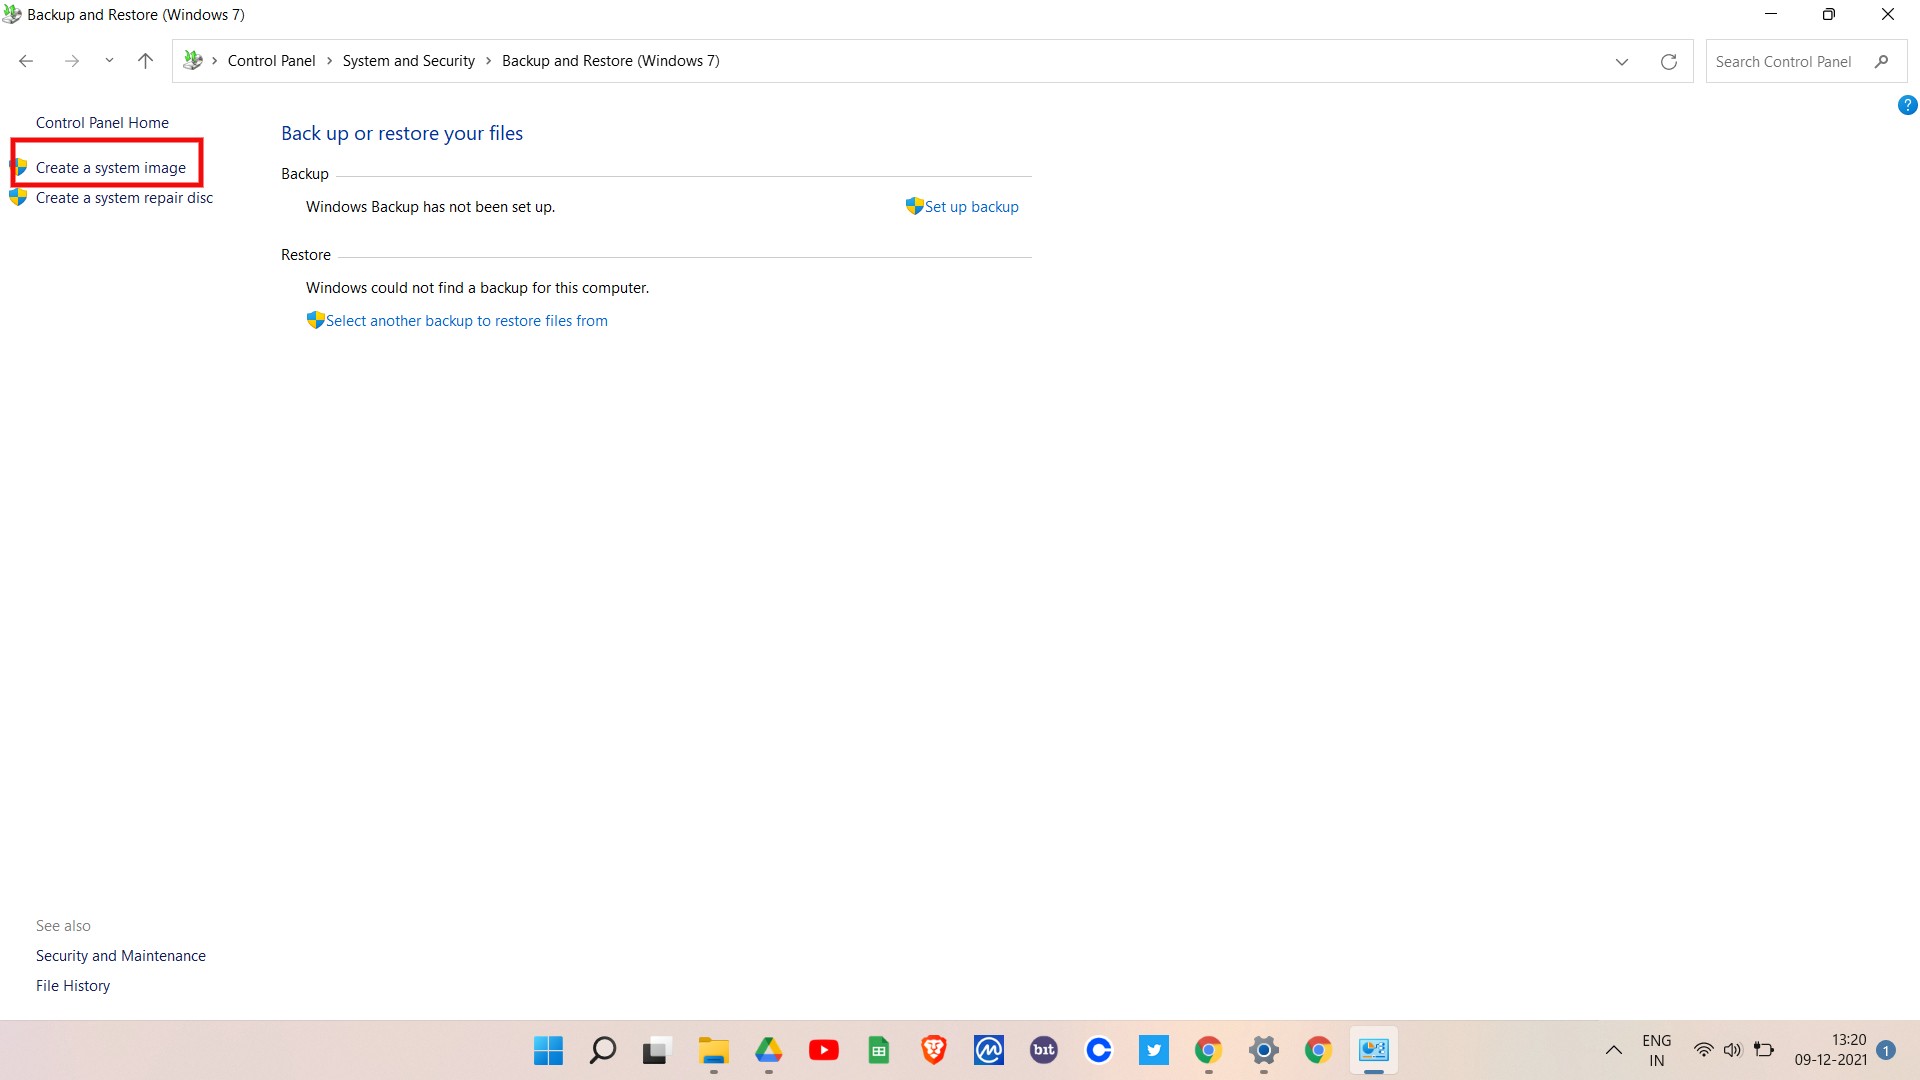
- Select “Create a system image” on the follow-up page.
- Select the drive in which you want to create the system image.
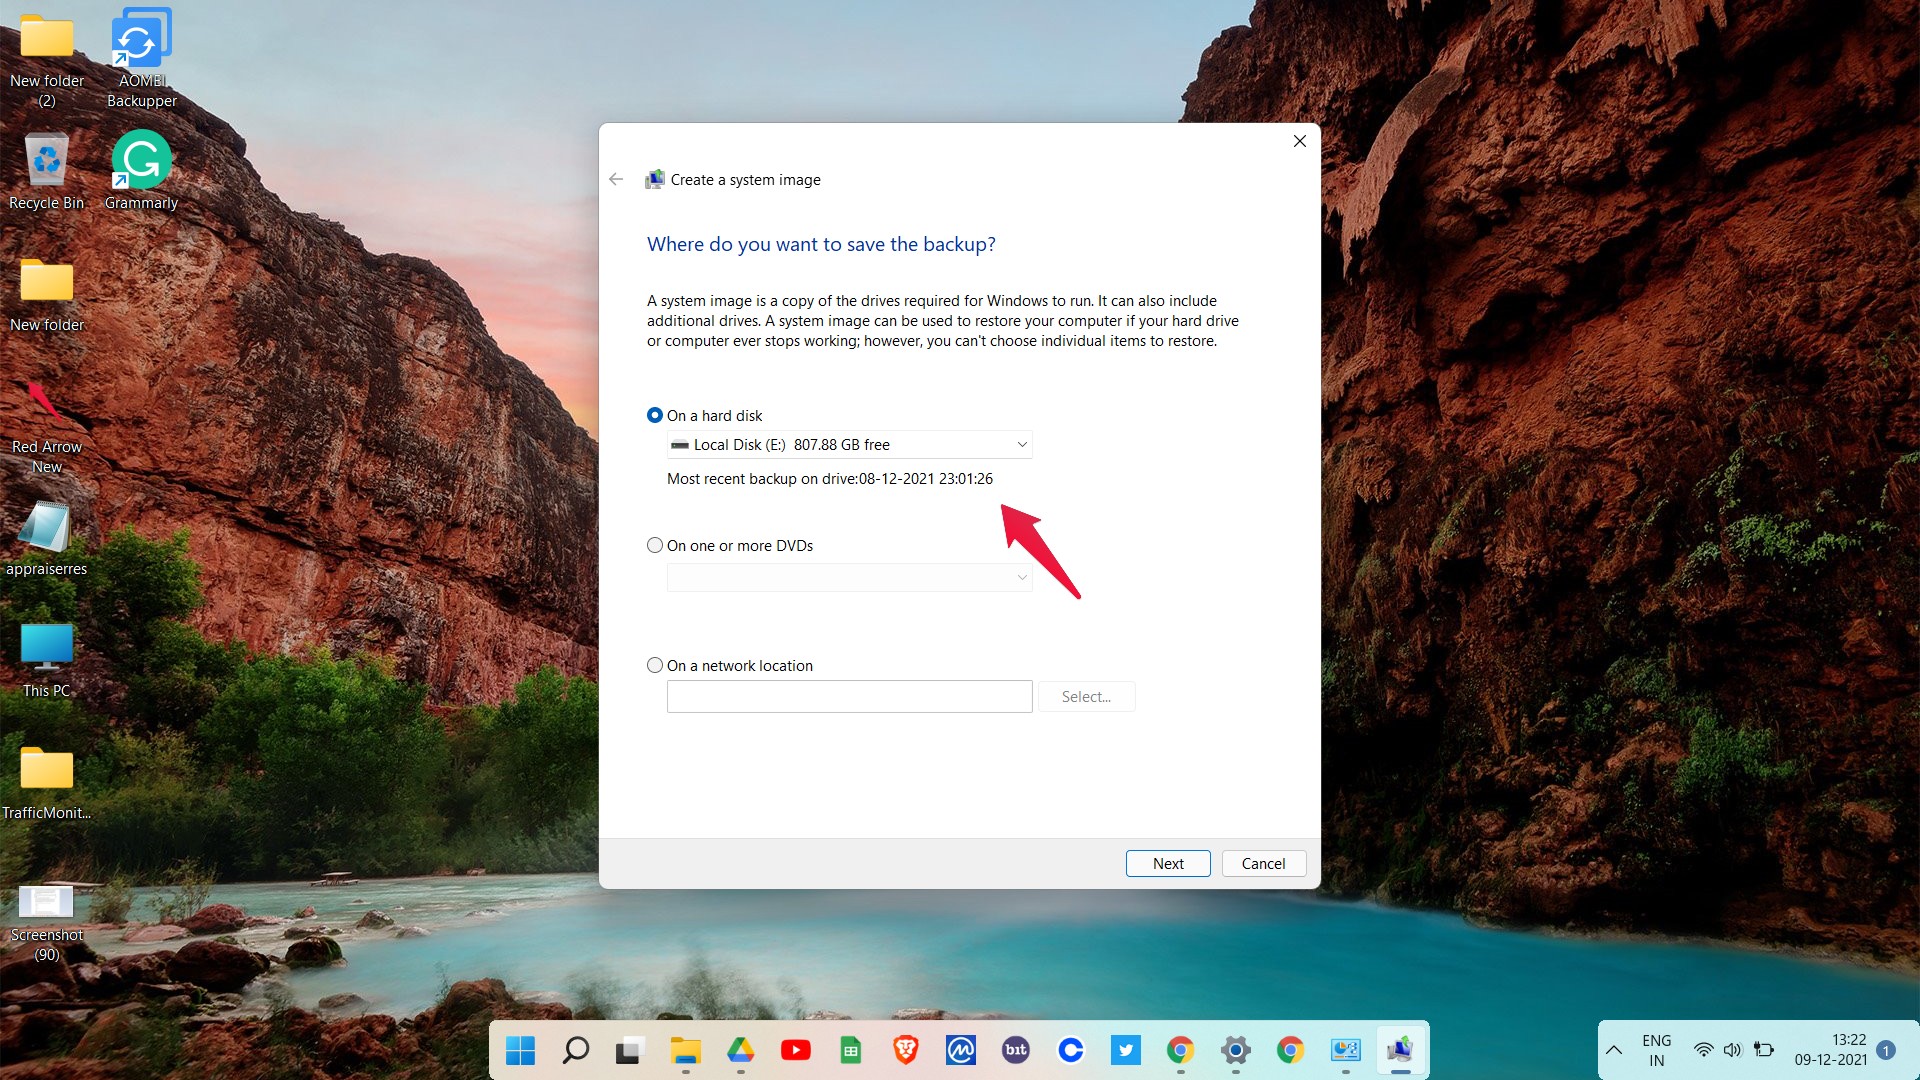
- Now, tap on “Next“.
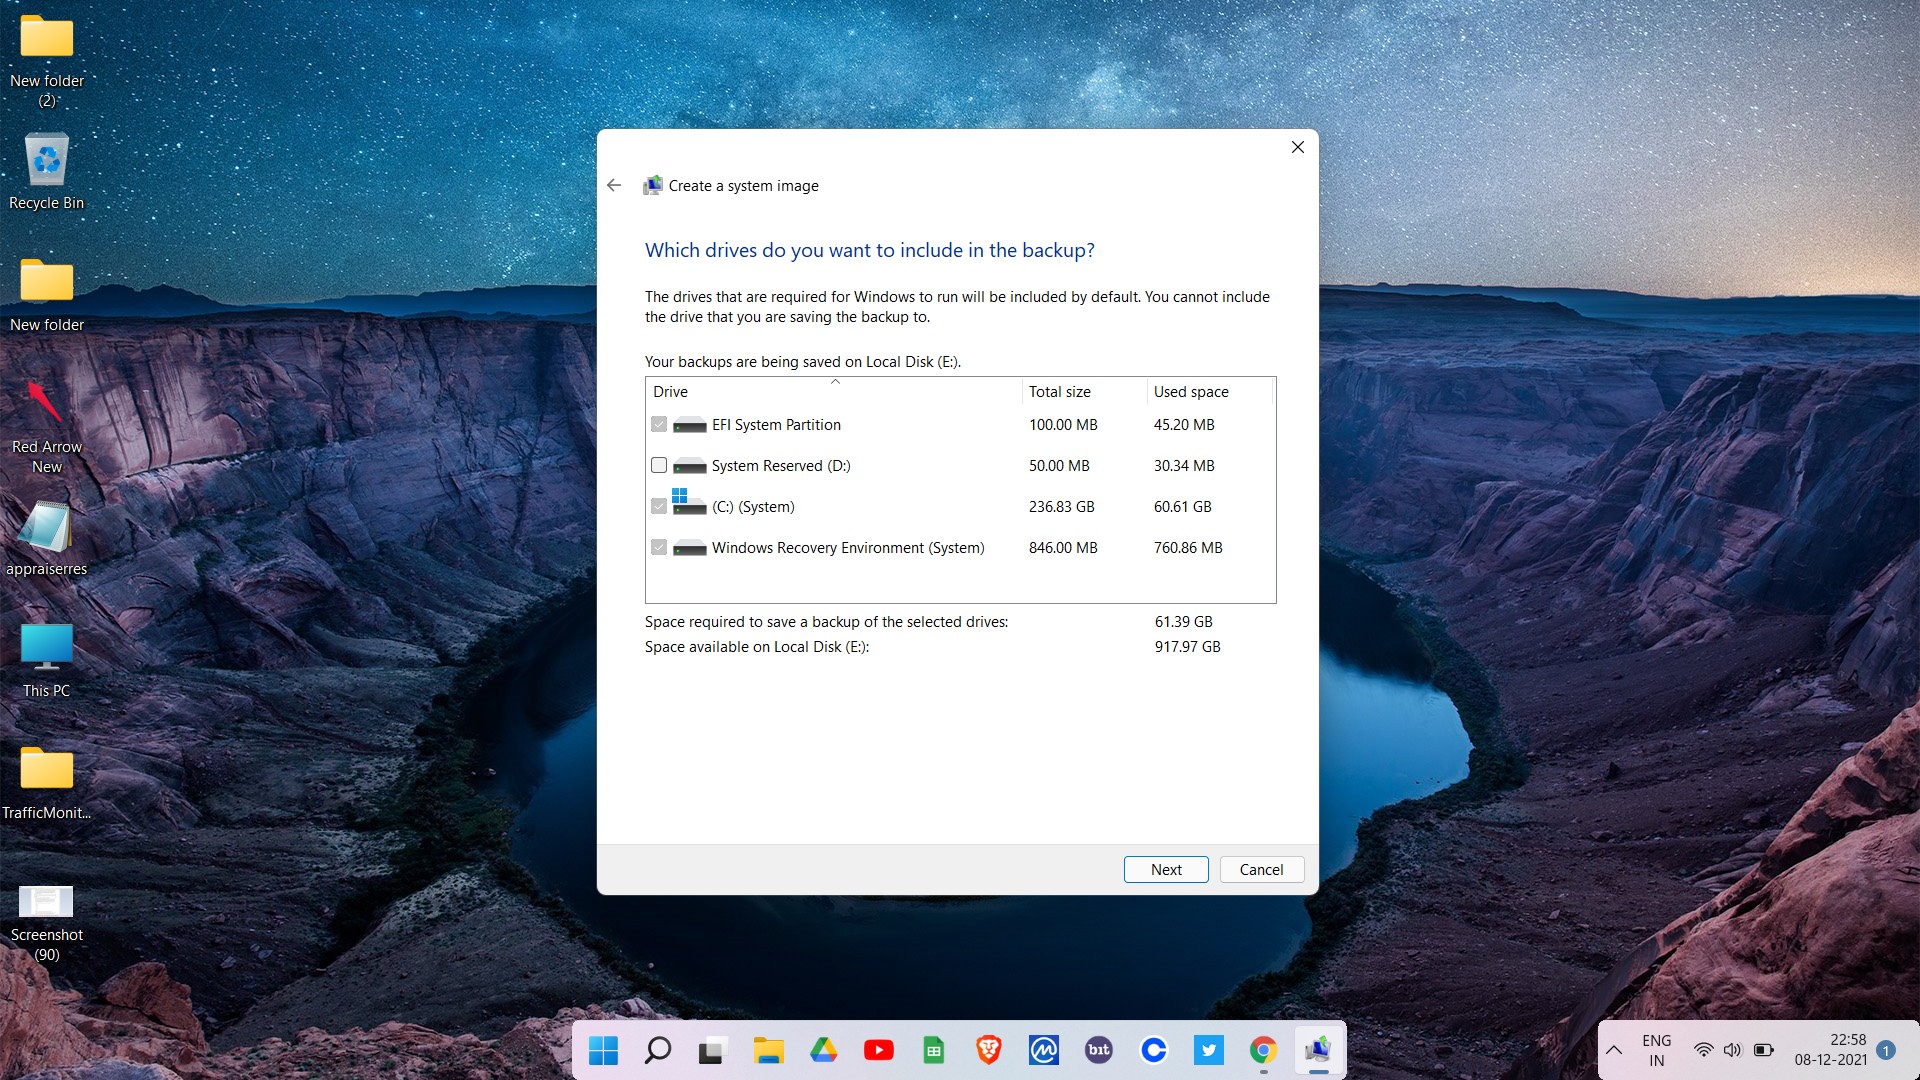
- Select the drives you want to include in the backup on the follow-up page. Make sure that drive is selected in which you have installed your Windows 11. After that, tap on “Next”.
- Lastly, tap “Start backup” to begin the process.
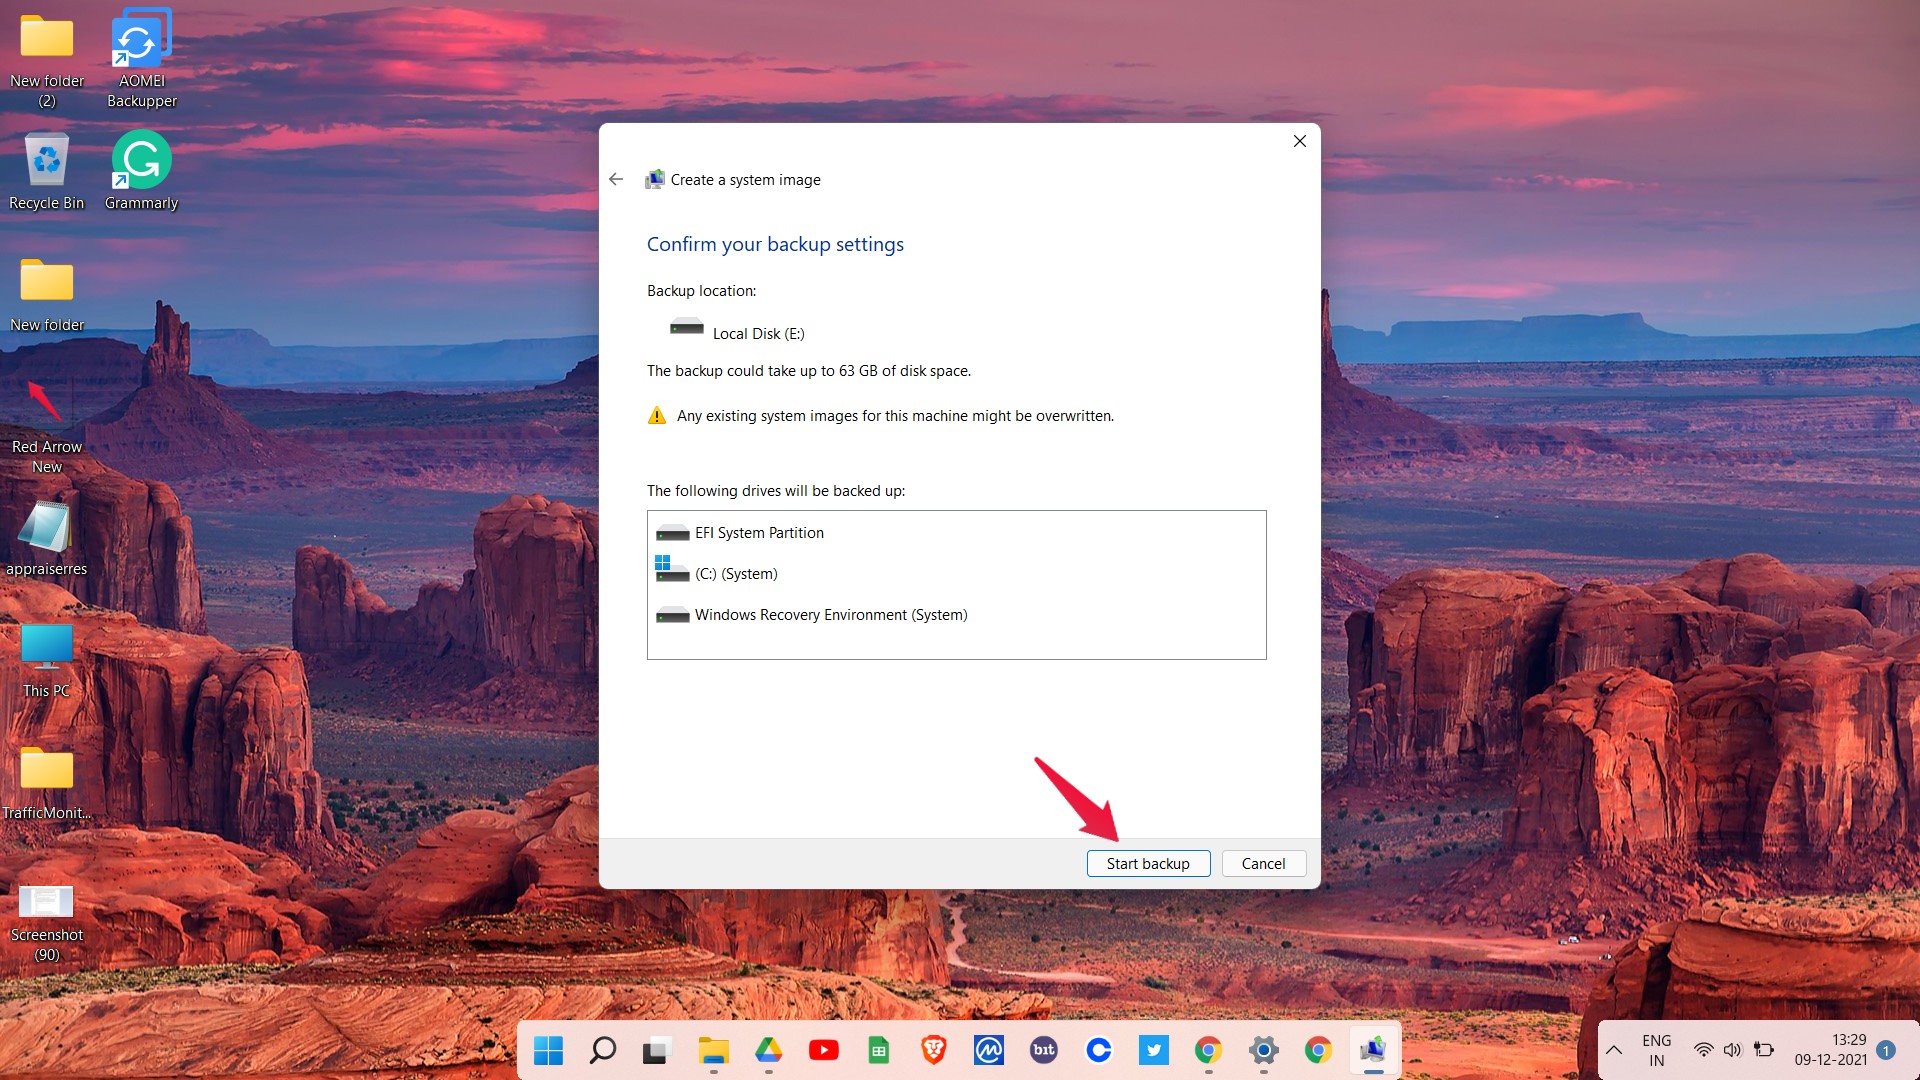
Depending on the items you’re backing up and your system specs, the backup process will take a few minutes. After that, follow the below-mentioned method.
- Go to the destination folder of your backup. The backup folder will be named “WindowsImageBackup“.
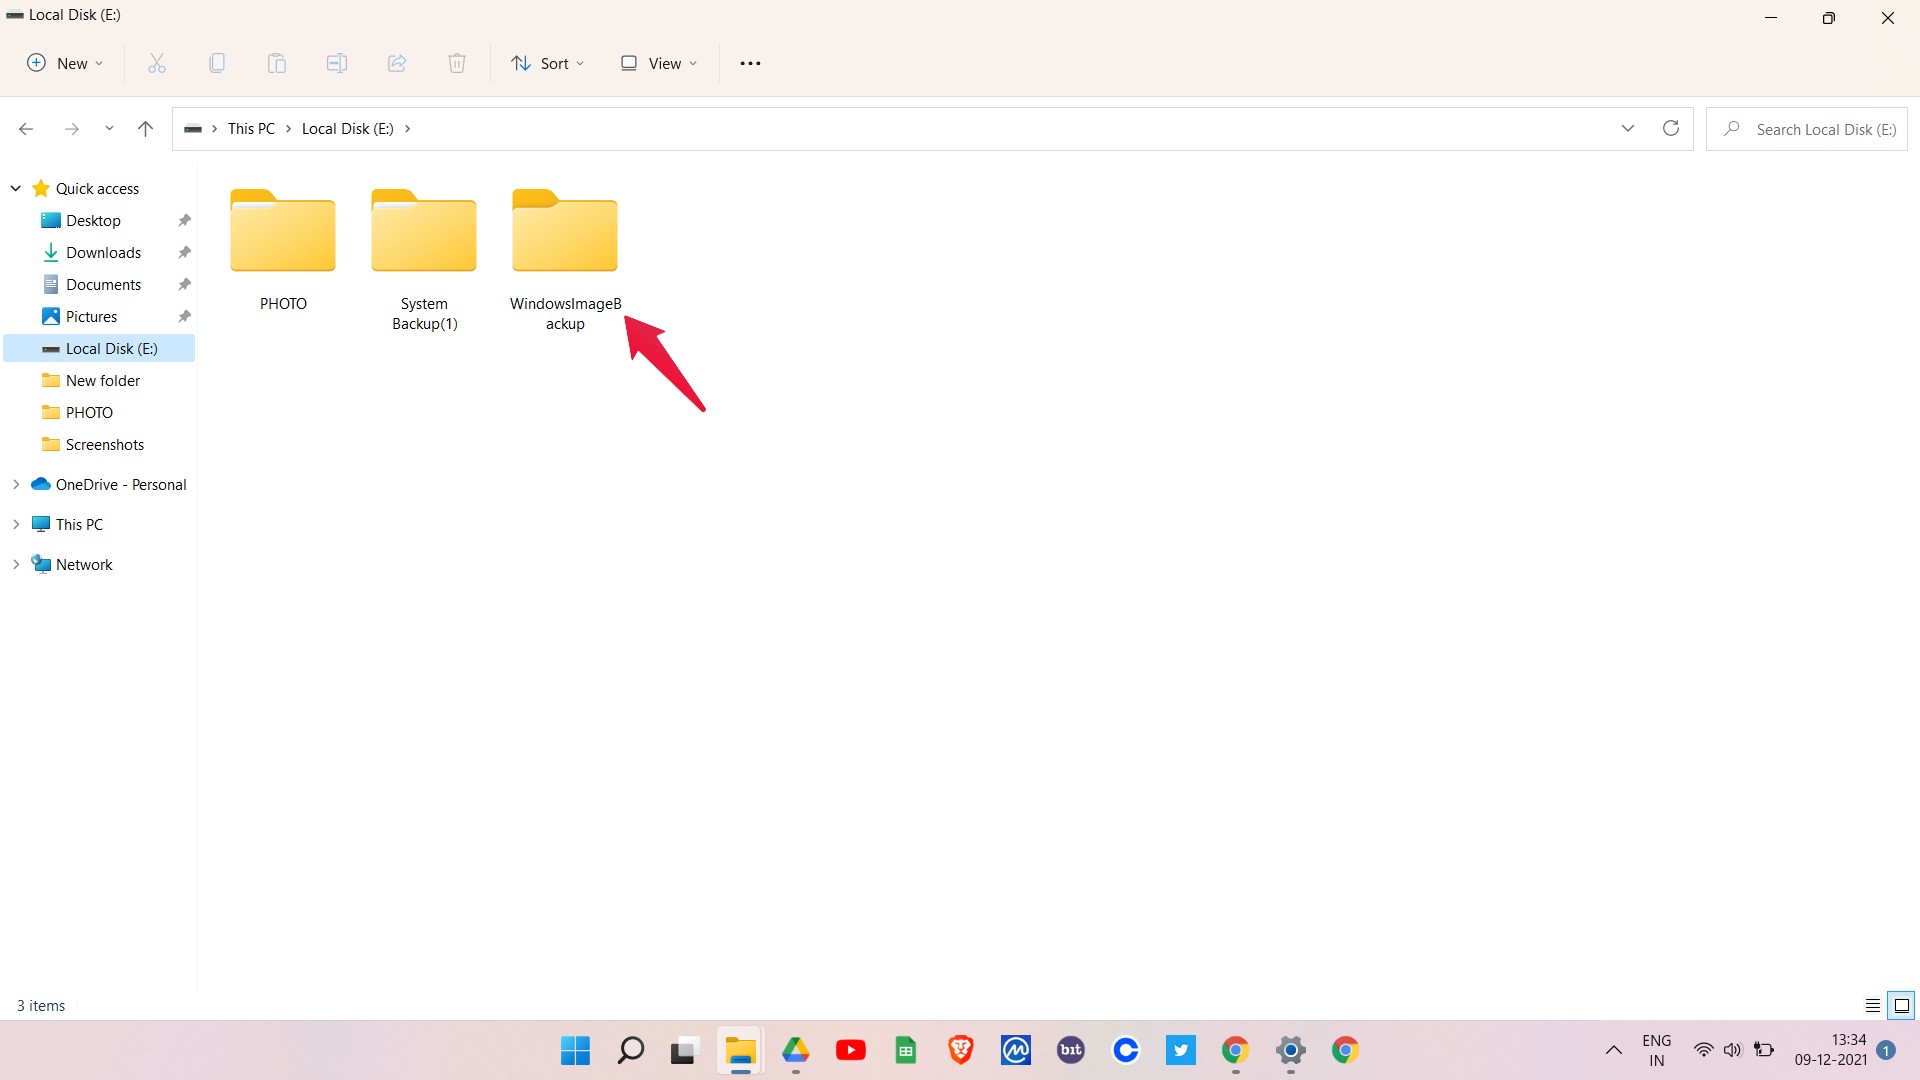
- Now, copy the folder, and paste it “OneDrive” folder.
- Tap on “Continue” if Folder Access denied notification pops up.
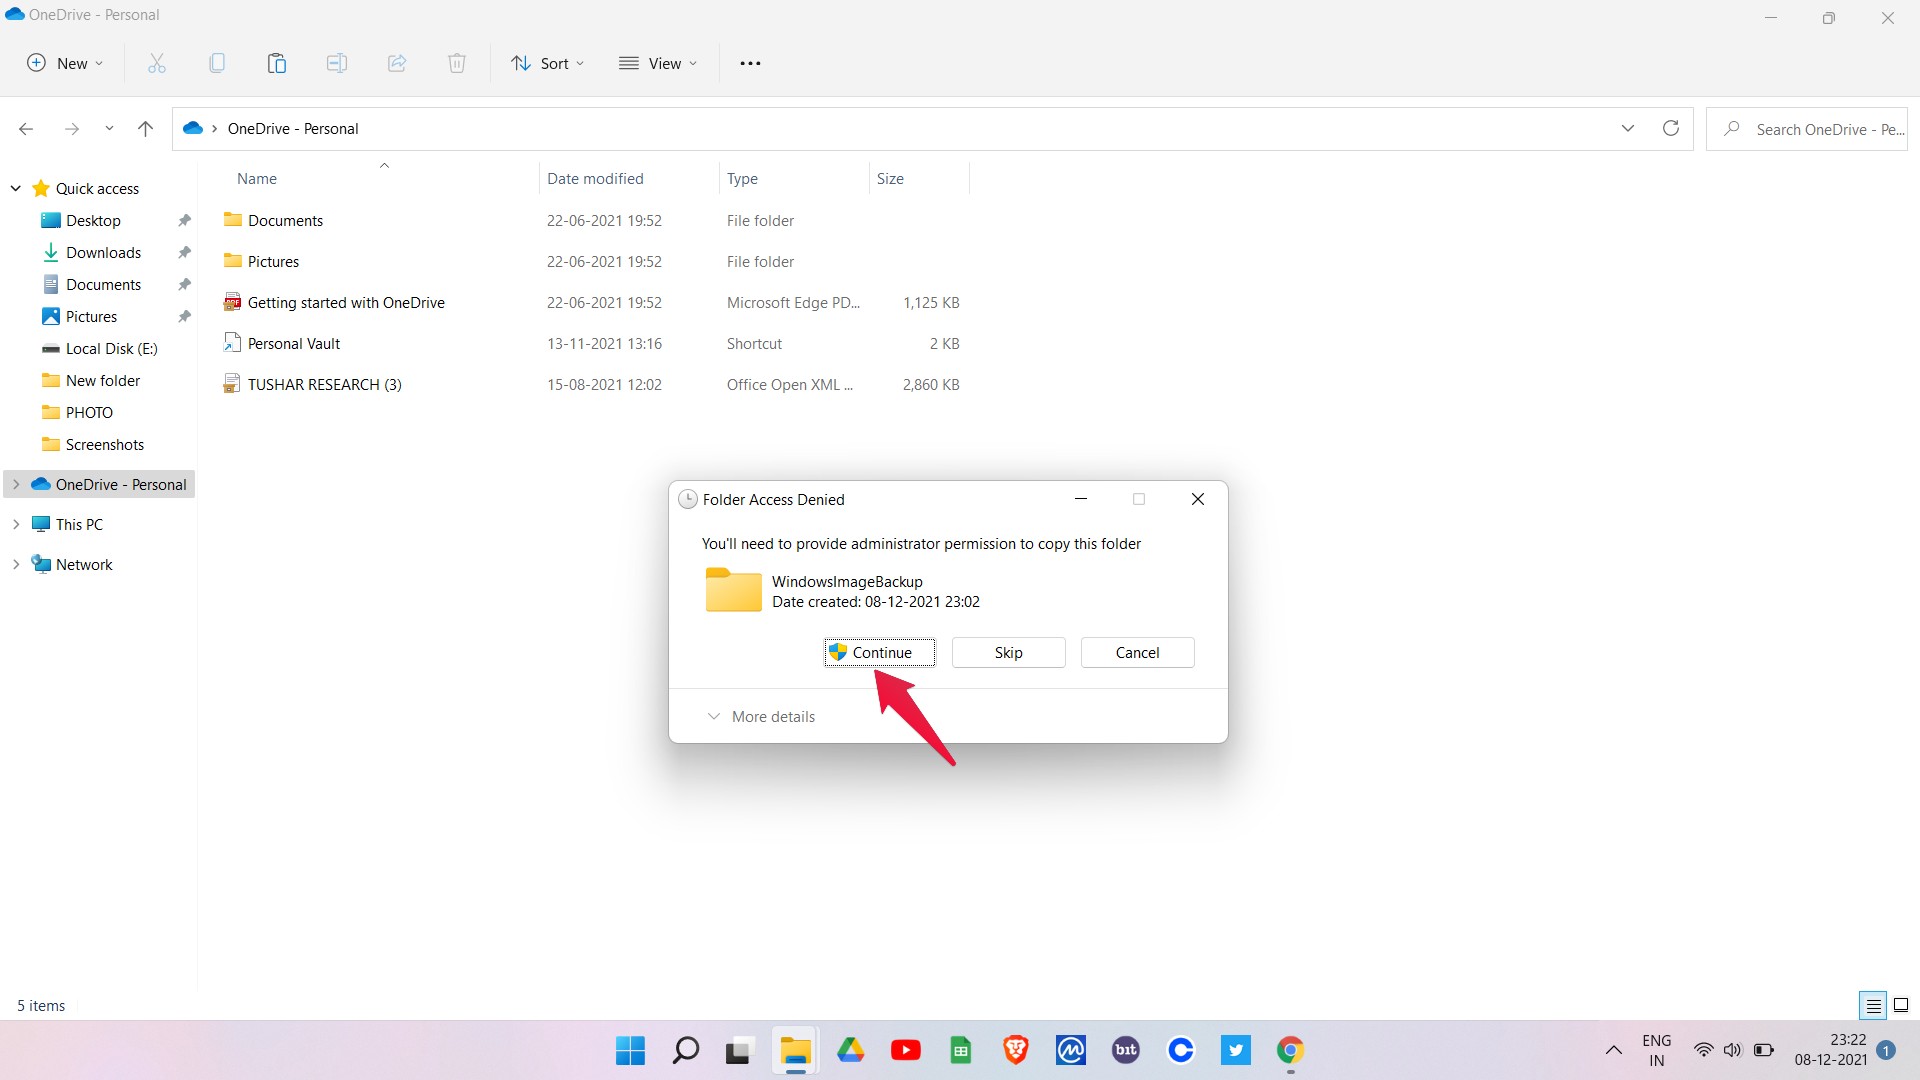
That’s it. You have successfully backed up Windows 11 to OneDrive.
Method 3. Backup Windows 11 to OneDrive Using Third-party Tool
You can backup Windows 11 to OneDrive using a third-party tool called “AOMEI Backupper Standard“. It is a free-to-use backup tool using which you can backup your whole system on the hard drive, cloud storage, or even on network drives. So, here are the steps you need to follow to backup Windows 11 to OneDrive using AOMEI Backupper Standard.
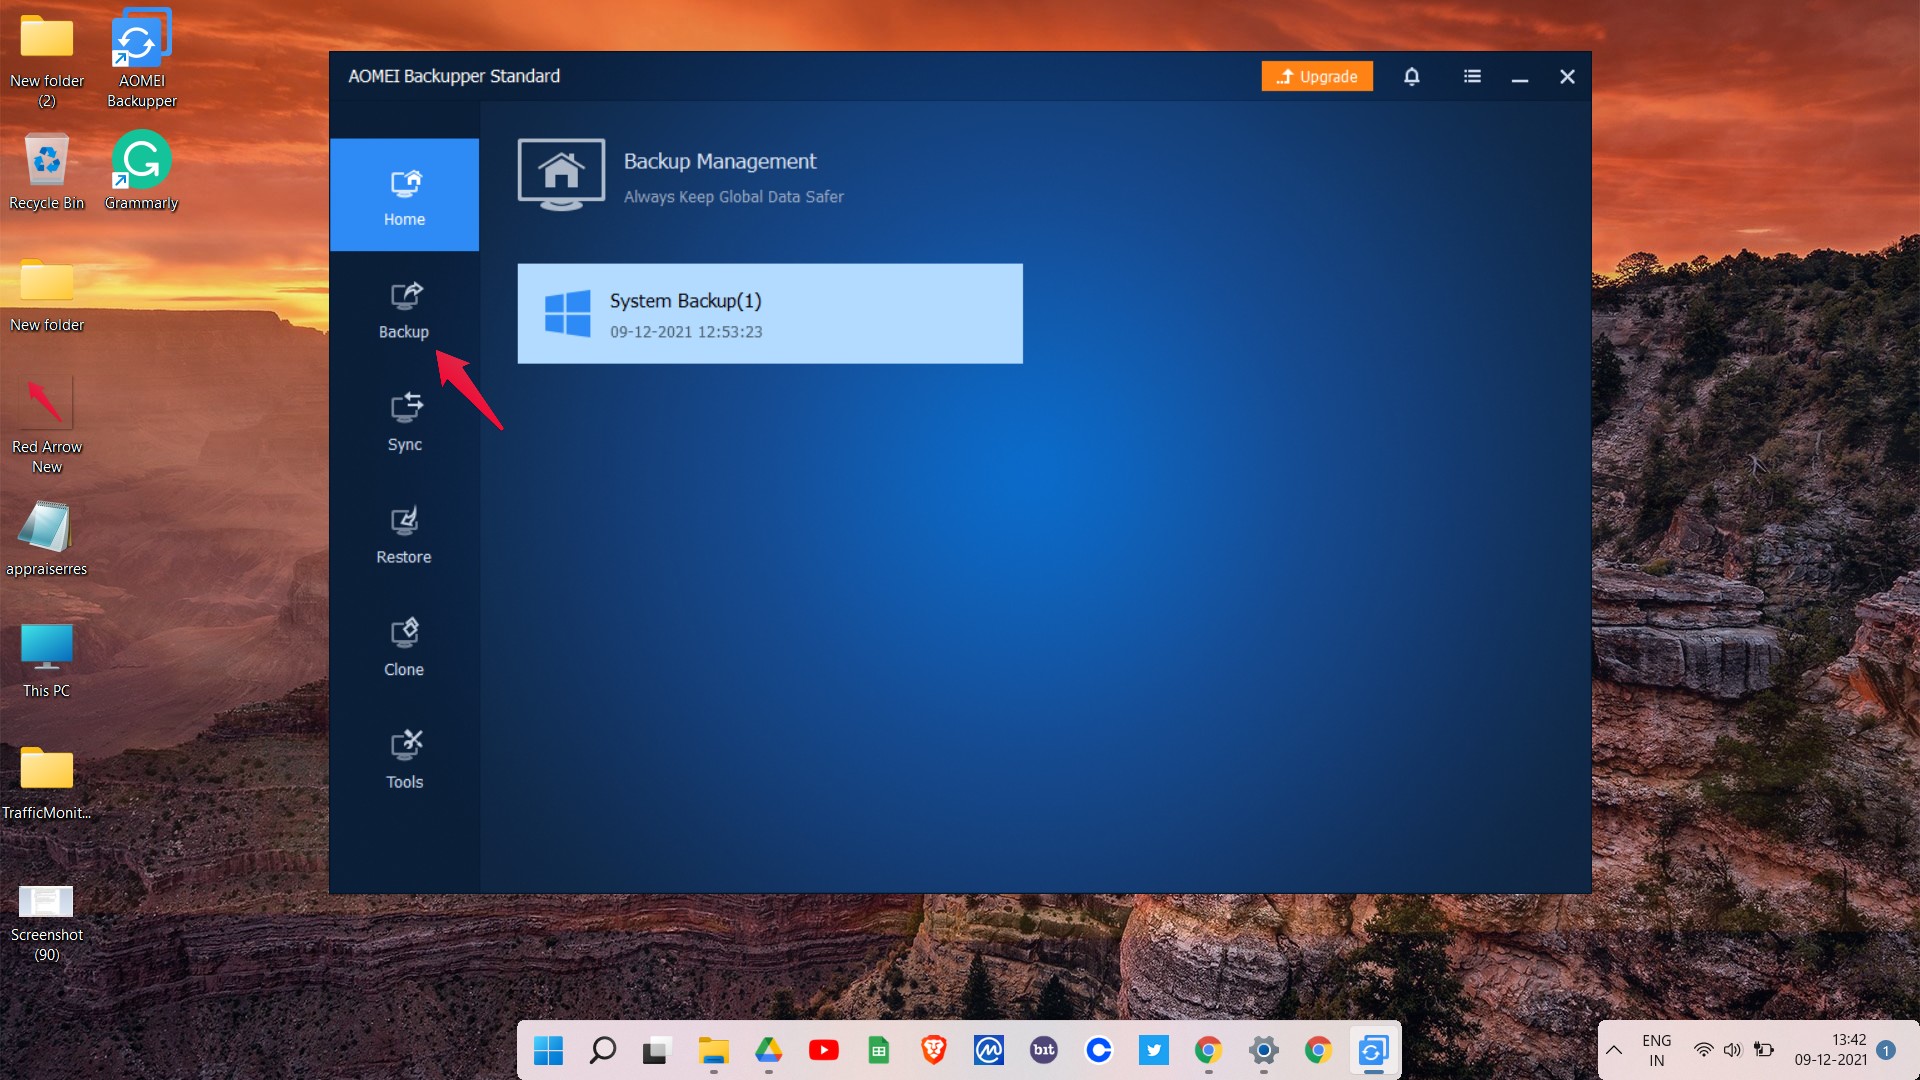
- Once downloaded and installed, launch AOMEI Backupper Standard.
- Tap on the “Backup” option.
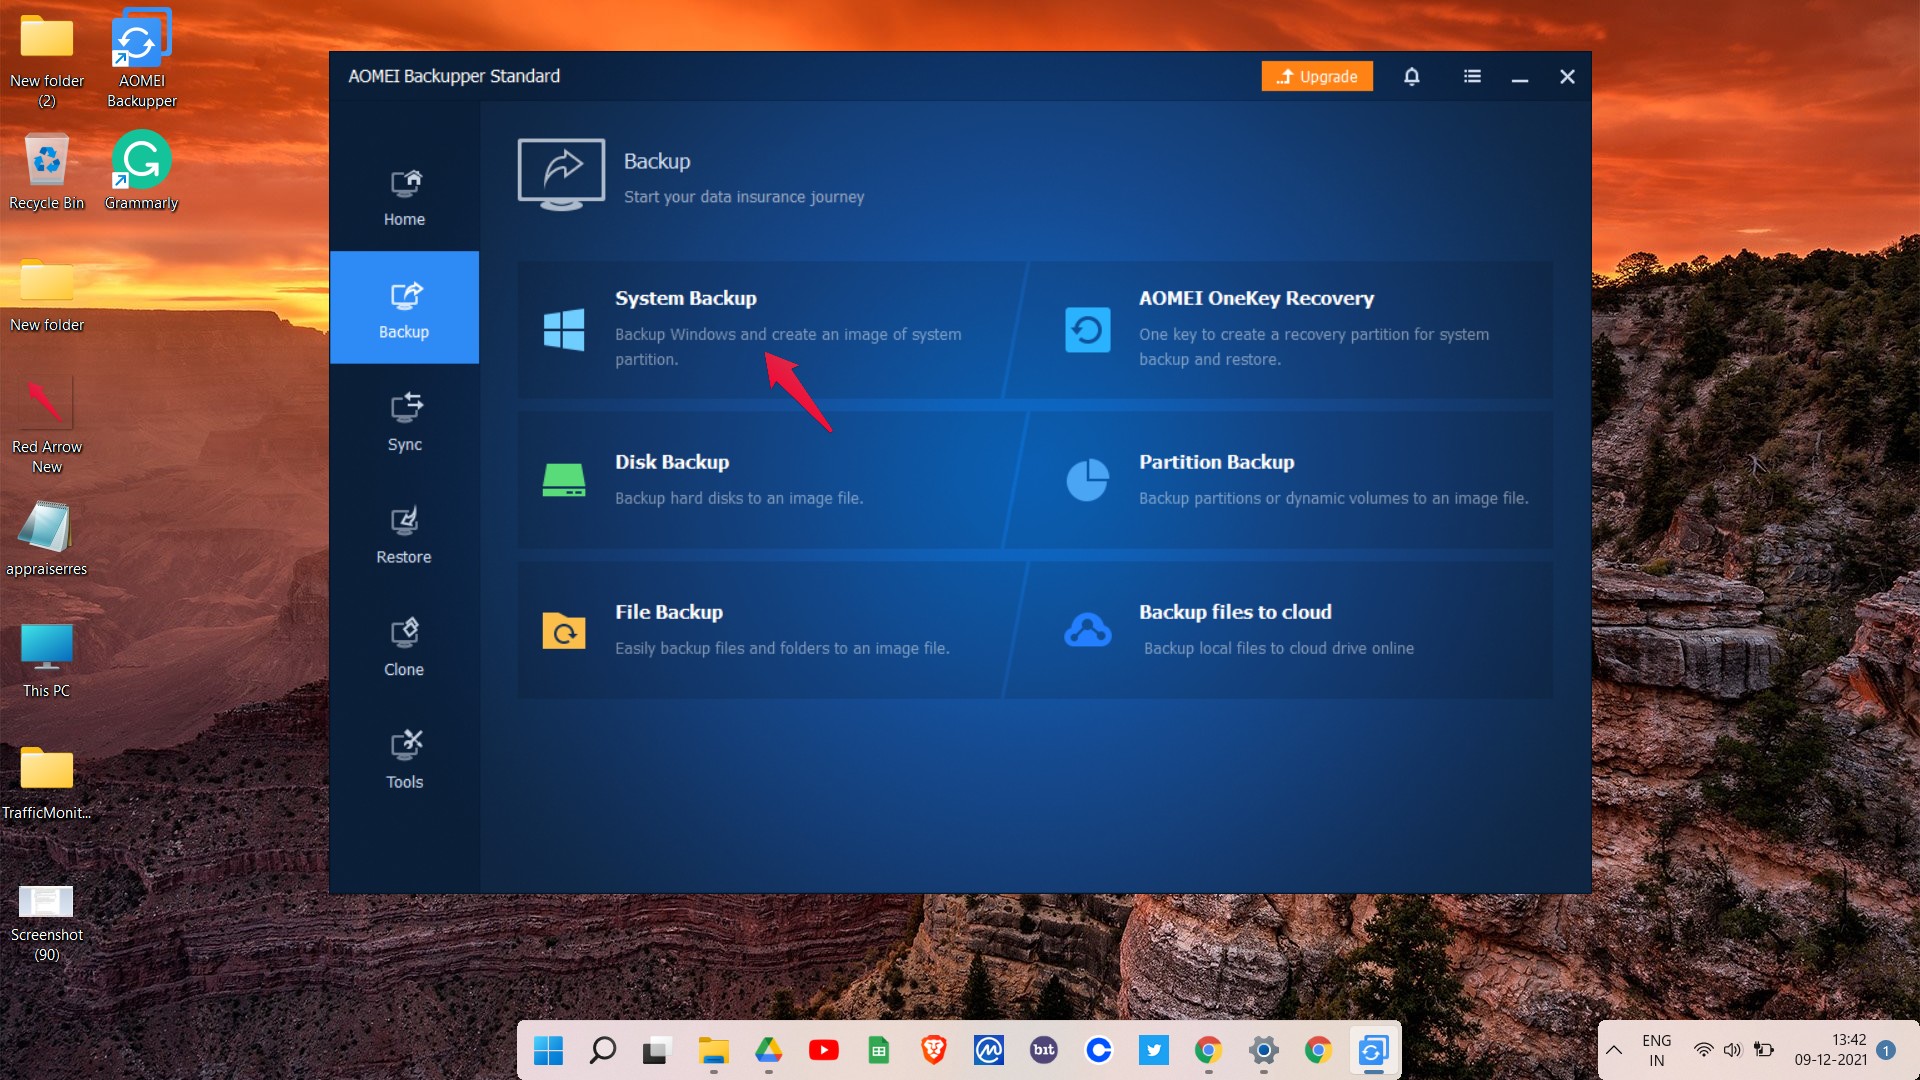
- Select “System Backup“.
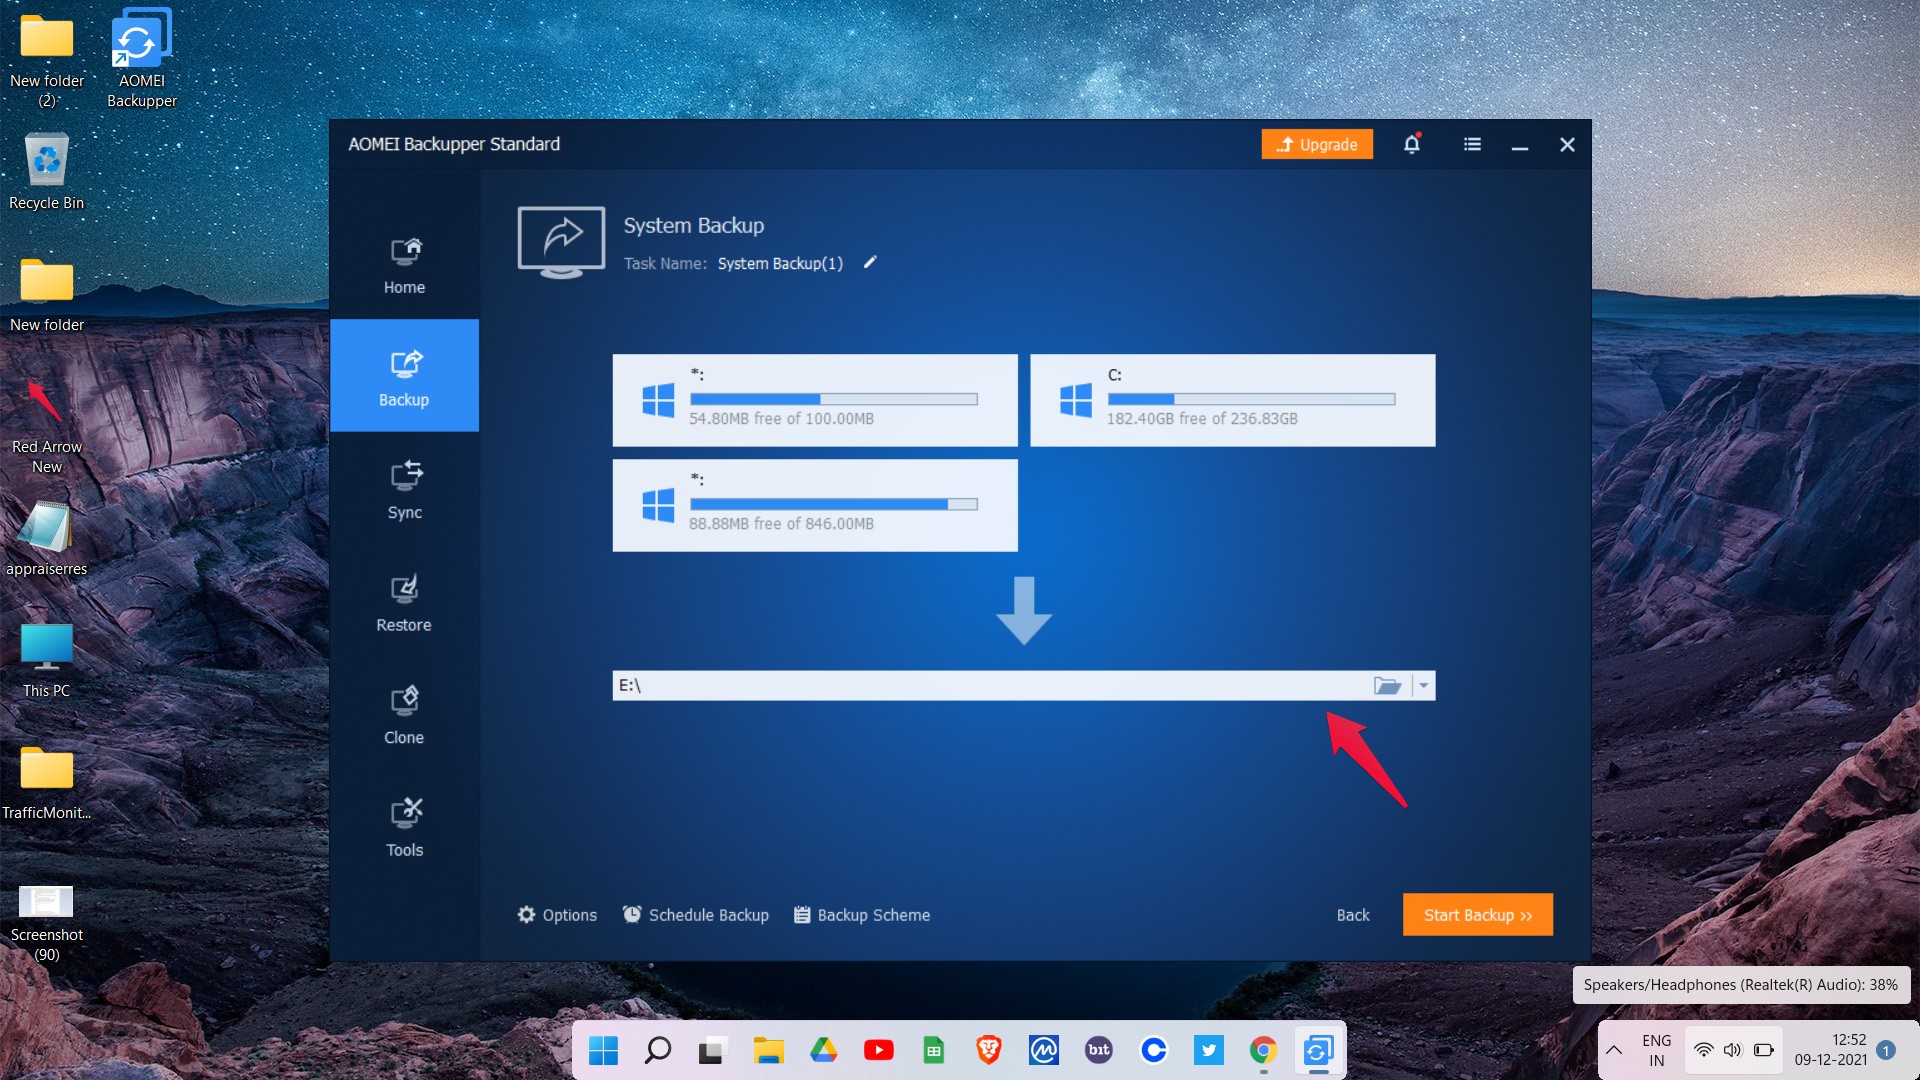
- Choose the place where you want to create the backup of Windows 11.
- Lastly, tap on the “Start Backup“.
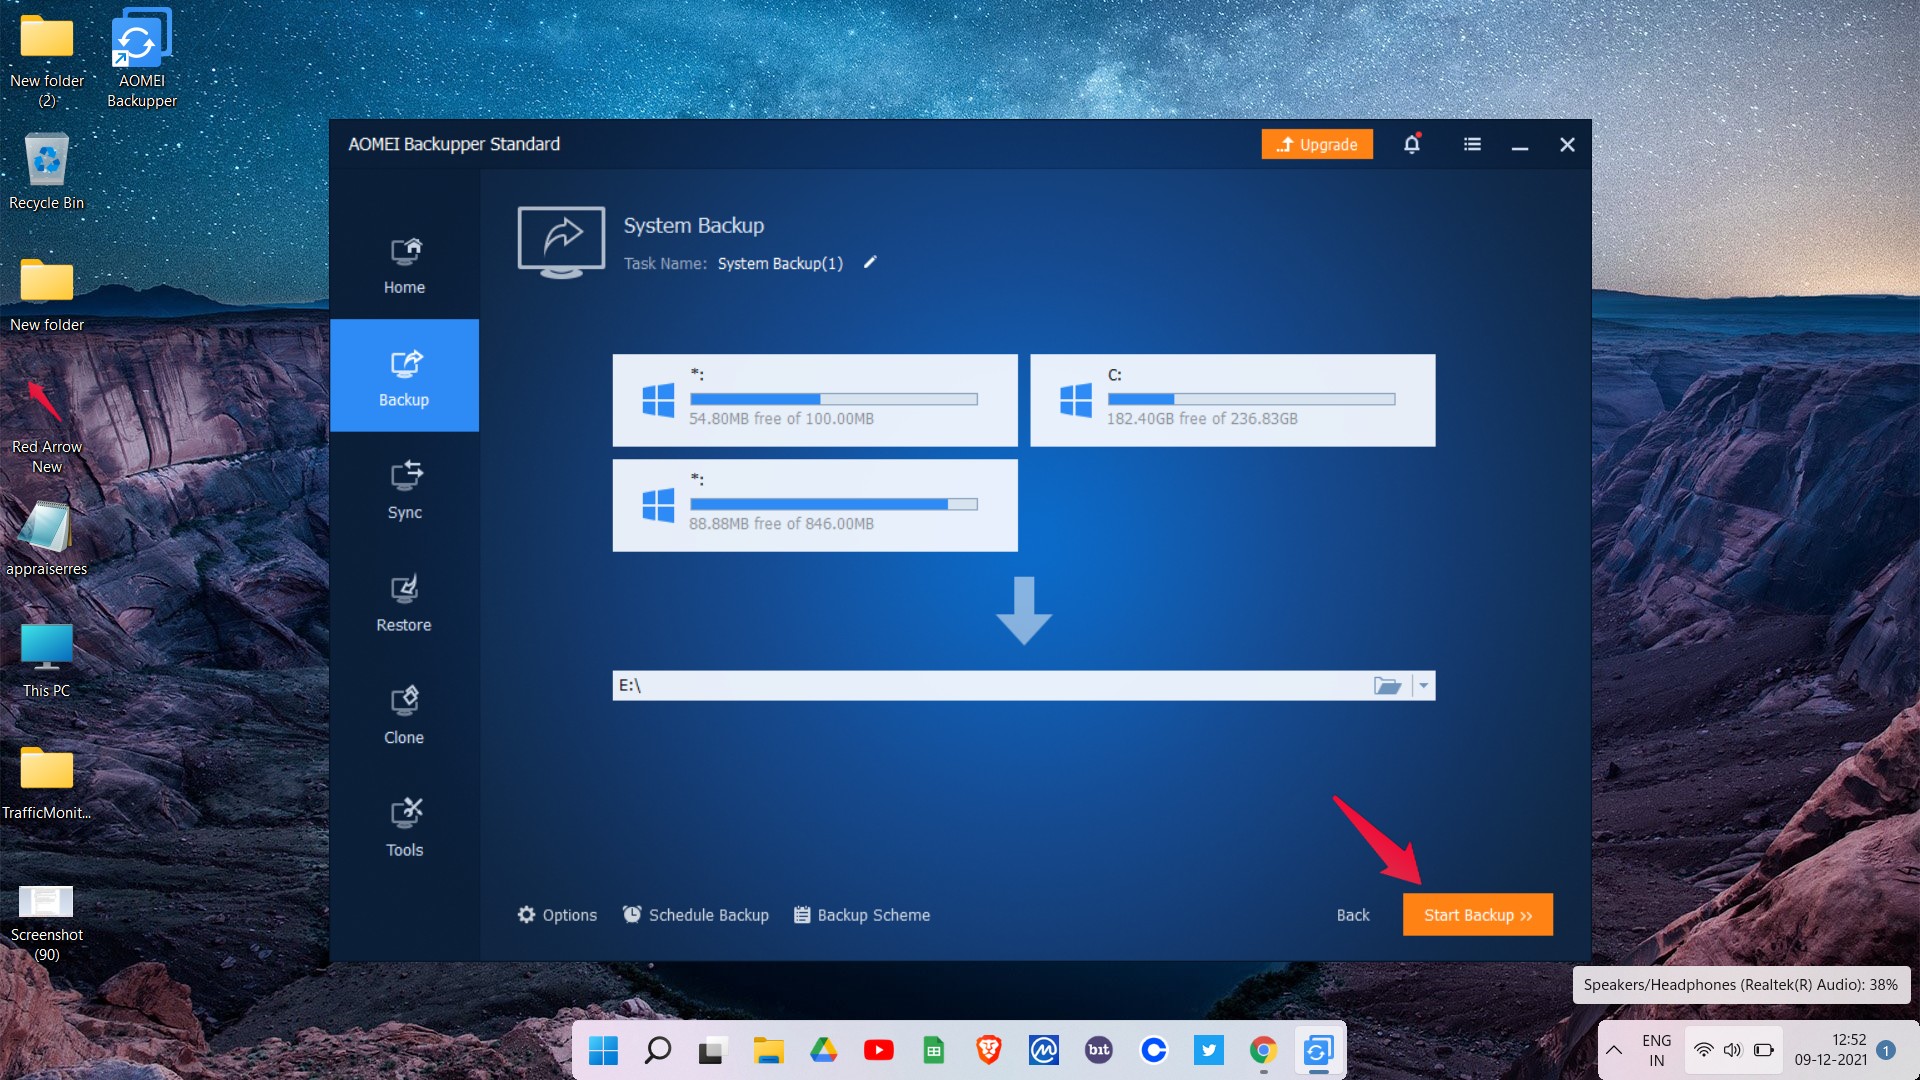
The application will take a few minutes to create a system backup. Once the backup process is complete, go to the path where you have backed up your system. The folder will be named “System Backup”.
- Now, just copy the “System Backup” folder and paste it into the OneDrive folder.
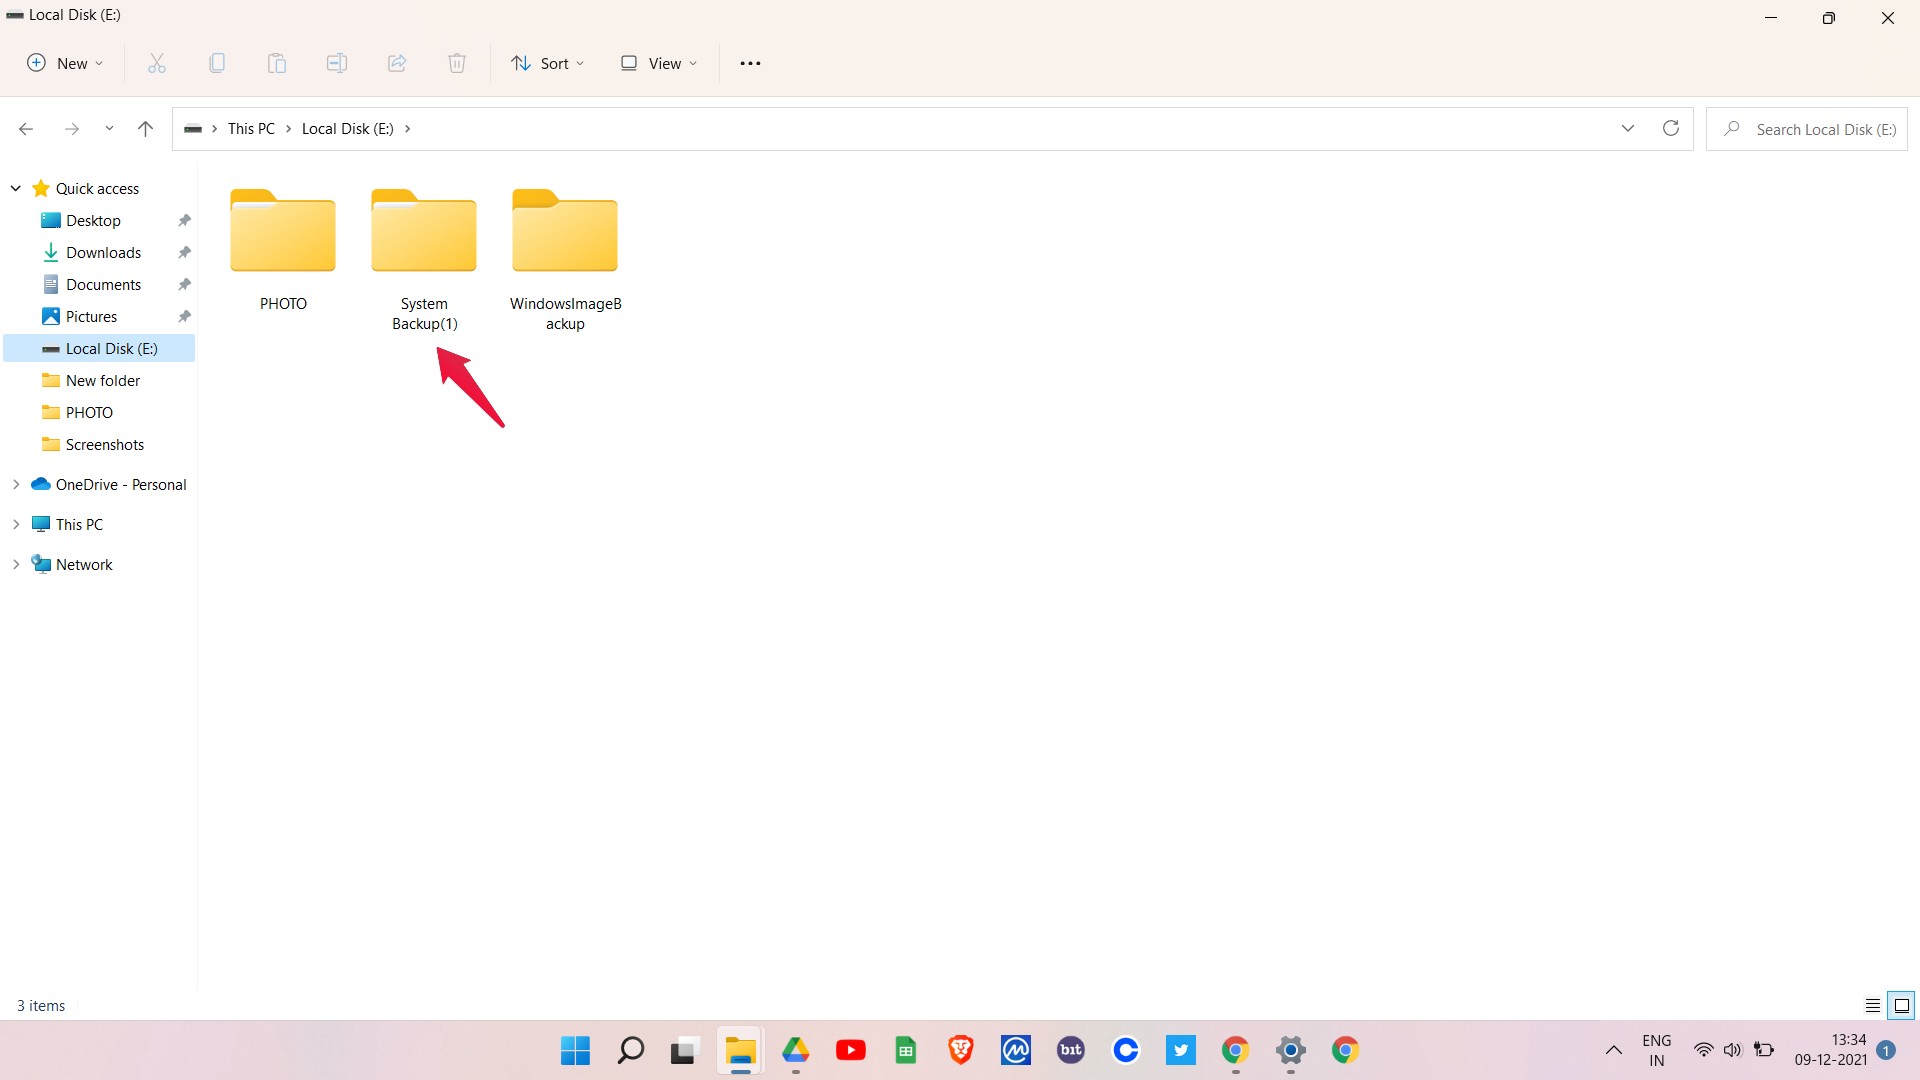
- Click on continue if the “Access Denied” notification pops up.
That’s it. You have now finally backed up Windows 11 to OneDrive using a 3rd-party application.
Final Words
So, this was all about how to backup Windows 11 to OneDrive. You can use either of the methods mentioned above; both work equally well. Moreover, don’t forget to share your thoughts regarding this article in the comment section.
