This guide will make you aware of seven different methods to fix the ‘We couldn’t find your OneDrive Folder’ error. This online file hosting and synchronization service behold quite a few nifty features up its sleeves.
Plus, it’s deeply integrated into the Windows ecosystem, making it easier to sync files from the PC over to the clouds. Likewise, you could get access to all your files right from the File Explorer itself.
However, that is proving to be easier said than done for its user base. Many have voiced their concern that the OneDrive client on their PC is unable to get a hold of the local directory.
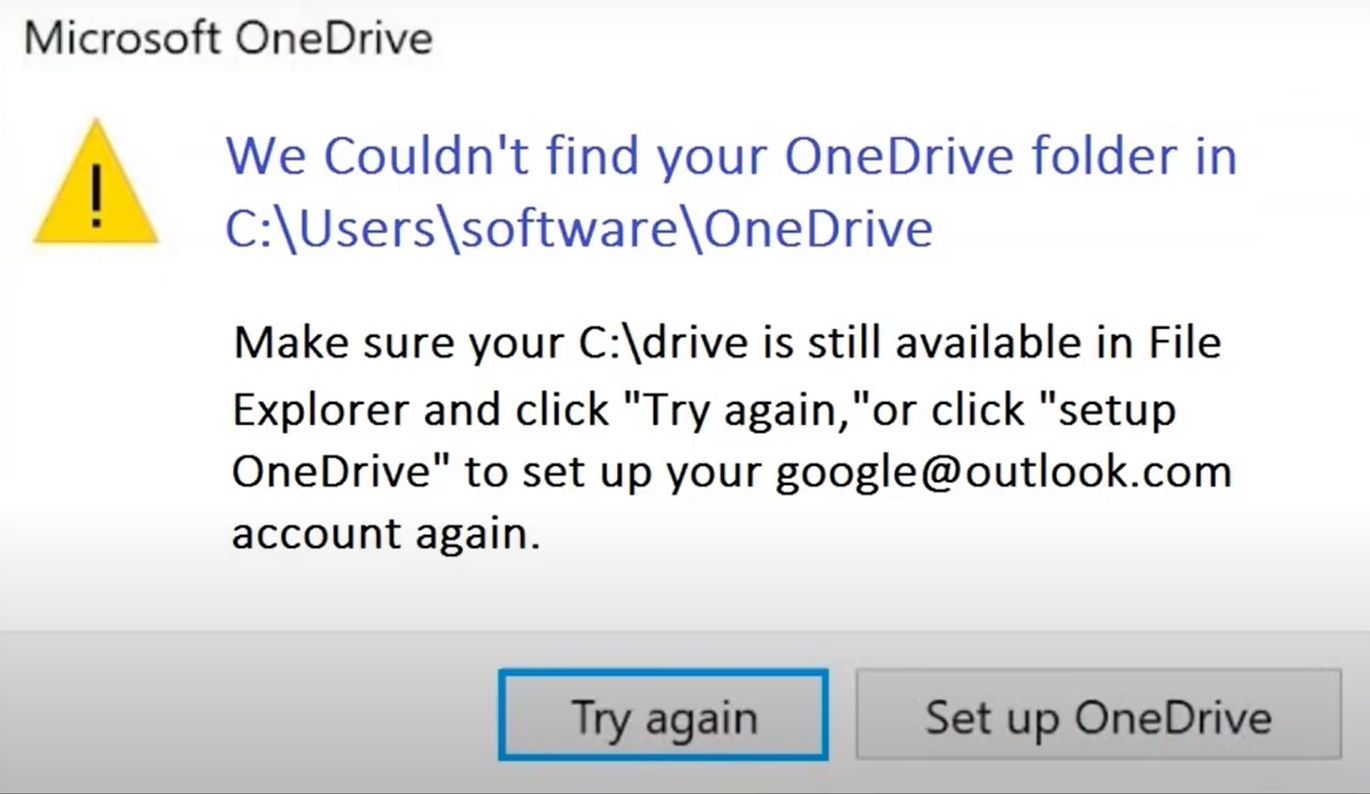
As a result of which, they are constantly getting bugged with the We couldn’t find your OneDrive Folder error. If you are also currently facing this issue, then this guide is here to help you out. Follow along for the various fixes.
Fix 1: Restart OneDrive
First off, it is recommended that you close the OneDrive client and then restart it. More often than not, a simple restart proves to be enough when it comes to rectifying an issue. So let’s proceed ahead and give it a try:
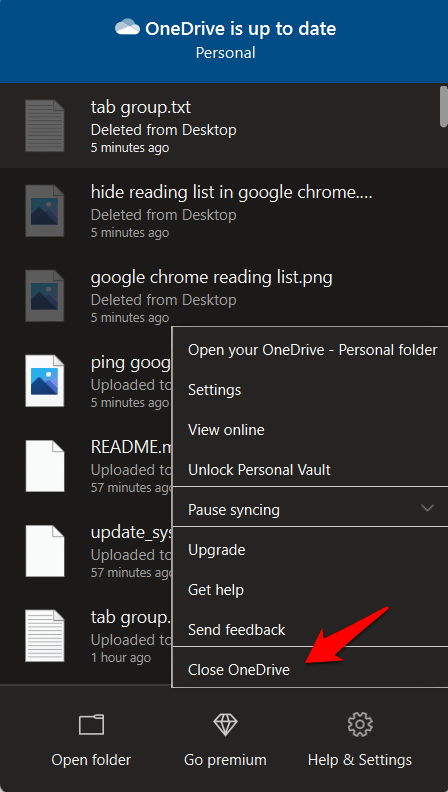
- To begin with, right-click on the OneDrive icon situated at the taskbar and select Close OneDrive.
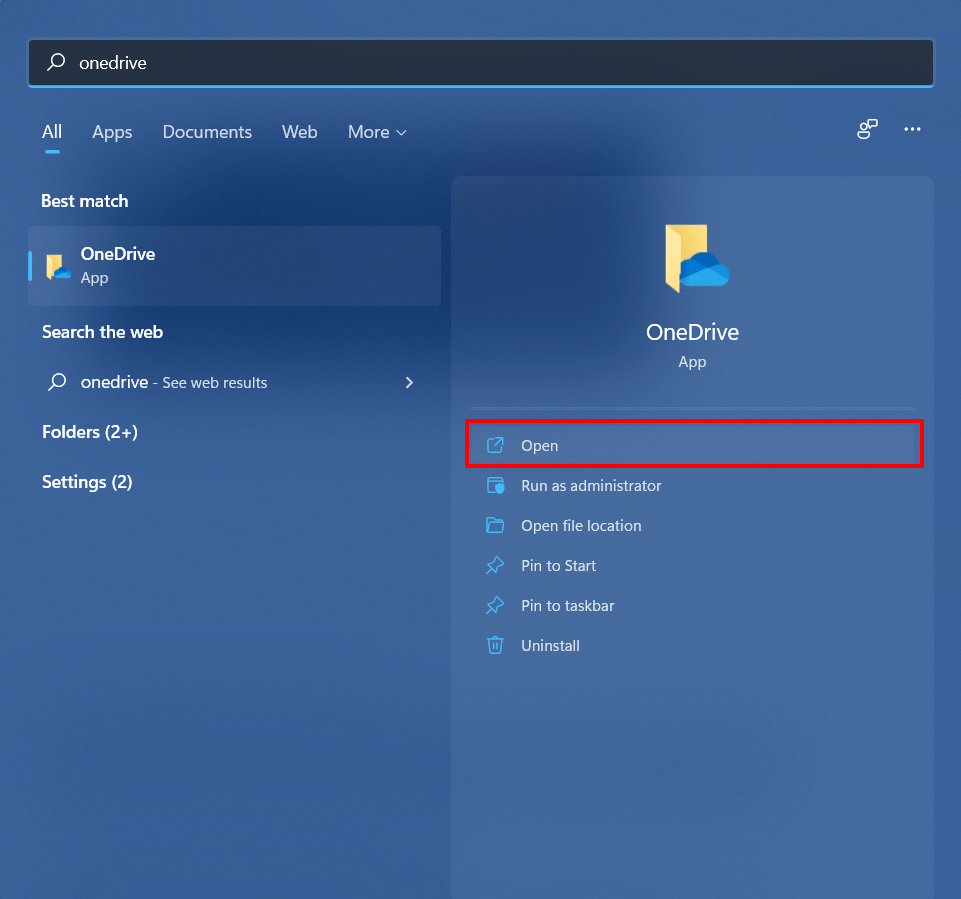
- Then head over to the Start Menu, search OneDrive, and open it.
- Check if it fixes the We couldn’t find your OneDrive Folder error.
Fix 2: Run as Administrator
OneDrive wouldn’t be able to access the files and folders present in the C Drive unless it has administrative privileges. Therefore, in such cases, you should open the app with elevated permissions, which could be done as follows:
- Head over to Start Menu, search OneDrive, and select Run as administrator.
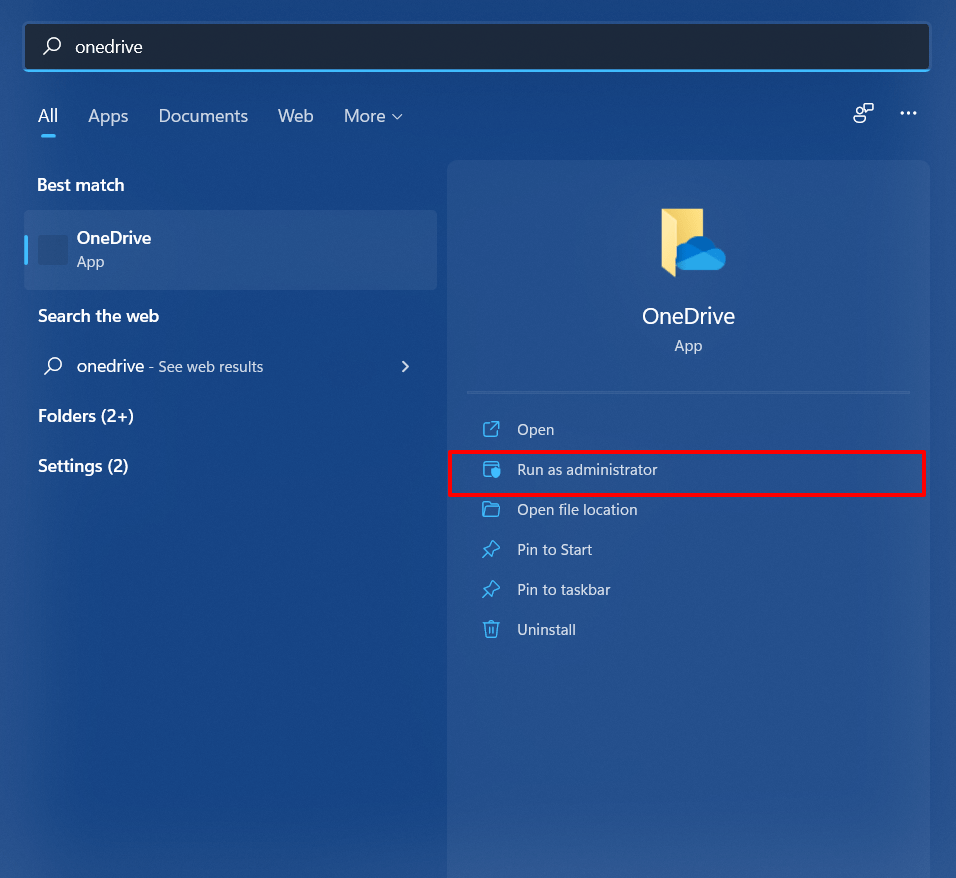
- You will now get a User Access Control Prompt, make sure to click YES.
- Now verify if it fixes the We couldn’t find your OneDrive Folder error or not.
Fix 3: Re-Link your Microsoft Account
If there’s an issue with your Microsoft account that is linked to OneDrive, then its consequences will be faced with the cloud storage service as well. To rectify this, you will have to unlink and then re-link your account to OneDrive. Here’s how:
- Right-click on the OneDrive icon present at the taskbar and select Settings.
- Now go to the Accounts tab and click on Unlink this PC.
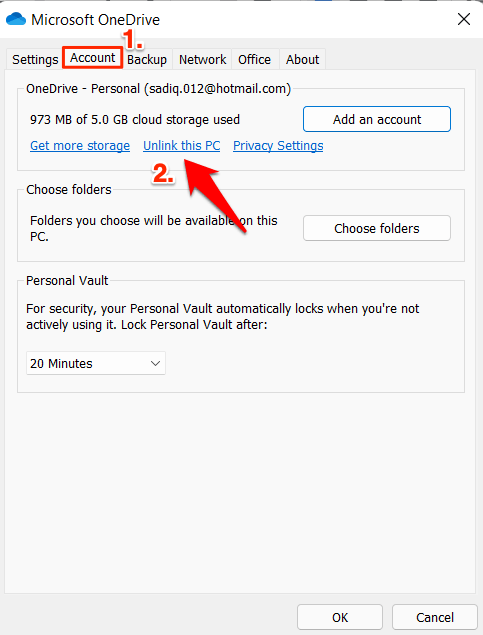
- After that, click on the Unlink Account button.
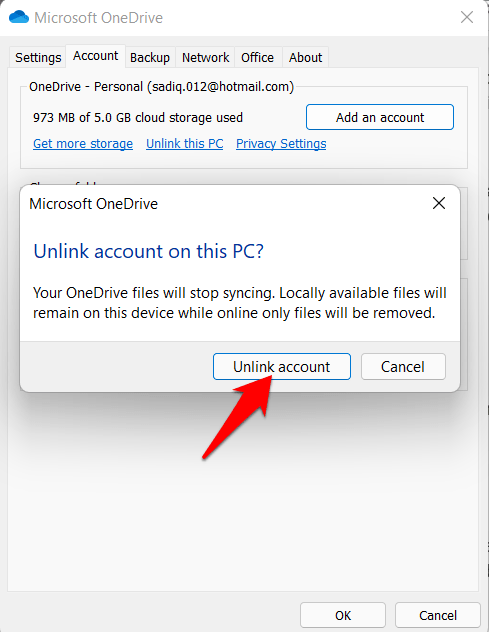
- Once that is done, restart OneDrive and sign in using your Microsoft Account credentials.
- Now check if relinking the account manages to fix the OneDrive Folder error or not.
Fix 4: Manually Update OneDrive
While OneDrive is set to automatically download and install the update in the background, however, in some instances (Firewall’s Restrictive rules, PC running on battery saver, etc.), it might fail to perform this auto-upgrade process. Therefore you should take the manual route and update it from your end. Here’s how:
- To begin with, right-click on the OneDrive icon present at the taskbar and select Settings.
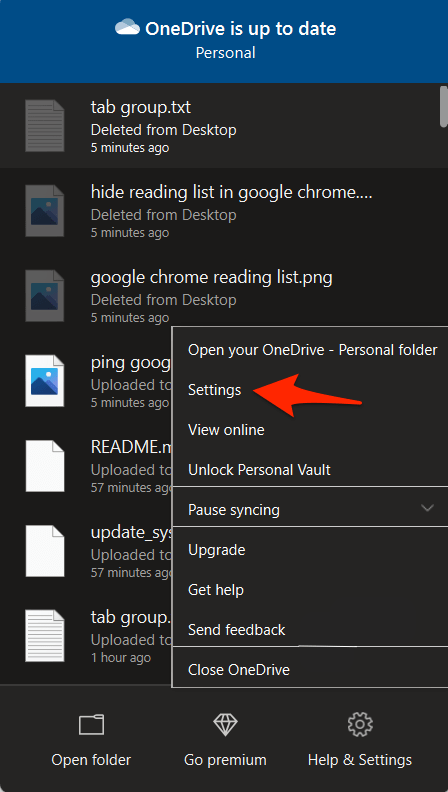
- Then go to the About tab and click on the current version number.
- It shall take you to the OneDrive release page. Match the latest available version with the one that is currently installed on your PC. If you are on a lower build, then download the latest one from that website.
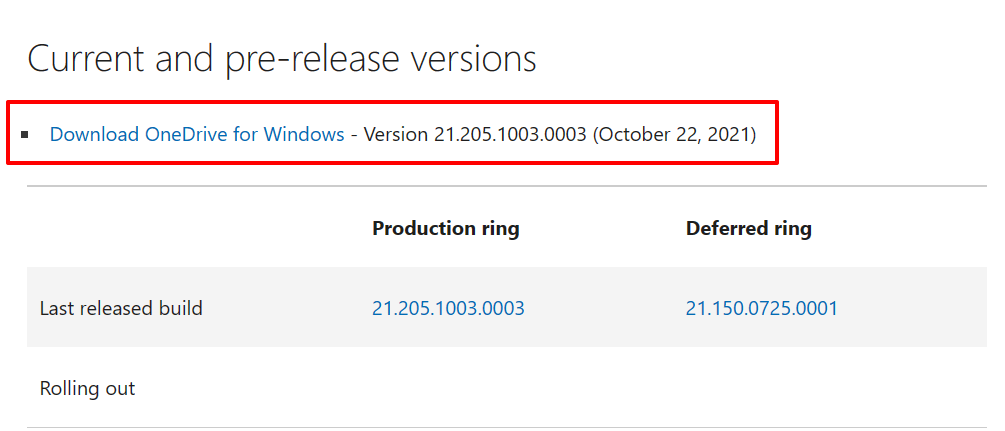
- Once downloaded, launch the file and proceed with the on-screen instructions to install it.
- Finally, restart your PC and then check if the unable to find OneDrive Folder error has been fixed or not.
Fix 5: Change the OneDrive Folder Location
By default, OneDrive files and folders are stored under the C Drive’s User directory. However, if the app isn’t running with administrative permissions or that drive is corrupt or has bad sectors, then OneDrive wouldn’t be able to access that location. In such cases, the best bet is to change the default file storage location of OneDrive. Here’s how it could be done:
- Launch File Explorer via Windows+E shortcut key combinations.
- Then head over to the below location (make sure to replace Username accordingly):
C:\Users\Username
- Now select the OneDrive folder present there and hit the Ctrl+X shortcut to cut it (or right-click on it and click on the Cut icon).
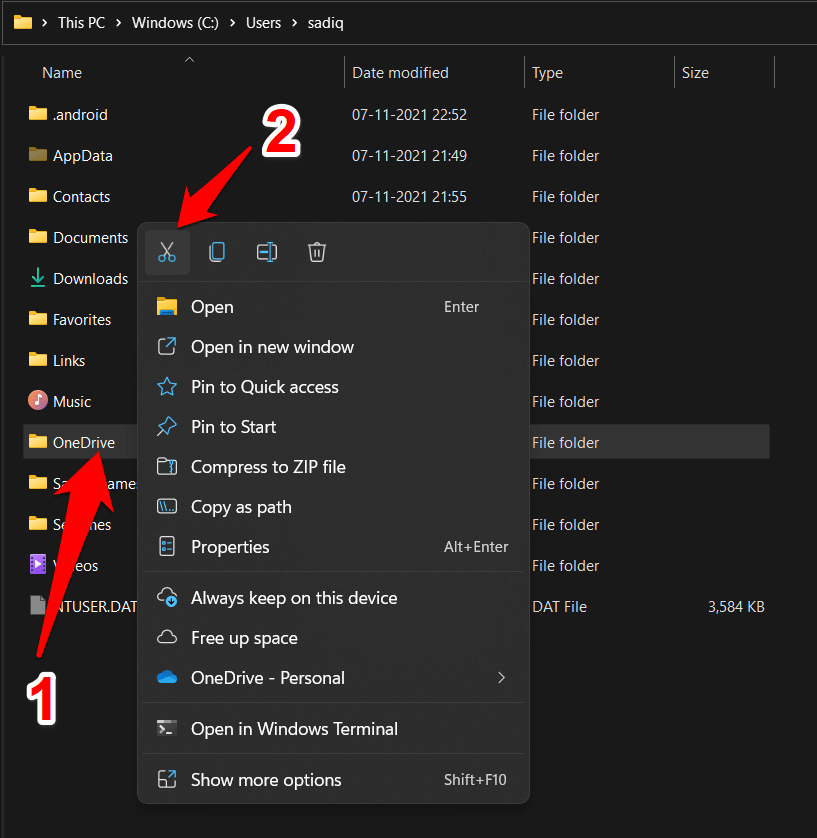
- Then navigate to your desired new location and use the Ctrl+V shortcut keys to paste the folder there.
- Once done, relaunch the app and check if it is able to fix the OneDrive Folder error.
Fix 6: Disable OneDrive AutoPlay Features via Registry Editor
Some users have reported that the OneDrive autoplay feature seems to be conflicting with the service’s ability to get hold of the folders present on your PC. To verify and hence rectify this issue, you will have to disable this feature by modifying its registry entries. Here’s how:
- To begin with, launch the Registry Editor from the Start Menu.
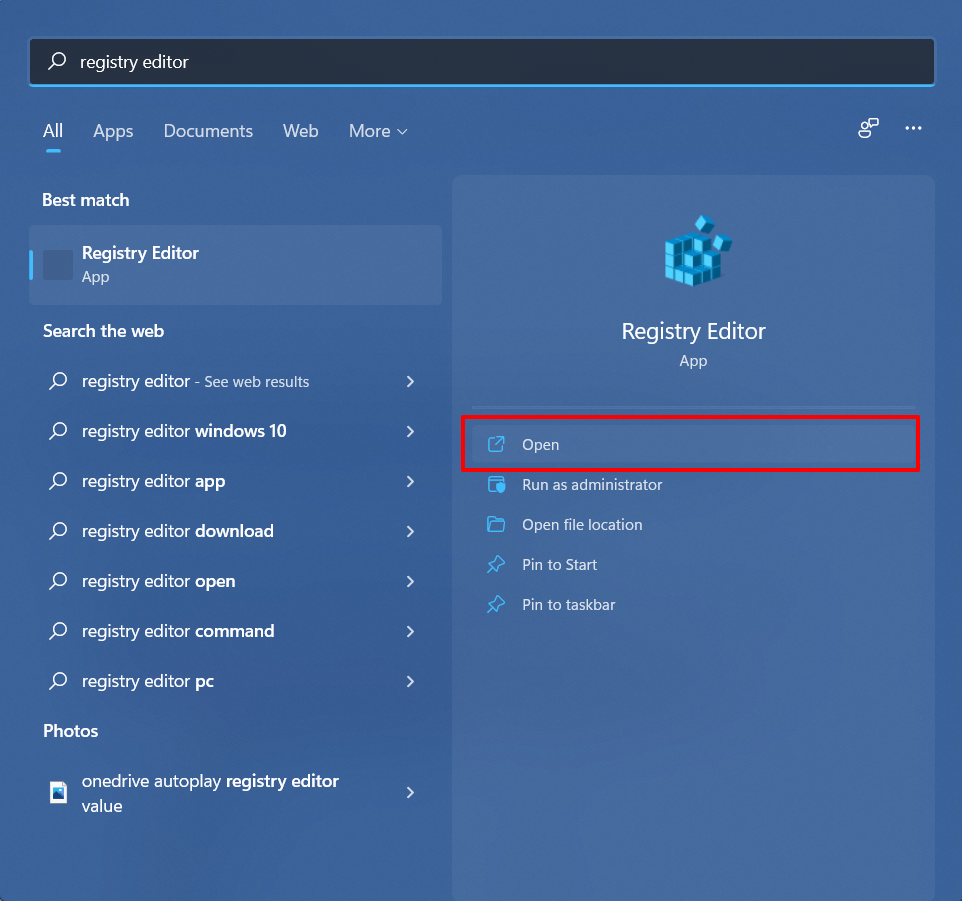
- Then copy-paste the below location in its address bar:
Computer\HKEY_CURRENT_USER\Software\Microsoft\Windows\CurrentVersion\Explorer\AutoplayHandlers\EventHandlers\CameraMemoryOnArrival
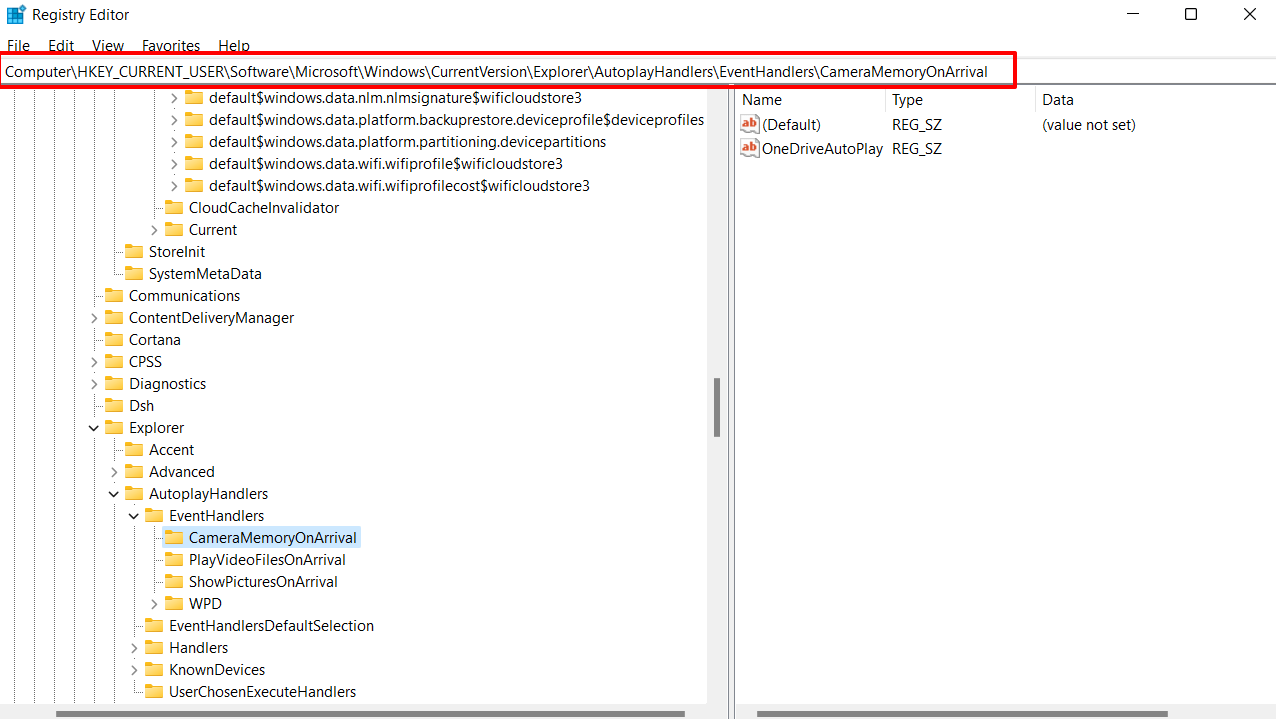
- Now go to the right-hand side and double-click on the OneDriveAutoPlay file to open it. Then type in 0 in the Value Data and hit OK.
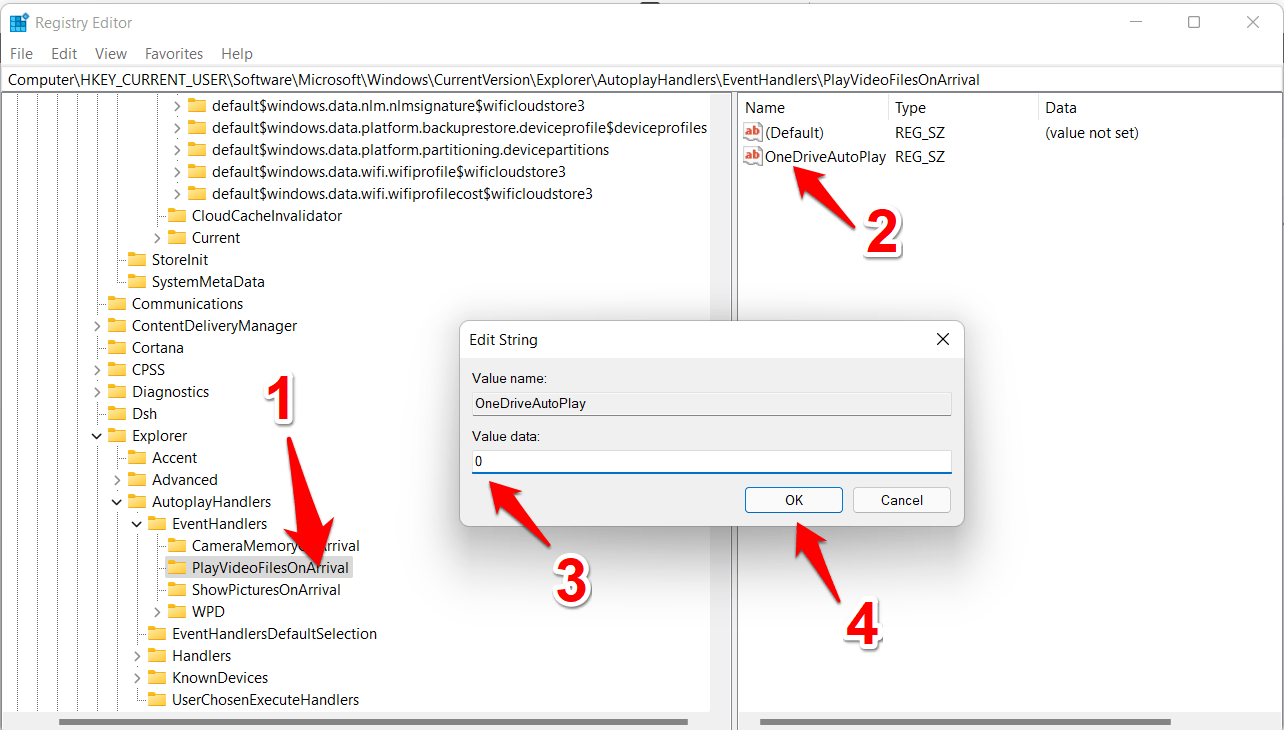
- After that, go to the PlayVideoFilesOnArrival folder and set the Value Data of the OneDriveAutoPlay file to 0 as well.
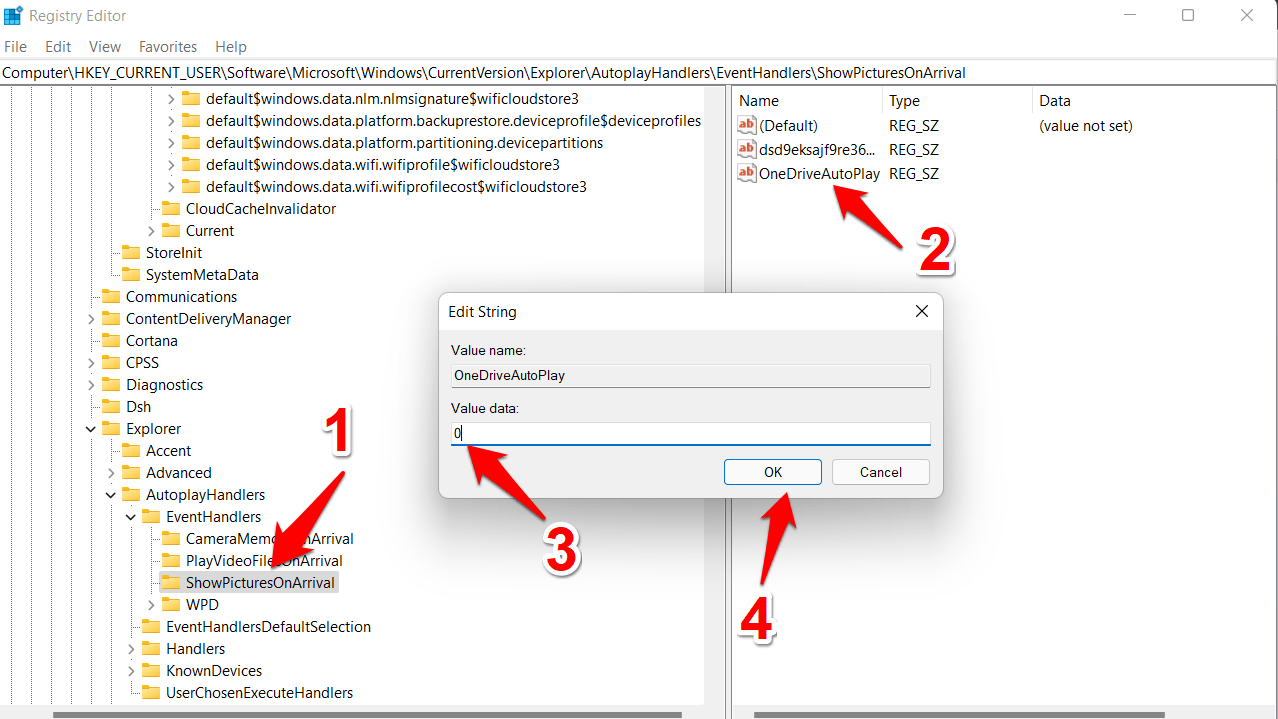
- Next up, go to the ShowPicturesOnArrival folder and input 0 in the Value Data field of the OneDriveAutoPlay file.
- Once all the three autoplay features have been disabled, restart your PC and then check if the We couldn’t find your OneDrive Folder error has been fixed or not.
Fix 7: Reset OneDrive
If none of those mentioned above methods managed to work out in your favor, then your last course of action should be to reset the app to its factory default state. To do so, bring up the Run dialog box via Windows+R shortcut keys, copy-paste the below command, and hit Enter:
%localappdata%MicrosoftOneDriveonedrive.exe /reset
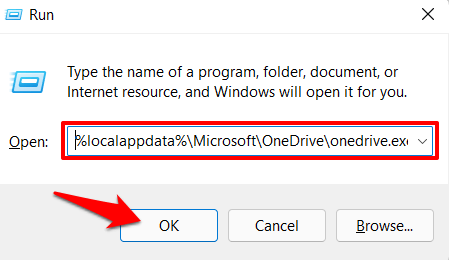
Once the command has been successfully executed, it should rectify the underlying OneDrive issue as well.
Conclusion
So with this, we round off the guide on how you could fix the We couldn’t find your OneDrive Folder error. We have listed seven different methods for the same. Do let us know in the comments section which one spelled out success for you.
