In this guide, I have discussed how to sync the Outlook calendar with the iPhone calendar. Instead of separately accessing the Microsoft Outlook app all the time to know about the events, you can simply sync it with your iPhone’s calendar app. This will save you time and also make it less confusing for you to sort out your events, as all of them will be available in one place.
There are primarily three ways by which you can sync outlook calendar with iPhone calendar. You may use the iCloud storage from Apple to sync the content from your email clients. Secondly, you can use the iTunes service and sync the existing Outlook calendar. Apart from the previous methods, you can use the iPhone Mail app and sync the calendars for ease of access.
1. Sync Outlook Calendar with iPhone Using iCloud
If you have an iPhone, you must have an Apple ID and access to iCloud. To enable constant access to all updates to existing events on the calendar and the addition of new events, you have to install the iCloud client app for Windows.
- Install iCloud on your Windows PC. You can get it from Microsoft Store.
- Access the iCloud profile with your Apple ID and password.
- The sync options will show up, which will include syncing Contacts and Calendars, including Outlook. By default, it will be selected.
- Click on Apply to confirm and start the sync.
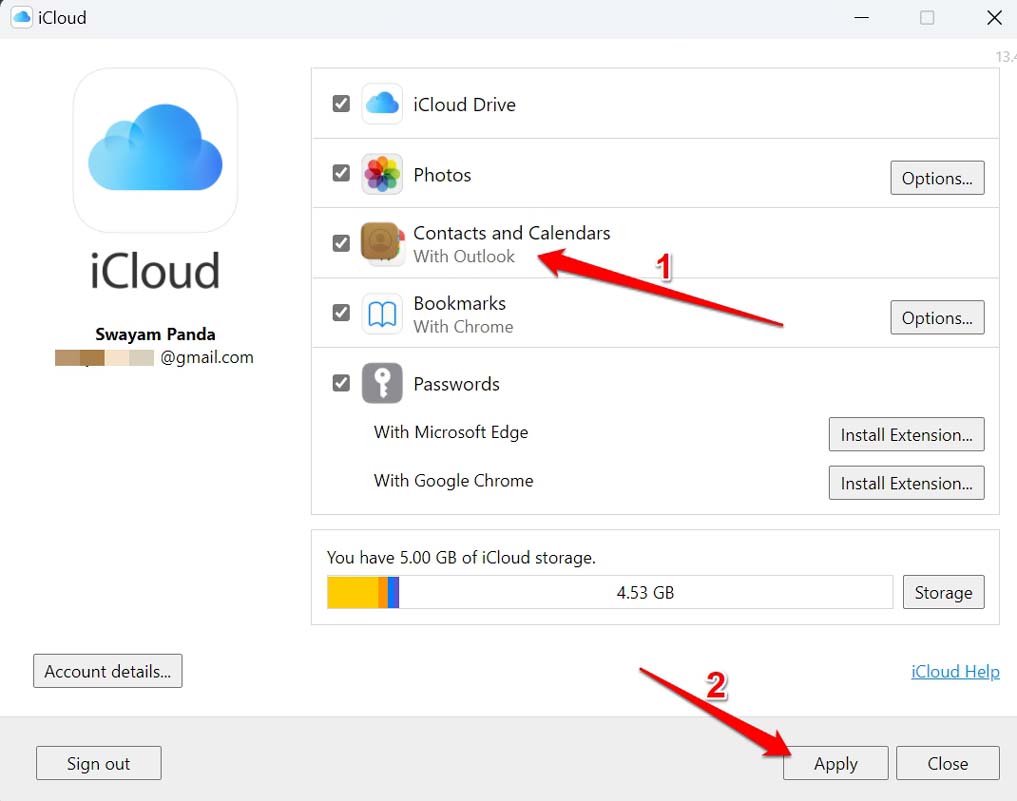
All event updates on iCloud or Outlook will now reflect in one place.
2. Use iPhone Mail App to Sync Outlook Calendar with iOS Calendar
If you use iPhone Mail App you can, you can easily sync with the Outlook app. Here are the steps to set up the syncing.
- Go to Settings > tap on Passwords > Password & Security.
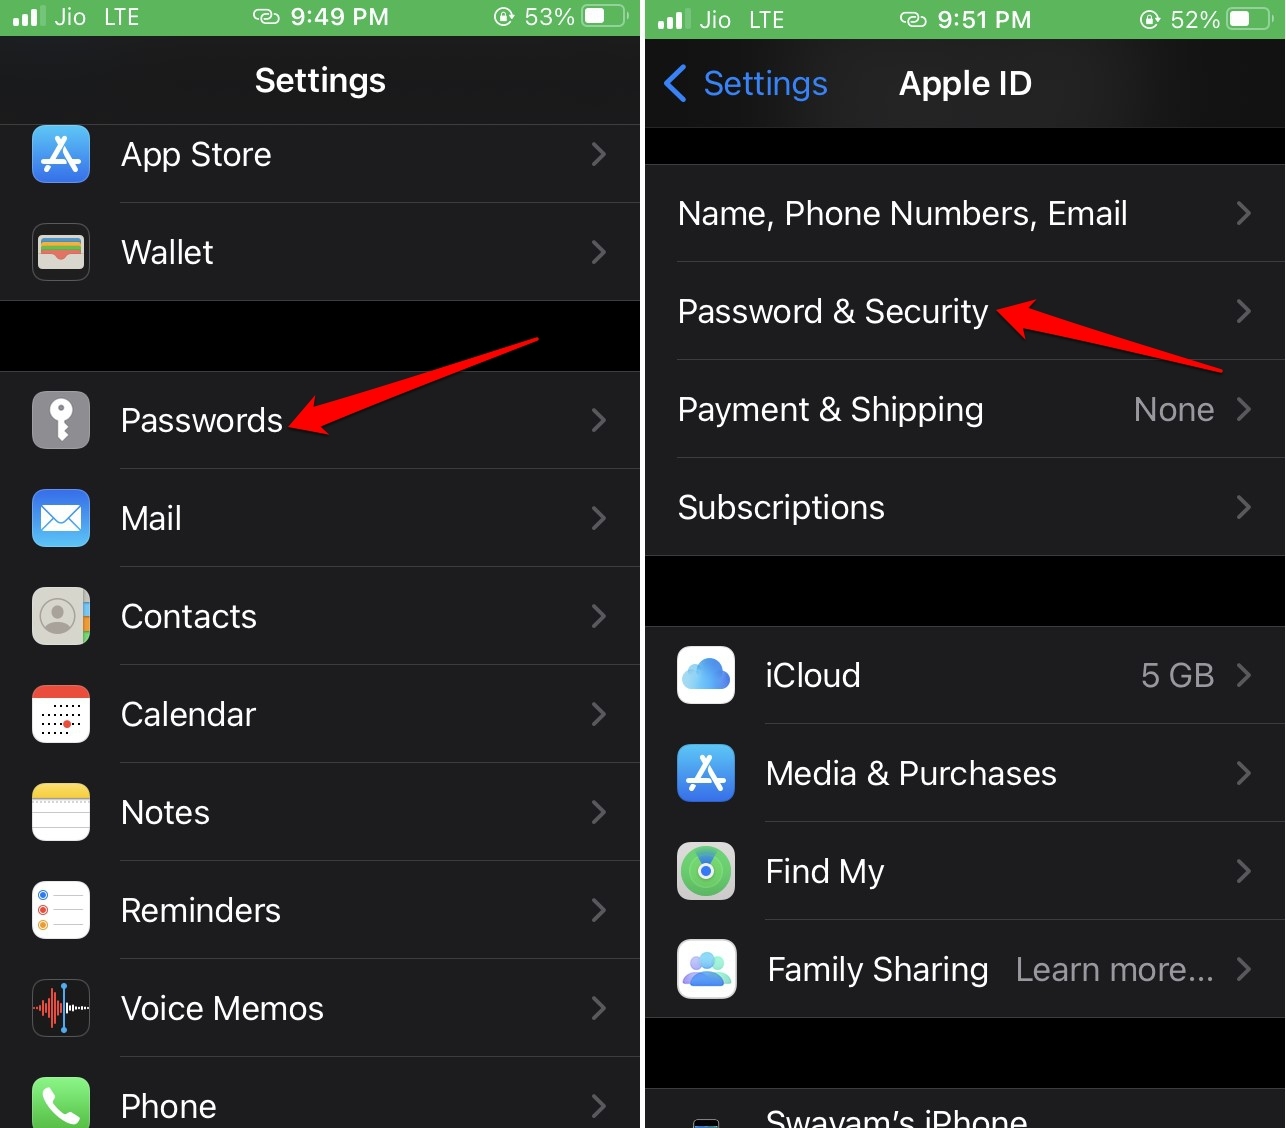
- Tap on the + icon to Add Account > mention the website as Outlook.com.
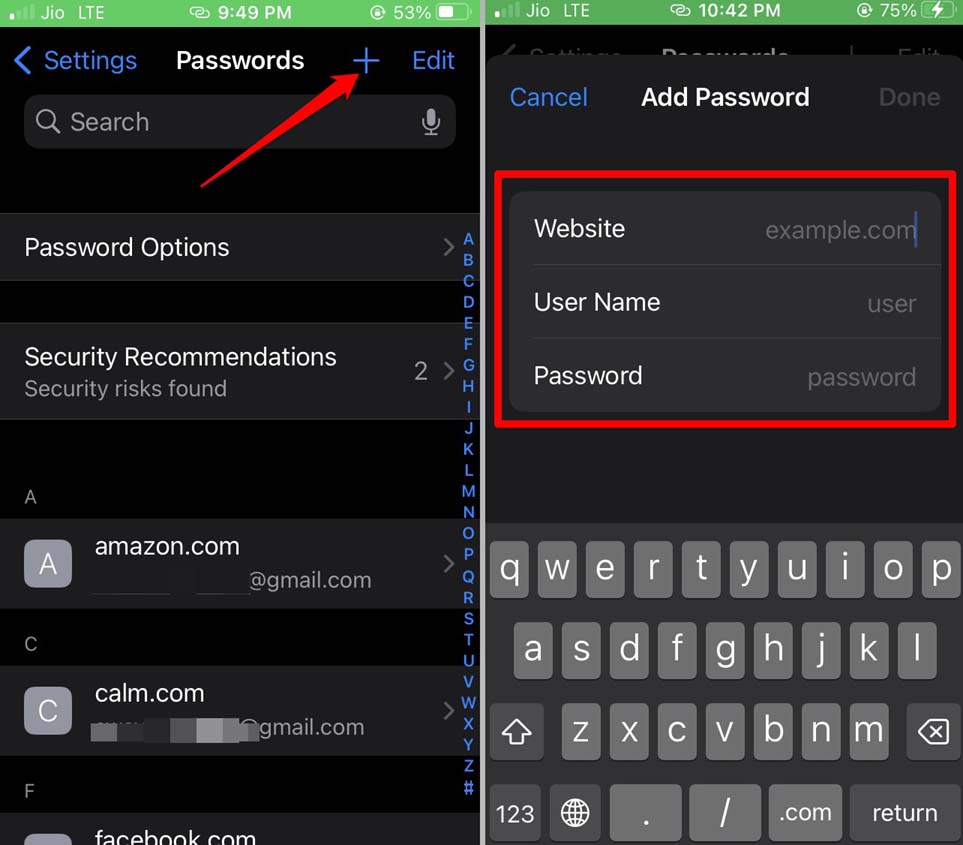
- Start by entering the username and password for Outlook.
- Tap on Yes when you are prompted with various app permissions to enable syncing.
- Enable the Calendars option to sync the event updates from the Outlook app.
You will see the option to continue using the existing calendars or remove them to avoid redundancy of events.
3. Use iTunes to Sync Outlook Calendar with iPhone Calendar
Usually, iTunes is used to create backups of Apple devices such as iPhones, install updates, share files, etc. You can sync your calendars from Outlook using iTunes to stay updated with all the event updates happening on Outlook. Once you sync the calendar on your iPhone, you do not have to separately open the Outlook app all the time you need some update on any event.
- Using the lightning cable provided with your iPhone, connect it to the PC.
- Launch the iTunes app using the Windows search.
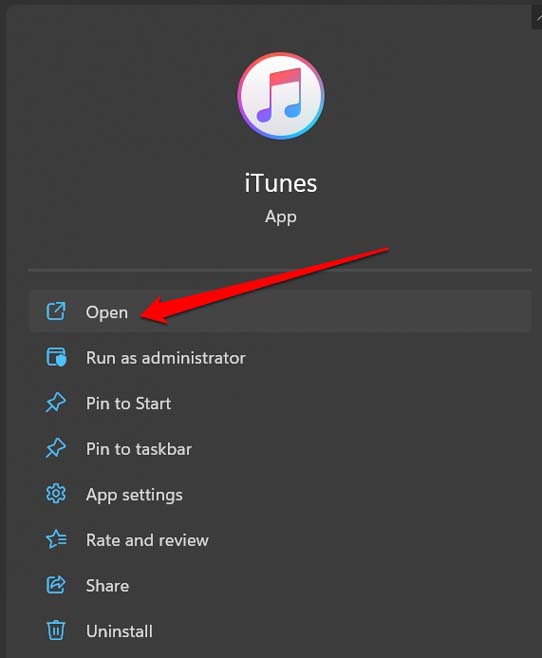
- Let the iPhone sync with the PC.
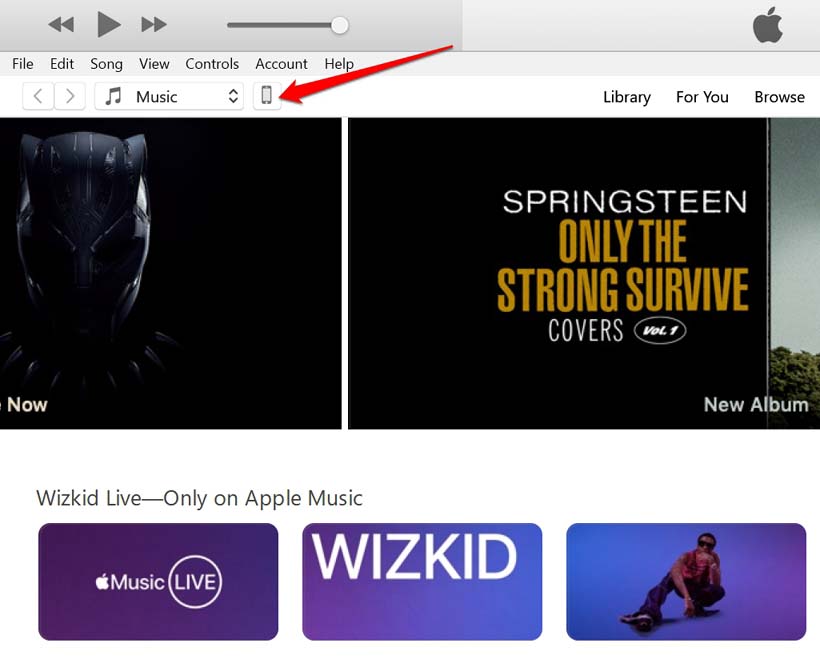
- Click on Sync Calendars, and from the drop-down menu, select Outlook.
- Make sure to select to sync all the calendars.
- Once you click on Apply, the event updates from the Outlook calendar will start to sync with the iPhone calendar.
You must keep in mind that if you are trying to use iTunes to sync the calendar from Outlook, then disable iCloud first on your iPhone. Here is how to disable iCloud.
- Go to Settings > Tap on the Apple ID profile name
- Navigate to iCloud > Tap the switch to disable the cloud storage.
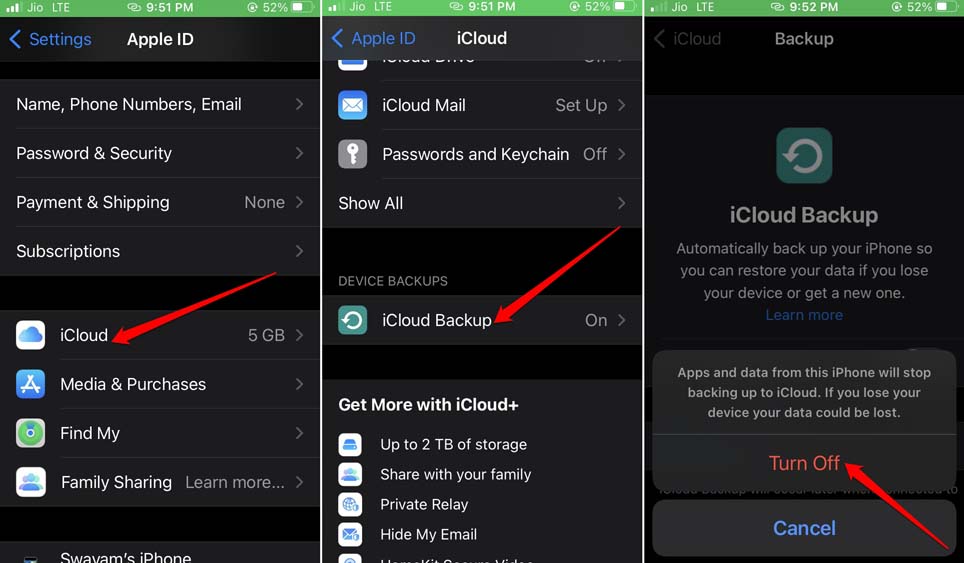
Once you disable iCloud, connect your iPhone to your PC/Mac.
Conclusion
Improve your productivity and stay updated regarding all the day-to-day events by syncing the Outlook calendar with the iPhone calendar. If you have multiple Apple gadgets, then with these Apple services used to sync the calendar, your itinerary will be always available on all those devices. I hope this guide was informative.
