Google Docs is an amazing productivity and collaboration tool from the Google Drive suite. It allows users to create, edit, and share documents. This popular tool is used by both individuals and businesses alike. Google Docs is free and relatively efficient. It has a bunch of different features that can be used to create the best of works.
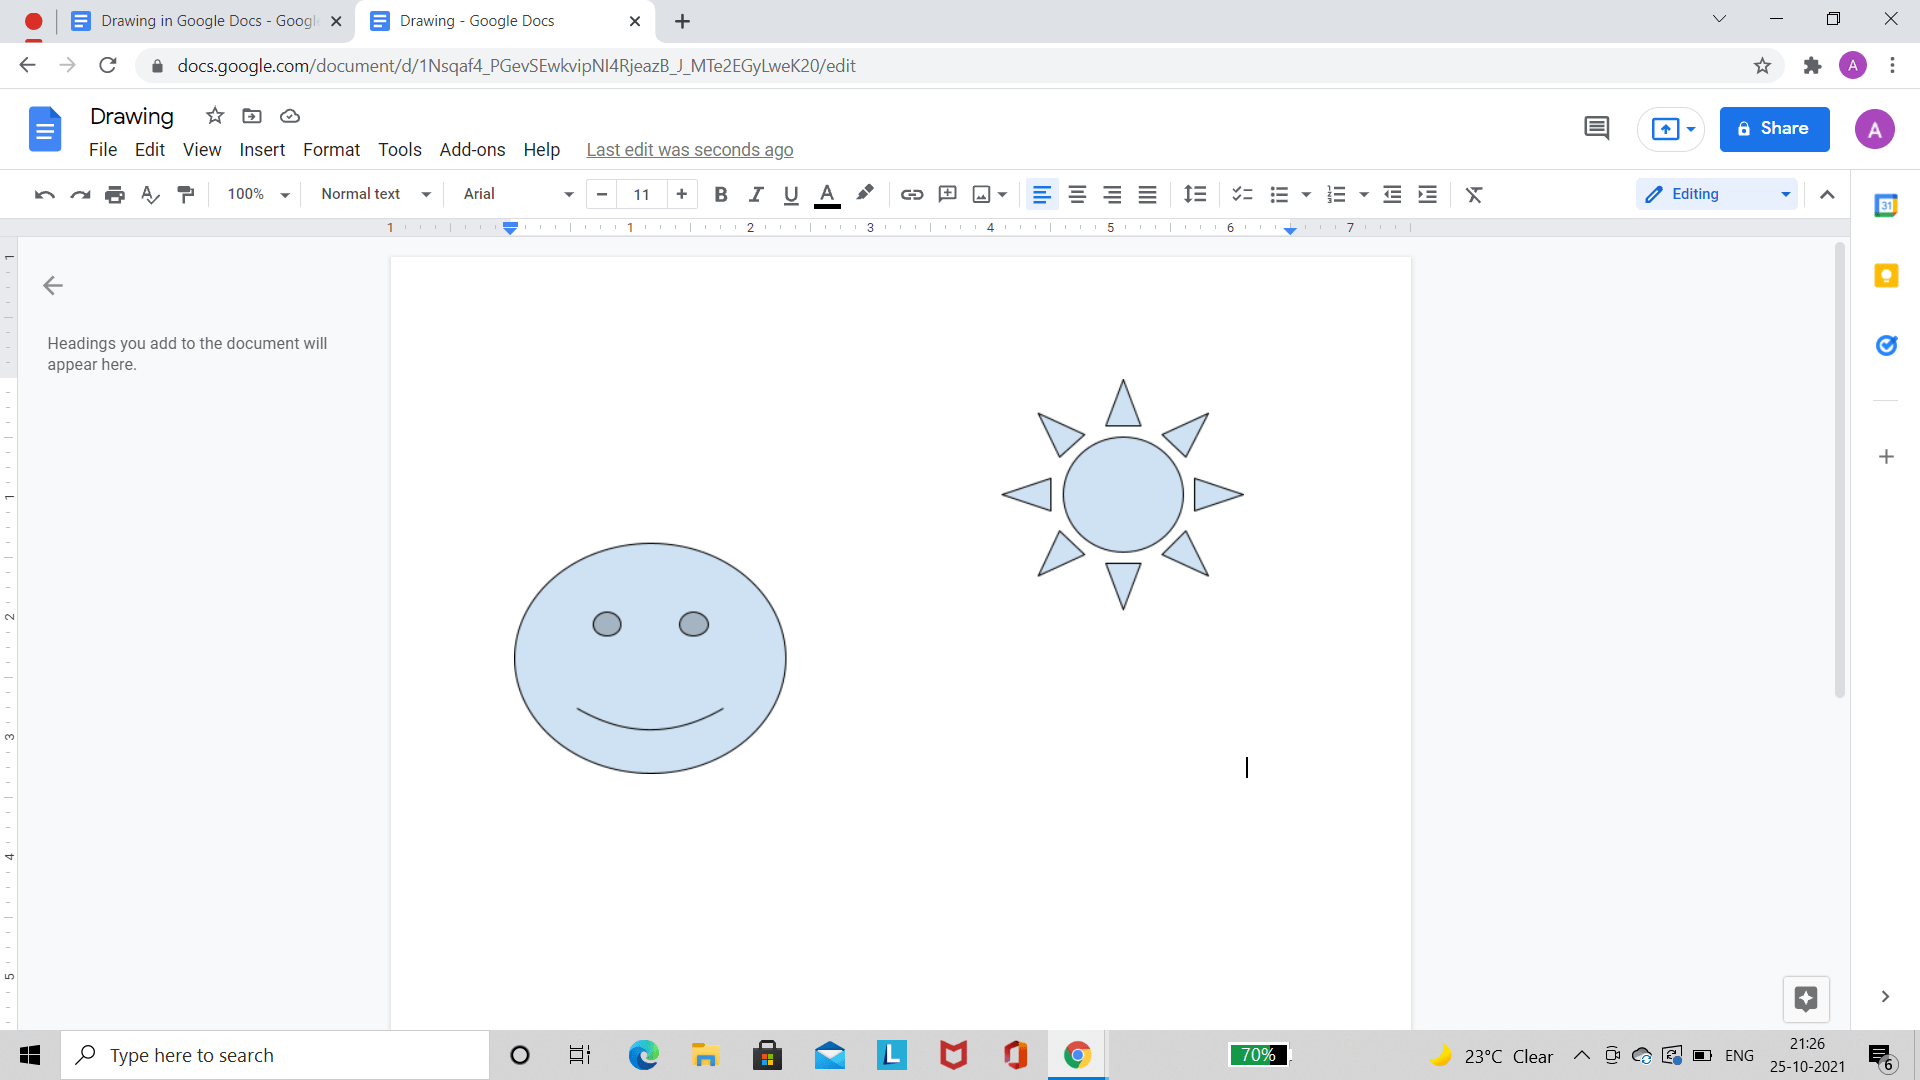
Users can insert tables, videos, pictures, charts, etc to spruce up their work. Users can also draw in Google Docs! That’s right! Users can unleash their creative side on the inbuilt drawing tool on Google Docs. We know that sounds hard to do but worry not! We have created a complete guide on Drawing in Google Docs. This guide has all the details on the components of the Google Docs drawing tool.
What Can you do with the Drawing Tool?
You can draw shapes, colors, text/word art, and lines on the drawing tool on Google Docs. Unfortunately, it does not support freehand drawing or sketching, although scribbling is allowed.
How to Start Drawing on Google Docs?
Let’s look at the steps to start drawing on Google Docs. There are only four simple steps. We have added images that will help you understand better.
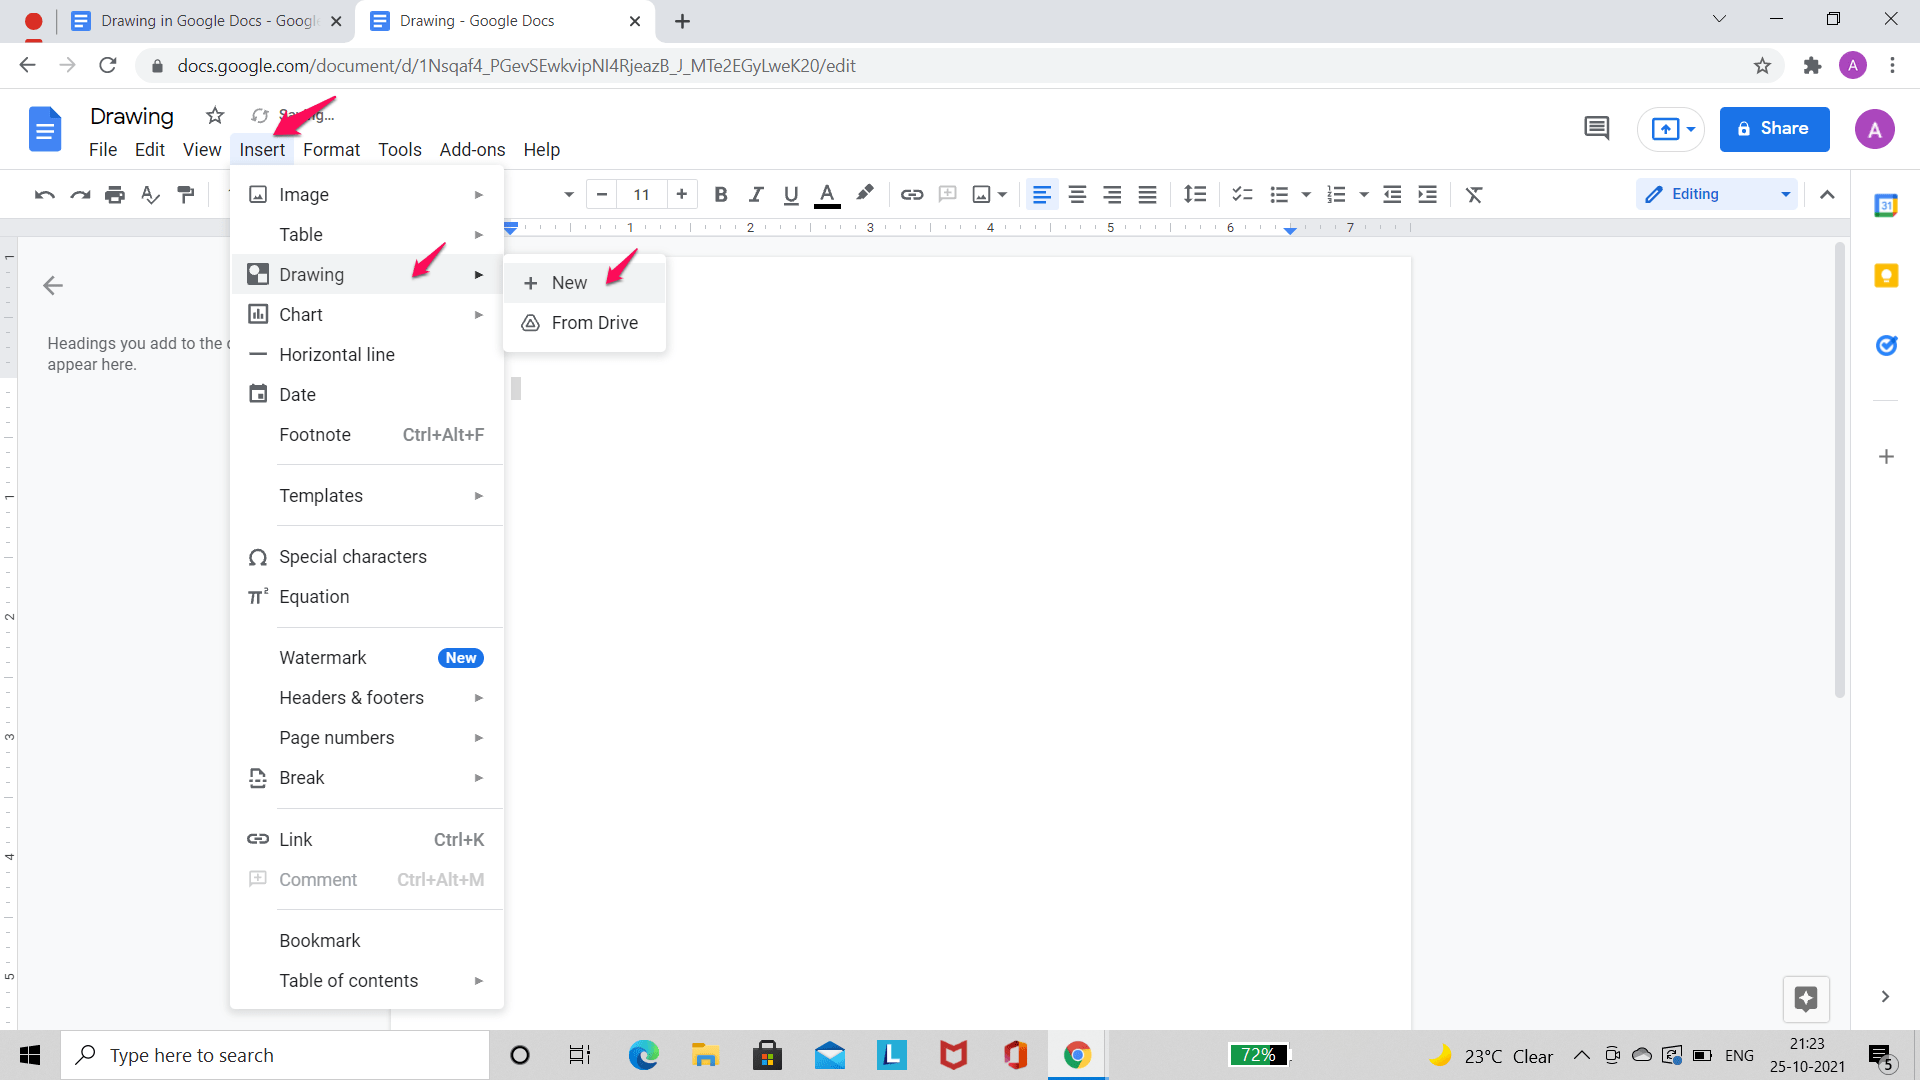
- Open the Google Docs page you want to draw in or create one and click on ‘Insert‘ and then click on ‘Drawing‘. Select ‘+ New‘ from the options that appear.
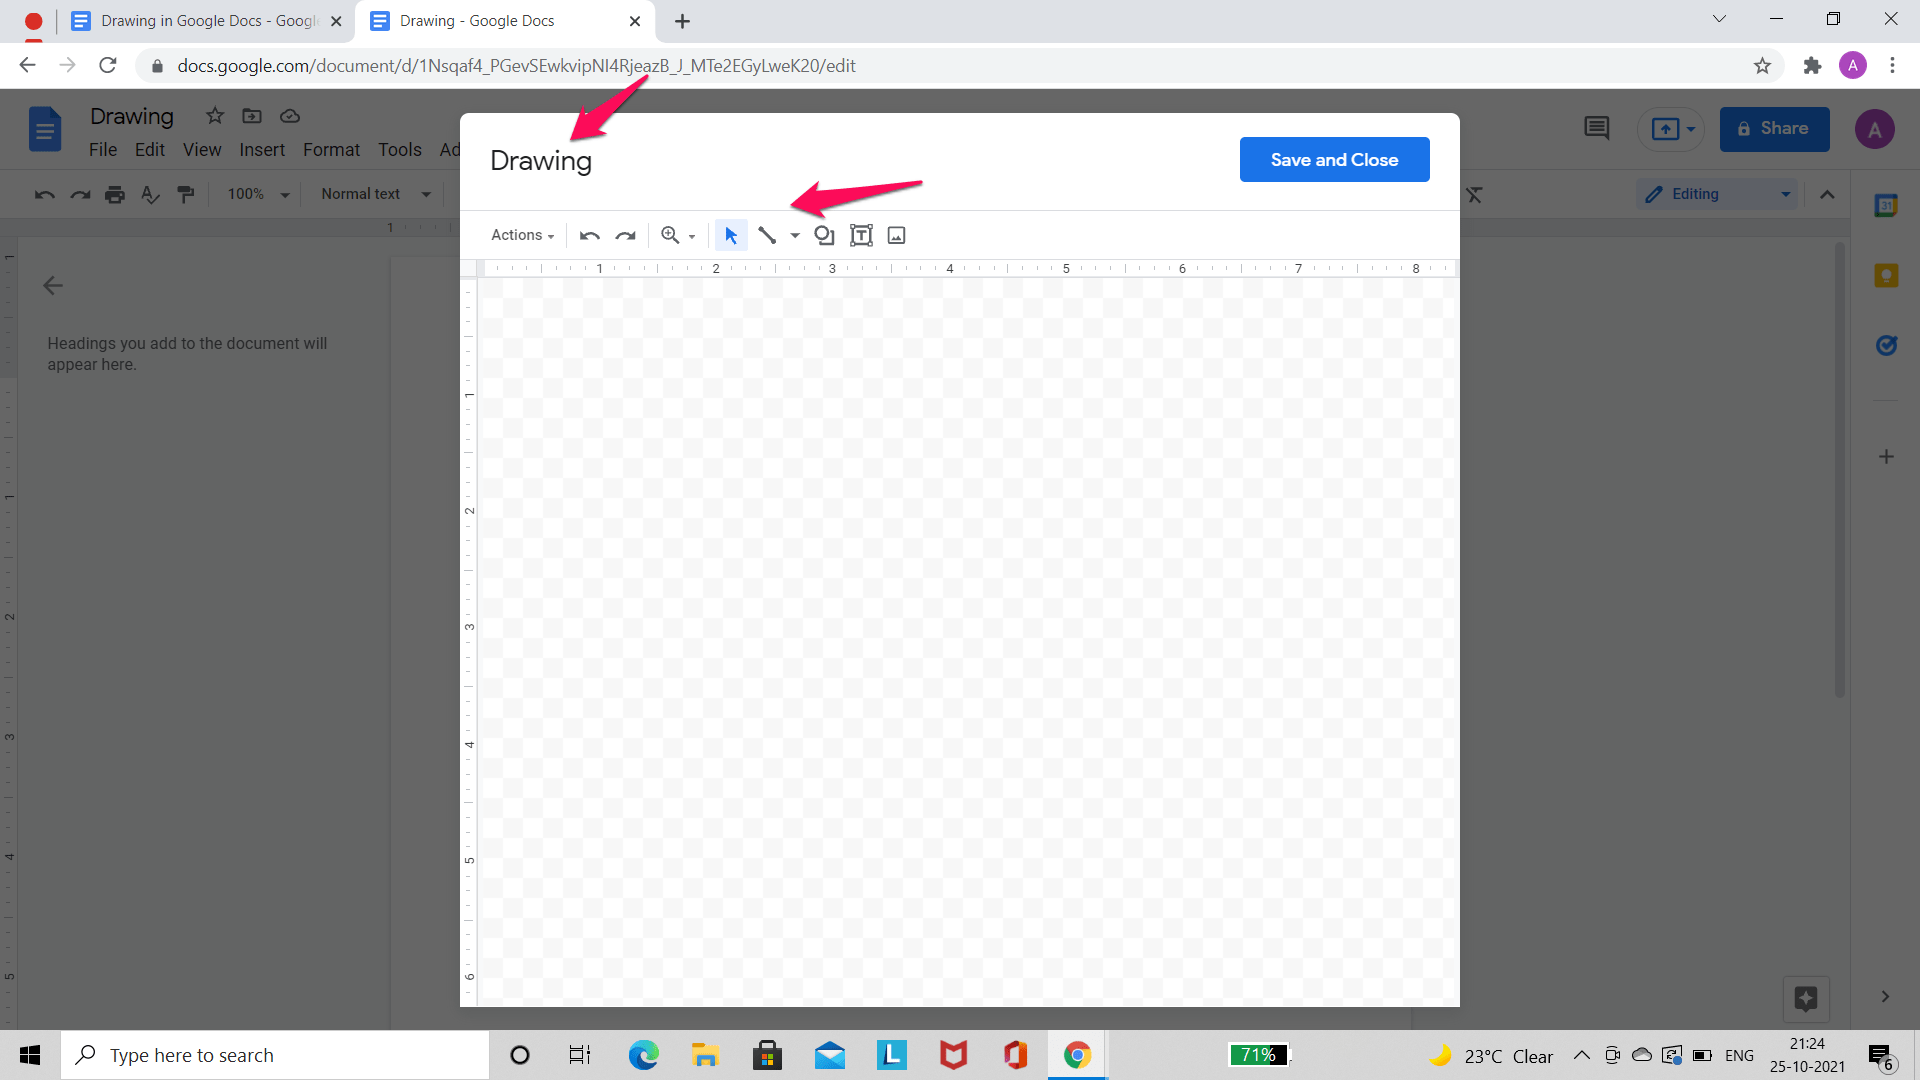
- A drawing window will pop up on the screen. This checkered window will have a toolbar and other features to help you draw.
- You can start drawing now!
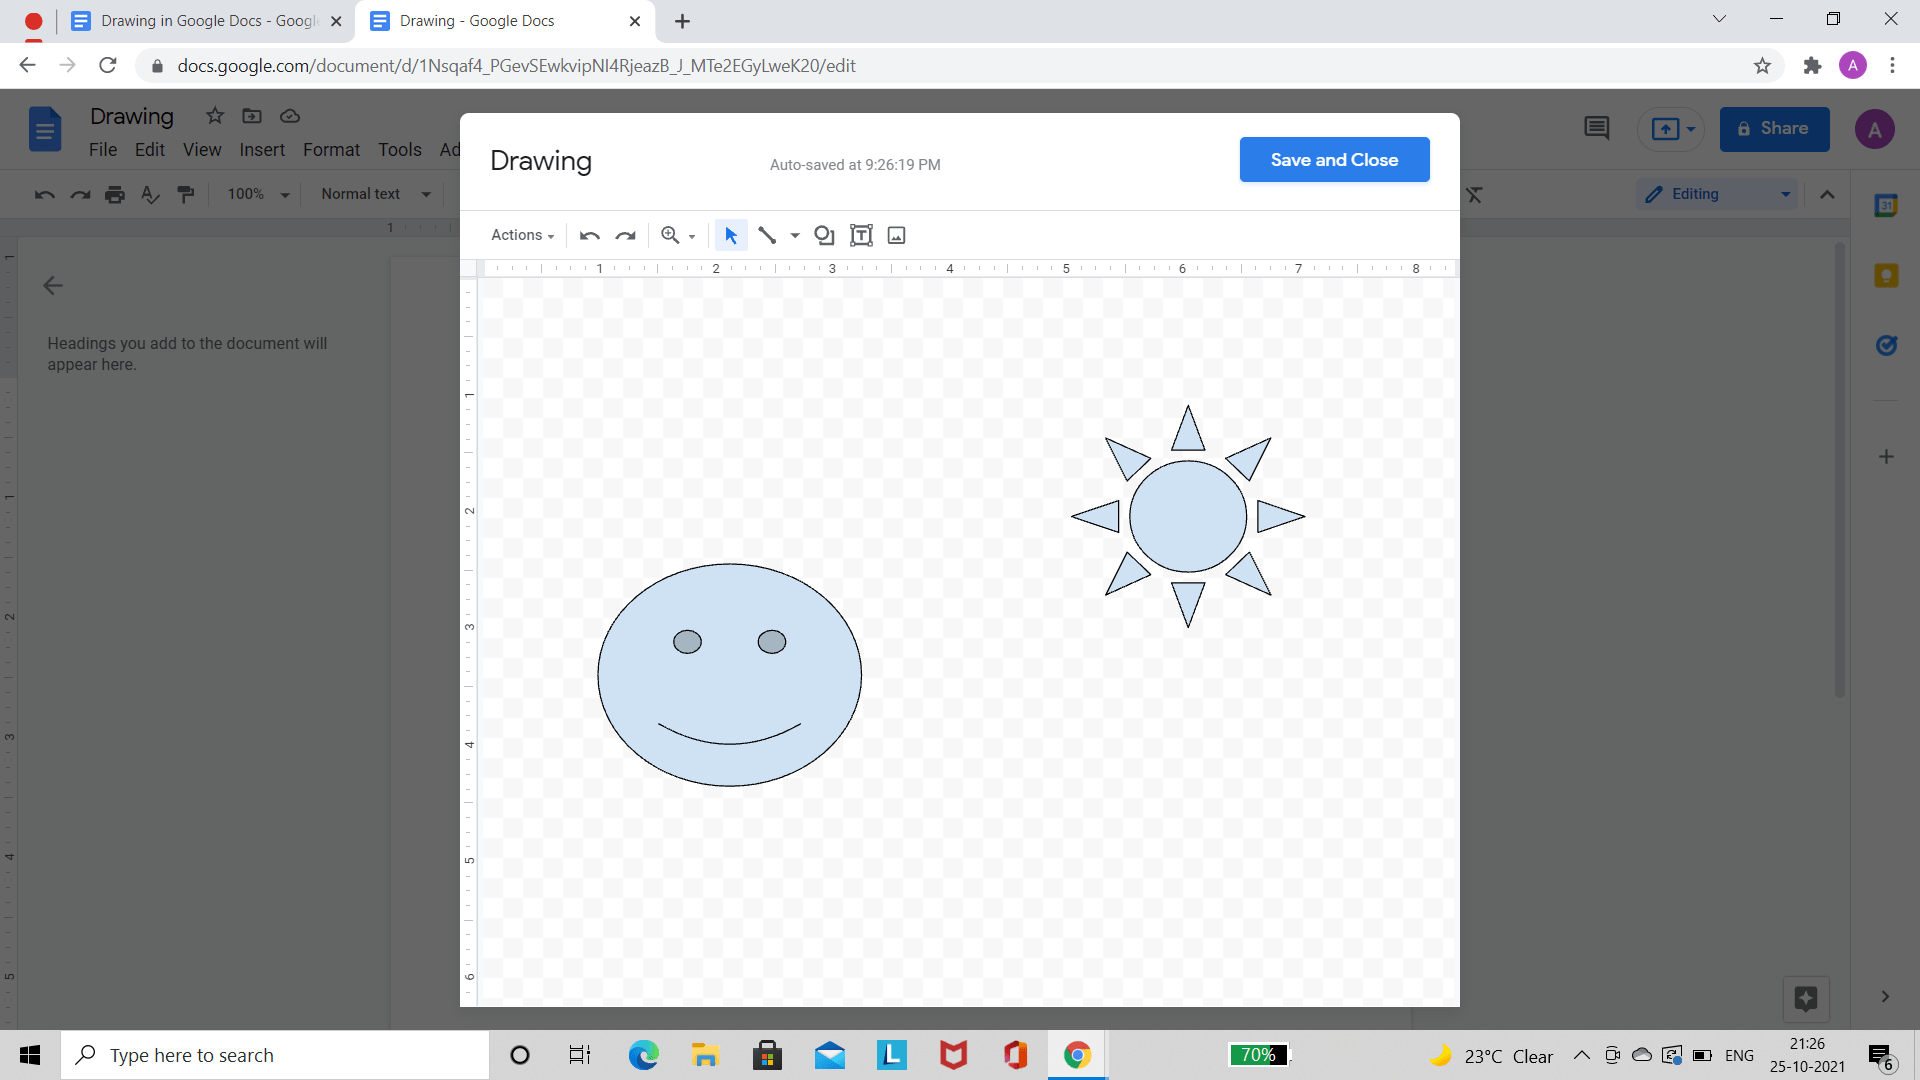
- Once you are done, click on ‘Save and Close‘, and you are all set!
Different Elements of the Drawing tool on Google Docs
Let us take a look at the different parts of the toolbar. Starting from the left, there’s an ‘Action’ ① menu, after which are the Undo button ② and the Redo button ③. Next comes the ‘Zoom’ ④ menu, the ‘Select’ ⑤ button, and the ‘Line’ ⑥ menu. The last three tools are the Shape ⑦ button, Text box ⑧ button, and Image ⑨ button.

We have described all the tools in detail for easy understanding. Let us start!
Action Menu
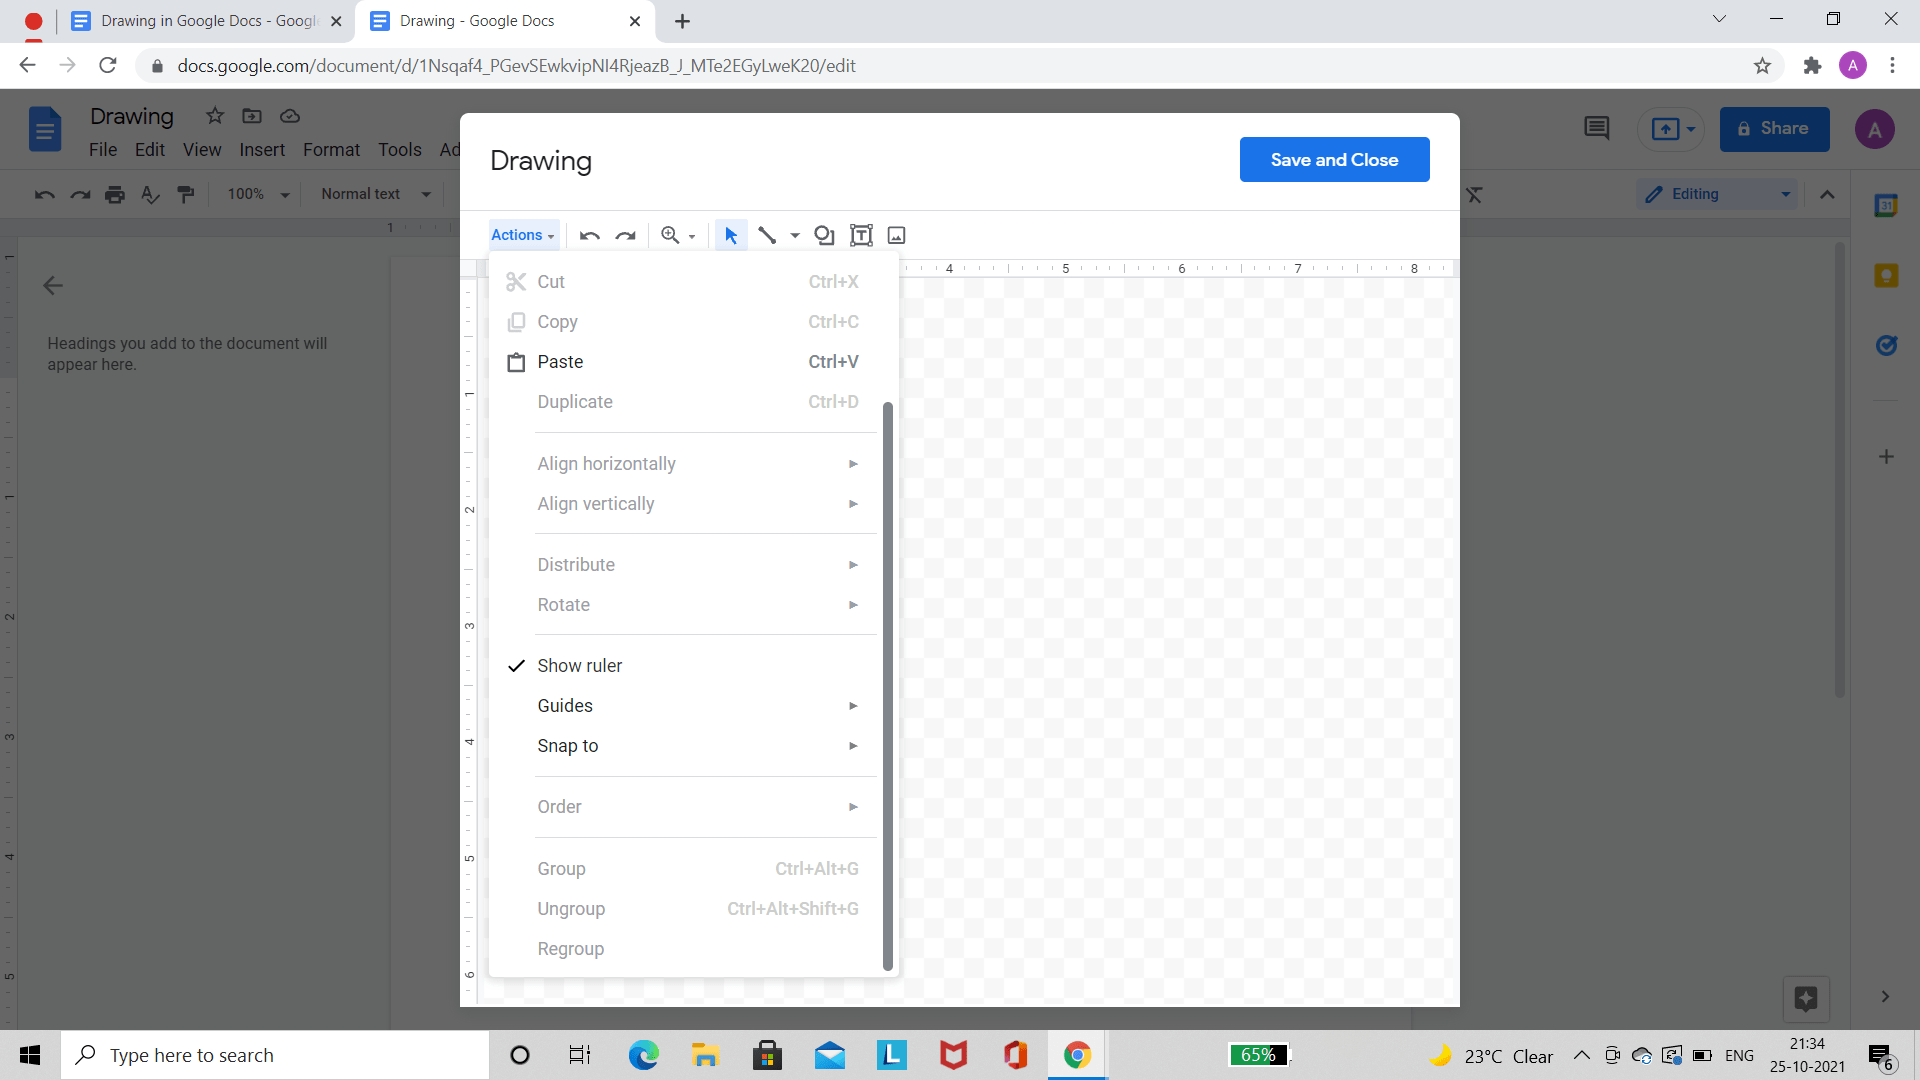
The ‘Action‘ menu has a bunch of different options you can choose from. The first and most important is the ‘Download‘ option. This allows users to download their creations in various forms like ODP documents, PDF documents, PDF, JPEG, PNG, and even Scalable Vector graphics.
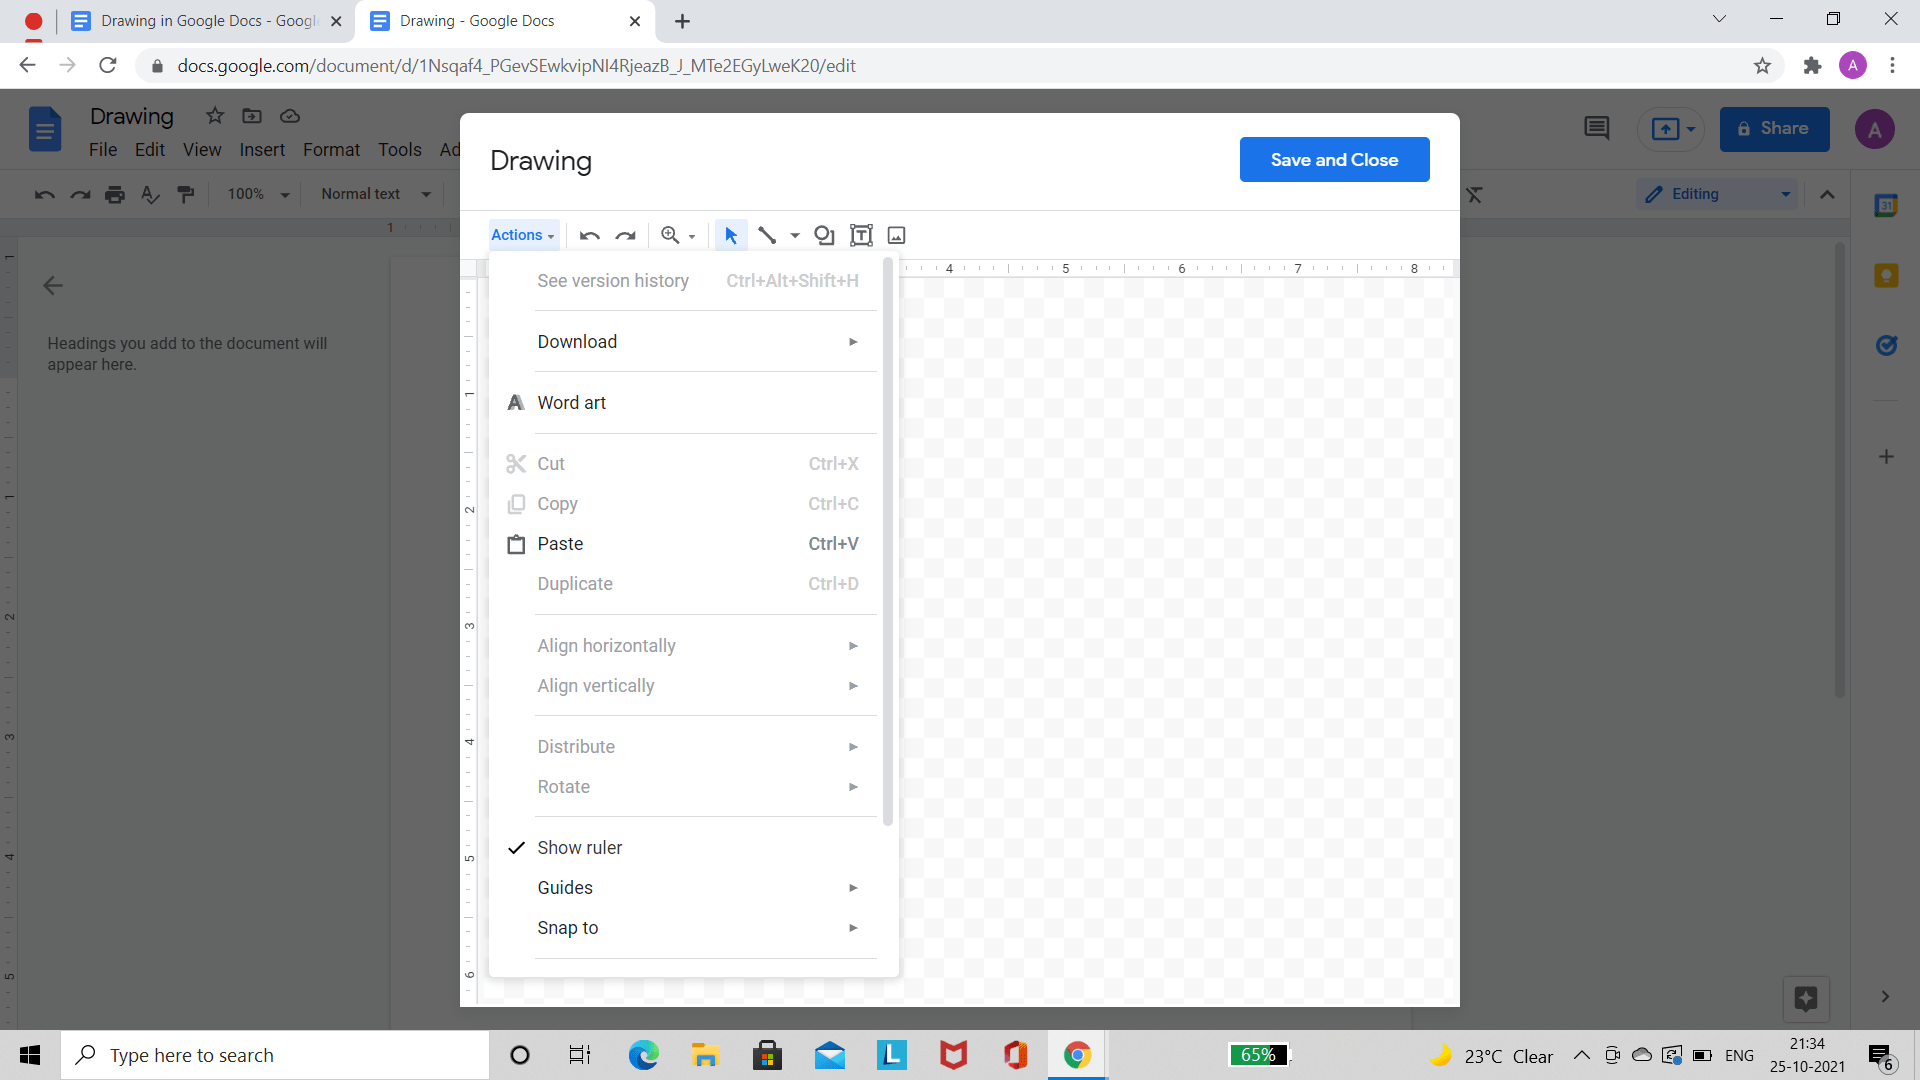
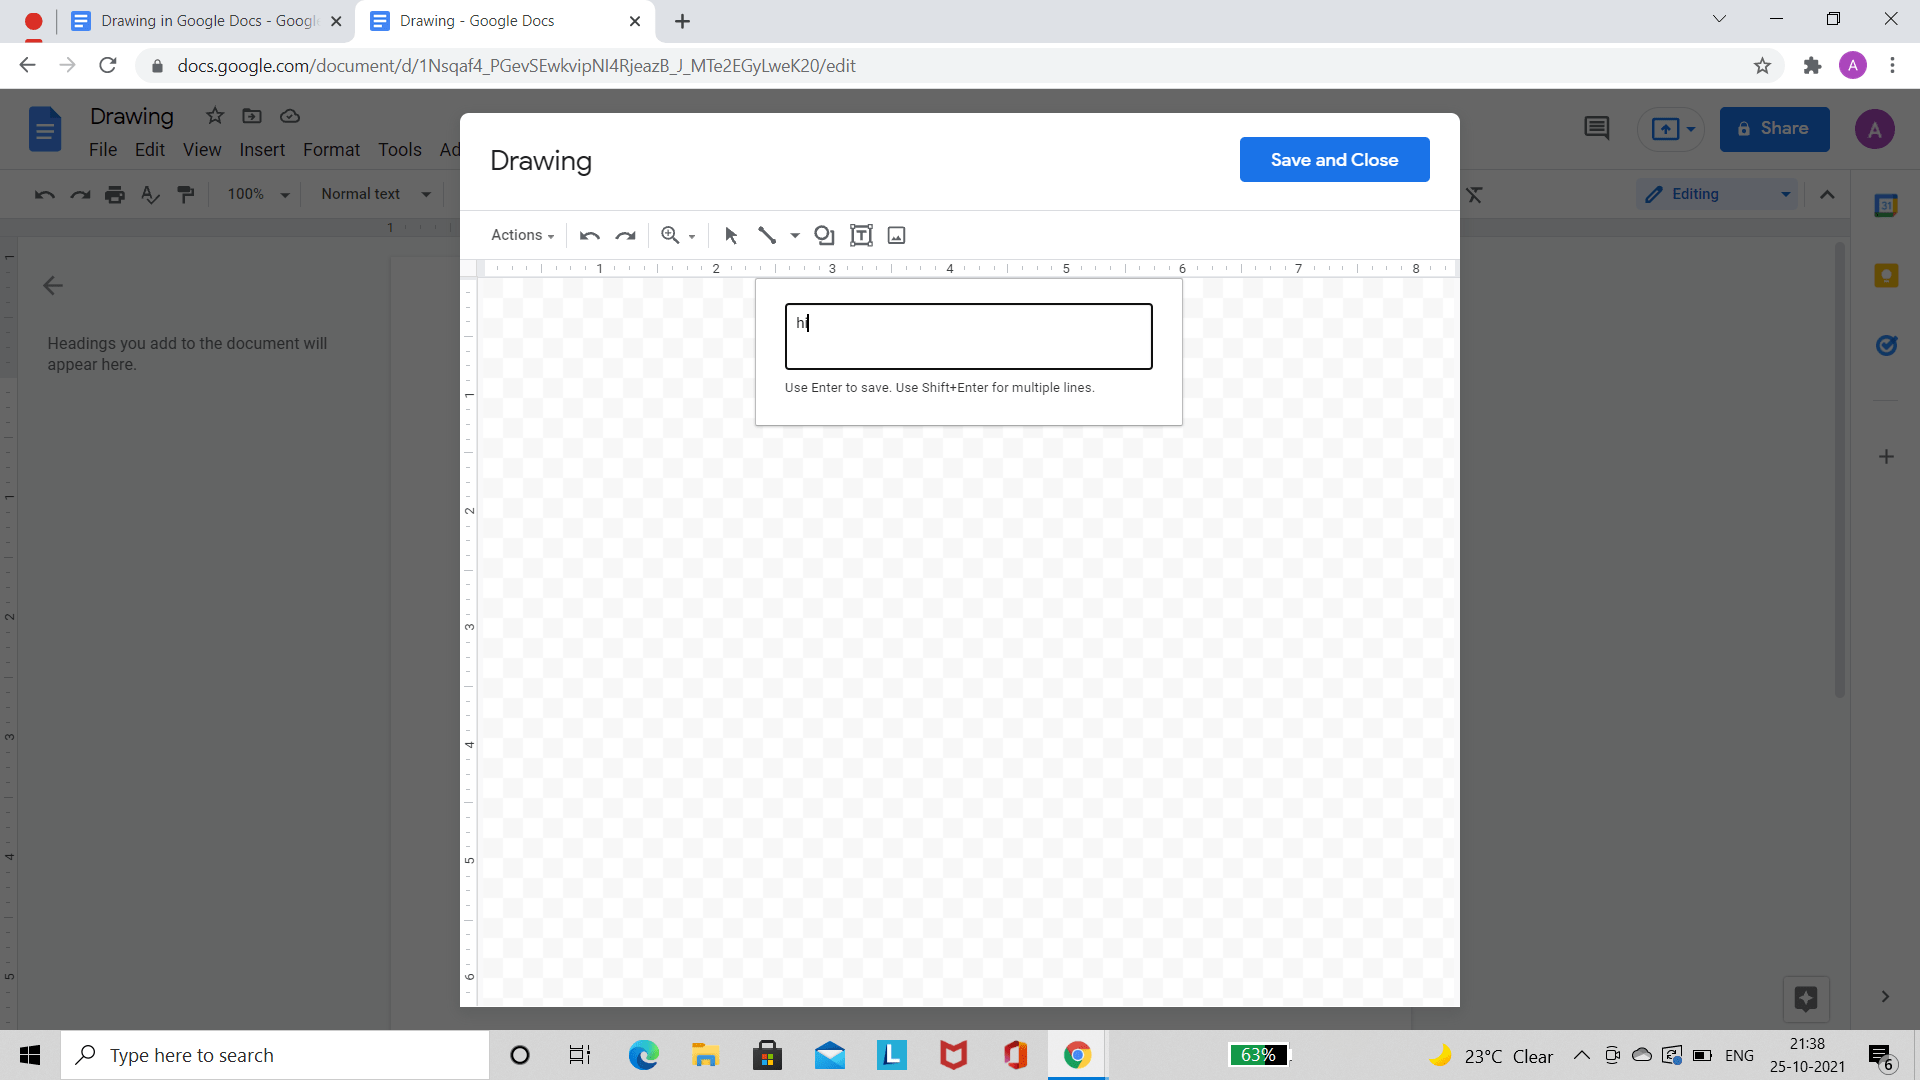
Next is the ‘Word Art‘ option, which allows users to insert word art. Once you click on Word Art, a text box shows up in which you type in the text you want to add.
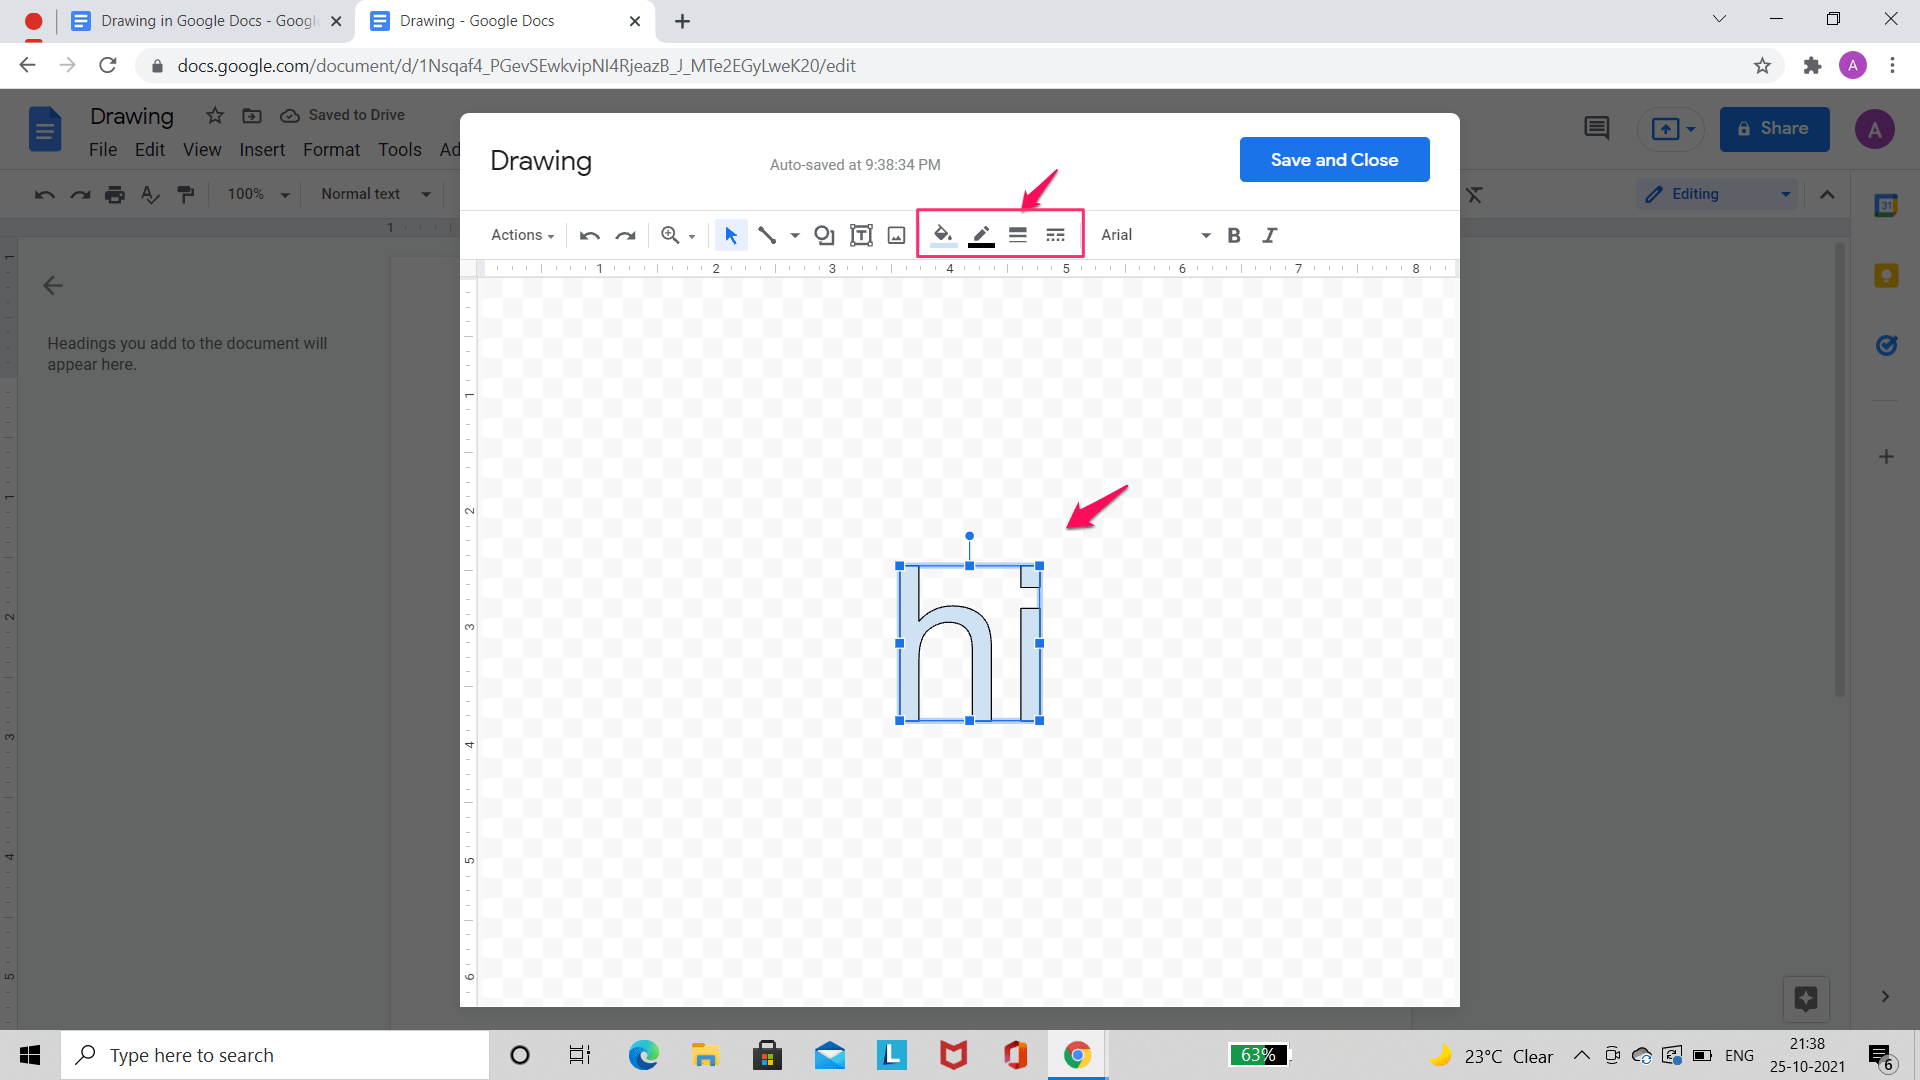
Hit the ‘Enter’ button and the word art is displayed. After this, additional editing tools appear on the toolbar like Fill Color, Border Color, Border weight, Border Dash, Font, Bold, and Italic. These allow the user to change the color, font, style of the text and change it to their liking.
Other options include the cut, copy, paste, align horizontally, align vertically, and duplicate options. Users can also see the version history of the drawing using the ‘See version history‘ option.

Users can also make use of the group (Let’s you rotate, flip, move, or resize all shapes or objects at the same time as a single unit), regroup and ungroup options. A distribute option and rotate option are available too. Users can rotate an object by 90 degrees in clockwise and counter-clockwise directions. They can also flip the image horizontally and vertically. Users can choose to show or hide the ruler, show, edit and clear the guides, and choose from grids and guides.
Undo Button
This is quite self-explanatory! The ‘Undo’ button helps the user correct an error by reverting to the previous state of the drawing/ document. This is symbolized by a left-leaning curved arrow pointing downwards.
Redo Button
This is quite self-explanatory too! The Redo button helps the user bring back any changes that the user might have gotten rid of. This is symbolized by a right-leaning curved arrow pointing downwards.
Zoom Menu
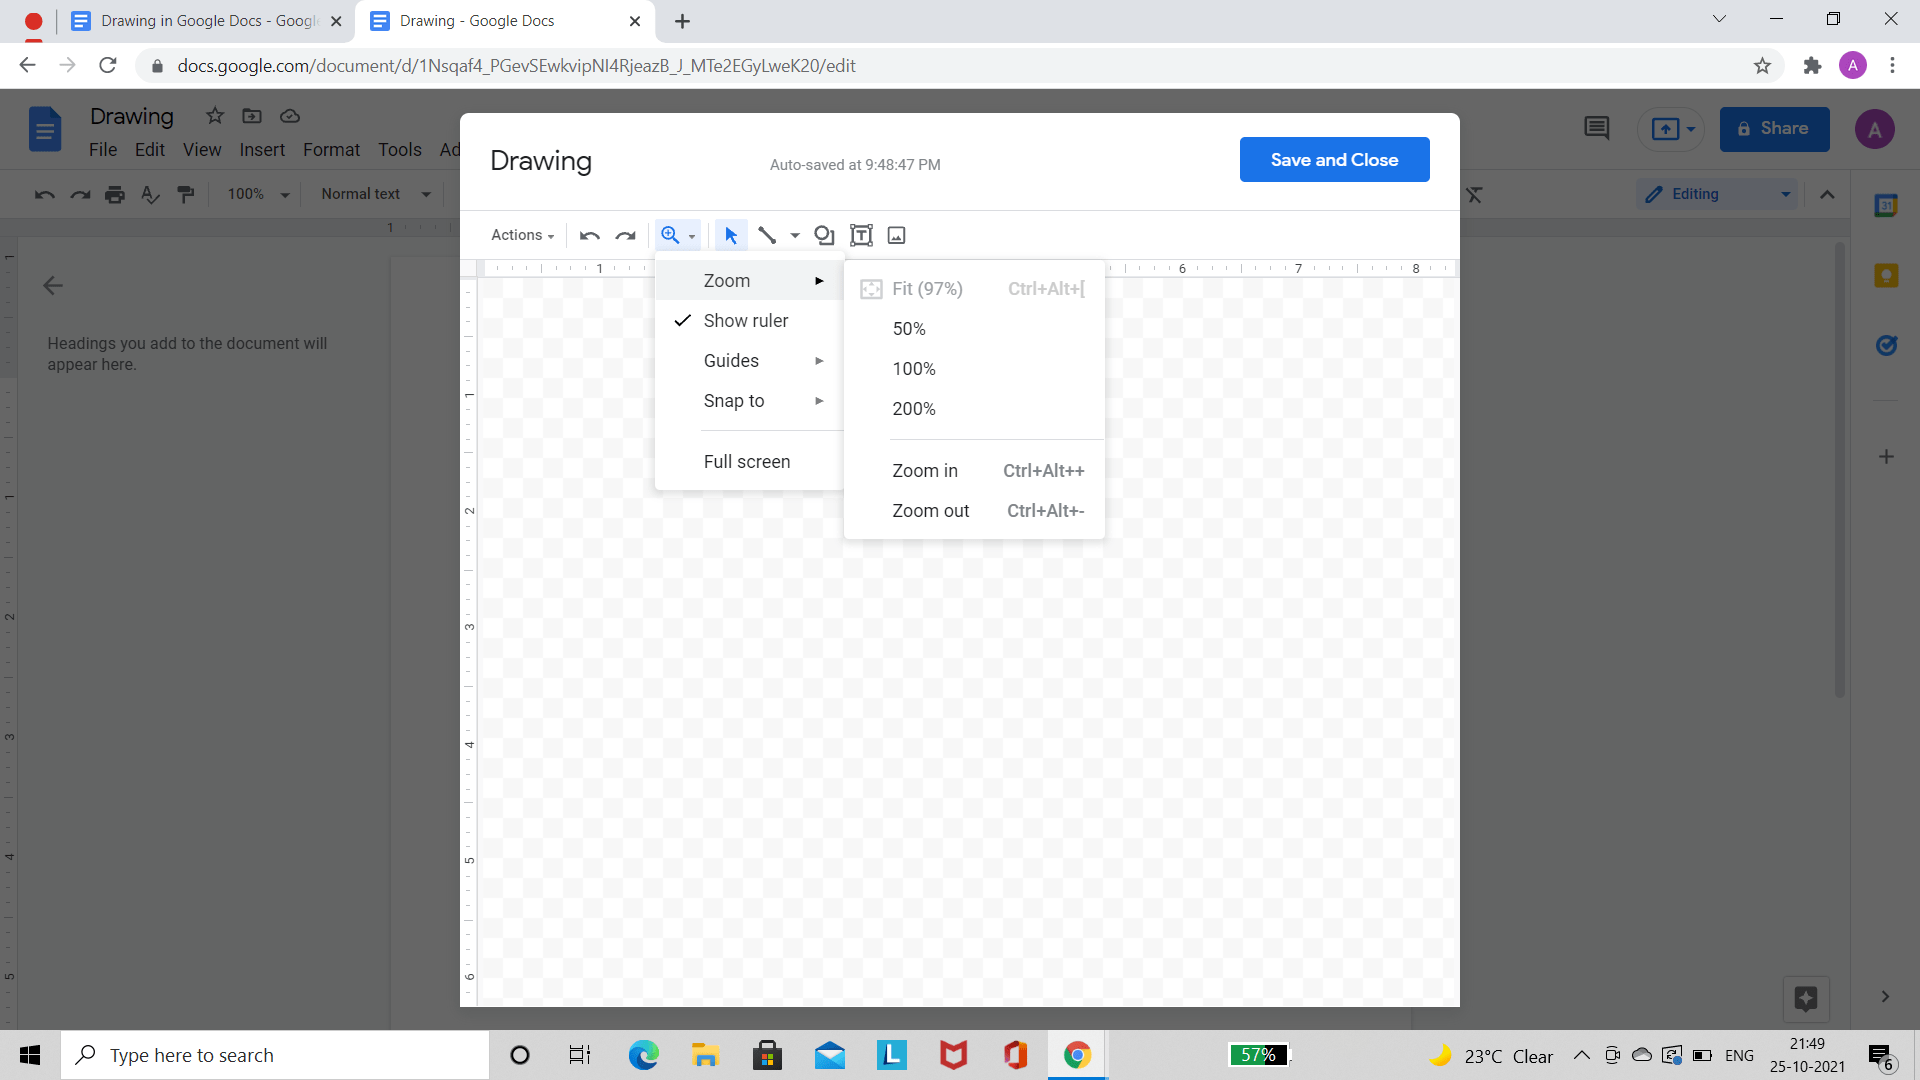
The ‘Zoom’ menu is symbolized by a magnifying glass with a plus sign in its center. It has five components, namely, ‘Zoom’, ‘Show Ruler’, ‘Guides’, ‘Snap to’ and ‘Full Screen’. The ‘Zoom’ option allows users to zoom in by 50%, 100%, and 200%. Users can also choose from the Zoom in and Zoom Out options. Users can show or hide the ruler and can also choose from grids and guides. The Full-screen option hides the toolbar completely.
Select Button
The Select Button is symbolized by a dark arrow pointing upwards. It allows users to select and deselect objects in the drawing.
Line Menu
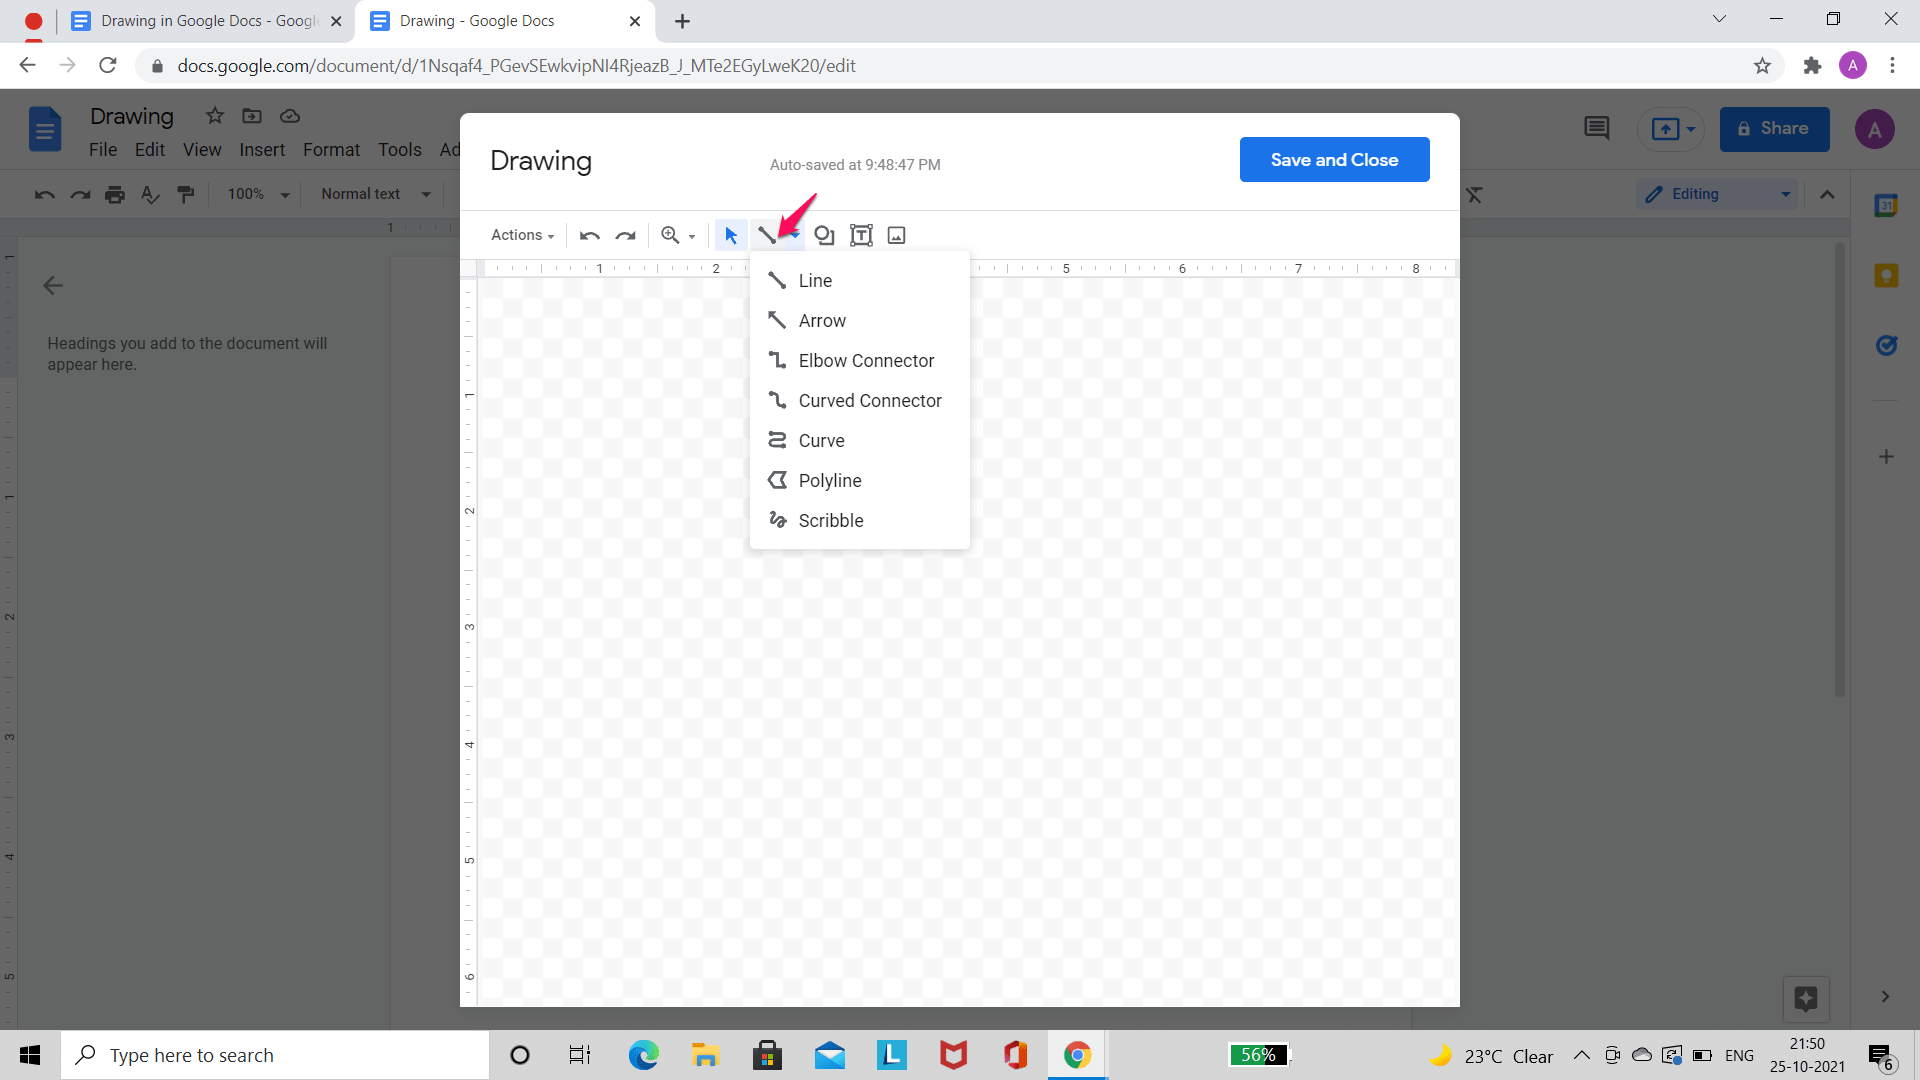
The ‘Line’ Menu is symbolized by a straight line leaning towards the left. The ‘Line’ menu has eight components, are ‘Line’, ‘Arrow’, ‘Elbow Connector’, ‘Curved Connector’, ‘Curve’, ‘Polyline’, and ‘Scribble’. All of these components can be used for different purposes. ‘Line’ allows the users to draw a straight line, while ‘Arrow’ allows users to draw an arrow. ‘Curve’ allows users to insert a curve into the drawing, while with ‘Scribble’, users can scribble freehand. ‘Elbow Connector’ and ‘Curved Connector’ can also be used to insert figures that look a lot like steps of the staircase. With ‘Polyline,’ users can draw quadrilaterals and polygons easily.
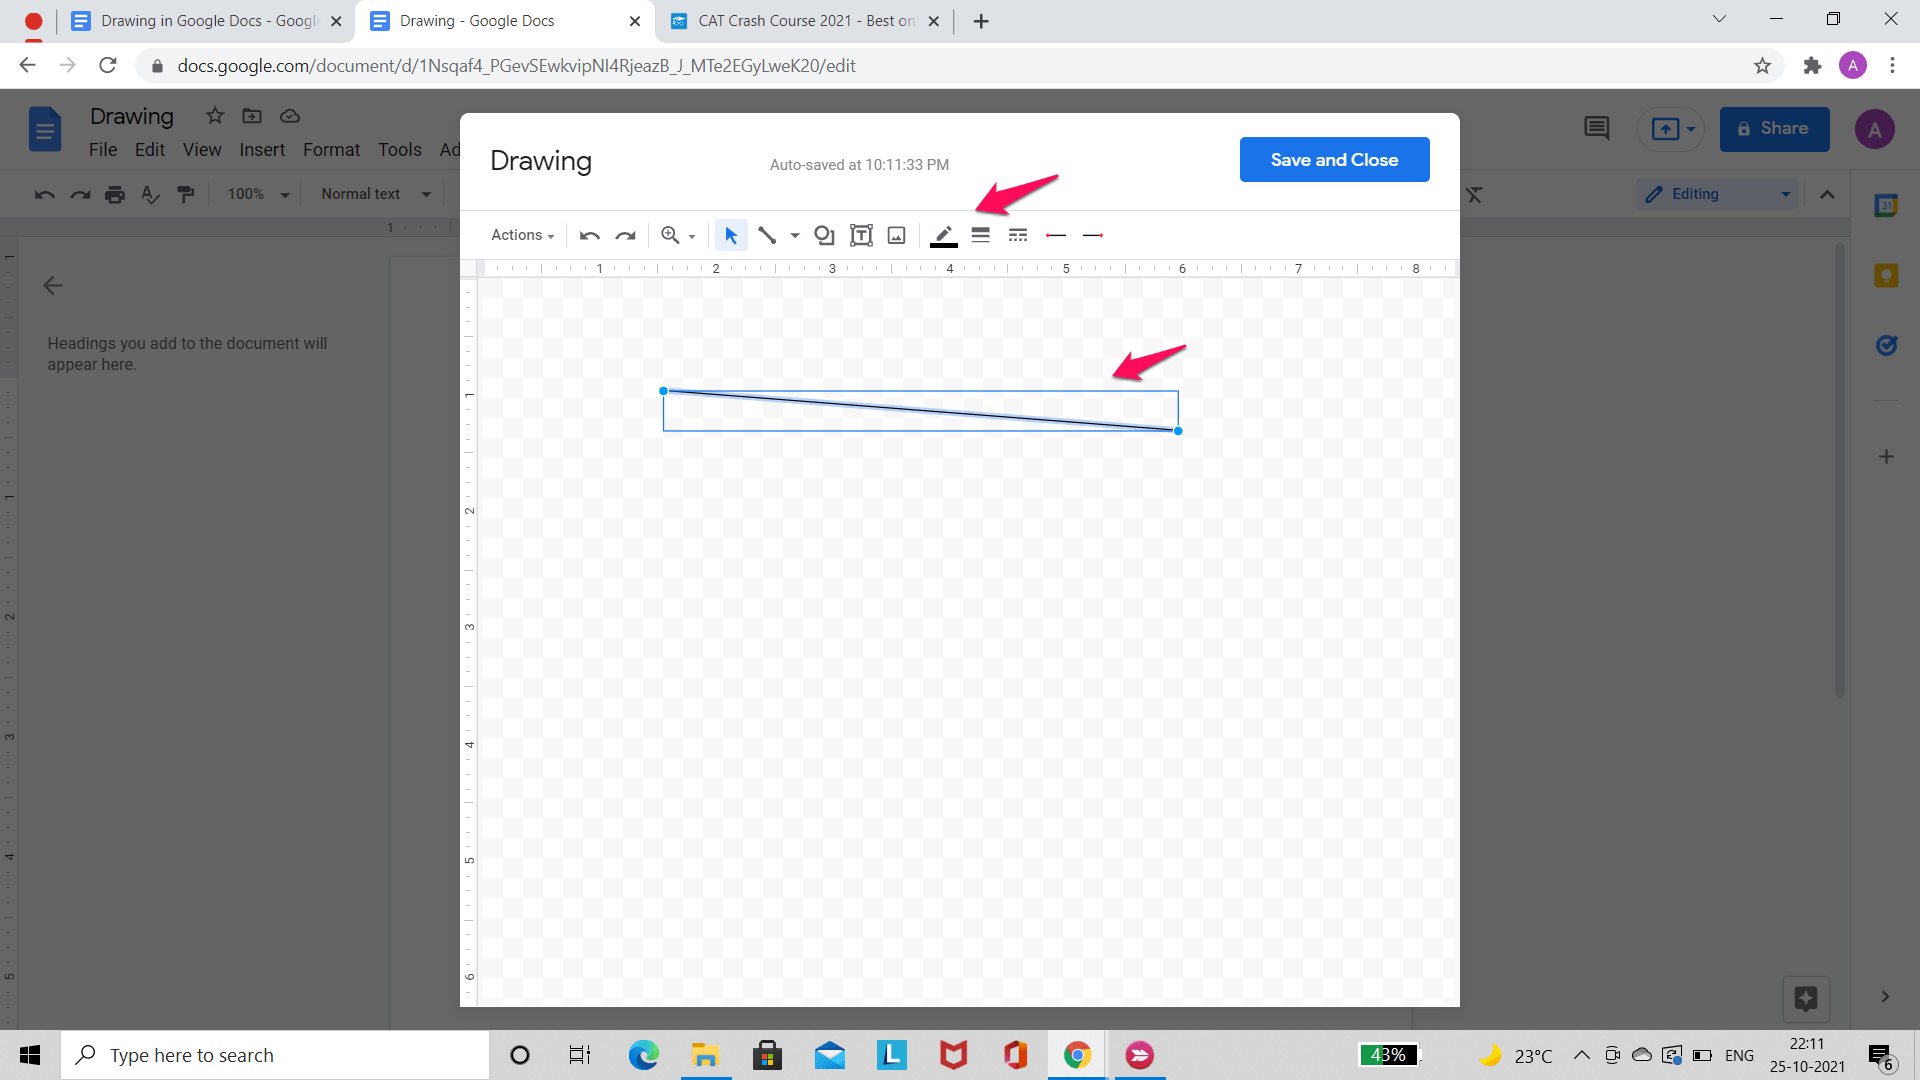
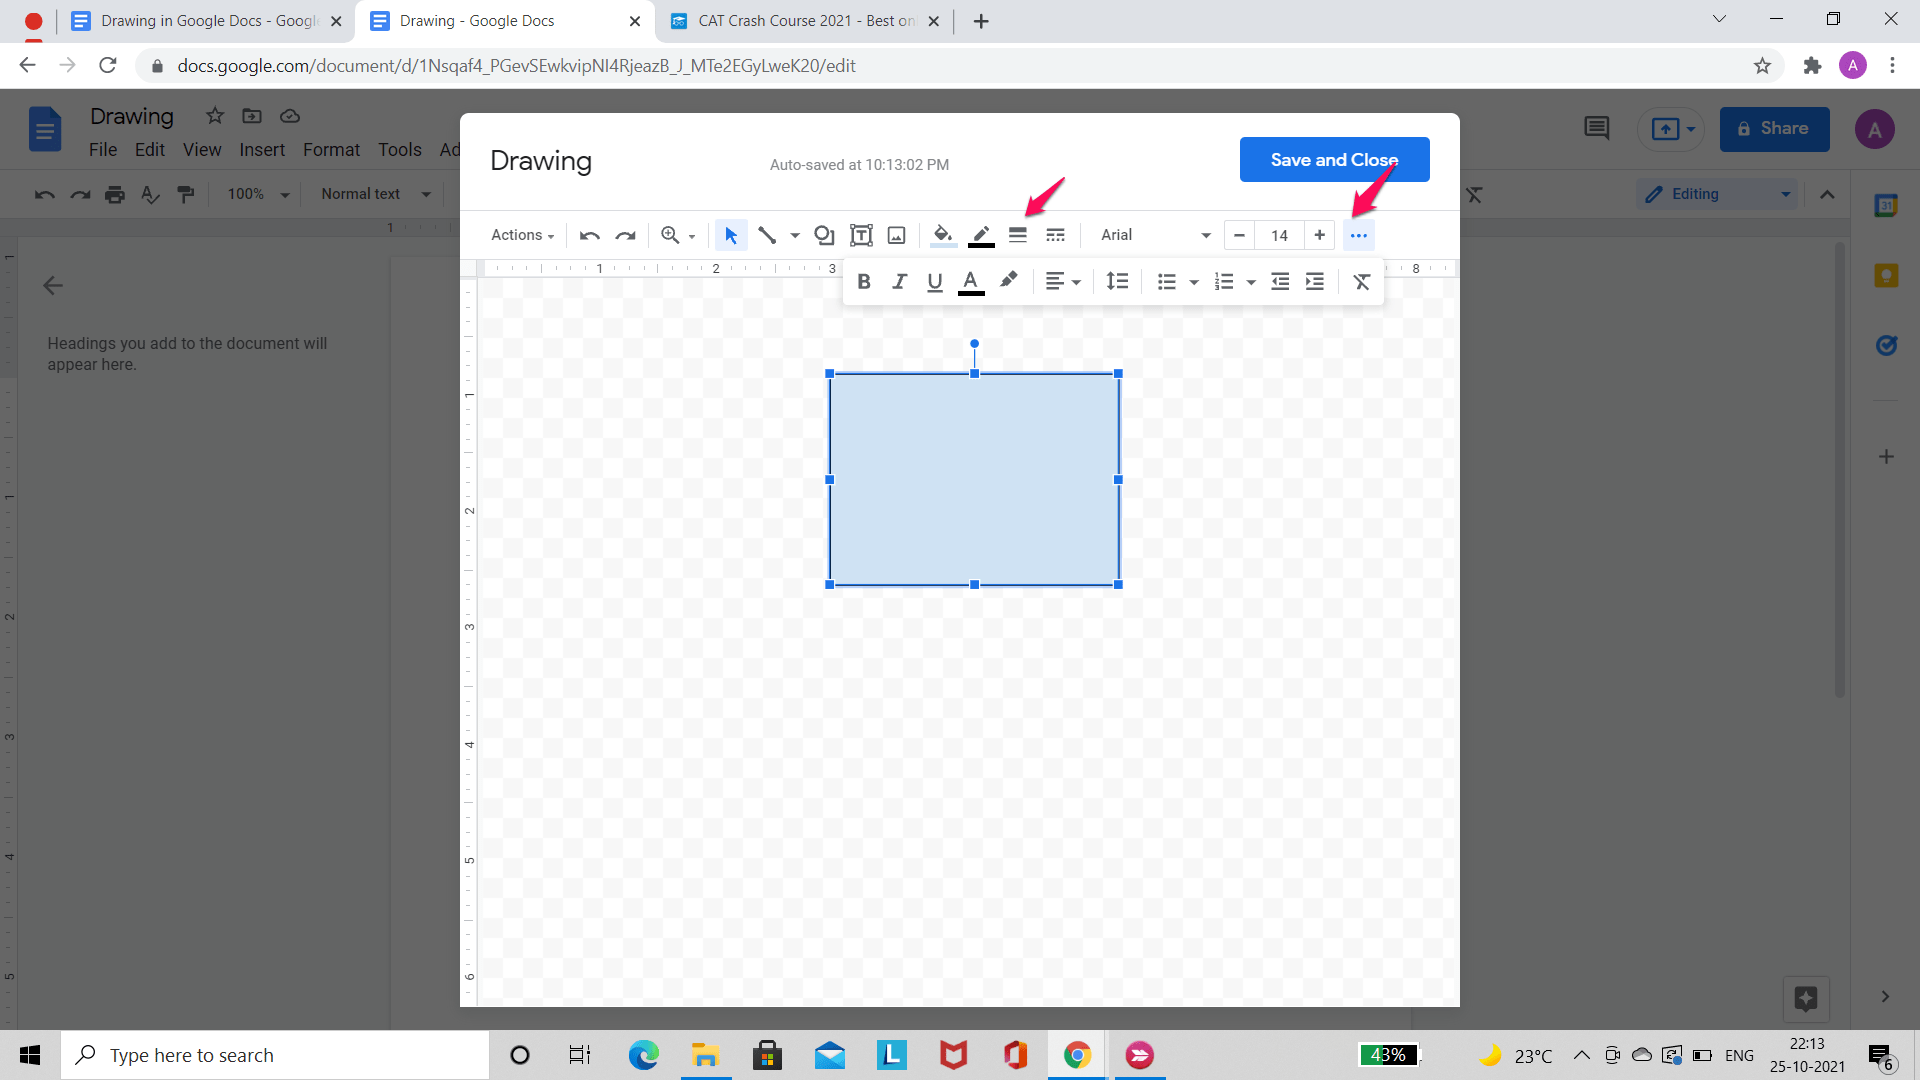
Additional editing tools like Line color, line weight, line dash, line start, and line end are displayed once you have inserted a line.
Shapes Button
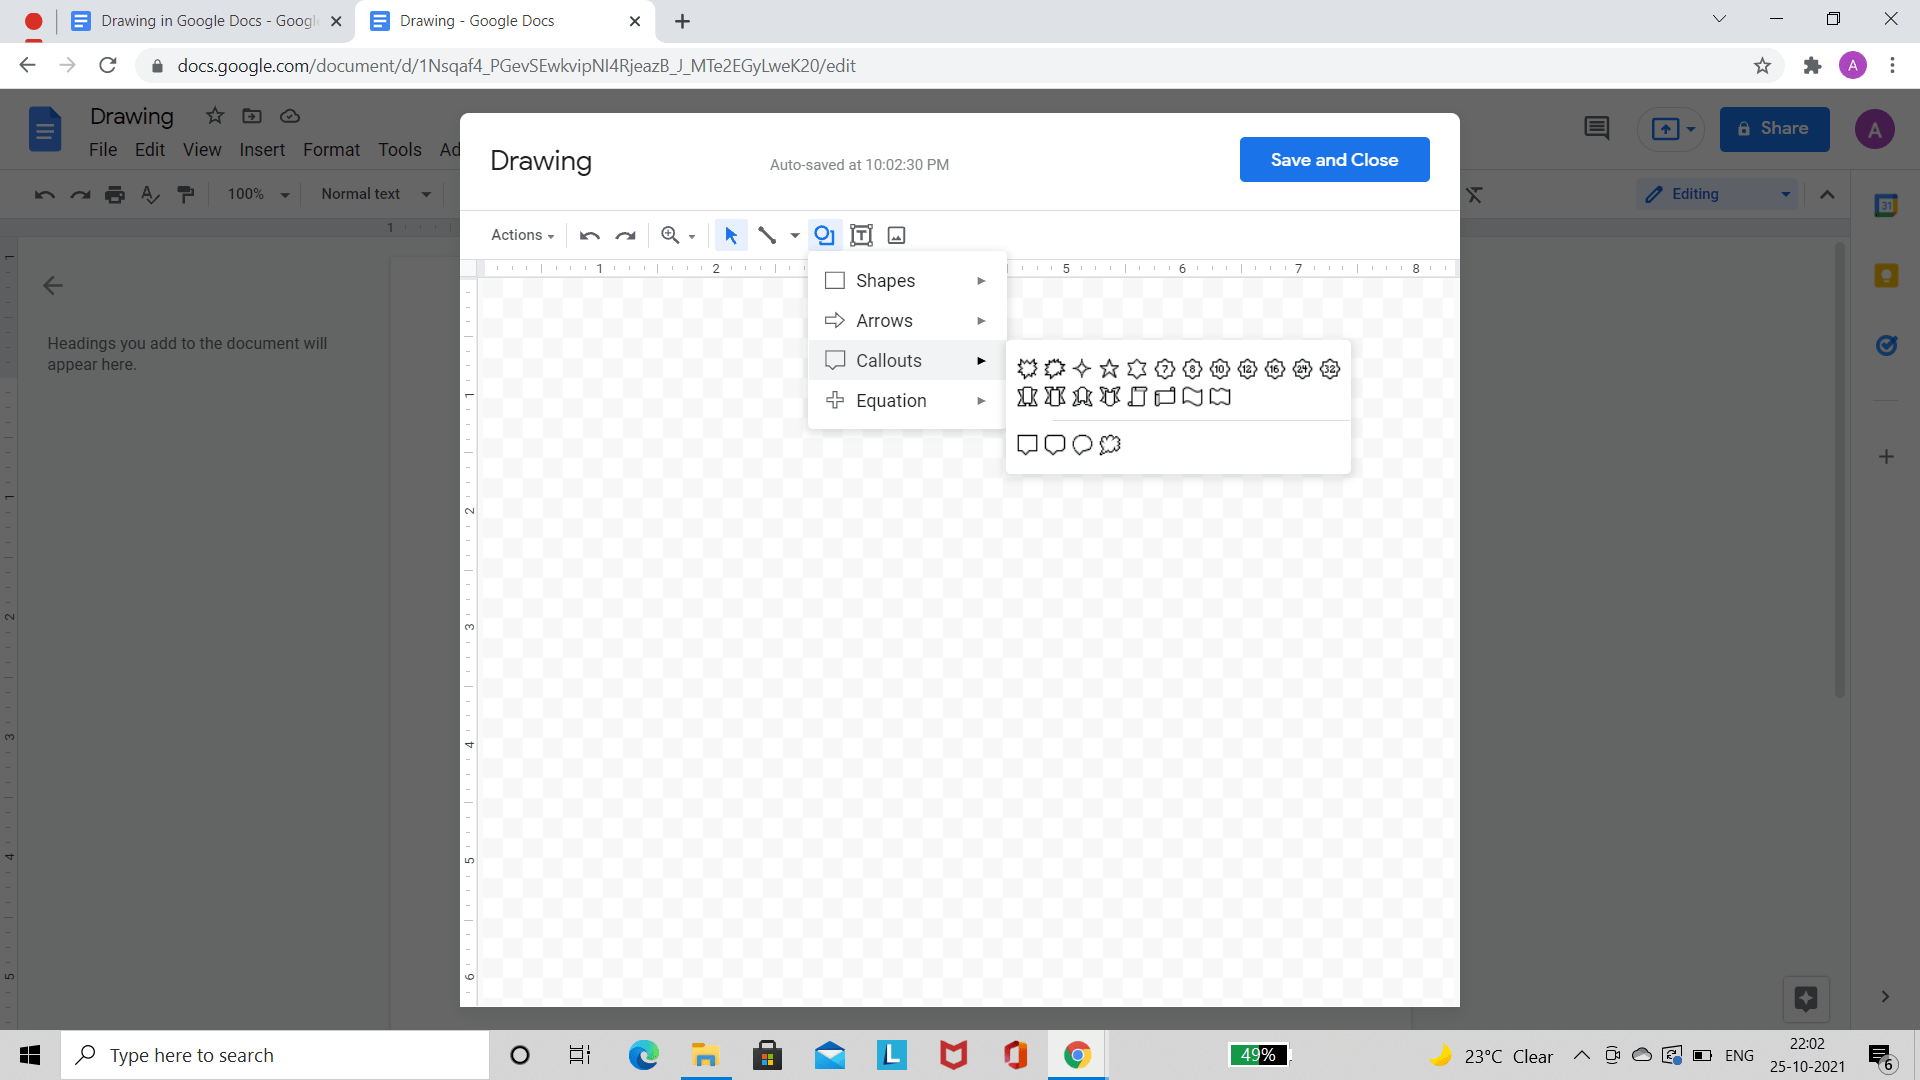
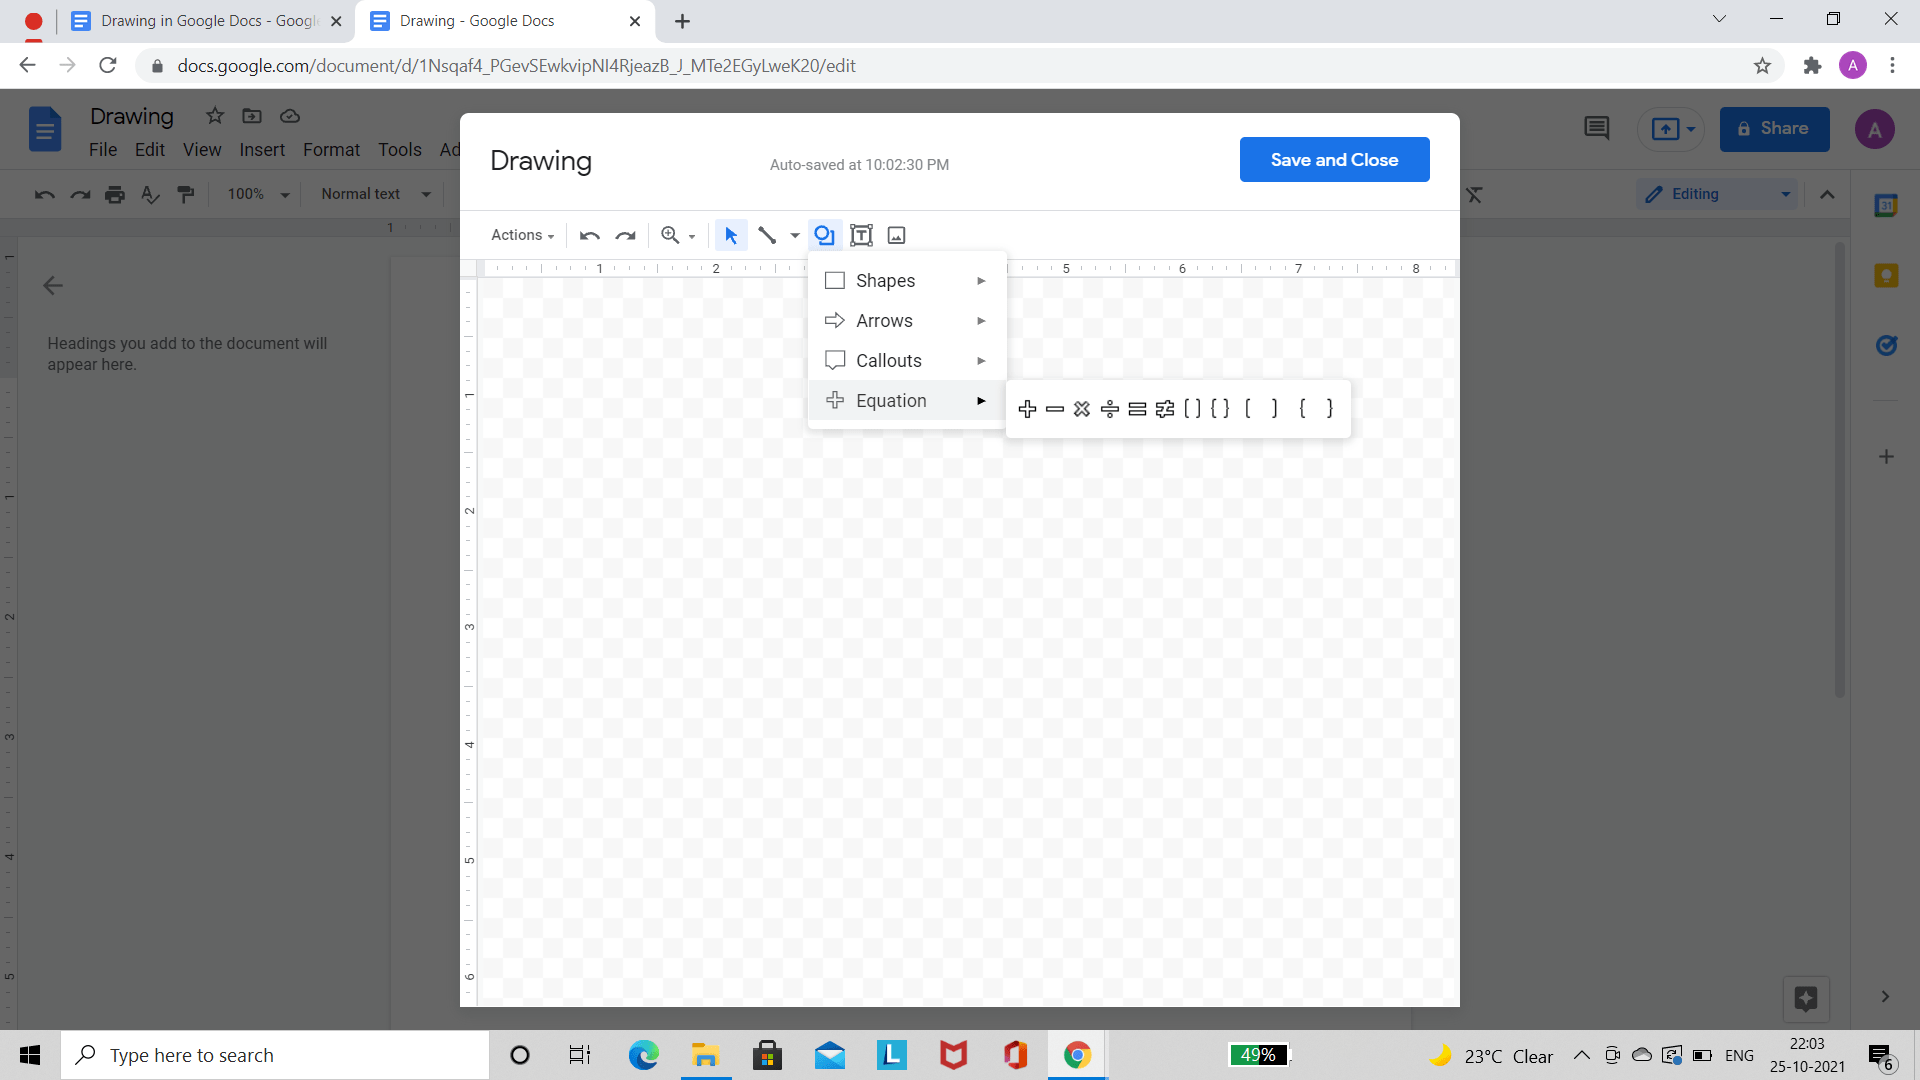
Next to the ‘Line’ menu is the ‘Shapes’ button. It is symbolized by a merged circle and square. Its four components are ‘Shapes’, ‘Arrows’, ‘Callouts’, and ‘Equations’. These components are further divided into different subparts. Once a shape is inserted, additional tools are displayed similar to the ones that show up when a line is inserted.
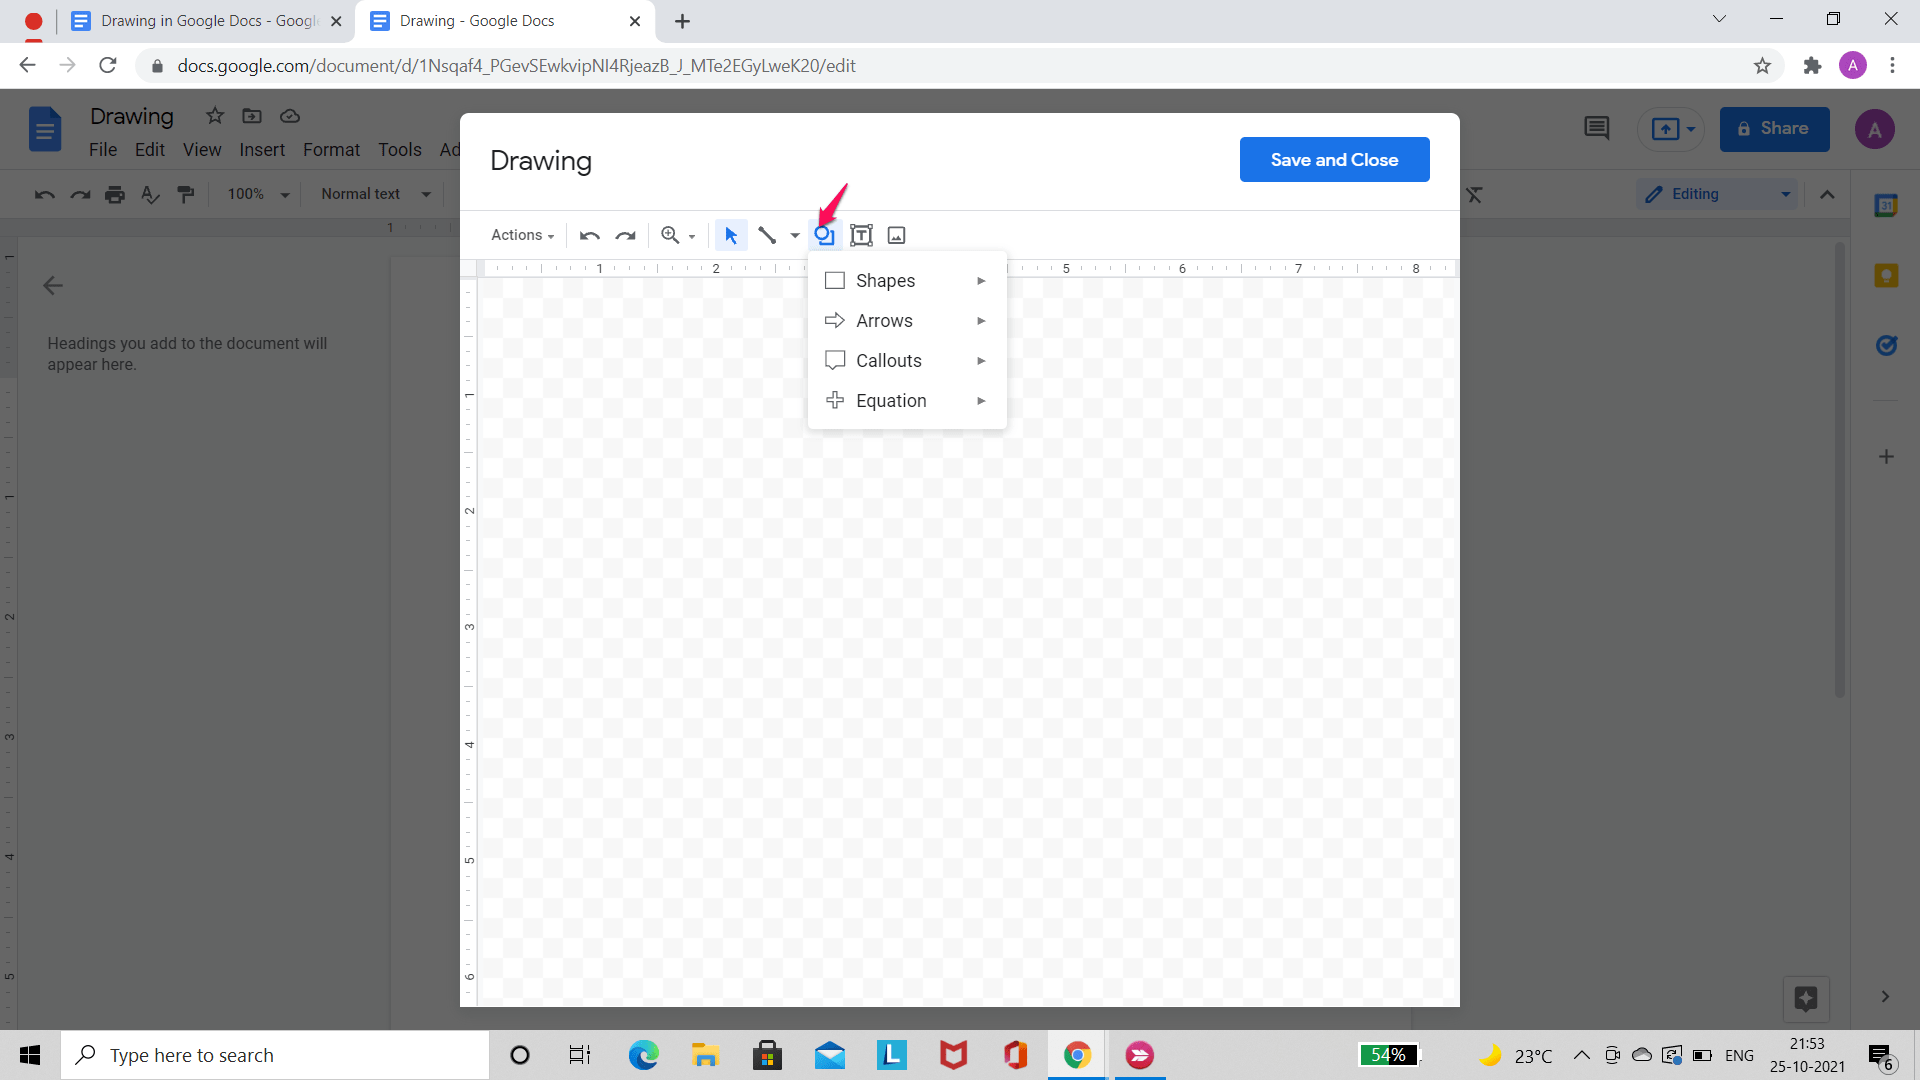
Shapes – The first subpart of ‘Shapes’ is the rectangle subpart, which has different kinds of rectangles like a basic rectangle, rounded rectangle, snip diagonal corner rectangle, rounded diagonal corner rectangle, and round single corner rectangle.
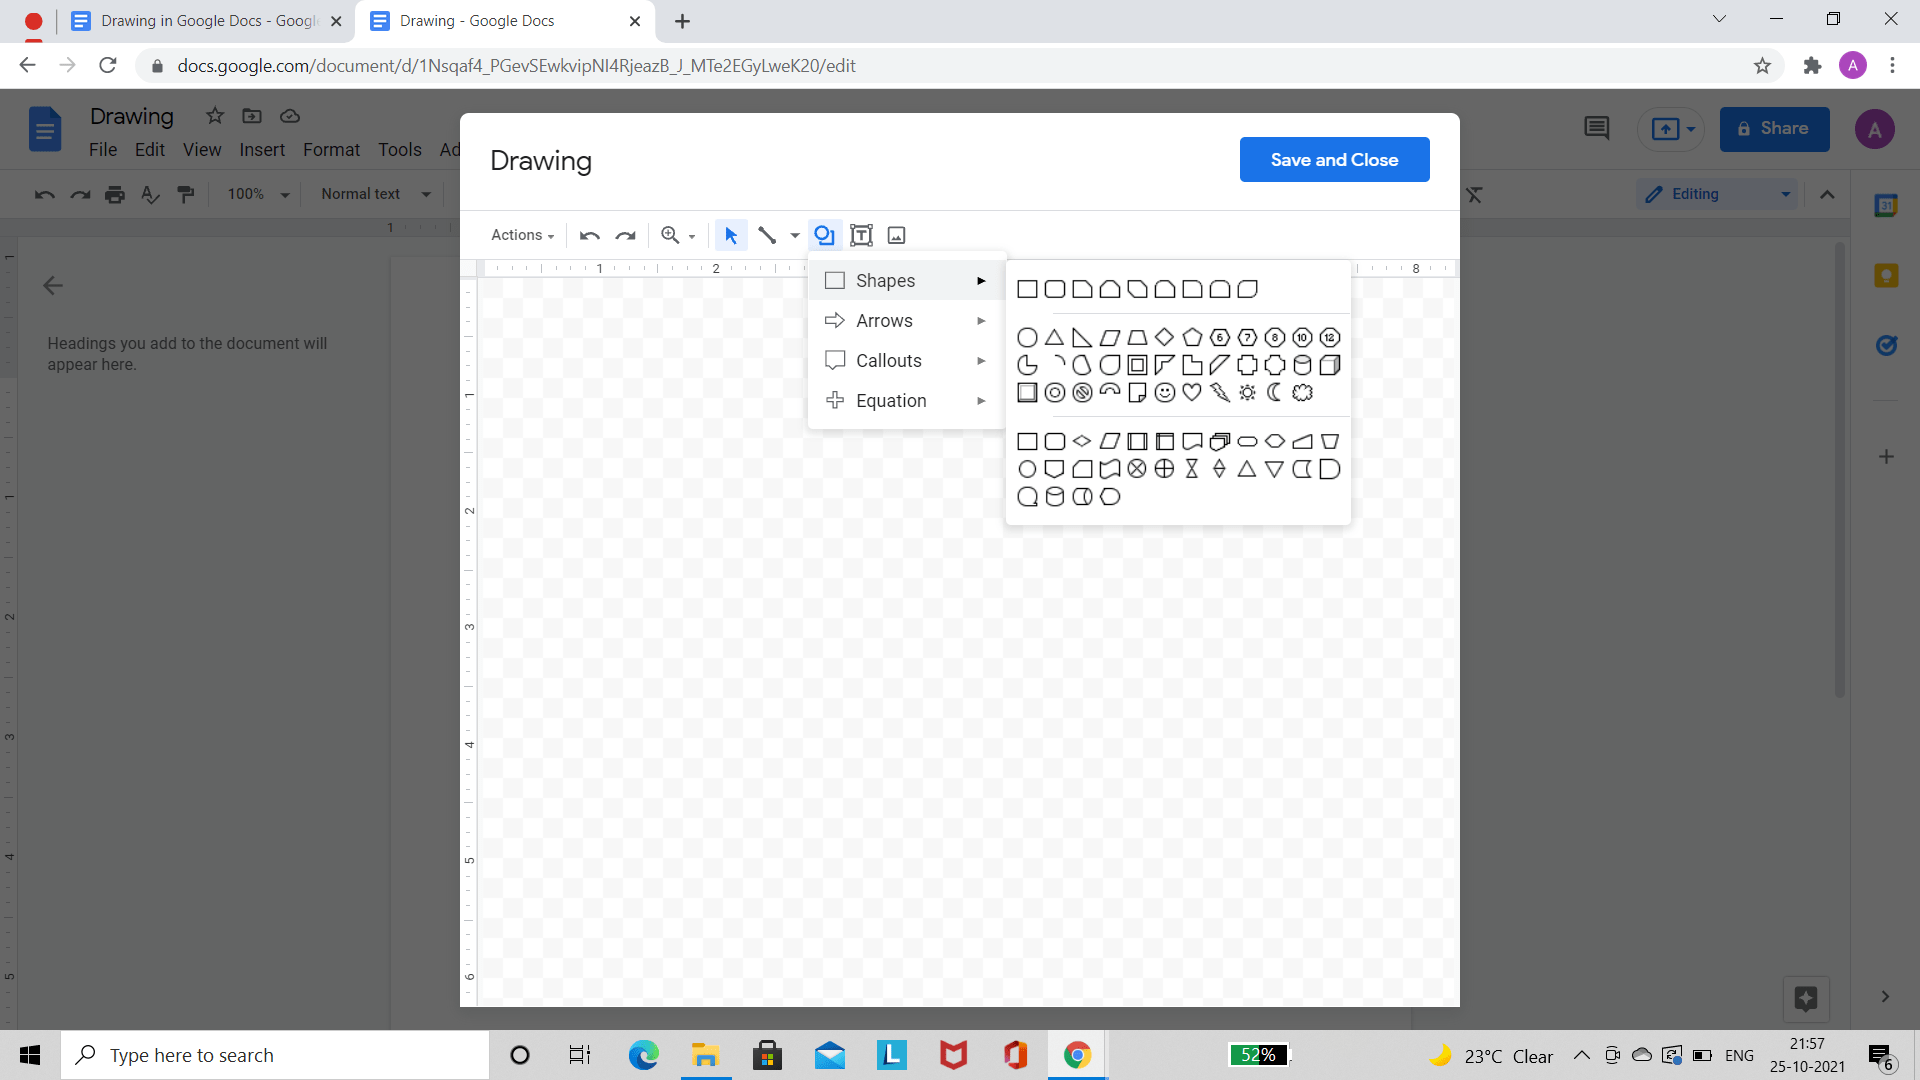
The second subpart houses various shapes like a triangle, right-angled triangle, trapezoid, parallelogram, diamond, regular pentagon, teardrop, frame, can, cube, bevel, pie, arc, chord, donut, smiley, heart, decagon, half frame, L- shape, cross, etc.
The third subpart has shapes related to a flowchart. It has shapes like Flowchart: Process, Flowchart: Alternate Process, Flowchart: Predefined Process, Flowchart: Document, Flowchart: Multi-document, Flowchart: Merge, Flowchart: Extract, Flowchart: Collate, Flowchart: Sort, Flowchart: Display, Flowchart: Connector, Flowchart: Punched Tape, etc.
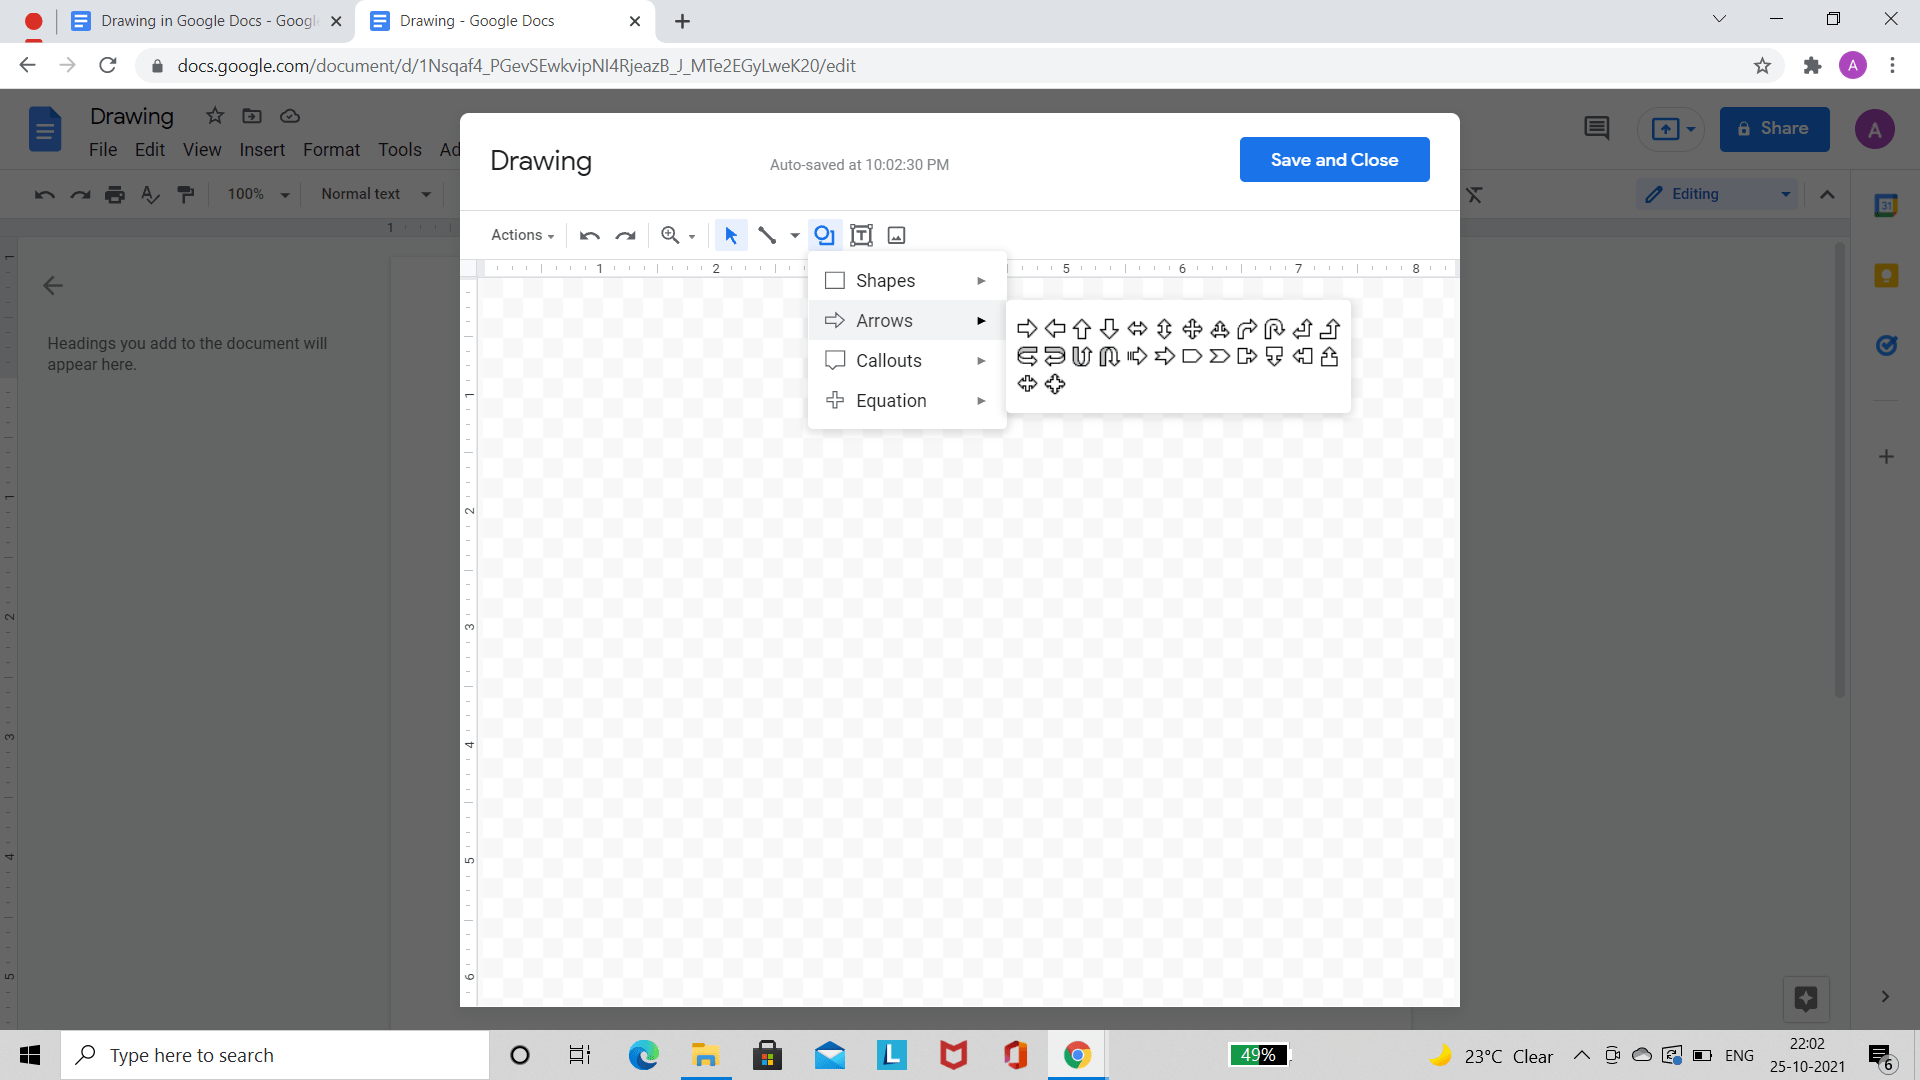
Arrows – ‘Arrows’ has all kinds of arrows that the user can add to the drawing. Up arrow, Down arrow, Left arrow, Right arrow, Left – Right arrow, Up-down arrow, Quad arrow, Curved left arrow, Curved right arrow, Pentagon arrow, Chevron, Quad arrow callout, bent-up arrow, and left-up arrow are some of the arrows that one can insert.
Callouts – Callouts allow users to insert speech/ chat bubbles. Speech/chat bubbles/ callouts usually appear in comic books, brochures, or other things where the user wants to convey a message. Explosion 1, Explosion 2, 4 point star, 5 point star, 6 point star, 7 point star, 8 point star, and 10, 12,16, and 32 point star are some of the elements present in the first subpart of Callouts. The second subpart contains only five elements, a rectangular callout, rounded rectangular callout, oval callout, and a cloud callout.
Equation – ‘Equations’ has very simple elements like a plus sign, subtract/minus sign, division sign, equal to sign, double bracket, double brace, not equal sign, etc.
Text Box
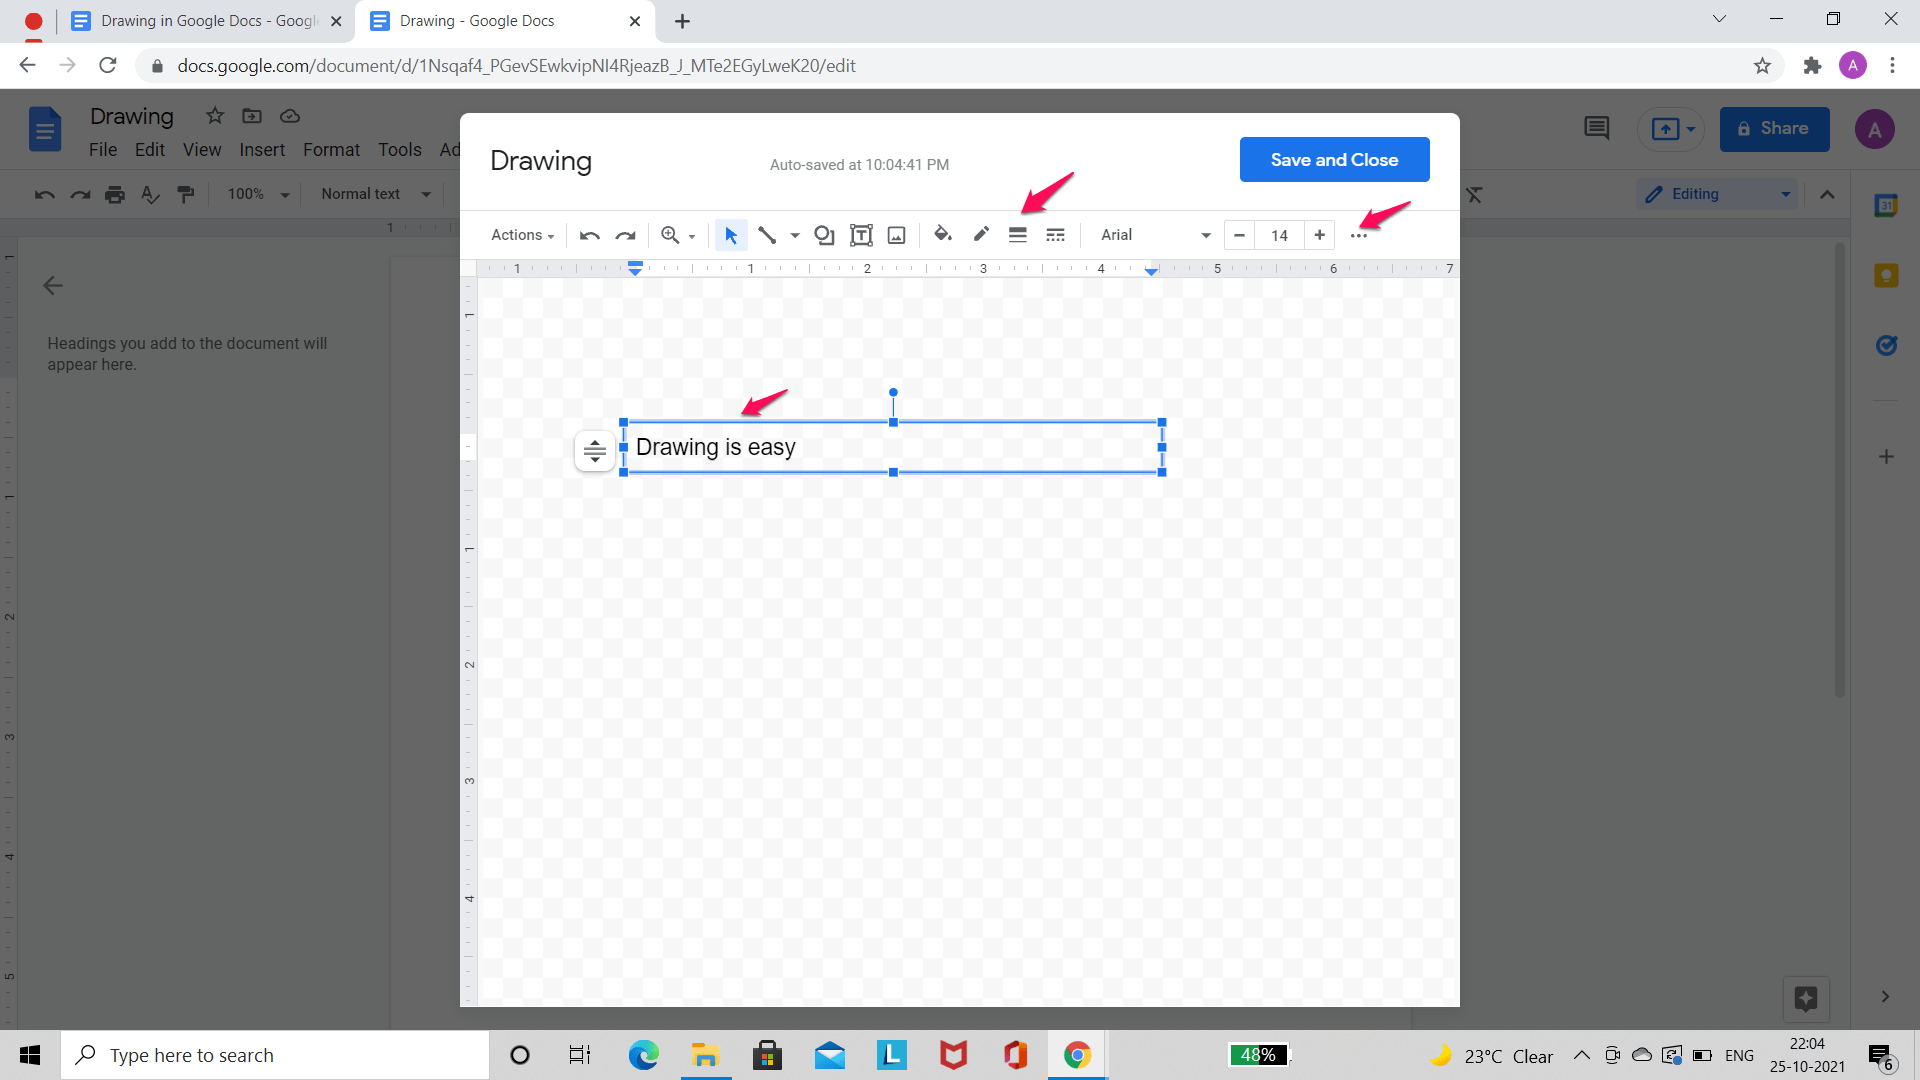
‘Text box’ is symbolized by a square with capital ‘T’ inside. Text Box allows users to insert a text box into the drawing. It is useful for inserting text whenever required. Users simply have to click on the text box icon and type in the text they want to insert and hit ‘Enter’. They can edit the text size, font, style, color with the help of additional editing tools.
Image
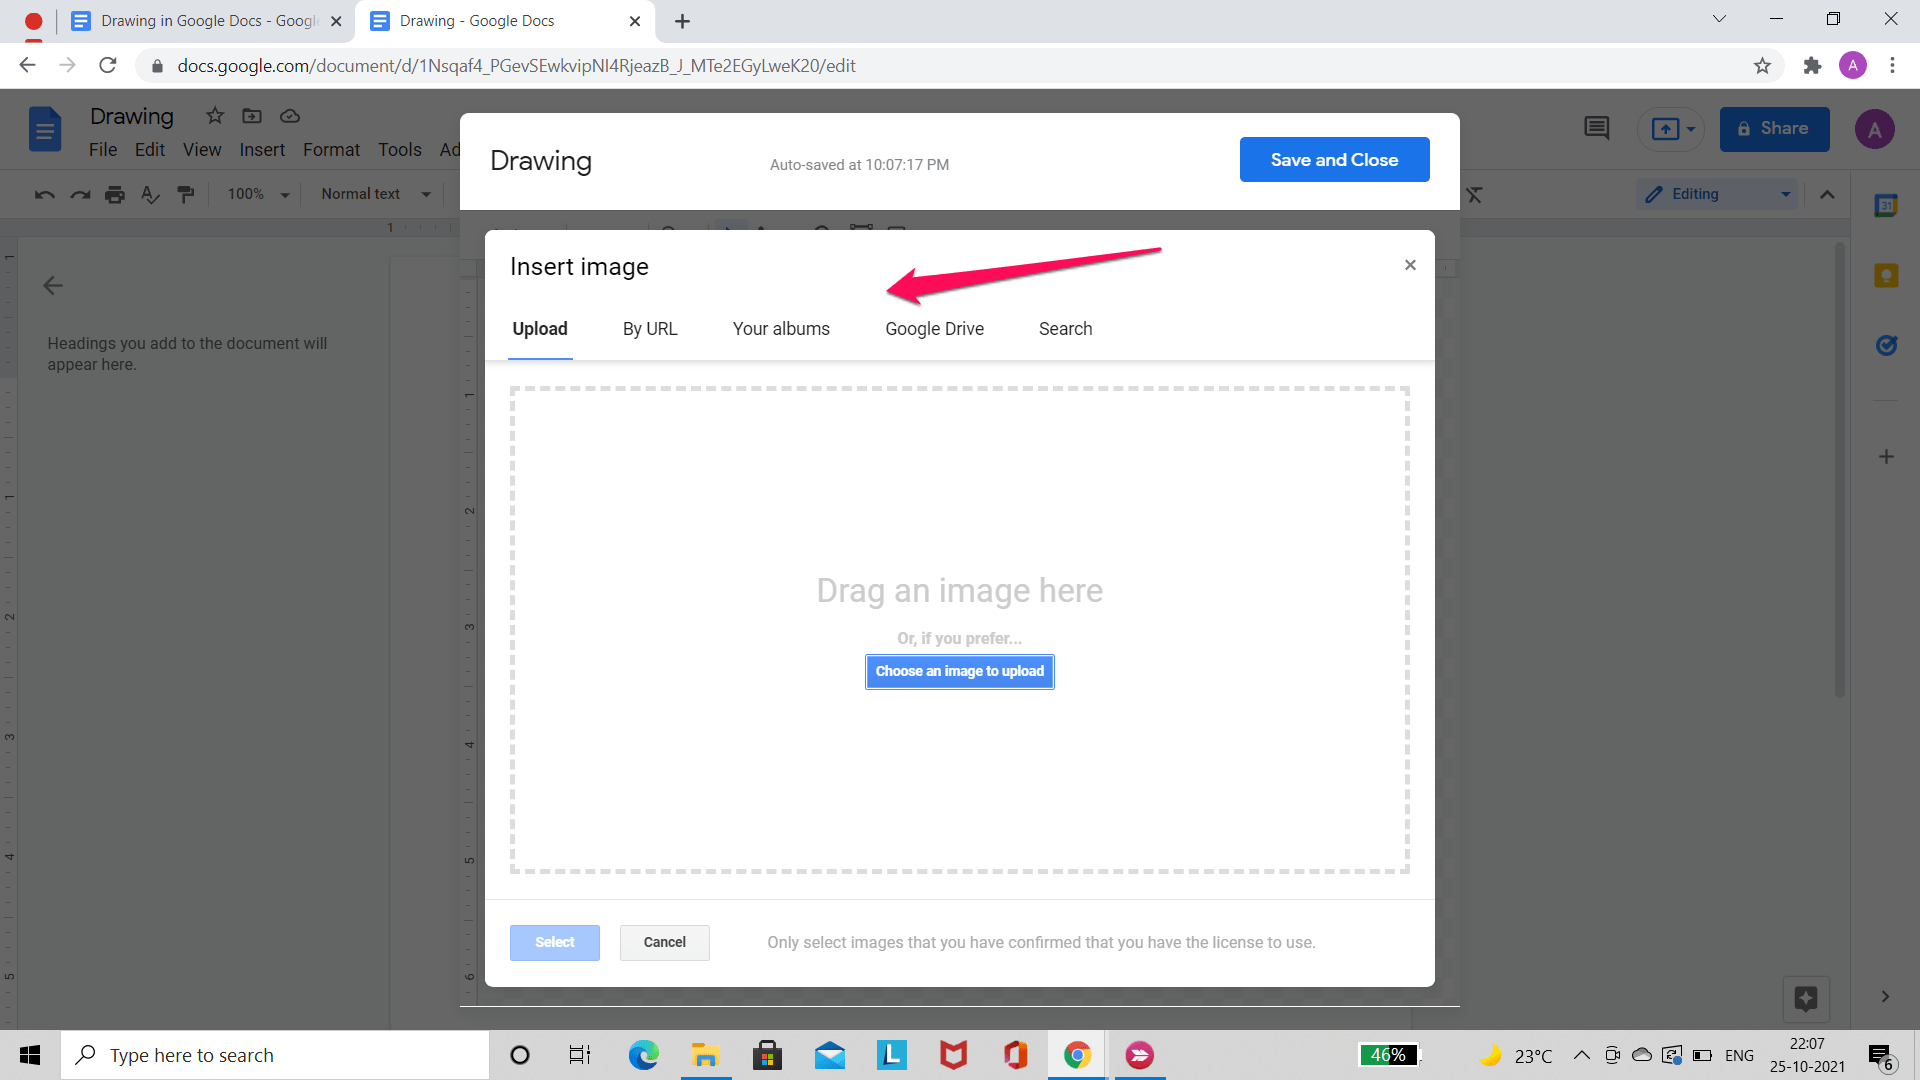
Image is the last element of the toolbar. ‘Image’ allows users to insert images into the drawing. Images can be inserted by various methods. Users can upload images from their device, from Google Drive, and through Google Search. The URL of the images can also be entered directly.
That’s it! We have covered all there is about drawing on Google Docs.
Important Note
Please note that currently users can only draw/ add drawings on Google Docs in a browser. The drawing feature is not available on the Android or iOS app of Google Docs.
Conclusion
Thus, we can see that drawing on Google Docs is quite simple. We hope that this simple guide helped you understand the drawing tool. Do try it and let us know! Happy Drawing!
